Set Up Guide Guía de configuración Guide de configuration
135 series IV
Lifestyle
®
home entertainment system
2 - English
Important Safety Instructions
Please read this guide
Please take the time to follow the instructions in this owner’s guide carefully. It will help you set up and
operate your system properly and enjoy its advanced features. Please save this guide for future reference.
The lightning flash with arrowhead symbol within an equilateral triangle alerts the user to the
presence of uninsulated, dangerous voltage within the system enclosure that may be of sufficient
magnitude to constitute a risk of electric shock.
The exclamation point within an equilateral triangle, as marked on the system, is intended to alert
the user to the presence of important operating and maintenance instructions in this owner’s
guide.
WARNING: Contains small parts which may be a choking hazard. Not suitable for children under
age 3.
WARNINGS:
To reduce the risk of fire or electrical shock, do not expose the product to rain or moisture.
Do not expose this apparatus to dripping or splashing, and do not place objects filled with
liquids, such as vases, on or near the apparatus. As with any electronic products, use care not
to spill liquids into any part of the system. Liquids can cause a failure and/or a fire hazard.
To prevent electric shock, match the wide blade of the line cord plug to the wide slot of the AC
(mains) receptacle. Insert fully.
Do not place any naked flame sources, such as lighted candles, on or near the apparatus.
CAUTIONS:
Make no modifications to the system or accessories. Unauthorized alterations may compro-
mise safety, regulatory compliance, and system performance.
Long-term exposure to loud music may cause hearing damage. It is best to avoid extreme
volume when using headphones, especially for extended periods.
NOTES:
The product label is located on the bottom or the back of the product.
Where the mains plug or appliance coupler is used as the disconnect device, such disconnect device
shall remain readily operable.
The product must be used indoors. It is neither designed nor tested for use outdoors, in recreation
vehicles, or on boats.
This product is intended to be used only with the power supply provided.
The speaker wire and interconnect cables included with the system are not approved for in-wall instal-
lation. Please check your local building codes for the correct type of wire and cable required for in-wall
installation.
Changes or modifications not expressly approved by Bose Corporation could void the user’s authority
to operate this equipment.
Important Safety Instructions
1. Read these instructions.
2. Keep these instructions.
3. Heed all warnings.
4. Follow all instructions.
5. Do not use this apparatus near water.
6. Clean only with a dry cloth.
7. Do not block any ventilation openings. Install in accordance with the manufacturer’s instructions.
8. Do not install near any heat sources such as radiators, heat registers, stoves, or other apparatus
(including amplifiers) that produce heat.
English - 3
Important Safety Instructions
9. Do not defeat the safety purpose of the polarized or grounding-type plug. A polarized plug has two
blades with one wider than the other. A grounding type plug has two blades and a third grounding
prong. The wide blade or the third prong are provided for your safety. If the provided plug does not fit
into your outlet, consult an electrician for replacement of the obsolete outlet.
10. Protect the power cord from being walked on or pinched particularly at plugs, convenience recep-
tacles, and the point where they exit from the apparatus.
11. Only use attachments/accessories specified by the manufacturer.
12.
Use only with the cart, stand, tripod, bracket, or table specified by the manufacturer, or sold
with the apparatus. When a cart is used, use caution when moving the cart/apparatus
combination to avoid injury from tip-over.
13. Unplug this apparatus during lightning storms or when unused for long periods of time.
14. Refer all servicing to qualified personnel. Servicing is required when the apparatus has been dam-
aged in a way, such as power-supply cord or plug is damaged, liquid has been spilled or objects
have fallen into the apparatus, the apparatus has been exposed to rain or moisture, does not operate
normally, or has been dropped.
Please dispose of used batteries properly, following local regulations. Do not incinerate.
This symbol means the product must not be discarded as household waste, and should be
delivered to an appropriate collection facility for recycling. Proper disposal and recycling helps
protect natural resources, human health and the environment. For more information on disposal
and recycling of this product, contact your local municipality, disposal service, or the shop
where you bought this product.
Bose Corporation hereby declares that this product is in compliance with the essential
requirements and other relevant provisions of Directive 1999/5/EC and all other applicable EU
directive requirements. The complete declaration of conformity can be found at:
www.Bose.com/compliance
Names and Contents of Toxic or Hazardous Substances or Elements
Part Name
Toxic or Hazardous Substances and Elements
Lead
(Pb)
Mercury
(Hg)
Cadmium
(Cd)
Hexavalent
(CR(VI))
Polybrominated
Biphenyl (PBB)
Polybrominated
diphenylether (PBDE)
PCBs X O O O O O
Metal parts X O O O O O
Plastic parts O O O O O O
Speakers X O O O O O
Cables X O O O O O
This table is prepared in accordance with the provisions of SJ/T 11364.
O: Indicates that said hazardous substance contained in all of the homogeneous materials for this part is
below the limit requirement of GB/T 26572.
X: Indicates that said hazardous substance contained in at least one of the homogeneous materials
used for this part is above the limit requirement of GB/T 26572.
4 - English
Important Safety Instructions
Please complete and retain for your records.
The serial and model numbers can be found on the bottom panel of the product.
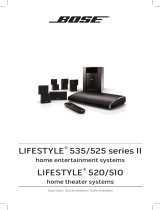
Lifestyle
®
SoundTouch
model: _____________________________________________________
Control console serial number: _____________________________________________________
Acoustimass
®
serial number: _______________________________________________________
Soundbar serial number: __________________________________________________________
Purchase date: ___________________________________________________________________
Please keep your receipt together with this Setup Guide and the Operating Guide.
Date of manufacture
The four bolded digits in the serial number indicate the date of manufacture. The first digit is the year of
manufacture; “5” is 2005 or 2015. Digits 2-4 are the month and date; “001” is January 1 and “365” is
December 31.
China Importer: Bose Electronics (Shanghai) Company Limited, Part C, Plan 9, No. 353 North Riying Road,
China (Shanghai) Pilot Free Trade Zone
EU Importer: Bose GP, Castleblayney Road, Carrickmacross, Ireland
Taiwan Importer: Bose Taiwan Branch, Room 905, 9F, Worldwide House, 131 Min Sheng East Rd, Section
3, Taipei, Taiwan, 105
App Store is a service mark of Apple Inc.
Amazon, Kindle and Fire are trademarks of Amazon.com, Inc. or its affiliates.
Android and Google Play are trademarks of Google Inc.
Blu-ray Disc
and Blu-ray
are trademarks of the Blu-ray Disc Association.
The Bluetooth
®
word mark and logos are registered trademarks owned by Bluetooth SIG, Inc. and any use
of such marks by Bose Corporation is under license.
Manufactured under license from Dolby Laboratories. Dolby and the double-D symbol are
trademarks of Dolby Laboratories.
For DTS patents, see http://patents.dts.com. Manufactured under license from Digital
Theater Systems, INC. DTS, the Symbol, & DTS and the Symbol together are registered
trademarks, and DTS Digital Surround is a trademark of DTS, Inc. ©DTS, Inc. All Rights
Reserved.
The terms HDMI and HDMI High-Definition Multimedia Interface, and the HDMI Logo are
trademarks or registered trademarks of HDMI Licensing LLC in the United States and other
countries.
iHeartRadio is a registered trademark of iHeartMedia, Inc.
This product incorporates Spotify software which is subject to 3rd party licenses found here:
www.spotify.com/connect/third-party-licenses.
Spotify is a registered trademark of Spotify AB.
SoundTouch and the wireless note design are trademarks of Bose Corporation in the U.S. and other
countries.
Wi-Fi is a registered trademark of Wi-Fi Alliance
®
© 2015 Bose Corporation. No part of this work may be reproduced, modified, distributed, or otherwise
used without prior written permission.
English - 5
Contents
Introduction
About your Lifestyle
®
SoundTouch™ system ................................................ 6
SoundTouch™ ..................................................................................................... 6
About your SoundTouch™ wireless adapter .......................................... 6
Unpacking the System
Carton contents ................................................................................................. 7
Accessories boxes ............................................................................................. 7
Cables and power cords box ..................................................................... 7
Essentials box ............................................................................................. 8
Control console box ................................................................................... 8
Setting Up the Soundbar
Connecting the soundbar ................................................................................ 9
Attaching the optional extension feet to the Soundbar ............................ 12
Setting Up the Control Console
Connecting the control console ...................................................................... 13
Setting Up the Acoustimass
®
Module
Connecting the Acoustimass module ........................................................... 16
Starting up the System
Installing the remote control’s batteries ...................................................... 18
Powering on the system .................................................................................. 19
Completing setup with UNIFY
®
....................................................................... 20
Care and Maintenance
Troubleshooting ................................................................................................ 21
Contacting customer service .......................................................................... 21
Appendix: Using UNIFY
®
to connect SoundTouch™
Adding the system to your Wi-Fi
®
network .................................................. 22
To add the system to an existing SoundTouch™ account .................. 22
Download and install the SoundTouch™ app ........................................ 22
6 - English
About your Lifestyle
®
SoundTouch™ system
The Lifestyle
®
SoundTouch
system is elegant and easy-to-use, delivering su-
perior performance for both music and video. This guide provides step-by-step
instructions for setting up your new system.
Your new home entertainment system includes a soundbar, control console,
Acoustimass
®
module, SoundTouch
wireless adapter and a universal remote
control.
SoundTouch™
With SoundTouch
, you can stream Internet radio, music services and your music
library. If you have Wi-Fi
®
at home, you’re ready to enjoy your favorite music in any
room you want. Refer to the operating guide for SoundTouch
features.
About your SoundTouch™ wireless adapter
The SoundTouch
wireless adapter in the Essentials box enables SoundTouch
and Bluetooth
®
technology on your entertainment system. Setting up your wireless
adapter is part of the UNIFY
®
setup process. Do not connect your wireless adapter
until prompted by UNIFY
®
. See page 20.
For system and SoundTouch
features, refer to the operating guide.
Introduction
English - 7
Carton contents
Carefully unpack the carton and confirm that the following parts are included. Save
the carton and packaging materials for transporting or storing the system.
Note: If part of the system is damaged, do not use it. Contact your authorized
Bose
®
dealer or Bose customer service. Refer to the contact sheet in the
carton.
Accessories boxes
Each box is identified by an icon on the box. These icons appear in the system
setup steps to indicate where parts are located.
Cables and power cords box
Use the appropriate power cord for your region.
Soundbar
Acoustimass
®
module
Audio input cable AC power cord
AM antenna
Unpacking the System
8 - English
Essentials box
SoundTouch
series II
wireless adapter
ADAPTiQ
®
audio calibration
headset
Operating guide
FM antenna IR emitter cable Stereo audio cable
USB cable USB drive (for system
updating only)
Acoustimass module feet
and Soundbar feet
Control console box
Control console
Power supply
HIGH SPEED HDMI
cable
Remote control and
Batteries
Unpacking the System
English - 9
Connecting the soundbar
The Lifestyle
®
SoundTouch
entertainment system uses the reflective surfaces of
your room to deliver wide, spacious sound. For best sound quality, the soundbar
should not be placed inside a cabinet, or diagonally in a corner.
To avoid wireless interference, keep other wireless equipment away from the sys-
tem. Place the system outside of and away from metal cabinets, away from other
audio/video components and away from direct heat sources.
Note: Remove all protective films. These may affect acoustic performance if left in
place.
What you need:
Audio input
cable
Power cord
OPTIONAL:
speaker array
extension feet
Soundbar
1. Lay the soundbar grille-side down on the table in front of your TV.
Tip: Lay the soundbar on a soft surface to protect it from being damaged.
2. Insert the audio input cable into the Audio In connector on the soundbar with
the flat surface and arrow on the plug facing up.
Soundbar
Audio input cable
Setting Up the Soundbar
10 - English
3. Insert the small end of the power cord into the Power connector.
Note: Do not plug the power cord into an AC power outlet until instructed to
do so.
4. Arrange the cables as needed for your setup location.
OPTIONAL: Secure cables under the clips in the channel running along the length
of the soundbar and attach the extension feet (page 12).
Setting Up the Soundbar
Power cord
Cable clip
Channel
English - 11
5. Turn the soundbar over and place it in front of your TV with the speaker grille
facing into the room.
Setting Up the Soundbar
12 - English
Attaching the extension feet to the
Soundbar (optional)
Attach the optional extension feet to raise the soundbar.
1. Turn the soundbar upside down onto a soft surface to protect it from being
damaged.
2. Attach the extension feet to the bottom of the soundbar.
3. Place the soundbar on its feet.
Wall mounting the soundbar
You can mount the soundbar on a wall. To purchase the WB-135 Wall Mount Kit,
contact your local Bose dealer or visit www.Bose.com
CAUTION: Do not use any other hardware to mount the soundbar.
Optional extension feet
Setting Up the Soundbar
English - 13
Connecting the control console
What you need:
HIGH-SPEED
HDMI
cable
Power cord
Control console
Power supply
1. Place the control console on a flat, stable surface near your TV.
Note: Until your system is completely installed, keep the control console
positioned for easy access to the rear connector panel.
Setting Up the Control Console
Control console
14 - English
Setting Up the Control Console
2. Insert one end of the HIGH-SPEED HDMI
cable into an HDMI IN connector
on your TV.
If an HDMI cable is already connected to an HDMI connector on your TV, you
can disconnect the other end and use this cable.
Note: If you plan on viewing 3D content, use the supplied
HIGH-SPEED HDMI cable.
3. Insert the other end of the HDMI cable into the HDMI OUT Video to TV
connector on the control console.
HDMI OUT
Video to TV
English - 15
Setting Up the Control Console
4. Insert the soundbar’s audio input cable into the Audio OUT connector on the
control console with the flat surface and arrow on the plug facing up.
Note: Do not connect the audio input cable to a Bose link connector.
5. Insert the power supply output cord into the Power connector.
Power supply
output cord
6. Insert a power cord into the power supply.
7. Plug the power cords from the soundbar and the control console into an AC
(mains) power outlet.
Power
Audio OUT
AC power cord
16 - English
Connecting the Acoustimass
®
module
What you need:
Rubber feet
Power cord
Acoustimass module
CAUTION: Choose a stable and level surface for the Acoustimass module.
Vibration can cause the module to move, particularly on smooth
surfaces like marble, glass or highly polished wood.
1. Attach the rubber feet to the bottom of the acoustimass module.
2. Insert the small end of the power cord into the Power connector.
Setting Up the Acoustimass
®
Module
Rubber foot
Bottom panel
Power
English - 17
3. Place the Acoustimass
®
module according to the following guidelines:
For best sound quality, stand the Acoustimass module on its feet along the
same wall as your TV, or along any other wall in the front third of the room.
The front opening of the module can face any direction.
Make sure there is an AC (mains) power outlet nearby.
CAUTION: Do not operate the Acoustimass module on its front end, back end,
side, or top.
Note: Remove all protective films. These may affect acoustic performance if left in
place.
4. Plug the Acoustimass module’s power cord into an AC (mains) power outlet.
Setting Up the Acoustimass
®
Module
18 - English
What you need:
Before you start:
Do not connect any devices to the control console until instructed by UNIFY
®
.
Make sure the soundbar and Acoustimass
®
module are in their final positions.
Installing the remote control’s batteries
1. Slide open the battery compartment cover on the back of the remote control.
2. Install the four provided AA (IEC LR6) batteries. Match the + and – symbols on
the batteries with the + and – markings inside the compartment.
3. Slide the battery cover back into place.
Starting Up the System
Remote control
and batteries
ADAPTiQ
®
audio
calibration headset
SoundTouch
series II
wireless adapter
USB cable
English - 19
Powering on the system
1. Press the power button on the control console.
Note: The system operates in a power saving mode when it is off to keep
energy consumption low, so it may take several seconds to start.
2. Check that the status indicator on the soundbar is off.
Note: If the status indicator is blinking amber, there is no wireless connection
between the speaker and the Acoustimass
®
module. Refer to “Trouble-
shooting” in the operating guide.
Status indicator
3. Power on your TV.
4. Using your TV’s remote control, change the TV input to the one that is
connected to your Lifestyle
®
SoundTouch
system.
Starting Up the System
Power button
Status indicator
20 - English
Completing setup with UNIFY
®
The UNIFY intelligent integration system guides you through the initial process of
setting up your system. It guides you through choosing the right cables and inputs,
and programming the Bose
®
remote to operate your connected devices.
Follow the instructions on your TV screen to complete the following:
Select your language.
Run the ADAPTiQ
®
audio calibration system.
Connect the SoundTouch
wireless adapter to your system and your Wi-Fi
®
network using a smartphone or tablet.
Note: If you are unable to complete setup with a smartphone or tablet,
see “Appendix: Using UNIFY
®
to set up SoundTouch
” on page 22.
Connect and set up external audio/video devices
Configure your Bose
®
remote to control your connected devices.
After completing the initial setup, you can use the UNIFY system at any time to
change your system setup. Refer to the operating guide.
Starting Up the System
  • Page 1 1
  • Page 2 2
  • Page 3 3
  • Page 4 4
  • Page 5 5
  • Page 6 6
  • Page 7 7
  • Page 8 8
  • Page 9 9
  • Page 10 10
  • Page 11 11
  • Page 12 12
  • Page 13 13
  • Page 14 14
  • Page 15 15
  • Page 16 16
  • Page 17 17
  • Page 18 18
  • Page 19 19
  • Page 20 20
  • Page 21 21
  • Page 22 22
  • Page 23 23
  • Page 24 24
  • Page 25 25
  • Page 26 26
  • Page 27 27
  • Page 28 28
  • Page 29 29
  • Page 30 30
  • Page 31 31
  • Page 32 32
  • Page 33 33
  • Page 34 34
  • Page 35 35
  • Page 36 36
  • Page 37 37
  • Page 38 38
  • Page 39 39
  • Page 40 40
  • Page 41 41
  • Page 42 42
  • Page 43 43
  • Page 44 44
  • Page 45 45
  • Page 46 46
  • Page 47 47
  • Page 48 48
  • Page 49 49
  • Page 50 50
  • Page 51 51
  • Page 52 52
  • Page 53 53
  • Page 54 54
  • Page 55 55
  • Page 56 56
  • Page 57 57
  • Page 58 58
  • Page 59 59
  • Page 60 60
  • Page 61 61
  • Page 62 62
  • Page 63 63
  • Page 64 64
  • Page 65 65
  • Page 66 66
  • Page 67 67
  • Page 68 68

Ask a question and I''ll find the answer in the document

Finding information in a document is now easier with AI