Page is loading ...

(Continued on the next page )
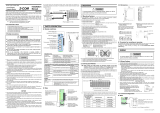
MECHATROLINK Communication Converter
IMR02E02-E2
Thank you for purchasing this RKC product. In order to achieve maximum performance
and ensure proper operation of your new instrument, carefully read all the instructions in
this manual. Please place this manual in a convenient location for easy reference.
This manual describes the operation method of the COM-MY. For the installation and the
communication data, please read if necessary the following separate manuals.
• COM-MY Installation Manual (IMR02E01-E): Enclosed with COM-MY
• COM-MY Communication Data List (IMR02E03-E): Enclosed with COM-MY
• COM-MY SRZ Communication Data List (IMR02E04-E): Separate
(Download or sold separately)
The above manuals can be downloaded from our website:
URL: http://www.rkcinst.com/english/manual_load.htm
1. HANDLING PROCEDURES
Mounting and wiring
Data setting
• See
COM-MY Installation Manual (IMR02E01-E)
• See
Z-TIO INSTRUCTION MANUAL (IMS01T01-E)
See
2. COMMUNICATION SETTING OF COM-MY
Address setting of the
SRZ function module
See
3. COMMUNICATION SETTING OF
SRZ FUNCTION MODULE
PLC (master)
Self-configuration
See
4.3 Preparing Programming Software MPE720
See
4.4 MP2300 (Master) Self-configuration
See
4.5 I and O Registers Read/Write
Communication setting
of COM-MY
2. COMMUNICATION SETTING OF COM-MY
Set communication setting before mounting and wiring of the COM-MY.
Do not separate the module mainframe from the base with the power turned on.
If so, instrument failure may result.
To avoid problems or malfunction, do not duplicate an address on the same
communication line.
2.1 Station Address and Transmission Bytes Setting
Set a station address and number of transmission bytes of MECHATROLINK. For this
setting, use a small blade screwdriver.
1
Number of transmission bytes
OFF 17 bytes
ON 32 bytes [Factory set value]
2 Station address high-order digit setting
OFF
60H
(Station address
=
60H
+
address setting switch set value)
[Factory set value]
ON 70H
(Station address
=
70H
+
address setting switch set value)
Station address setting range:
60H to 7FH [96 to 127: Decimal] (Factory set value: 61 H)
MECHATROLINK
setting switch
OFF ON
12
ON
MECHATROLINK
address setting switch
Station address low-order digit setting (Set value
×
1H)
Factory set value: 1
2.2 Unit Address Setting
Set a unit address of host communication. For this setting, use a small blade screwdriver.
For Modbus, the value obtained by adding “1” to the set address
corresponds to the address used for the actual program.
COM-MY
Host communication
address setting switch
Setting range:
0 to F
[0 to 15: Decimal]
Factory set value:
0
2.3 Host Communication DIP Switch Setting
Use the host communication DIP switch on the right side of COM-MY to select
communication speed, data bit configuration, protocol and host communication DIP switch
setting validity/invalidity.
The data change of switch No. 1 to 3 become valid the power of the COM-MY
is turned on again or when control is switched from STOP to RUN. The data
change of switch No. 7, 8 become valid the power of the COM-MY is turned
on again.
Host communication
DIP switch
COM-MY
mainframe
Right side view
ONOFF
1 2 3 4 5 6 7
8
NO
1 2 Host communication speed
OFF OFF 4800 bps
ON OFF 9600 bps
OFF ON 19200 bps [Factory set value]
ON ON 38400 bps
3 Communication protocol and Data bit configuration
OFF
RKC communication [Factory set value]
Data 8-bit, without parity, Stop 1-bit
ON
Modbus
Data 8-bit, without parity, Stop 1-bit
7 MECHATROLINK communication speed
OFF 10 Mbps (MECHATROLINK-II) [Factory set value]
ON 4 Mbps (MECHATROLINK-I)
8
Host communication DIP switch (excluding the switch No.7)
setting validity/invalidity
OFF
Valid [Factory set value]
(Host communication DIP switch settings are valid)
ON Invalid (Settings via host communication or loader communication are valid)
Switch No. 7 is always valid, regardless of the setting of Switch No. 8.
4 5 6
OFF OFF OFF Fixed (Do not change)
3.
COMMUNICATION SETTING OF SRZ FUNCTION MODULE
3.1 Address Setting of SRZ Function Module
Only make the module address setting to make the Z-TIO, Z-DIO and Z-CT module
communication settings. The SRZ unit performs internal communication (RS-485) between
the COM-MY and the function module (Z-TIO, Z-DIO, Z-CT module), so the
communication protocol, communication speed and data bit configuration do not need to
be set. A module address is set for each function module type.
To avoid problems or malfunction, do not duplicate an address in a function
module of the same type on the same communication line.
A
ddress setting switch
Setting range:
0 to F
[0 to 15: Decimal]
Factory set value: 0
Z-DIO
module 1
A
ddress setting switch set value
Z-TIO
module 1
Z-TIO
module 3
Z-TIO
module 2
SRZ unit
Z-CT
module 1
0 1 2 0 0
3.2 For the SRZ Unit's Channel
Setting the function module (Z-TIO, Z-DIO, Z-CT module) address determines the channel
number used for communication. To each function module address, the relevant channel
is assigned.
Each channel number can be calculated from the following equation.
Channel number of communication =
[Address setting switch set value
a
] × [Max. channel number of the function module
b
]
+ [Channel number in a module]
a
When the setting is A to F, it is a decimal number.
b
For the Z-TIO module, it is calculated by “4.”
For the Z-DIO module, it is calculated by “8.”
For the Z-CT module, it is calculated by “12.”
Example: When 2 Z-TIO modules (4-channel type) and 2 Z-DIO modules are joined
A
ddress setting switch set value
CH1
CH2
Z-TIO module 1
CH3
CH4
CH5
CH6
Z-TIO module 2
CH7
CH8
Z-TIO module 2:
The temperature control
channel number used
for communication of
channel 4
1 × 4 + 4 = 8
Z-DIO module 1
DI4 (CH4)
DI3 (CH3)
DI2 (CH2)
DI1 (CH1)
DI8 (CH8)
DI7 (CH7)
DI6 (CH6)
DI5 (CH5)
DO1 (CH1)
DO2 (CH2)
DO3 (CH3)
DO4 (CH4)
DO5 (CH5)
DO6 (CH6)
DO7 (CH7)
DO8 (CH8)
Z-DIO module
2
DI4 (CH12)
DI3 (CH11)
DI2 (CH10)
DI1 (CH9)
DI8 (CH16)
DI7 (CH15)
DI6 (CH14)
DI5 (CH13)
DO1 (CH9)
DO2 (CH10)
DO3 (CH11)
DO4 (CH12)
DO5 (CH13)
DO6 (CH14)
DO7 (CH15)
DO8 (CH16)
Z-DIO module 2:
The channel number
used for communication
of digital output 8
1 × 8 + 8 = 16
Z-DIO module 2:
The channel number
used for communication
of digital input 5
1 × 8 + 5 = 13
0 1
COM-MY
0 1
4. USAGE EXAMPLE
In this usage example, described the following system configuration.
4.1 System Configuration
MECHATROLINK
communication
converter
COM-MY (Slave)
Station address: 61H
Programmable controlle
r
(PLC)
YASKAWA Machine
Controller MP2300
(Master)
Personal computer
MPE720 installed
personal computer
Z-TIO
module 1
0 1 2 0
Z-TIO
module 3
Z-TIO
module 2
Z-DIO
module 1
MECHATROLINK
A
ddress setting
switch set value
MECHATROLINK
terminator
(Termination resistors)
Use instruments
• MECHATROLINK communication converter: COM-MY .................. 1
• Module type controller SRZ: Z-TIO module ........... 3
(4-channel type: 2, 2-channel type: 1)
Z-DIO module........... 1
• YASKAWA Machine Controller MP2300
- Basic module MP2300 (JEPMC-MP2300)
- Communication module 218IF-01 (JAPMC-CM2300)
• MECHATROLINK cable (JEPMC-W6002-01, YASKAWA product)
• MECHATROLINK terminator (JEPMC-W6022, YASKAWA product)
• Personal computer
Software of the following must be installed in a personal computer.
- Programming software MPE720 (Version 4.41A or later, YASKAWA product)
• Communication cable (for RS-232C connection, JEPMC-W5311-03, YASKAWA
product)
For the personal computer to be connected to the PLC, see Instruction Manual of
MP2300 and MPE720.
4.2 Use Instruments Setting
Set the COM-MY and Z-TIO/Z-DIO module as the following.
COM-MY setting
Station address: 61H [Factory set value]
Number of transmission bytes: 32 bytes [Factory set value]
Communication speed: 10 Mbps (MECHATROLINK-II) [Factory set value]
For setting method, see 2. COMMUNICATION SETTING OF COM-MY.
Z-TIO/Z-DIO module setting
Module address: Z-TIO module: 4-channel type: 0, 1
2-channel type: 2
Z-DIO module: 0
For setting method, see 3. COMMUNICATION SETTING OF SRZ FUNCTION
MODULE.
4.3 Preparing Programming Software MPE720
In order to connect a computer to the MP2300, configure the PLC folder and the
communication process of the programming software MPE720.
These settings are not required if the communication settings have already been made.
Communication process settings
The example of connecting by serial communication is described below.
1. Open the YE_Applications Folder and double-click the Communication Manager
icon. When the Communication Manager is started, the Communication Process icon
will be displayed on the task tray at the right bottom of the screen. Double-click the
Communication Process icon to open the Communication Manager Window.
2. Double-click Logical PT number 1 in the Communication Manager Window.
3. Select Serial under Port Kind and then click Detail Button in the Logical Port Setting
Dialog Box.
4. Specify the COM port that will be used for serial communication in the Physical Port and
click the OK button. Click the OK button in the Logical Port Setting Dialog Box to
return to the Communication Manager Window.
5. Select the menu command File → Save to save the communication port settings.
6. Exit the Communication Manager Window and restart to validate the settings.
Create the order folder and controller folder
1. Start the MPE720.
2. Select (root) at the left of the File Manager Window. Right-click the mouse and select
New → Order Folder.
3. Enter an Order Folder name and click the OK Button in the Make New Folder Dialog
Box.
4. Select the Order Folder created in step 3. Right-click the mouse and select Create New
Folder → Controller Folder.
A
ll Rights Reserved, Copyright 2007, RKC INSTRUMENT INC.
CO
M
-
MY
Instruction Manual
CAUTION
Order Folder name:
Up to 8 characters
Communication Process icon
Communication Manager
icon

®
RKC INSTRUMENT INC.
The first edition: MAY 2007 [IMQ00]
The second edition: NOV. 2007 [IMQ00]
HEADQUARTERS: 16-6, KUGAHARA 5-CHOME, OHTA-KU TOKYO 146-8515 JAPAN
PHONE: 03-3751-9799 (+81 3 3751 9799) E-mail: info@rkcinst.co.jp
FAX: 03-3751-8585 (+81 3 3751 8585) NOV. 2007
MECHATROLINK is the trademark of MECHATROLINK Members Association.
Modbus is a registered trademark of Schneider Electric.
Company names and product names used in this manual are the trademarks or registered
trademarks of the respective companies.
5. Enter a Controller Folder name under Controller Name, select MP2300 under Controller
Type, and click the OK Button in the Controller Configuration Dialog Box.
6. A new Controller Folder will be created for MP2300.
4.4 MP2300 (Master) Self-configuration
Execute self-configuration of the MP2300 (master) machine controller to make the
MP2300 recognize the COM-MY (slave).
Self configuration is executed from the programming software MPE720.
Execute self-configuration
1. Connect the MP2300 and the COM-MY with MECHATROLINK, and switch on the
power of the MP2300 and the COM-MY.
2. Start the MPE720.
3. Right-click Controller Folder in the File Manager Window, select the Online checkbox,
and select Log On.
Online (Online checkbox is selected):
References the MP2300 main unit.
Offline (Online checkbox is not selected):
References the project in the computer.
4. Enter User Name and Password, and click the OK Button in the Log on to the
controller Dialog Box.
5. In the File Manager Window, select the Controller folder → Definition folder →
Module Configuration. Double-click the Module Configuration.
6. Right-click the numeric cell (No. 00 in the illustration below) on the Slot Number line
where the Module Type line is MP2300 in the Controller area of the Engineering
Manager Window. Select Module Self Configuration in the menu that appears to
execute self-configuration.
7. Executing self-configuration causes the MP2300 to automatically recognize the
connected COM-MY (slave). Self-configuration ends after several seconds.
8. Select the menu command File → Save & Save to Flash to save the module
configuration definitions.
Checking the connection
1. Double click the MECHATROLINK cell on the Details line where the Module Type line
is SVB (COM-MY) in the Module Details area of the Engineering Manager Window.
2. The MECHATROLINK window will open to let you check the connection status.
In the following illustration, COM-MY is connected by MECHATROLINK-II, and input of
16 words (MECHATROLINK response) from the IW0010 register and output of 16
words (MECHATROLINK command) from the OW0020 register are assigned.
Transmission Parameter Tab
Status Tab
4.5 I and O Registers Read/Write
After self-configuration is executed in section 4.4 (IW0010 to IW001F, OW0020 to
OW002F), the procedure for register (I/O) read/write by Register List is indicated.
1. Log on online to the MPE720.
See Step 1 to 4 of Execute self-configuration.
2. In the File Manager Window, select the menu command Tool → Register List.
The Register List Window appears.
3. Set the following parameters in the Register List Window and then click anywhere in
the display area. The contents of the registers will be displayed.
Register No.: Sets the register number to start the display.
D: Sets the number of registers to display.
TYPE: Sets the display type (BIN, DEC, HEX or ASCII).
Setting example:
Upper section: Register No.: OW0020 D:16 TYPE: HEX
→
OW0020 to OW002F (MECHATROLINK command)
Lower section: Register No.: IW0010 D:16 TYPE: HEX
→
IW0010 to IW001F (MECHATROLINK response)
4. Read and write of data.
Data read
Example: Reading the measured value (PV) in a configuration with one Z-TIO module (4
channels) connected.
1. Set 01FCH (measured value CH1) in OW0021 (2nd word: DATA_NO data item
specification).
For the data set in the data item specification, see Register Address in the
COM-MY Communication Data List (IMR02E03-E).
2. Set 0010H in OW0020 (lower byte of 1st word: SUB_COM sub-command).
0010H (0000000000010000: Binary):
Data size 000, Sequence number 01, Read specification 0
The upper byte of the command 1st word is reserved by the system. Do not write
to this byte.
Sub command (SUB_COM) bit configuration (The lower byte of the command 1st word)
Bit No. Name Data range
b0 to 3 SIZE 17 byte-mode: 0 to 6 32 bye-mode: 0 to 13
(0 or value exceeding the maximum number:
Maximum number is read or written)
Specify the data size.
b4, b5 SEQ_NO 0 to 3
Specify a sequence number different from the current
sequence number.
In the example, if the current number is 0, specify 1.
b6 Unused
b7 RW 0: Read specification
1: Write specification
Specify read/write attribute of data.
3. The data is displayed in the response.
Example of data read
The response 1st word is reserved by the system, and thus the read value
should be disregarded.
In this example, the response below is displayed.
IW0011 (2nd word: STATUS): 0014H *
IW0012 (3rd word: READ_DATA1) : CH1 measured value
IW0013 (4th word: READ_DATA2) : CH2 measured value
IW0014 (5th word: READ_DATA3) : CH3 measured value
IW0015 (6th word: READ_DATA4) : CH4 measured value
* 0014H (0000000000010100: Binary):
Alarm (0: Normal), Warning (0: Normal), Can accept command 1, Sequence number
01, Setting write normal end 0, Read specification 0
STATUS bit configuration
Bit No. Name Data range
b0 ALARM 0: Normal
1: Error (Communication error or Instrument abnormality)
Alarm states.
b1 WARNG 0: Normal
1: Warning (Controller communication error)
Warning states.
b2 CMDRDY 0: Cannot accept command (Busy: during processing)
1: Can accept command (Ready)
Command states.
b3 Unused
b4, b5 SEQ_NO 0 to 3
Sequence number.
b6 SETERR 0: Setting write normal end
1: Setting write error end (abnormal data corruption)
State of last executed setting processing.
b7 RW 0: Read specification
1: Write specification
Read/write attribute of data.
b8 to 15 Unused
Data wirite
Example: Writing 200 °C to the set values (SV) of CH1-4 in a configuration with one Z-TIO
module (4 channels) connected.
1. Set 0ADCH (set value CH1) in OW0021 (2nd word: DATA_NO data item specification).
For the data set in the data item specification, see Register Address in the
COM-MY Communication Data List (IMR02E03-E).
2. Set 00C8H (200 °C) in OW0022 to OW0025 (3rd to 6th words: WRITE_DATA1 to
WRITE_DATA4).
3. Set 00A4H in OW0020 (lower byte of 1st word: SUB_COM sub-command).
00A4H (0000000010100100: Binary):
Data size 4 (0100: Binary), Sequence number 02 (10: Binary), Write specification 1
The upper byte of the command 1st word is reserved by the system. Do not write
to this byte.
4. The written data is displayed in the response.
Exception operation
When power is turned ON
During initialization after the power is turned on, CMDRDY bit (b2) of STATUS is 0
(commands cannot be accepted). If an I/O write is attempted at this time, it will be
disregarded. If an I/O read is attempted, 0 will be returned.
When a device error occurs
When ALARM (error code) is other than 00H, or the WARNG bit (b1) or ALARM bit (b1) of
STATUS is 1 (error), this indicates that the device is in an error condition. If an I/O write is
attempted at this time, it will be disregarded. If an I/O read is attempted, 0 will be returned.
Controller Folder name:
Up to 8 characters
Type of master
User Name: USER-A
(Factory set value)
Password: USER-A
(Factory set value)
Display area
Command
Response
COM-MY is
connected by
MECHATROLINK-II
Double-click
Right-click
Input:
16 words from the
IW0010 register
Output:
16 words from the
OW0020 register
Command
Response
2nd word
6th word
1st word 2nd word
3rd word
4th word
5th word
/