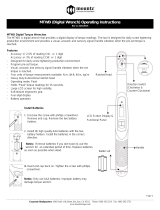
Mountz EZ-TorQ II Operating Instructions Manual

Category
Measuring, testing & control
Type
Operating Instructions Manual

Mountz EZ-TorQ II is a versatile torque tester designed for various applications. It accurately measures torque in seven units and features three operating modes: Track (for monitoring varying torque), Peak (for testing hand torque wrenches), and First Peak (for click-type mechanical torque wrenches). The device offers real-time graphing, data logging, and PC connectivity via RS-232 or USB. It's equipped with high-capacity Li-Ion batteries, stores up to 150 data points, and includes software for Quick Tool Tests, Data Logging, and Sensor Calibration.

Mountz EZ-TorQ II is a versatile torque tester designed for various applications. It accurately measures torque in seven units and features three operating modes: Track (for monitoring varying torque), Peak (for testing hand torque wrenches), and First Peak (for click-type mechanical torque wrenches). The device offers real-time graphing, data logging, and PC connectivity via RS-232 or USB. It's equipped with high-capacity Li-Ion batteries, stores up to 150 data points, and includes software for Quick Tool Tests, Data Logging, and Sensor Calibration.

Corporate Headquarters: 1080 North 11th Street, San Jose, CA 95112 Phone: (408) 292-2214 Fax: (408) 292-2733
www.mountztorque.com
Operating Instructions
Version 3.2
(3/22/2017)
Features
Page 2
Heading Page
Screen Display 4
Mounting 4
Menu Selections (Units, Mode, Set-Up, Quick Test & Filter) 5-7
Enter Key & Mode Selection 7
Set-Up Selections (Direction, Data Output, Contrast, Language, Sleep, Backlight, 8-10
Clear Memory, Auto Clear & Tolerance)
Filter Selections 11
External Connection 12
Power Tool Testing 12
EZ-TorQ Meter Interface Software 13-14
Com Port Selection 15
Quick Test Downloading 16
Data Logging 17
Bootloader 18
Battery Operation/Universal Charger 19
Accessories 20
System Accuracy +/- 0.5% of reading from 20% to 100% of full scale.
System Accuracy +/- 1% of reading from 10% to 20% of full scale.
Recommended for hand screwdrivers, most wrenches and power tools*
Selection of three operating modes: (Track, Peak and First Peak*)
Seven units of torque measurements: (ozf.in, lbf.in, lbf.ft, cN.m, N.m, kgf.m, kgf.cm).
Features built-in Quick Test operation.
Includes PC Windows based software programs:
EZ-TorQ II Interface Program - to conduct Quick Tool Tests, Data Logging and Sensor Calibration.
“Flash" memory allows upgrades to be done by the user in the field & internet through the RS-232 port.
Easy to use Menu Structure.
Six-digit display.
Ability to download readings to PC via RS-232 or via USB
Real time out via RS-232
High Capacity Li-Ion Batteries for long life.
The unit will store a total of up to 150 data points.
Real time graph of torque vs. time using associated PC Windows software.
Features Go / No Go LEDs that illuminate when high or low tolerance setting is achieved or out of tolerance
Three low-pass filter settings (500, 170 and 130 Hz)*
* Note! - Mountz added these features to the EZ-TorQ II operating system in September 2011. EZ-TorQ II models prior to seri-
al # EZ1108001 do not have these features. If you would like to have your EZ-TorQ II torque tester upgraded to include the
current operating system, please send it to a Mountz Service & Repair facility.
1. New Operating mode: First Peak
2. New low-pass filter settings (500, 170 and 130 Hz)
Corporate Headquarters: 1080 North 11th Street, San Jose, CA 95112 Phone: (408) 292-2214 Fax: (408) 292-2733
www.mountztorque.com
Page 3
Quick Menu Structure
Main Display Screen
Peak
23.8 lbf.in
Menu
Quick Test
Units Mode Setup
Main Menu
lbf.in
lbf.ft
ozf.in
kgf.cm
kgf.m
N.m
cN.m
Track
Peak
Backlight
Clear Memory
Auto Clear
Tolerance
Direction
Contrast
Language
Sub-Menu
Sub-Menu
Sub-Menu
Enter
Enter
Sleep Mode
Enter
Filter
Pan-Pac
(130 Hz)
Mountz
(170 Hz)
Sub-Menu
Enter
Data Output
ISO
(500 Hz)
First Peak
Corporate Headquarters: 1080 North 11th Street, San Jose, CA 95112 Phone: (408) 292-2214 Fax: (408) 292-2733
www.mountztorque.com
Page 4
Screen Display and Menu Structure
When the torque tester is turned on it will display a
Screen similar to that below for 5 seconds and then
go into Reading Mode.
EZtorQ II
Version 1.03
Sensor Model:
EZtorQ 100i
Serial Number:
EZ-09-05-007
The Reading Mode Screen will appear as shown
below:
Track
+0.0000 Lbf.in
Menu
The Menu key is used to access the available menu items. The scroll keys allow scrolling through various menu items.
The Enter key is used to select a menu item and is also used to clear readings from the display if the unit is in Manual
Clear mode.
Scroll keys
It is recommend securing the torque tester to a work-
bench before operating. Immobilizing the analyzer is
critical for the safety of the operator as well as for the
accuracy of torque measurements during operation.
Mounting the unit to a fixed surface offers the most
secure way to immobilize the analyzer, and is
recommended when used at a permanent location. It
employs two spring loaded mounting screws from the
unit into the mounting surface.
Note: Remember that a loose torque tester during utilization can impact the validity of torque readings. Always make
sure the unit is secure before operating, as repeated usage may loosen the screws.
Loosen both
black caps to
access
mounting
screw.
MOUNTING
Corporate Headquarters: 1080 North 11th Street, San Jose, CA 95112 Phone: (408) 292-2214 Fax: (408) 292-2733
www.mountztorque.com
Page 5
Menu Selections
Pressing the "Menu" Key will present the following Screen:
1. Use the Scroll Up or Down key to toggle through: Quick Test, Units, Mode, Setup & Filter.
2. Press Enter key to select a choice.
Setup any operational parameters such as Auto Clear before starting a Quick test as settings cannot
be changed during a Quick Test operation.
1. Press Menu button.
2. With the Quick Test selected, press Enter key
Selecting Quick Test
Once the Quick test is started the "Menu" indication at the bottom left of the EZ-TorQ screen will
change to "Stop". When the desired number of readings are collected, press the Menu key to
end the Quick test.
Quick Test
Units
Mode
Setup
Filter
Quick Test
Units
Mode
Setup
Filter
Corporate Headquarters: 1080 North 11th Street, San Jose, CA 95112 Phone: (408) 292-2214 Fax: (408) 292-2733
www.mountztorque.com
lbf.in
lbf.ft
ozf.in
kgf.cm
kgf.m
N.m
Menu Selections
1. Select Units by highlighting and pressing Enter.
2. Use the Scroll Up or Down key to toggle through the Unit options.
3. Press Enter key to select a Units Setting.
Selecting Units
Note:
cN.m is also available but you must
scroll down.
Track
Peak
First Peak
1. Select Mode by highlighting and pressing Enter.
2. Use the Scroll Up or Down key to toggle through the Mode options.
3. Press Enter key to select a Mode Setting.
4. The Main (or reading screen) will display the value of the selected Mode.
Selecting Mode Options
Backlight
First Peak
Data Output
Clear Memory
Auto Clear
Tolerance
Direction
1. Select Setup by highlighting and pressing Enter.
2. Use the Scroll Up or Down key to toggle through the Setup options.
3. Press Enter key to select a Setup Setting.
Selecting Setup
Page 6
Note:
Contrast, Language & Sleep Mode is
also available but you must scroll
down.
Quick Test
Units
Mode
Setup
Filter
Quick Test
Units
Mode
Setup
Filter
Quick Test
Units
Mode
Setup
Filter
Corporate Headquarters: 1080 North 11th Street, San Jose, CA 95112 Phone: (408) 292-2214 Fax: (408) 292-2733
www.mountztorque.com
Pan-Pac (130 Hz)
Mountz (170 Hz)
ISO (500 Hz)
Menu Selections
1. Select Units by highlighting and pressing Enter.
2. Use the Scroll Up or Down key to toggle through the Filter options.
3. Press Enter key to select a Filter Setting.
Selecting Filters
Page 7
Quick Test
Units
Mode
Setup
Filter
Enter Key
The ENTER key function is used for two functions.
CLEARING DISPLAY
The first function is used to clear any torque reading on the display. When the ENTER key is pressed it also sends the
displayed reading to the RS 232 port for printing or downloading to an application program. After sending the data, the
readings will automatically be cleared from the display.
VALIDATING SET-UPS
The other function is the validation of user selection during set-ups (see the Mode Selection, Filter Selection, and the
Units Selection).
Corporate Headquarters: 1080 North 11th Street, San Jose, CA 95112 Phone: (408) 292-2214 Fax: (408) 292-2733
www.mountztorque.com
Page 8
The EZ-TorQ Torque Tester offers three different modes of displaying torque information during operation
(Track, Peak and First Peak). The user will determine which mode is best suited for the application. The use of the three
modes is described below.
TRACK
This mode constantly tracks increasing or decreasing torque
variations. Use this mode to monitor varying torque on motors
and machinery. Also for calibration and testing of dial torque
products (small wrenches or dial screwdrivers).
PEAK
The display retains the highest torque applied. Use this mode
during calibration or testing of any hand type torque wrench
(dial, beam, and screwdriver), as well as power tools.
FIRST PEAK
The display holds the first detected torque peak applied.
Before any torque is applied, the display show dashes in the
torque value area. Once peak is detected, the display will
show the torque value. If a second peak is detected then it
will be displayed in the lower right (in small reverse video).
The function of this mode is primarily used for testing and
calibrating click type mechanical torque wrenches. The
tester captures the point where the wrench first clicks. As
additional force is applied a secondary torque is displayed.
This mode may be used for operator training on the correct
use of operating a click wrench. Always apply torque smoothly
to avoid false first peak readings.
Mode Selection
Track
+12.010 Lbf.in
Menu
Peak
+22.350 ozf.in
Menu
Setup Selections
This function allows the user to turn on the display backlight for low light
environments.
Use the Up / Down scroll keys to select the desired setting and press
Enter to select the setting.
Backlight
BACKLIGHT SETTING
Backlight: OFF
FPK 500 Hz
+23.615 lbf.in
Menu
+24.755
Corporate Headquarters: 1080 North 11th Street, San Jose, CA 95112 Phone: (408) 292-2214 Fax: (408) 292-2733
www.mountztorque.com
Setup Selections
This function allows a user to toggle data output to On or Off. Defaults setting is
Off.
Use the Up / Down Scroll keys to toggle the setting from Off to On. Press enter
to save the setting.
Note! The unit should never be plugged into the Mountz Interface
Program with Data Output turned to "on"
.
Data Output
This function clears the stored readings from Quick tests. The user will be asked
if they really want to perform this function. If they do they must choose "Yes".
The stored readings can also be deleted from the meter using the EZ Interface
Program.
Scroll to Yes, if you truly desire to clear the readings, and press Enter.
Clear Memory
This function controls the method of clearing the display of torque readings.
When Auto Clear is selected, the torque values, during operation, will automati-
cally be cleared from the display. The user can set the time threshold to control
how long the values should be displayed before clearing. When Manual Clear is
selected, the torque values during operation will indefinitely be display until the
user presses the Enter key. The Auto Clear timer can be set from 1 to 5 seconds.
If a Quick Test is in operation, the readings will be stored when the Auto Clear
timer expires or the user presses Enter if in Manual Clear mode.
Use the Up / Down scroll keys to change between Manual and Auto and press
Scroll Left to move to the Time. Use the Up / Down scroll keys to select the
Time. When finished, press Enter to end the process and store the setting.
Auto Clear
Page 9
Clear Tool Test Results
Are You Sure?
Yes
No
AUTO CLEAR SETTING
Mode: MANUAL
Time: (seconds) 1
Data Output
Off
On
This function allows a user to set up the First Peak settings.
Use the Up / Down Scroll keys to toggle between each setting.
Use the Scroll Left set up the data for each setting
Press enter to save the setting.
Note! The unit should never be plugged into the Mountz Interface
Program with Data Output turned to "on"
.
First Peak
First Peak
Sensitivity: Low
Min Peak: 5.0089 lbf.in
Units: lbf.in
Corporate Headquarters: 1080 North 11th Street, San Jose, CA 95112 Phone: (408) 292-2214 Fax: (408) 292-2733
www.mountztorque.com
Setup Selections
Allows an operator to set the direction for capturing the torque readings:
(Clockwise, Counter Clockwise and Both directions).
Use the Up / Down scroll keys to change between BOTH, CW and CCW.
When finished, press Enter to end the process and store the setting.
Direction
This function sets the contrast of the Display.
Use the Up scroll key to increase the contrast and the Down scroll key to
decrease the contrast. When finished, press Enter to end the process and store
the setting.
Contrast
Page 10
DIRECTION SETTING
Direction: BOTH
SET LCD CONTRAST
Contrast: 60
The function allows the user to change the language of the meter. Only two lan-
guages are available in the meter at one time
Use the Up / Down scroll keys to change between languages. When finished,
press Enter to end the process and store the setting.
Language
LANGUAGE SETTING
Language: English
The meter will automatically turn off after 10 minutes of non use (no torque read-
ings or no presses of the key pad buttons).
This function is used to turn off the sleep mode for users that do not want the
meter to go to sleep.
Use the Up / Down scroll keys to change between sleep mode On / Off. When
finished, press Enter to end the process and store the setting.
Caution: The meter will have significantly less operational life if Sleep Mode is
turned off.
Sleep
SLEEP MODE SETTING
Auto Sleep: On
TOLERANCE SETTING
Low: 10.000
High: 14.00
Units: Lbf.in
The Tolerance parameters control the Go and No-Go multicolored Green / Red
LED and In Tolerance and Out of Tolerance indication on the meter screen. The
user sets a lower and upper torque threshold to get a visual warning signal when
these limits are reached or breached during operation.
When you first enter the Tolerance Setting screen Low Tolerance will be in
reverse video. When this is true you can scroll between Low and High tolerance
using the Scroll Up / Down keys.
To set the Tolerance press Enter and the value will change to normal video and
the cursor with be on the last digit. Use the Scroll Up / Down keys to increase
or decrease digits and scroll left to move to the next digit. When done with Low
Tolerance press Enter and the Low Tolerance will appear in reverse video. Use
Scroll down to move to High Tolerance and then press enter to edit the value.
After completion press the Menu key.
Tolerance
Corporate Headquarters: 1080 North 11th Street, San Jose, CA 95112 Phone: (408) 292-2214 Fax: (408) 292-2733
www.mountztorque.com
Filter Selections
The EZ-TorQ II product utilizes hardware level low pass filters prior to A/D conversion and software averaging to clean
the main signal and remove undesired frequency signals which may be a result of noise which can occur during dynamic
motion. Three filter settings are provided, as described below.
1. Pan-Pacific (130Hz): At this frequency setting, the operator will see a decrease in torque values displayed as the
speed of the power tool is increased. The 130Hz frequency filter in conjunction with software averaging cuts off signals
above 130Hz, which will result in slightly lower torque values being displayed with increased RPM.
2. Mountz (170Hz): At this frequency setting, the operator will see limited or no change to the torque values being dis-
played as the speed of a power tool is increased. The 170Hz frequency filter in conjunction with software averaging cuts
off signals above 170Hz, which will result in little or no change to torque values being displayed with increased RPM.
3. ISO (500Hz): At this frequency setting, the operator will see an increase in torque values displayed as the speed of
the power tool is increased. The 500Hz frequency filter in conjunction with software averaging cuts off signals above
500Hz, which will result in higher torque values being displayed with increased RPM. The 500Hz frequency setting is
offered for customers seeking to test power tools in accordance the ISO standard ISO 5393.
Page 11
Corporate Headquarters: 1080 North 11th Street, San Jose, CA 95112 Phone: (408) 292-2214 Fax: (408) 292-2733
www.mountztorque.com
Page 12
External Power Supply
Plug the provided transformer to charge the internal batteries in the unit.
RS 232 Connection:
The RS 232 can be used for printing or downloading torque values into a computer or used
with an external PC to calibrate the unit.
Rate: 19,200 BPS
Output Format: 8 bits fixed, 1 stop bit, no parity.
External Connections
On the left side, there are three slots for external connections.
Pin-Out
The following diagram and Table define the pins of the I/O connectors for the EZ-TorQ
Torque Tester.
Pin Numbers
6..................
RS 232
RS 232 Connector
Pin Signal
1 Not used
2 RXD
3 TXD
4 Not Used
5 Ground
6 Not Used
Analog Output
Connector provided for those that wish to monitor the amplified analog signal before the
analog to digital conversion.
POWER TOOL TESTING
The run down adapters (RDA) are designed to provide consistent and reliable torque readings for use with power driven
torque control tools. The RDA’s reduce the impact and irregular peaks that cause poor repeatability. Each RDA has an
effective torque range and will supply repeatable torque data within that range if used correctly.
Always use a quality joint rate simulator (run down adapter) when testing power tools in a simulated application. Use the
peak mode. The Peak mode is designed to meet the demanding frequency requirements for testing dynamic torque
applications.
Using Run Down Adapters
The EZ-TorQ includes a 1/4 Female Hex Square Drive Adapter which is used for testing hand tools. It also includes a
Run Down Adapter
Operation
1. The run down adapter is placed in-line between the tool drive and transducer of the torque tester.
2. The torque tester should be properly secured on a solid surface or a test bench.
3. Before each test run, the Input drive run down adapter (RDA) should be completely backed-up. (Unless using
Mountz AURA run down adapter)
4. The RDA is designed to run in clockwise direction only.
5. Apply torque until RDA is run down completely. Then note or save reading with the torque tester.
Corporate Headquarters: 1080 North 11th Street, San Jose, CA 95112 Phone: (408) 292-2214 Fax: (408) 292-2733
www.mountztorque.com
Installation of the "EZ-TorQ II Interface Software"
The interface program allows the operator to conduct Tool Tests, Data logging and Sensor Calibration.
1) Insert the CD into the PC and the EZ-TorQ II Interface Program splash screen will appear. Click on the “Install EZ-
TorQ II Program”
Page 13
Corporate Headquarters: 1080 North 11th Street, San Jose, CA 95112 Phone: (408) 292-2214 Fax: (408) 292-2733
www.mountztorque.com
Page 14
3) Click Install.
4) After the installation is successful click Finish.
5) After installation of the EZ-TorQ Interface Program, turn on the unit and connect it to a PC through the RS-232
port.
6) A Green light will show on the Interface Program indicating that the software was installed and the unit is
connected properly.
Corporate Headquarters: 1080 North 11th Street, San Jose, CA 95112 Phone: (408) 292-2214 Fax: (408) 292-2733
www.mountztorque.com
Page 15
The EZ-TorQ Interface Program contains a com port selection tab which allows for selection of a specific com port.
The default setting is Com 1. Go to File Menu, select Com Port.
If using a USB connection, Toggle through the com port selections and click ok on the available selections until the
On-Line indicator turns Green. The EZ-TorQ meter must be turned on to establish a connection. The COM port set-
ting can also be verified by checking port assignments via device manager.
COM Port Selection
Corporate Headquarters: 1080 North 11th Street, San Jose, CA 95112 Phone: (408) 292-2214 Fax: (408) 292-2733
www.mountztorque.com
Page 16
The EZ-TorQ Meter Interface software can be used to download the results of the Quick test data stored in the meter.
The test data stored in the meter can be deleted using this program or deleted using the menu in the meter. If you
desire to add comments to the download, check the "Require Comments" check box and you will be provided with a win-
dow to add comments to the downloaded results.
Quick Test Downloading
1) Download Results - Retrieves the results of a QuickTest after it has been run. It will offer a chance to add further
notes to the test at this point. The results will save in the PC in a location of your choice in a folder under the name
entered in the "Operator" field in the upper portion of EZ-TorQ Meter Interface software. The results are stored in a
.csv file which can be opened in Excel or using a text editor program, such as Notepad. The file name will be the
QuickTest number followed by the date and the time at which the test was started.
2) Clear Data in Meter - Clears the test data for the QuickTest in the EZ-TorQ II meter. The operator will be asked for
confirmation before the action takes place.
Corporate Headquarters: 1080 North 11th Street, San Jose, CA 95112 Phone: (408) 292-2214 Fax: (408) 292-2733
www.mountztorque.com
Page 17
The Data Logging tab of the EZ-TorQ Meter Interface software provides a feature to graph torque vs time in real time.
The Data Logging tab also provides a "Real-time" feature that allows the capture of meter readings into an Excel
Spreadsheet.
Data Logging
1) Graph: The real time torque vs. time graph can be accessed by clicking on the Data logging tab, and then clicking on
the Start button on the top left side of the screen. After torque has been applied and the desired graph has been
obtained, click the Stop button to stop the collection of readings. There are different features available at the top of
the Start button that can be utilized for the graph.
Corporate Headquarters: 1080 North 11th Street, San Jose, CA 95112 Phone: (408) 292-2214 Fax: (408) 292-2733
www.mountztorque.com
Page 18
2) Real-time: The Real-Time button on the upper right side of the Data Logging screen allows a user to connect the EZ-
TorQ II Meter to a PC and get readings sent to the PC, in Real-Time, which can be printed to a printer or saved as an
Excel Spread Sheet. The screen reading is sent from the Meter when Auto clear takes place or when Enter is pressed if
the meter is in Manual Clear mode.
This program is used to update the code in the EZ-TorQ II unit. This program does not automatically install as the
Interface program does when CD is inserted into the PC. Insert the CD into the PC. Locate the Bootloader.exe file and
click on it, a small window will pop up as shown below.
The EZ-TorQ II is supplied with RS-232 cable adapter and USB serial converter adapter. Connect the RS-232 cable to
the torque tester and the computer. Turn on the EZ-TorQ II unit. Click the button "Start boot loader on device" and the
EZ-TorQ II screen will indicate the EZ-TorQ II is in bootloader mode.
To update the firmware click the "Boot load HEX file to device" button, and locate the hex file on the computer. The
Bootloader
Corporate Headquarters: 1080 North 11th Street, San Jose, CA 95112 Phone: (408) 292-2214 Fax: (408) 292-2733
www.mountztorque.com
Page 19
The EZ-TorQ II Meter is powered using Li-Ion batteries for long battery life. The battery pack should last up to 40 hours
with normal use and maximum charge. The battery icon is always on the display. It is filled in completely when fully
charged and shows white space as the battery depletes.
When the battery strength appears low, the unit should be connected to the external AC adapter to charge the batteries.
The torque readings may become inaccurate when the unit is used with a low battery. Charging time is 4 hours mini-
mum, but the unit may be used with charging.
BATTERY OPERATION
Track
+0.0000 Lbf.in
Menu
Universal Charger/ Adapter
The unit is supplied with a Universal Charger/ Adapter with auto volt feature -100-240 V, and the user does not have to
physically change the voltage setting.
Item # 770300
process will take about 6 minutes. The status will be shown in the EZ-TorQ Bootloader window as the process takes
place.
In some cases when a computer does not have an RS-232 connector and the USB serial converter adapter is used, the
serial port where the connection is received might come in at a port different than COM1. In this situation if the user
wants to update the firmware through the Bootloader program, the user needs to perform the following procedure:
1) Right-Click the Bootloader.exe file and click on Create Shortcut.
2) Once the shortcut is created, right click on "Shortcut to BootLoader.exe" file and click on Properties.
3) Under the Shortcut menu locate the Target address box.
4) In the Target address box the user will see the address of the shortcut file as shown in the example below:
"C:\Documents and Settings\Administrator\Desktop\EzTorQ II- ALL FILES\Latest EzTorQ II CD Jan 4th
2010\BootLoader.exe"
5) Right after BootLoader.exe" add a space and forward slash followed by the ComPort the connection comes in at as
shown in the example below: "C:\...................exe" /com6
Corporate Headquarters: 1080 North 11th Street, San Jose, CA 95112 Phone: (408) 292-2214 Fax: (408) 292-2733
www.mountztorque.com
Page 20
Accessories
Model Item #
Universal Charger (for EZ-TorQ) 770301
Case (for EZ-TorQ) 600729
Battery Pack (for EZ-TorQ) 603107
Brush Cap 14-501830
RS232 Cable 773064
Serial to USB Adapter 773069
1/4 F/Hex Sq. Dr Adapter (17mm F/Hex) 600727
Square Dr. Adapter (1/4 Sq. Dr x 1/4 Hex x 2" Oal) 120143
Spring RDA10i 070600
Spring RDA50i 070605
Spring RDA100i 070610
Spring RDA150i 070615
Service
Mountz Inc. features an experienced calibration and repair staff. Our trained technicians can calibrate and repair most
any tool. Mountz provides rapid service with quality that you can trust as we offer two state-of-the-art calibration lab and
repair facilities that can calibrate up to 20,000 lbf.ft.
Since 1965, Mountz Inc. has proven its in-depth knowledge of torque and torque solutions by consistently developing,
producing, marketing and servicing highly sophisticated, cutting-edge tools. Mountz Inc. is known to the industry as the
premier torque tool supplier.
Tool Service & Repair Capability
Torque Wrenches: Click, Dial, Beam, Cam-Over & Break-Over
Torque Screwdrivers: Dial, Micrometer, Preset & Adjustable
Torque Analyzers/Sensors: All brands
Electric Screwdrivers: All brands
Air Tools: All brands
Impact Wrenches, Drills, Pulse Tools, Grinders, Percussive Tools,
Air Screwdrivers, Nutrunners, DC Controlled Nutrunners
Torque Multipliers: All brands
Corporate Headquarters: 1080 North 11th Street, San Jose, CA 95112 Phone: (408) 292-2214 Fax: (408) 292-2733
www.mountztorque.com
Mountz Service Locations
Eastern Service Center
19051 Underwood Rd.
Foley, AL 36535
Phone: (251) 943-4125
Fax: (251) 943-4979
Western Service Center
1080 N.11th Street
San Jose, CA 95112
Phone: (408) 292-2214
Fax: (408) 292-2733
www.mountztorque.com
  • Page 1 1
  • Page 2 2
  • Page 3 3
  • Page 4 4
  • Page 5 5
  • Page 6 6
  • Page 7 7
  • Page 8 8
  • Page 9 9
  • Page 10 10
  • Page 11 11
  • Page 12 12
  • Page 13 13
  • Page 14 14
  • Page 15 15
  • Page 16 16
  • Page 17 17
  • Page 18 18
  • Page 19 19
  • Page 20 20

Mountz EZ-TorQ II Operating Instructions Manual

Category
Measuring, testing & control
Type
Operating Instructions Manual

Mountz EZ-TorQ II is a versatile torque tester designed for various applications. It accurately measures torque in seven units and features three operating modes: Track (for monitoring varying torque), Peak (for testing hand torque wrenches), and First Peak (for click-type mechanical torque wrenches). The device offers real-time graphing, data logging, and PC connectivity via RS-232 or USB. It's equipped with high-capacity Li-Ion batteries, stores up to 150 data points, and includes software for Quick Tool Tests, Data Logging, and Sensor Calibration.

Ask a question and I''ll find the answer in the document

Finding information in a document is now easier with AI