Philips CEM3000X User manual
- Category
- Car media receivers
- Type
- User manual
This manual is also suitable for
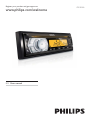
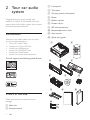
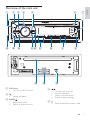
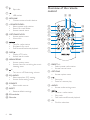
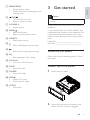
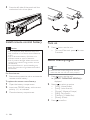
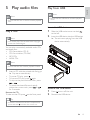
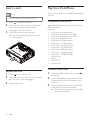
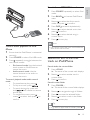
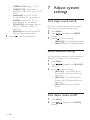
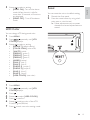
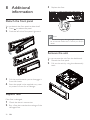
The Philips CEM3000X is a versatile car audio system that lets you enjoy your favorite music from a variety of sources on the go. Listen to FM/AM radio, play CDs, MP3s, or WMA files from a USB stick or SD card, or connect your iPod, iPhone, or other external device via the auxiliary input. With 4 x 50W of power, you'll experience rich, clear sound that fills your vehicle. Additional features include a built-in clock, multiple EQ presets, and a detachable front panel for added security.
The Philips CEM3000X is a versatile car audio system that lets you enjoy your favorite music from a variety of sources on the go. Listen to FM/AM radio, play CDs, MP3s, or WMA files from a USB stick or SD card, or connect your iPod, iPhone, or other external device via the auxiliary input. With 4 x 50W of power, you'll experience rich, clear sound that fills your vehicle. Additional features include a built-in clock, multiple EQ presets, and a detachable front panel for added security.


-
 1
1
-
 2
2
-
 3
3
-
 4
4
-
 5
5
-
 6
6
-
 7
7
-
 8
8
-
 9
9
-
 10
10
-
 11
11
-
 12
12
-
 13
13
-
 14
14
-
 15
15
-
 16
16
-
 17
17
-
 18
18
-
 19
19
-
 20
20
-
 21
21
-
 22
22
-
 23
23


Philips CEM3000X User manual
- Category
- Car media receivers
- Type
- User manual
- This manual is also suitable for
The Philips CEM3000X is a versatile car audio system that lets you enjoy your favorite music from a variety of sources on the go. Listen to FM/AM radio, play CDs, MP3s, or WMA files from a USB stick or SD card, or connect your iPod, iPhone, or other external device via the auxiliary input. With 4 x 50W of power, you'll experience rich, clear sound that fills your vehicle. Additional features include a built-in clock, multiple EQ presets, and a detachable front panel for added security.
Ask a question and I''ll find the answer in the document
Finding information in a document is now easier with AI
Related papers
-
Philips CEM3000 User manual
-
Philips CEM3000/00 User manual
-
Philips CEM3000B User manual
-
-
-
-
-
-
Philips CEM2000X User manual
-
