Page is loading ...

Originalinstructions
Usermanual
HM3Humimax™
Evaporative
humidier/cooler
TEN-HM3-B1506©MuntersEuropeAB2015


Tableofcontents
Tableofcontents...........................iii
1Introduction.................................1
1.1Aboutthismanual.....................
1
1.2Warranty...............................
1
1.3Inspectionofdelivery..................
1
1.4Conformitywithdirectivesand
standards..............................
2
1.5Marking................................
2
2Safety.........................................3
2.1Warnings...............................
3
2.2Intendeduse...........................
3
2.3Safeinstallation,operationand
maintenance...........................
3
3Productdesign..............................5
3.1Productdescription...................
5
3.2Principleofoperation..................
5
3.3Function................................
6
3.4Options.................................
6
4Installation...................................7
4.1Safety..................................
7
4.2Movingtheequipment................
7
4.3Storingtheequipment................
7
4.4Installtheconsolesonthewall........
7
4.5Installtheunitontheconsoles........
8
4.6Electricalconnections................
9
4.7RemoteOn/Offswitchconnection...
10
4.8Humidity/temperaturesensor
connection.............................
10
4.9ConnectionofModbusRS485
communication........................
11
4.10ConnectionofBACnetcommunica-
tion.....................................
11
4.11ConnectionofModbusTCP/IP
communication........................
11
4.12ConnectionofcontrolsystemHMI...
12
4.13Watersupplyanddrain................
13
4.14Chloridetabletdosing.................
13
5Operation....................................15
5.1HMIOperation.........................
15
5.2HMILightindications..................
16
5.3HMIDisplay............................
16
5.4Settings................................
18
5.5Pre-startchecks.......................
19
5.6Startthehumidier....................
19
5.7Controllermenus......................
20
5.7.1Startpage......................
20
5.7.2Mainindex......................
21
5.7.3Passwordenter(Login)........
21
5.7.4Operatingmode................
22
5.7.5Temperatureandhumidity....
23
5.7.6Globalfunctions................
25
5.7.7Setup...........................
25
5.7.8SettingOn/Offweekly
schedule........................
28
5.7.9Restoresavedparameters....
29
6Serviceandmaintenance.................30
6.1Safety..................................
30
6.2General................................
30
6.3Maintenanceprocedure..............
31
7Faulttracing.................................33
8Technicalspecication....................34
8.1Dimensionsandweight...............
34
8.2Waterconsumption...................
34
8.3Technicaldata.........................
35
9Dimensioning...............................36
10Simplieddimensioning..................39
11Scrapping....................................41
12ContactMunters............................42
TEN-HM3-B1506Tableofcontentsiii

HM3Humidier
1Introduction
1.1Aboutthismanual
Thisinstructionmanualcontainsimportantsafetyinformationandaproductdescription,aswellas
installationandmaintenanceinstructionsforthedeliveredhumidier.Readallrelevantpartsofthismanual
beforeoperatingorperforminganyworkontheunit.Observanceofthisinformationwillhelpyoutoavoid
danger,tominimiserepaircostanddowntime,andtoincreasethereliabilityandtheservicelifeoftheunit.
Thismanualmustbestoredinapermanentlocationclosetotheunit.
Thismanualdoesnotdescribeinfullallthemaintenanceworkrequiredtoguaranteethelongevityand
reliabilityofthistypeofequipment.Onlytheservicesofaqualiedengineerwhoisamemberofa
conrmedmaintenancecompanywillensurethesafeandlonglastingoperationoftheunit.
Thecontentsofthismanualcanbechangedwithoutpriornotice.
NOTE!Thismanualcontainsinformationwhichisprotectedbycopyrightlaws.Itisnotallowedtoreproduceor
transmitanypartofthismanualwithoutwrittenconsentfromMunters.
Sendanycommentsregardingthismanualto:
MuntersEuropeAB
TechnicalDocumentation
P.O.Box1150
SE-16426KISTASweden
e-mail:[email protected]
1.2Warranty
ThewarrantyisbasedonthetermsofsaleanddeliveryofMunters.Thewarrantyisnotvalidifrepairsor
modicationsarecarriedoutwithoutthewrittenagreementofMunters,oriftheunitdoesnotoperateunder
theconditionsagreedwithMunters.Damagesresultingfromnegligence,poormaintenanceorfailureto
complywiththerecommendationswillnotbecoveredbythewarranty.
Itisaconditionofthewarrantythattheunitforthefullwarrantyperiodisservicedandmaintainedbya
qualiedMuntersengineerorMuntersapprovedengineer.Accesstospecicandcalibratedtestequipment
isnecessary.Theserviceandmaintenancemustbedocumentedforthewarrantytobevalid.
Thewarrantyislimitedtoafreeexchangeofpartsorcomponentswhichhavefailedasaresultofdefects
inmaterialsorworkmanship.
Commissioning/Start-upinspection"S"byMuntersismandatorytovalidatethefullwarranty.
AlwayscontactMuntersforserviceorrepair.Operatingfaultscanoccuriftheunitismaintained
insufcientlyorincorrectly.
1.3Inspectionofdelivery
■Inspectthedeliveryandcomparewiththedeliverynote,orderconrmationorotherdelivery
documentation.Makesurethateverythingisincludedandnothingisdamaged.
■ContactMuntersimmediatelyifthedeliveryisnotcompleteordamagedinordertoavoidinstallation
delays.
1IntroductionTEN-HM3-B1506

HM3Humidier
■Removeallpackagingmaterialfromtheunit,andmakesurethatnodamagehasoccurredduring
transportation.
■AnyvisibledamagemustbereportedinwritingtoMunterswithin3daysandpriortoinstallationof
theunit.
■Disposeofthepackagingmaterialaccordingtolocalregulations.
1.4Conformitywithdirectivesandstandards
ThehumidierisinconformitywiththeessentialsafetyrequirementsoftheMachineryDirective
2006/42/EC,andinconformitywiththeprovisionsoftheEcodesignDirective(ErP)2009/125/EC,and
oftheEMCDirective2004/108/EC.
1.5Marking
Type
Fa br. No.
Fa br. ye a r
0,23 kW
Ma x 0,23 kW
1501 190XXX XXXXX
2015
Humima x HM3
2
2
·
·
230V 50 Hz
Ma de in S we de n
Munters Europe AB
P.O. B ox 1150
SE- 164 26 Kis ta , S wede n
Weight: 40 kg
IP 44
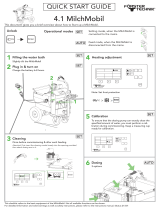
M
Figure1.1Unitlabelexample
Theunitlabelisplacedontheback,nexttothemaincircuitbreaker.
TEN-HM3-B1506Introduction2

HM3Humidier
2Safety
2.1Warnings
Informationaboutdangersareinthismanualindicatedbythecommonhazardsymbol:
W W
W
ARNING! ARNING!
ARNING!
Indicatesapossiblehazardthatcanresultinseverepersonalinjuryordeath.
CA CA
CA
UTION! UTION!
UTION!
Indicatesapossiblehazardthatcanresultindamagetotheunitorotherproperty,orcauseenvironmental
damage.
NOTE!Highlightssupplementaryinformationforoptimaluseoftheunit.
2.2Intendeduse
TheunitdeliveredbyMuntersmustonlybeusedforthetreatmentofair.Thisincludescoolingand
humidifyingtheair.
Anyotheruseoftheunit,orusewhichiscontrarytotheinstructionsgiveninthismanual,cancausepersonal
injuryanddamagetotheunitandotherproperty.
NomodicationoftheunitisallowedwithoutpriorapprovalbyMunters.Attachmentorinstallationof
additionaldevicesisonlyallowedafterwrittenagreementbyMunters.
2.3Safeinstallation,operationandmaintenance
Greatefforthasbeenplacedonthedesignandmanufactureoftheunit,tocomplywithapplicablesafety
aspectsforthistypeofequipment.
Theinformationinthismanualincludessuggestionsforbestworkingpracticeandshallinnowaytake
precedenceoverindividualresponsibilitiesorlocalregulations.
Duringoperationandotherworkwithamachineitisalwaystheresponsibilityoftheindividualtoconsider:
■Thesafetyofallpersonsconcerned.
■Thesafetyoftheunitandotherproperty.
■Theprotectionoftheenvironment.
Alwayscarryoutriskassessmentsbeforedoinganyworkontheunit.
3SafetyTEN-HM3-B1506

HM3Humidier
1
0
W W
W
ARNING! ARNING!
ARNING!
Beforedoinganyserviceormaintenanceworkontheunitmakesurethatallelectricalequipmenthasbeen
disconnectedfromthepowersupply,andsecuredagainstreconnection.Theunitisconnectedtohighvoltage
whichcancauseseriousinjuryordeath.
Thehumidierincludesarotatingfan.Keephandsawayfromfanbladesatalltimeswhileunitison.DONOT
serviceunituntilthefanhascompletelystopped.
Theunitmustneverbeconnectedtoavoltageorfrequencyotherthanthatforwhichitwasdesigned.Refertothe
unitlabel.Linevoltagethatistoohighcancauseanelectricalshockhazardanddamagetotheunit.
Useonlyapprovedliftingequipmenttoavoidaccidents.
Sharpsteeledgesontheunitcancausecuts.Useprotectivegloves,particularlyduringdisassemblyorassembly.
Waterspillagecancauseslippingaccidentsresultinginseriousinjury.
CA CA
CA
UTION! UTION!
UTION!
Neverclimbontheunitoruseitasscaffolding.
TEN-HM3-B1506Safety4

HM3Humidier
3Productdesign
3.1Productdescription
TheMuntersHumimaxmaintainsarequiredhumidityortemperature,dependingontheselectedoperation
modeandthetechnicalpossibilities.
Themaincomponentsareastainlesssteelcasing,anevaporativehumidicationpadandahighperformance
fanforwhichthespeedisregulatedtoachievetheselectedsetpoint.
Commonapplicationsareprinting,electronicsmanufacturing,datacenterserverroomsandpreservation
ofartifacts.
3.2Principleofoperation
A
B
A.Warmanddryair
B.Cooledandhumidiedair
AcirculationpumpinthewatertrayfeedswatertothetopoftheCELdekevaporativemedia.Thewater
owsdownthecorrugatedsurfaceofthemedia.
Asthewarmanddryairpassesthroughthepaditevaporatespartofthewaterandproducescool,humidied
air.
Therestofthewaterassistsinwashingthepad,andisdrainedbacktothetray.
Theenergythatisneededfortheevaporationistakenfromtheairitself.Theairthatleavesthehumidieris
thereforehumidiedandcooledsimultaneouslywithoutanyexternalenergysupplyfortheevaporation.
Thisisinessencetheadiabaticcoolingprocess.Itisveryefcientandtheconsumptionofenergyisverylow.
5ProductdesignTEN-HM3-B1506

HM3Humidier
3.3Function
Theunitcanbestarteddirectlyfromthecontrolpanel,byaweeklyscheduleinthecontrollerorbyaremote
switch.
ItcanasstandardbeconnectedtoaModbusTCP/IPorRS485communicationnetwork,andoptionally
throughBACnet.
Theunitcanbeusedasstandalone,orinagroupofunitsworkingtogetherwithacommoncontrolinput.
SeetheHM3CommissioningGuideformoreinformationonconnectionpossibilities.
Thebottomoftheunitformsawatertray.Waterissuppliedtothetraythroughawaterlter,asolenoid
valveandalevelswitchthatcontrolsthewaterlevel.
Thetrayisemptiedandrelledwithfreshwaterasneeded(batchdrain)toensurealowlevelofminerals.
Thedrainvalveisopenedelectrically.
Inthecaseoftemperaturecontrolmode,thereisamaximumhumiditylimitationsettingtopreventover
saturationoftheair.Ifthisvalueisreached,thefanspeedwillberegulateddownwithoutconsideringthe
temperature.
3.4Options
Iftheaircontainsahighconcentrationofparticlesororganicdust,anoptionalairpre-ltercanbeinstalled
onthebackoftheunit.Thepre-lterisbasedonameshnetwith350micrometerltration.
Problemswithorganicdustandmineralscanbereducedbyusinganoptionaldosingsystemwith
bromide/chloridetablets,see4.14,Chloridetabletdosing.
TheunitcanoptionallybeequippedwithaBACnetcommunicationmodule,see
4.10,ConnectionofBACnetcommunication.
TEN-HM3-B1506Productdesign6

HM3Humidier
4Installation
4.1Safety
W W
W
ARNING! ARNING!
ARNING!
Theunitmustneverbeconnectedtoavoltageorfrequencyotherthanthatforwhichitwasdesigned.Refertothe
unitlabel.Linevoltagethatistoohighcancauseanelectricalshockhazardanddamagetotheunit.
Sharpsteeledgesontheunitcancausecuts.Useprotectivegloves,particularlyduringdisassemblyorassembly.
CA CA
CA
UTION! UTION!
UTION!
Allelectricalcablingmustbesecuredinasafewaytoavoiddamagesduringnormaloperationorservice,and
nottointerferewithremovaloftheevaporativepads.
Donotstepontheunitorthepiping.
Aexiblehosemustbeusedtoconnecttothewatersupply.
4.2Movingtheequipment
W W
W
ARNING! ARNING!
ARNING!
Thehumidierisheavy.Becarefulwhenliftingormovingtheparts.
Useonlyapprovedliftingequipmenttoavoidinjuries.
Thehumidierisfront-heavy.Takenecessaryprecautionstopreventtheunitfromtippingover.
Thehumidiermustalwaysbehandledcarefully.
Providedthatthepackagingmaterialhasnotbeenremoved,thehumidiercanbeliftedbyacraneorforklift
truck.
Disposeofthepackagingmaterialaccordingtolocalregulations.
4.3Storingtheequipment
■Placethehumidierinanuprightpositiononahorizontalsurface.
■Re-usethepackagingmaterialtoprovideprotectionfortheunit.
■Takenecessaryprecautionstopreventtheunitfromtippingover.
■Protectthehumidierfromphysicaldamage.
■Storethehumidierundercoverandprotectitfromdust,frost,rainandaggressivecontaminants.
■Evaporativepadsmustbestoredinadryenvironment.
4.4Installtheconsolesonthewall
1.Theconsolesaretobexedinpositiononaconcretewallbyfour12mmconcreteexpansion-shell
boltsaccordingtoTable4.1.
2.Foranothertypeofwalloranalternativexturemethod,theresultingxturemusthavethesame
stabilityfactor.
7InstallationTEN-HM3-B1506

HM3Humidier
3.Nonsolidwallshavetobereinforcedtocarrytheweightoftheunit.Forweightinformation,see
8.1,Dimensionsandweight.
4.Thesafetyoftheinstallationmustalwaysbeveriedbeforeoperation.
NOTE!Theunitmustbepositionedlevelwithin2°inbothdirections.
UnitA(mm/inch)B(mm/inch)
HM32000360/14.2600/23.6
HM35000360/14.2600/23.6
HM310000360/14.21200/47.2
Table4.1Drillingtemplate
4.5Installtheunitontheconsoles
1.Makesurethattheunitisnotconnectedtothepowersupply.
2.NotetheminimumdistancefromthewallinFigure4.1,(mm/inch)togivesufcientaircirculation
andservicespace.
/
13.8
/0.6
/31.5
/15.4
15/ 0.6
Figure4.1Positionontheconsoles
TEN-HM3-B1506Installation8

HM3Humidier
CA CA
CA
UTION! UTION!
UTION!
Donotinstalltheunitaboveanyelectricalorothermoisturesensitiveequipment.
3.Removethebottomplatefromtheunit.
4.Attachtheunittotheconsoleswiththeincludedscrews,nutsandwashers.
5.Installthebottomplate.
6.Adjustthedeectorsonthefrontoftheunittodirecttheairowinthedesireddirection.
NOTE!Atoosteepanglesettingofthedeectorswillreducetheairow.Themaximumrecommendedangle
is45
°
.
4.6Electricalconnections
W W
W
ARNING! ARNING!
ARNING!
Theunitmustneverbeconnectedtoavoltageorfrequencyotherthanthatforwhichitwasdesigned.Refertothe
unitlabel.Linevoltagethatistoohighcancauseanelectricalshockhazardanddamagetotheunit.
Makesurethattheunitisconnectedtoanelectricaloutletthatiscorrectlygrounded.
Asafetyswitchmustbeinstalledbetweentheunitandthepowersupplyincaseofaxedinstallation.
9InstallationTEN-HM3-B1506

HM3Humidier
4.7RemoteOn/Offswitchconnection
TouseremotestartwhenthehumidierisinAutomode,anexternalswitchcanbeconnectedtothe
controller.
Figure4.2Connectionofremoteswitch
Connectanormallyopen(NO)switchtoterminalsX3andM,seeFigure4.2.
4.8Humidity/temperaturesensorconnection
CA CA
CA
UTION! UTION!
UTION!
Connectionofthehumiditysensormustbecarriedoutbyapersonwithadequateknowledge.
Followtheinstructionsbelowtoassembleandconnectthehumiditysensorconnectionkittothesensor.
Useathreewiresignalcable.
Connectajumpercablebetween+RHand+T.
-RH
- T
+RH
1
2
3
+T
Figure4.3Connectionofleadsandhumiditysensorconnectionkitassembly
TEN-HM3-B1506Installation10

HM3Humidier
1.Connectthewiresbetweentheconnectorandthesensor,Pin1=-RH,Pin2=-T,Pin3=+RH
2.Notethejumpercablebetween+RHand+T
3.Attachtheterminal(2)totheconnector(1)
4.Tightentheterminalscrews(3)
5.Attachthecover(4)totheconnector(1)
6.Attachtheange(5)tothecover(4)
ConnecttothesocketmarkedRH/Tonthebackofthehumidier.
Ifyouhavemorethanonehumidierinthesameroom,itispossibletouseonlyonesensor.Thisisset
upatcommissioning.
Thehumiditysensormustbeinstalledinapositionthatisagoodrepresentationofthegeneralroom
humidity.
Itisimportantthatthehumiditysensorisnotplacednearanyheatsourcesordisturbingaircurrents,orin
thedirectairowfromthehumidier.
4.9ConnectionofModbusRS485communication
Seehowtoassembletheconnectorin4.8,Humidity/temperaturesensorconnection.
Pinconnection:Pin1=A+,Pin2=B-,Pin3=REF.
ConnecttothesocketmarkedRS485onthebackofthehumidier.
4.10ConnectionofBACnetcommunication
TheBACnetcommunicationmoduleisoptional.Anetworkcablemustbeconnectedtothemoduleinside
theClimatixcontrolbox.
Formoreinformation,seetheHM3CommissioningGuide.
4.11ConnectionofModbusTCP/IPcommunication
ConnectanetworkcabletothesocketmarkedTCP/IPonthebackofthehumidier.
11InstallationTEN-HM3-B1506

HM3Humidier
4.12ConnectionofcontrolsystemHMI
ALARM
UP
ESC
DOWN
ENTER
INFO
Figure4.4ClimatixcontrolsystemHMI
ConnectthedisplayplugtothesocketmarkedHMIonthebackofthehumidier.
InstalltheHMI-holderinasuitableposition.
PositiontheHMIsothatthestatusindicationLEDisvisible.
TEN-HM3-B1506Installation12

HM3Humidier
4.13Watersupplyanddrain
Connectthesuppliedexiblehosetotheunit,andtothemainswatersupplythroughthewaterlterandthe
shut-offvalve.Thevalveisdeliveredtogetherwiththettingfora1/2"pipe.
Theminimumwaterpressureis1bar,maximumpressure8bar.
Themaximumowthroughthesolenoidvalveis3litersperminute.
Thepipesandconnectedequipmentmustbeinstalledinsuchawayastoavoidhigh-pressurepeaksinthe
watersupplypipe.
Theoutletwaterconnectioninnerdiameteris24mm,rubbersleeve.
Thedrainmustextendandterminatewithanindirectconnectiontothesanitarysystembywayofanopen
drain,funneldrain,orxedairgap,allofwhichshallincludeatrappartintheirinstallation.
Makesurethatthedrainhasenoughcapacityfortheoverowprotectiontoworkproperly.
Thetubemustinnopositionbeabovetheoutletconnectiononthehumidier.
CA CA
CA
UTION! UTION!
UTION!
Makesurethatthereisnowaterleakage.
Figure4.5Overowfunnel
4.14Chloridetabletdosing
Ahighconcentrationofdustintheairincreasestheriskforcloggedpadsandwatertank.Infactthe
evaporativehumidierisalsoaveryeffectiveairlter.Problemswithorganicdustandmineralscanbe
reducedbyusinganoptionaldosingsystemwithbromide/chloridetablets.
13InstallationTEN-HM3-B1506

HM3Humidier
Figure4.6Chloridetabletdosingsystem
InstallthebromidechloridetabletdosingsystemDT1:
■Attachthebracketintheholesoftheframeunderneaththeevaporativepad.
■Positionthedosersothatthebottomofthecontainerisapproximately5mm/0.2inchabovethebottom
ofthetray.
■Ifthedoserisstandingonthebottomofthetray,thewatercirculationwillnotbesufcientandthe
chlorideconcentrationtoolow.
■Whenthedoserisinthecorrectposition,thetabletswillbewettedinsequenceandthechloride
concentrationwillbecorrect.
NOTE!Formaintenance,makesurethattheholesarenotcloggedandrelltabletsasneeded.
TEN-HM3-B1506Installation14

HM3Humidier
5Operation
5.1HMIOperation
TheHumanMachineInterface(HMI)isusedtodisplayvaluesandparameters,andtoinputsettingsand
commandstothecontrolsystem.
ALARM
UP
ESC
DOWN
ENTER
INFO
KeyActionFunction
PressScrolluporincreaseaninputvalue. UP
PressandholdPressandholdformorethan1.5secondenablestheaccelerationfunction
torolluporincreasethevaluerapidly.
PressScrolldownordecreaseaninputvalue. DOWN
PressandholdPressandholdformorethan1.5secondenablestheaccelerationfunction
torolldownordecreasethevaluerapidly.
PressSelection/conrmation. ENTER
PressandholdAfterlogginginanyuserlevel,PressandholdkeyENTERfor3seconds
toactivatelogin/logoffwindow.Iftheuserisnotloggedin,pressandhold
keyENTERfor3secondstodisplaythepasswordenterpage.
INFOPressGotoMainIndex.TogglebetweenStartpageandMainindex.
ALARMPressGotoAlarmpage.Togglebetweenactivealarms,alarmhistoryandalarm
functions.
PressCancelmodication/exittoupperlevelofmenu/backtopreviouspage. ESC
PressandholdGotoSettings.
Table5.1OverviewoffunctionsofHMIkeys
15OperationTEN-HM3-B1506

HM3Humidier
5.2HMILightindications
LEDIndicationFunction
BlinkinggreenStdBy,Start-up/Stopsequence,Override,Fanoverrun,
ConstantgreenRunmode
ConstantorangeAlarm/Immediatestop
Blinking
green/orange
Wiringtestmode
INFO
Blinkingred/orangeCongurationmode
BlinkingredIndicatesactiveandunacknowledgedalarmexists.
ConstantredIndicatesactivealarmsexistbutallalarmshavebeenacknowledged.
ALARM
OffNoactivealarmexists.
Table5.2OverviewofHMILED-lightindications
5.3HMIDisplay
Figure5.1Displayexample,seeTable5.3
TEN-HM3-B1506Operation16

HM3Humidier
PositionIconExplanation
1
KeyINFO
2
KeyALARM
3
KeyESC
4
•••
Indicatestherearecharactersnotshowninthisline.Ifastringislongerthanthe
lengthoftheline,the“...”willbedisplayedattheendoftheline.Ifthislineis
highlighted,itwillscrollautomaticallycharacterbycharacter.
Inalinewithmorethan1string,iftheendpartofastringiscoveredbythestring
ofnextposition,“...”willbedisplayedattheendofthestring.Whenthislineis
highlighted,therststringwithcoveredtextwillscrollautomaticallycharacterby
character.
Thecharacterscrollingfunctionassuresthatacompletecharactershiftseachtime.
5►Indicatesthatasub-menuexists.
6
KeyENTER
▼TheiconontherightmarginistoindicatethekeyDOWN.
Theiconontheuppermarginistoindicatethereareotherline(s)hiddenbelow
thecurrentscreen.
7
—Onvaluechangingpage,theicon▼becomes“-”toindicatethatthekeyisusedfor
valuedecreasing.
▲TheiconontherightmarginistoindicatethekeyUP.
Theiconontheuppermarginistoindicatethereareotherline(s)hiddenabove
thecurrentscreen.
8
+Onvaluechangingpage,theicon▲becomes“+”toindicatethatthekeyisused
forvalueincreasing.
Noindication–Level0,Viewingofalloperationalsettings.
Operatorlogin,see5.7.3,Passwordenter(Login)
9
Systemconguration,see5.7.3,Passwordenter(Login)
101/11Indicatesthatthetotalnumberoflinesinthispageis11,andline1iscurrently
selected.
11TitlePagetitle.
Table5.3Overviewofdisplayicons
17OperationTEN-HM3-B1506
/