Masking Tape
8+ tubes Non-Solvent
Based Construction Adhesive
(Silicone Adhesive when installing over
tile)
7-1/4" Circular Saw
and Masonry Blade
Caulk Gun
1-2 Tubes Color Matched
100% Silicone Sealant
Sanding Block
Plus:
• Standard Woodworking Tools
• Spring Loaded Braces or Lumber
(to create bracing)
• Sawhorses
• Drop Cloth
• 1/4" Roundover Router Bit (Optional)
Drill & Hole Saw
(size will vary)
Breathing
Protection
Shop Vacuum
Rags
High Speed Rotary
Tool with Cut-Off
Wheel
Denatured
Alcohol
DENATURED
ALCOHOL
Jigsaw with
Grit Blade
54" (1372 mm) Shower Barre*
40" (1016 mm) Shower Barre*
36" (914 mm) Shower Barre*
24" (610 mm)
Shower Barre*
Right Corner Joint
Left Corner Joint
Hook
7" (178 mm)
Floating Shelf
Back Wall Layout
Right Sidewall LayoutLeft Sidewall Layout
Record your layout in the area below. Note the location of
backer material, seams, and accent walls.
21" (533 mm)
Floating Shelf
14" (356 mm)
Floating Shelf
16" (406 mm)
Maximum
16" (406 mm)
Maximum
16" (406 mm)
Maximum
16" (406 mm)
Maximum
16" (406 mm)
Maximum
16" (406 mm)
Maximum
16" (406 mm)
Maximum
*** Backer board should span four studs.
* Backer board should span two studs.
** Backer board should span three studs.
2x4 backing required
24" (610 mm) long minimum*
2x4 backing required
36" (914 mm) long minimum**
2x4 backing required
40" (1016 mm) long minimum**
2x4 backing required
54" (1372 mm) long
minimum***
Attach directly to studs or 2x4 backing
17-1/2" (445 mm) minimum*
Attach directly to stud or 2x4 backing
17-1/2" (445 mm) long minimum*
Seam Joint
Attach directly to stud or 2x4 backing
17-1/2" (445 mm) long minimum*
2x4 backing required
17-1/2" (445 mm) long minimum*
9"
(229 mm)
Locker
14-1/2"
(368 mm)
Locker
Edge Trim
Layout
Accessories
Available accessories are shown. Determine installation location prior to
wall installation. Install backer board support as indicated.
11" (279 mm) 17" (432 mm)
16" (406 mm)
Maximum
14" (356 mm)
Locker
9" (229 mm)
Locker
Back Side
Front
Side
Seam
Joint
54" (1372 mm)
(not shown)
40"
(1016 mm)
36"
(914 mm)
24"
(610 mm)
Hook
Shower Barres
Handrail Shelf
7" (178 mm)
14" (356 mm)
21" (533 mm)
Floating Shelf
Uncut Edge
Cut Edge
IMPORTANT! If a 9” (229 mm) or 14” (356 mm)
locker unit will be installed, follow the directions
packed with the locker unit. Do not use this
installation guide.
NOTE: The handrails, robe hook, and shelves
require 2x4 backing support.
Determine the accessories that will be installed.
Install the rough plumbing for the bath and
shower components.
Install backing support for all accessories
that require additional support following the
instructions provided with the accessory.
Record the locations of the backing on the
diagram above.
IMPORTANT! Water resistant wallboard
backing material is recommended.
Check the studs for plumb. Studs should be
within 3/8” (10 mm) of plumb.
Use shims if necessary to ensure all walls are
plumb or within 3/8” (10 mm) of plumb.
Determine if there will be vertical or horizontal
seams beyond the corner locations.
Order optional seam joints as needed.
Determine if edge trim will be installed.
Order optional edge trim as needed.
Back Wall Measurement:
Measure the installation area to determine the
cut dimensions for the panel(s).
If corner joints will be installed, subtract 1/16”
(2 mm) from the width of the wall panel for each
corner joint.
If a seam joint(s) will be installed, subtract 1/16”
(2 mm) from the width or height of the wall
panel for each seam joint.
Mark the cut lines on the back side of the wall
panel(s).
Sidewall Measurement:
If a corner joint(s) will be installed, subtract
5/16” (8 mm) from the width of the wall panel
for each corner joint.
If a seam joint(s) will be installed, subtract 1/16”
(2 mm) from the width or height of the wall
panel for each seam joint.
Record the location of the handle, showerhead,
bath spout and other components.
Mark the cut lines on the back side of the wall
panel(s).
Optional for Installations With Ceiling Panels:
CAUTION: Risk of injury. Install the ceiling
panel and allow the adhesive to cure before
installing the wall panels.
If the ceiling will be covered with the panel
material, measure and cut the ceiling panel to
size.
NOTE: Polyurethane based adhesive is
recommended for the ceiling panel.
Construct bracing or use commercial bracing to
hold the ceiling material in place while it cures.
Apply construction adhesive to the ceiling
material as shown in step 15.
With a partner, carefully lift the ceiling panel
into place.
Brace the panel tight against the ceiling
and allow it to cure following the adhesive
instructions.
NOTE: In steam shower installations, a pitched
ceiling may result in condensation running
down the walls.
IMPORTANT! For seam joint installations,
the cut edge of the panel MUST be positioned
opposite the seam. The seam joint MUST mate
to an uncut, beveled wall panel edge.
If the wall panel has already been cut, use a
router and a 1/4” roundover bit to restore the
bevel on the panel edge before installing a
vertical or horizontal seam joint.
Position the back wall panel face down on
a stand or sawhorses that have a protective
material on them.
IMPORTANT! It is recommended the panel be
cut using a power saw and an abrasive wheel or
an abrasive masonry blade.
Cut the panel to the required dimensions. Use a
jigsaw with a grit blade for contour cuts.
Repeat with the side wall panels.
From the front side of the panel, use a hole saw
to cut the holes for valving and other shower
components.
Wall Panels with Optional Joints
K-97600, K-97601, K-97603, K-97604, K-97605, K-97606, K-97607, K-97608, K-97609, K-97610, K-97611, K-97612,K-97613, K-97614, K-97615, K-97616, K-97617, K-97618, K-97619, K-97620
NOTE: Install corner joints for aesthetic look when the wall is out-of-plumb
less than 3/8” (10 mm), or the panels are cut unevenly.
The existing rough walls must be within 3/8” (10 mm) of plumb. Shim as
needed.
Use color matched silicone sealant in the joints that match the color of the
walls as closely as possible.
Check all joints, walls, and accessories for proper color before beginning
installation.
Cover the shower base with a drop cloth or other protective material to
avoid damage.
Follow the construction adhesive and silicone sealant instructions for
application and curing time.
Inspect all components for damage after unpacking, prior to installation.
A router may be used to cut the walls. The router bit will dull quickly.
If the panels are being installed over existing tile, scuff the tile using 100 grit
sandpaper to provide a better surface for adhesive contact.
11236601-2-D
1236601-2-D
Installation and Care Instructions
Record model number from box for reference.
Model Number:______________
Required Tools Rough-in Plan
2 3 4
7 86 9
5
10
USA/Canada: 1-800-4KOHLER
México: 001-800-456-4537
kohler.com
1
IMPORTANT! Dust will be generated when cutting the wall panels.
Cutting the panels should be performed outside or in a well ventilated area.
IMPORTANT! For best results, cut the walls using a masonry blade and
circular saw blade. Do not use a blade with teeth.
IMPORTANT! If the wall panels have patterns, lay out the panels before
cutting and determine the desired layout.
IMPORTANT! Leave this manual for the end user.
Read these instructions before installing or using this product.
WARNING: Risk of serious injury. When cutting the wall panels, take
appropriate safety measures including the use of breathing protection.
CAUTION: Risk of serious injury. Always wear safety glasses while
cutting and drilling.
CAUTION: Risk of injury. If the ceiling will be covered with the wall
material, the ceiling must be installed prior to the wall panels. Allow
sufficient time for the ceiling installation to cure before installing the
wall panels or the ceiling can fall during installation, causing injury.
CAUTION: Risk of product damage. The wall panels should be room
temperature before cutting. Allow the temperature to stabilize if the
walls were outside in a cold climate.
CAUTION: Risk of product damage. Prolonged exposure to UV light
will damage the finish on the wall panels.
Top View
Shallow
Channel
Deep
Channel
Corner
Joints
Construction
Adhesive
Construction
Adhesive
Shims
Shims
54" (1372 mm)
(not shown)
40"
(1016 mm)
36"
(914 mm)
24"
(610 mm)
Hook
Shower Barres
Handrail Shelf
7" (178 mm)
14" (356 mm)
21" (533 mm)
Floating Shelf
Shim
Corner
Joint
Seam
Joint
7/8"
(14 mm)
Side View
Top View
Back Wall with Joints
Shallow
Channel
Sealant
Deep Channel
Sanding Block
Back Side
Seam
Joint
Top View
KOHLER® Limited Warranty — Choreograph™ Walls and Accessories
Kohler Co. warrants all Choreograph products (including Choreograph accessories) to be free of defects in
material and workmanship during normal residential use for ten (10) years from the date of sale. If a Choreograph
product or accessory is used commercially or is installed outside of the United States of America, Canada or Mexico,
Kohler Co. warrants the Choreograph product or accessory to be free of defects in material and workmanship
during normal use for three (3) years from the date of sale.
If Kohler Co’s. inspection of your Choreograph product or accessory discloses a defect in material or workmanship
within the applicable period of coverage stated above, Kohler Co. will, at its election, repair, replace or make
appropriate adjustment. Kohler Co. is not responsible for labor charges, installation, or other incidental or
consequential costs. In no event shall the liability of Kohler Co. exceed the purchase price of the Choreograph
product or accessory. Damages due to improper handling, installation or maintenance are not considered
manufacturing defects and are not covered by this warranty. This warranty is valid for the original, consumer
purchaser only. Proof of purchase (original sales receipt) must be provided to Kohler Co. with all warranty claims.
To obtain warranty service, contact Kohler Co., either through your plumbing contractor, home center, wholesaler,
dealer, or E-tailer, or by calling or writing Kohler Co., Attn.: Customer Care Center, 444 Highland Drive, Kohler,
Wisconsin 53044, 1-800-4KOHLER (1-800-456-4537) from within the USA and Canada, and 001-800-456-4537 from
within Mexico, or visit www.kohler.com within the USA, www.ca.kohler.com from within Canada, or www.
mx.kohler.com in Mexico.
TO THE EXTENT PERMITTED BY LAW, ALL IMPLIED WARRANTIES INCLUDING THOSE OF
MERCHANTABILITY AND FITNESS FOR A PARTICULAR PURPOSE ARE HEREBY DISCLAIMED.
KOHLER CO. AND SELLER HEREBY DISCLAIM ANY LIABILITY FOR SPECIAL, INCIDENTAL, OR
CONSEQUENTIAL DAMAGES. Some states/provinces do not allow limitations on how long an implied warranty
lasts, or the exclusion or limitation of special, incidental or consequential damages, so these limitations and
exclusions may not apply to you. This warranty gives you specific legal rights. You may have other rights which
vary from state/province to state/province.
This is the exclusive written warranty for Kohler Co.
Troubleshooting
Symptom Recommended Action
1. A panel is not correctly adhering to the wall or
ceiling.
A. There may be vapor lock. Pull the panel out away from the wall to allow vapor to escape and press back into place.
B. Is the installation over tile? The tile should have been roughed up with sandpaper to allow a better surface for the
adhesive to grip. Remove the panel, rough up the tile, apply additional adhesive, and reinstall the panel.
C. Were the wall and panel surfaces cleaned before adhesive was applied? Remove the panel and clean the surfaces.
Apply additional adhesive. Reinstall the panel.
IMPORTANT! It is critical the walls and panels
are clean for a strong bond to be created by the
adhesive.
Clean the back of the panels with denatured
alcohol.
On the edges of each panel, remove excess
material and smooth any rough edges using a
sanding block.
When wall panels fit into the corner joints, sand
the cut edges for a smooth fit.
Dry fit the corner and seam joints to the back
wall panel if they are being installed. (See step
14 for correct orientation.)
Dry fit the back and sidewall panels to confirm
fit. Adjust as needed.
Remove the wall panels and joints.
Installations Using Corner Joint(s):
Measure the height of the back wall panel.
Cut the corner joint to the height of the back wall
panel.
Apply color matched silicone sealant in the
deep channel on the corner joint. Apply enough
sealant to fill 1/2 of the channel.
Installations Using Corner Joint(s):
Install the deep channel of the corner joint on the
side of the back wall panel.
Repeat for the second joint if needed.
TIP: To remove excess adhesive, spray
denatured alcohol on the area to be cleaned and
onto your finger. The denatured alcohol will
help make the removal of the adhesive easier.
NOTE: Use silicone sealant if the panels are
being installed over tile. Use bath and shower
construction adhesive for other applications.
Apply construction adhesive or silicone adhesive
to the back wall panel in a circular pattern.
The beads of adhesive should be 5” (127 mm) to
7” (178 mm) apart.
Apply a bead of construction adhesive along the
top edge of the back wall panel 3/4” (19 mm)
from the edge.
Move the back wall panel into place at a slight
angle.
Push the panel against the rough wall. Press
firmly and evenly across the entire wall. The
panel should contact the rough wall along the
entire area.
TIP: When removing excess silicone sealant,
spray denatured alcohol on the area with excess
sealant and your finger.
Remove the excess sealant with your finger.
Push firmly on all surfaces of the back wall panel
for full adhesion.
NOTE: Bracing may be needed to hold the panel
in place depending on the wall material and
adhesive being used.
When installed over tile, use a temporary brace
to secure each wall panel in place for 48 hours to
allow full adhesion.
If corner joints are installed, apply color matched
silicone sealant in the shallow channel. Apply
enough sealant to fill 1/2 of the channel.
NOTE: Use silicone adhesive if the panels are
being installed over tile. Use bath and shower
construction adhesive for other applications.
Apply bath and shower construction adhesive
to the side wall panel (bottom panel if there are
two panels) in a circular pattern. The beads of
sealant should be 5” (127 mm) to 7” (178 mm)
apart.
Press the side wall panel (bottom panel if there
are two panels) to the joints, then push the panel
firmly against the rough wall.
NOTE: Bracing may be needed to hold the panel
in place depending on the wall material and
adhesive being used.
When installed over tile, use a temporary brace
to secure each wall panel in place for 48 hours to
allow full adhesion.
Installations With Horizontal Seam Joint(s):
If a seam joint will be installed with a corner
joint, allow enough length for the seam joint to
extend into the corner joint channel.
Cut the seam joint to the required length.
Trim the end of seam joint where it will meet the
corner joint as shown.
NOTE: To trim the seam joint, a small rotary
tool with a cutting wheel is recommended.
Installations With Vertical Seam Joint(s):
Fill one channel on the wall side of the seam
joint with color matched silicone sealant.
Install the seam joint onto the installed wall
panel.
Apply color matched silicone sealant to the
second channel of the seam joint when you are
ready to install the locker unit.
Installations With Horizontal Seam Joint(s):
Fill one channel with color matched silicone
sealant on the seam joint and install the seam
joint to the installed wall panel.
Install the additional wall panels following the
same steps.
Repeat steps 19 through 26 with the second
side of the enclosure
If installing edge trim on the outside edge of the
wall panel(s), measure the panel height and cut
the edge trim to fit.
Apply color matched silicone sealant to the edge
trim channel.
Install the edge trim to the outside edge of the
wall panel(s).
IMPORTANT:
For better adhesion success,
allow the panels to cure 24 to 48 hours before
performing the final steps. Sealing the top and
bottom will restrict air flow, resulting in longer
curing time.
IMPORTANT! Brace the wall panels while
the adhesive is curing to stop the panels from
bowing outward.
Apply sealant to the top seam where the panels
meet the rough wall.
Apply sealant to the bottom seams where the
panels meet the bath or shower base.
Apply sealant to any exposed cut edges.
Install all accessories following the instructions
packed with them.
Wait 24 hours before showering or running
water.
21236601-2-D ©2016 Kohler Co.
11 12
17
22
13
18
23
16
21
14
19
15
20
24
25
27 28
26
29
30
Ruban cache
8+ tubes d'adhésif de construction
non dissolvant
(adhésif à la silicone lors de l'installation
sur du carrelage)
Scie circulaire 7-1/4"
et lame à maçonnerie
Pistolet à mastic
1-2 tubes de mastic à
la silicone à 100%
couleur assortie
Cale à poncer
Plus:
• Outils de menuiserie standard
• Entretoises à ressort ou bois
(pour créer un support)
• Chevalets
• Toile de protection
• Arête tranchante arrondie 1/4"
(Optionnelle)
Perceuse et scie
cylindrique
(la taille varie)
Protection
respiratoire
Aspirateur
d'atelier
Chiffons
Outil rotatif haute
vitesse avec meule
de coupe
Alcool dénaturé
Scie sauteuse
avec lame à
grains
Barre de douche 54" (1372 mm)*
Barre de douche 40" (1016 mm)*
Barre de douche 36" (914 mm)*
Barre de douche
24" (610 mm)*
Joint de coin droit
Joint de coin gauche
Crochet
Étagère flottante
7" (178 mm)
Disposition du mur arrière
Disposition du mur latéral droit
Disposition du mur latéral gauche
Noter la disposition dans la zone ci-dessous. Noter l'emplacement du matériau
d'appui, des joints, et des murs d'accent.
Étagère flottante
21" (533 mm)
Étagère flottante
14" (356 mm)
16" (406 mm)
maximum
16" (406 mm)
maximum
16" (406 mm)
maximum
16" (406 mm)
maximum
16" (406 mm)
maximum
16" (406 mm)
maximum
16" (406 mm)
maximum
*** La planche d'appui doit s'étendre sur quatre montants.
* La planche d'appui doit s'étendre sur deux montants.
** La planche d'appui doit s'étendre sur trois montants.
Support 2x4 requis
longueur de 24" (610 mm) minimum*
Support 2x4 requis
longueur de 36" (914 mm) minimum**
Support 2x4 requis
longueur de 40" (1016 mm) minimum**
Support 2x4 requis
longueur de 54" (1372 mm)
minimum***
Attacher directement sur les montants ou le support 2x4
17-1/2" (445 mm) minimum*
Attacher directement sur le montant ou le support 2x4
longueur de 17-1/2" (445 mm) minimum*
Joint de jonction
Attacher directement sur le montant ou le
support 2x4 longueur de 17-1/2" (445 mm)
minimum*
Support 2x4 requis
longueur de 17-1/2" (445 mm)
inimum**
Casier 9"
(229 mm)
Casier
14-1/2"
(368 mm)
Garniture
de rebord
Disposition
Accessoires
Les accessoires disponibles sont illustrés. Déterminer l'emplacement d'installation
avant l'installation du mur. Installer le support de planche d'appui tel qu'indiqué.
11" (279 mm) 17" (432 mm)
16" (406 mm)
maximum
Casier
14" (356 mm)
Casier
9" (229 mm)
Côté
avant
Arrière
Joint
de jonction
54" (1372 mm)
(non illustré)
40"
(1016 mm)
36"
(914 mm)
24"
(610 mm)
Crochet
Barres de douche
Étagère de
main courante
Étagère flottante
7" (178 mm)
14" (356 mm)
21" (533 mm)
Bord coupé
Bord non coupé
Mesure du mur arrière:
Mesurer la surface d'installation pour
déterminer les dimensions de découpe pour le(s)
panneau(x).
Si des joints de coins sont installés, soustraire
1/16 (2 mm) de chaque largeur de panneau
mural pour chaque joint de coin.
Si un ou des joints de jonction sont installés,
soustraire 1/16 (2 mm) de la largeur ou de la
hauteur du panneau mural pour chaque joint de
jonction.
Mettre les lignes de découpe sur l'arrière du ou
des panneaux muraux.
Mesure des murs latéraux:
Si un ou des joints de coins sont installés,
soustraire 5/16 (8 mm) de la largeur du panneau
mural pour chaque joint de coin.
Si un ou des joints de jonction sont installés,
soustraire 1/16 (2 mm) de la largeur ou de la
hauteur du panneau mural pour chaque joint de
jonction.
Noter l'emplacement sur la poignée, la pomme
de douche, le bec de la baignoire, et les autres
composants.
Mettre les lignes de découpe sur l'arrière du ou
des panneaux muraux.
Optionnel pour les installations avec panneaux
de plafond:
ATTENTION: Risque de blessures. Installer le
panneau du plafond et laisser l'adhésif sécher
avant d'installer les panneaux muraux.
Si le plafond sera couvert avec le matériau des
panneaux, mesurer et couper le panneau du
plafond à la taille appropriée.
REMARQUE: Il est recommandé d'utiliser de
l'adhésif à base de polyuréthane pour le panneau
du plafond.
Construire un renfort ou utiliser un renfort
disponible sur le marché pour maintenir le
matériau du plafond en place pendant qu'il sèche.
Appliquer de l'adhésif de construction sur le
matériau du plafond comme sur l'illustration à
l'étape 15.
Avec un partenaire, lever avec précaution le
panneau du plafond pour le mettre en place.
Soutenir le panneau de manière serrée contre
le plafond et le laisser sécher en suivant les
instructions accompagnant l'adhésif.
REMARQUE: Dans les installations de douches
à vapeur, un plafond incliné pourrait entraîner
l'écoulement d'une condensation le long des murs.
IMPORTANT! Pour les installations avec un
joint de jonction, le bord coupé du panneau
DOIT être positionné sur le côté opposé du joint.
Le joint de jonction DOIT s'accoupler à un bord
de panneau mural non coupé et biseauté.
Si le panneau mural a déjà été coupé, utiliser
une évideuse et une arête tranchante arrondie
de 1/4” pour restaurer le biseau sur le bord du
panneau avant d'installer un joint de jonction
vertical ou horizontal.
Positionner le panneau mural arrière tourné vers
le bas sur un stand ou des chevalets recouverts
d'un matériel de protection.
IMPORTANT! Il est recommandé de couper le
panneau à l'aide d'une scie électrique et d'une
meule abrasive, ou d'une lame à maçonnerie
abrasive.
Couper le panneau aux dimensions requises.
Utiliser une scie sauteuse munie d'une lame à
grain pour les découpes de contours.
Répéter avec tous les panneaux muraux latéraux.
À partir du côté avant du panneau, utiliser une
scie-cloche pour découper les trous pour les
vannes et autres composants de douche.
IMPORTANT! Si l'on installe une unité de
casier de 9” (229 mm) ou 14” (356 mm), suivre
les instructions accompagnant cette unité. Ne
pas utiliser ce guide d'installation.
REMARQUE: Les mains courantes, les crochets
à vêtements et les étagères doivent être
supportées à l'arrière par un montant 2x4.
Déterminer quels accessoires seront installés.
Installer la plomberie de raccordement pour les
composants de la baignoire et de la douche.
Installer un support arrière pour tous
les accessoires qui exigent un support
supplémentaire en suivant les instructions
accompagnant l'accessoire.
Noter les emplacements du support arrière sur
le diagramme ci-dessus.
IMPORTANT! Il est recommandé d'utiliser
du matériau de support de panneau mural
hydrofuge.
Inspecter les montants pour vérifier qu'ils sont
d'aplomb. Les montants doivent être compris
dans un rayon de 3/8" (10 mm) de l'aplomb.
Utiliser des cales si nécessaire afin d'assurer que
les murs sont d'aplomb ou qu'ils sont compris
dans un rayon de 3/8” (10 mm) de l'aplomb.
Déterminer si des joints verticaux ou
horizontaux seront présents au-delà des
emplacements de coins.
Commander des joints de jonction optionnels
selon les besoins.
Déterminer si une garniture de bordure sera
installée.
Commander une garniture de bordure
optionnelle selon les besoins.
Panneaux muraux avec joints optionnels
K-97600, K-97601, K-97603, K-97604, K-97605, K-97606, K-97607, K-97608, K-97609, K-97610, K-97611, K-97612,K-97613, K-97614, K-97615, K-97616, K-97617, K-97618, K-97619, K-97620
REMARQUE: Installer les joints de coins pour offrir une vue esthétique
lorsque le mur est hors d'aplomb à moins de 3/8” (10 mm), ou si les
panneaux sont coupés de manière inégale.
Les murs de raccordement existants doivent être compris dans un rayon de
3/8" (10 mm) de l'aplomb. Caler selon les besoins.
Utiliser un mastic à la silicone de couleur assortie dans les joints afin de le
faire correspondre le plus possible à la couleur des murs.
Inspecter tous les joints, ainsi que les parois et les accessoires pour vérifier
que la couleur est adéquate avant de commencer l'installation.
Recouvrir la base de la douche avec une toile de protection ou un autre
matériel de protection pour éviter des dommages.
Suivre les instructions relatives à l'adhésif de construction et au mastic à la
silicone et à celles concernant l'application et le temps de prise.
Inspecter tous les composants pour y rechercher des dommages éventuels,
après les avoir déballés, et avant l'installation.
Une toupilleuse peut être utilisée pour couper les parois. La mèche de la
toupilleuse s'émousse rapidement.
Si les panneaux sont installés sur du carrelage déjà présent, frotter le
carrelage avec du papier abrasif de grain 100 afin de fournir une meilleure
surface pour le contact adhésif.
31236601-2-D
1236601-2-D
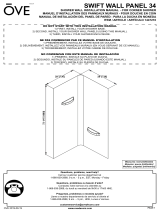
Instructions d'installation et d'entretien
Noter le numéro de modèle sur le carton d'emballage à titre de référence.
Nº du modèle:______________
Outils requis Plan de raccordement
2 3 4
7 86 9
5
10
USA/Canada: 1-800-4KOHLER
Mexique: 001-800-456-4537
1
IMPORTANT! De la poussière sera générée lors de la découpe des
panneaux muraux. La découpe des panneaux doit être effectuée à l'extérieur
ou dans une zone bien ventilée.
IMPORTANT! Pour obtenir les meilleurs résultats possibles, couper les
murs à l'aide d'une lame à maçonnerie et d'une lame de scie circulaire. Ne
pas utiliser une lame dotée de dents.
IMPORTANT! Si les panneaux muraux ont des motifs, étaler les panneaux
avant de couper et déterminer la disposition souhaitée.
IMPORTANT! Laisser ce manuel pour l'utilisateur final.
Lire ces instructions avant d'installer ou d'utiliser ce produit.
AVERTISSEMENT: Risque de blessures graves. Lors de la découpe
des panneaux muraux, suivre les mesures de sécurité appropriées, et
inclure l'utilisation d'une protection respiratoire.
ATTENTION: Risque de blessures graves. Toujours porter des
lunettes de sécurité pendant la découpe et le perçage.
ATTENTION: Risque de blessures. S'il sera recouvert du matériau de
panneau mural, le plafond devra être installé avant les panneaux
muraux. Laisser assez de temps pour l'installation du plafond, afin que
celui-ci sèche avant de poser les panneaux muraux; sinon le plafond
pourrait tomber pendant l'installation, ce qui créerait des blessures.
ATTENTION: Risque d'endommagement du produit. Les panneaux
muraux doivent être à la température ambiante avant d'être coupés.
Attendre que la température se soit stabilisée si les murs étaient
entreposés à l'extérieur, dans un climat froid.
ATTENTION: Risque d'endommagement du produit. Une exposition
prolongée à la lumière ultraviolette endommagera la finition sur les
panneaux muraux.
kohler.com
Vista superior
Canal poco
profundo
Canal
profundo
Juntas
esquineras
Adhesivo
de construcción
Adhesivo
de construcción
Cuñas
Cuñas
54" (1372 mm)
(no se muestra)
40"
(1016 mm)
36"
(914 mm)
24"
(610 mm)
Gancho
Agarraderas de ducha
Estante para
agarradera
Estante flotante
7" (178 mm)
14" (356 mm)
21" (533 mm)
Cuña
Junta
de unión
7/8"
(14 mm)
Vista lateral
Junta
esquinera
Vista superior
Panel mural posterior con juntas
Canal
poco profundo
Sellador
Canal profundo
Bloque con papel
de lija
Lado posterior
Junta
de unión
Vista superior
Garantía limitada de KOHLER® — Paredes y accesorios Choreograph™
Kohler Co. garantiza todos los productos Choreograph (y los accesorios Choreograph) contra defectos de
materiales y de mano de obra en uso residencial normal durante diez (10) años a partir de la fecha de venta. Si un
producto o accesorio Choreograph se usa comercialmente o si se instala fuera de los Estados Unidos de América,
Canadá o México, Kohler Co. garantiza el producto o el accesorio Choreographcontra defectos de materiales y de
mano de obra en uso normal durante tres (3) años a partir de la fecha de venta.
Si la inspección realizada por Kohler Co. de su producto o accesorio Choreograph demuestra un defecto de
materiales o de mano de obra dentro del periodo aplicable de cobertura especificado arriba, Kohler Co. a su criterio,
reparará reemplazará o hará los ajustes pertinentes. Kohler Co. no se hace responsable de costos de mano de obra,
instalación u otros costos incidentales o indirectos. En ningún caso deberá la responsabilidad de Kohler Co. exceder
el precio de compra del producto o del accesorio Choreograph. Los daños debidos a errores de manejo, instalación
o mantenimiento inadecuado no se consideran defectos de fabricación, y no están cubiertos por esta garantía. Esta
garantía es válida únicamente para el comprador consumidor original. Al presentar las reclamaciones de garantía a
Kohler Co., es necesario incluir el comprobante de compra (recibo de venta original).
Para obtener servicio de garantía comuníquese con Kohler Co. a través de su contratista de plomería, centro de
remodelación, mayorista, distribuidor, distribuidor por Internet, o llame o escriba a Kohler Co., Atención: Customer
Care Center, 444 Highland Drive, Kohler, Wisconsin 53044, EE.UU., 1-800-4-KOHLER (1-800-456-4537) desde los
EE.UU. y Canadá, y al 001-800-456-4537 desde México, o visite www.kohler.com desde los EE.UU., www.ca.kohler.
com desde Canadá, o www.mx.kohler.com en México.
EN LA MEDIDA QUE LA LEY LO PERMITA, POR MEDIO DE LA PRESENTE SE DESCARGA
RESPONSABILIDAD DE TODA GARANTÍA IMPLÍCITA, INCLUIDA LA DE COMERCIALIZACIÓN E
IDONEIDAD PARA UN USO DETERMINADO. KOHLER CO. Y EL VENDEDOR, POR MEDIO DE LA
PRESENTE, DESCARGAN TODA RESPONSABILIDAD POR CONCEPTO DE DAÑOS PARTICULARES,
INCIDENTALES O INDIRECTOS. Algunos estados/provincias no permiten limitaciones en cuanto a la duración
de una garantía implícita o a la exclusión o limitación de daños particulares, incidentales o indirectos, por lo que es
posible que estas limitaciones y exclusiones no se apliquen a su caso. Esta garantía le otorga ciertos derechos legales
espeficos. Además, usted puede tener otros derechos que varían de estado a estado y provincia a provincia.
Esta es la garantía exclusiva por escrito de Kohler Co.
Resolución de problemas
Síntoma Acción recomendada
1. Un panel no se está adhiriendo correctamente
a la pared o al techo o cielo raso.
A. Es posible que haya vapor bloqueado. Separe el panel de la pared para permitir que escape el vapor y vuelva a
oprimirlo a su lugar.
B. ¿Está hecha la instalación sobre azulejos? Los azulejos deben haber sido raspados con papel de lija para producir
una superficie en la que el adhesivo se pudiera adherir mejor. Retire el panel, raspe los azulejos, aplique adhesivo
adicional y vuelva a instalar el panel.
C. ¿Fueron limpiadas las superficies de paredes y de paneles antes de aplicar el adhesivo? Retire el panel y limpie las
superficies. Aplique adhesivo adicional. Vuelva a instalar el panel.
¡IMPORTANTE! Es crítico que las paredes y
los paneles estén limpios para que el adhesivo
forme un fuerte enlace.
Limpie la parte posterior de los paneles con
alcohol desnaturalizado.
En los bordes de cada panel, retire el exceso de
material y alise los bordes ásperos con un bloque
con papel de lija.
Cuando los paneles murales se ajusten a juntas
esquineras, lije los bordes cortados para que el
ajuste sea fino.
Coloque preliminarmente las juntas esquineras
y las juntas de unión en el panel mural posterior,
si las va a instalar. (Consulte la orientación
correcta en el paso 14.)
Coloque preliminarmente los paneles posterior y
laterales para confirmar que queden bien. Haga
los ajustes necesarios.
Retire los paneles murales y las juntas.
Instalaciones con juntas esquineras:
Mida la altura del panel mural posterior.
Corte la junta esquinera a la altura del panel
mural posterior.
Aplique sellador de silicona del mismo color en
el canal profundo en la junta esquinera. Aplique
suficiente sellador para llenar la mitad del canal.
Instalaciones con juntas esquineras:
Instale el canal profundo de la junta esquinera
en el lado del panel mural posterior.
Repita con la segunda junta, si es necesario.
CONSEJO: Para quitar el exceso de adhesivo,
rocíe alcohol desnaturalizado en el área
a ser limpiada y en su dedo. El alcohol
desnaturalizado ayuda a quitar el adhesivo con
mayor facilidad.
NOTA: Use sellador de silicona si los paneles
están siendo instalados sobre azulejo. Use
adhesivo de construcción para bañeras y duchas
en otras aplicaciones.
Aplique adhesivo de construcción o adhesivo de
silicona al panel mural posterior en un patrón
circular.
Los hilos continuos de adhesivo deben estar
separados de 5” (127 mm) a 7” (178 mm) entre sí.
Aplique un hilo continuo de adhesivo de
construcción a lo largo del borde superior del
panel mural posterior a 3/4” (19 mm) del borde.
Mueva el panel mural posterior a su lugar a un
ligero ángulo.
Empuje el panel contra la pared sin acabado.
Oprima con firmeza y de manera uniforme en
todo el panel. El panel debe hacer contacto con
la pared sin acabado en toda el área.
CONSEJO: Al quitar el exceso de sellador de
silicona, rocíe alcohol desnaturalizado al área
con exceso de sellador y a su dedo.
Retire el exceso de sellador con el dedo.
Empuje con firmeza en todas las superficies del
panel mural posterior para que la adhesión sea
total.
NOTA: Es posible que se requieran refuerzos
para sostener el panel, de acuerdo al material de
la pared y al adhesivo que se esté usando.
Cuando instale sobre azulejo, use un refuerzo
temporal para fijar cada panel mural en su lugar
durante 48 horas, y que así la adhesión sea total.
Si se instalan juntas esquineras, aplique sellador
de silicona del mismo color en el canal poco
profundo. Aplique suficiente sellador para llenar
la mitad del canal.
NOTA: Use adhesivo de silicona si los paneles
están siendo instalados sobre azulejo. Use
adhesivo de construcción para bañeras y duchas
en otras aplicaciones.
Aplique adhesivo de construcción para bañeras
y duchas al panel mural lateral (o al panel
inferior si hay dos paneles) en un patrón
circular. Los hilos continuos de sellador deben
estar separados de 5” (127 mm) a 7” (178 mm)
entre sí.
Oprima el panel mural lateral (panel inferior si
hay dos paneles) a las juntas, y luego empuje el
panel con firmeza contra la pared sin acabar.
NOTA: Es posible que se requieran refuerzos
para sostener el panel, de acuerdo al material de
la pared y al adhesivo que se esté usando.
Cuando instale sobre azulejo, use un refuerzo
temporal para fijar cada panel mural en su lugar
durante 48 horas, y que así la adhesión sea total.
Instalaciones con juntas de unión horizontales:
Si se va a instalar una junta de unión con una
junta esquinera, deje suficiente longitud para
que la junta de unión llegue hasta el canal de la
junta esquinera.
Corte la junta de unión a la longitud requerida.
Recorte el extremo de la junta de unión en el
punto donde se encuentra con la junta esquinera,
como se muestra.
NOTA: Para recortar la junta de unión,
recomendamos usar una pequeña herramienta
rotativa con una rueda de corte.
Instalaciones con juntas de unión verticales:
Llene un canal en el lado de la pared de la junta
de unión con sellador de silicona del mismo
color.
Instale la junta de unión en el panel mural ya
instalado.
Aplique sellador de silicona del mismo color al
segundo canal de la junta de unión cuando usted
esté listo para instalar la unidad de estantería.
Instalaciones con juntas de unión horizontales:
Llene un canal con sellador de silicona del
mismo color en la junta de unión, e instale la
junta de unión en el panel mural instalado.
Siga los mismos pasos para instalar paneles
murales adicionales.
Repita los pasos del 19 al 26 en el segundo lado
del recinto
Si va a instalar guarnición de borde en el borde
exterior de los paneles murales, mida la altura
de los paneles y corte la guarnición del borde a
que ajuste.
Aplique sellador de silicona del mismo color al
canal de la guarnición de borde.
Instale la guarnición de borde al borde exterior
de los paneles murales.
IMPORTANTE: Para obtener mejor adhesión,
permita que los paneles se curen de 24 a 48 horas
antes de realizar los últimos pasos. Al sellar la
parte superior e inferior se restringe el flujo de
aire, lo que requiere mayor tiempo de curado.
¡IMPORTANTE! Refuerce los paneles murales
mientras se cura el adhesivo para evitar que los
paneles se pandeen hacia fuera.
Aplique sellador a la unión superior donde los
paneles se unen a la pared sin acabar.
Aplique sellador a las uniones inferiores en el
punto donde los paneles se unen a la bañera o a
la base de la ducha.
Aplique sellador a todos los bordes expuestos.
Instale todos los accesorios de acuerdo a las
instrucciones incluidas con ellos.
Espere 24 horas antes de tomar una ducha o de
dejar correr agua.
61236601-2-D ©2016 Kohler Co.
11 12
17
22
13
18
23
16
21
14
19
15
20
24
25
27 28
26
29
30
  • Page 1 1
  • Page 2 2
  • Page 3 3
  • Page 4 4
  • Page 5 5
  • Page 6 6

Ask a question and I''ll find the answer in the document

Finding information in a document is now easier with AI