Direct Mount the GDZW7-ECO (Option 3)
Alternatively, if hard-mount and ceiling mount are not practical the
GDZW7-ECO can be mounted directly on the garage door opener using
the large foam tape strip. Prepare a flat surface on the garage door
opener body, ensuring it is clean and dry for proper tape adhesion. Affix
the foam tape to the recessed area in the center of the back face of the
GDZW7-ECO. Then press and hold the GDZW7-ECO against the prepared area on the
garage door opener, compressing the tape for 30 seconds. Note: This direct-mount method
does not meet the UL 325 standard.
Connect GDZW7-ECO to Power
Remove the screw from the 120 VAC outlet near the garage door opener
and use it to secure the included power adapter for the GDZW7-ECO.
Route and secure the power lead, then plug the DC connector into the
GDZW7-ECO. The status LED on the GDZW7-ECO will illuminate solid green
upon powerup, if already added to the Z-Wave network.
Connect GDZW7-ECO to Opener Motor
Determine your opener type.* Use wireless control for garage door openers with
Chamberlain® Security+ 2.0 (yellow learn button) and Chamberlain Security+ (purple, red,
or orange learn buttons). For all other garage door openers use the Wired option below.
Wireless
To learn the GDZW7-ECO into the garage door opener like a wireless remote:
1. Plug the garage door opener power cord back into the 120 VAC outlet.
2. To switch between Security+ 2.0 and Security+ modes on GDZW7-ECO, press and
hold the HUB button for two (2) seconds. The GDZW7-ECO speaker will beep twice,
and the Status LED will blink twice in Security+ 2.0 mode, or only beep/blink once if
in Security+ mode. Repeat until in the desired mode.
3. Press the pairing button on the back of the Garage Door Opener motor and check if
a status LED indicates pairing mode.*
4. Press and hold the TILT button on the GDZW7-ECO for two seconds. The speaker
should beep twice, and the GDZW7-ECO will transmit like a remote.
5. Check the Garage Door Opener status LED is no longer in Pairing mode.*
6. To test the pairing, press and hold TILT button on the GDZW7-ECO for two seconds.
If pairing was successful, the garage door opener will start to move.
7. Repeat steps 2 – 6, as needed.
Wired
1. Connect the GDZW7-ECO’s relay switch wires to the pushbutton wall console
terminals on the garage door opener. Make sure not to disconnect any wires that
are already connected to the garage door opener. The terminal location and labels
will vary by model, but may be named: “PUSHBUTTON”, “WC”, “PWC”, “PB”.*
2. Plug the garage door opener power cord back into the 120 VAC outlet.
Test System Operation
Caution: Be sure the GDZW7-ECO and its wires are clear of all moving parts, and the
Warning Light is not obstructed. Adjust the installation and secure the wires, if needed.
1. To verify normal operation and calibrate the GDZW7-ECO’s sensors, first use the
garage door opener’s manual push button to open, then close, the garage door.
2. Now use your Z-Wave® controller to OPEN the garage door.
3. For the final test, use your Z-Wave controller to CLOSE the garage door. The LED
Warning Light will repeatedly flash, and the audio beeper will repeatedly beep while
the garage door closes.
* Refer to the manual for the garage door opener to see specific instructions for that
model.
Advanced Installation Options
The GDZW7-ECO has additional installation options.
Removal from a Z-Wave® Network
There are two methods to removing the GDZW7-ECO from a Z-Wave network: exclusion and
performing a factory reset (see section on Factory Reset).
1. Follow the Z-Wave controller’s instructions on putting the Z-Wave controller into
removal/exclusion mode.
2. Locate and press the hub button.
3. Device’s status indicator will blink red and beep three times to indicate successful
removal.
Factory Reset
Please use this procedure only when the network primary controller is missing or otherwise
inoperable. Factory resetting the GDZW7-ECO will default it to factory settings and reset the
tilt sensor pairing to the original tilt sensor.
1. Locate the reset button.
2. Insert a paperclip into the hole until you feel the button depress. There will be a
short beep.
3. Hold the button down for ten seconds. The status indicator will blink red while the
reset button is pressed and will go out after ten seconds.
4. The device’s status indicator will turn green when the reset operation is complete.
The device is now ready to be added to a Z-Wave network.
Note: Factory reset only works when the device is already added into a Z-Wave network. If the
GDZW7-ECO is not included in a network, then it cannot be factory reset.
Adding a Tilt Sensor
The GDZW7-ECO pairs with the tilt sensor to monitor the state of the garage door. The
original (included with the GDZW7-ECO) tilt sensor does not need to be added. To add a
different Ecolink ClearSky tilt sensor:
1. Locate and press the “Tilt” button. There will be a short beep and LED will blink red.
2. Remove pull-tab from the tilt sensor or reinsert the battery into the tilt sensor.
3. If pairing is successful, the warning light will blink white and beep for one second.
Adjust the Tilt Sensor Angle
To adjust the angle at which the tilt sensor detects an open or close,
manually bend the ball-in-can as shown. By slightly bending this can up
and down, there is a slight adjustability of ± 10°.
Change the Tilt Sensor’s Battery
Use a screwdriver to remove the screw on the bottom of the sensor
case. Push against and outwards where the screw was located, and the case will open.
Replace with a fresh CR123A battery. Fit the case back together and screw the case shut.
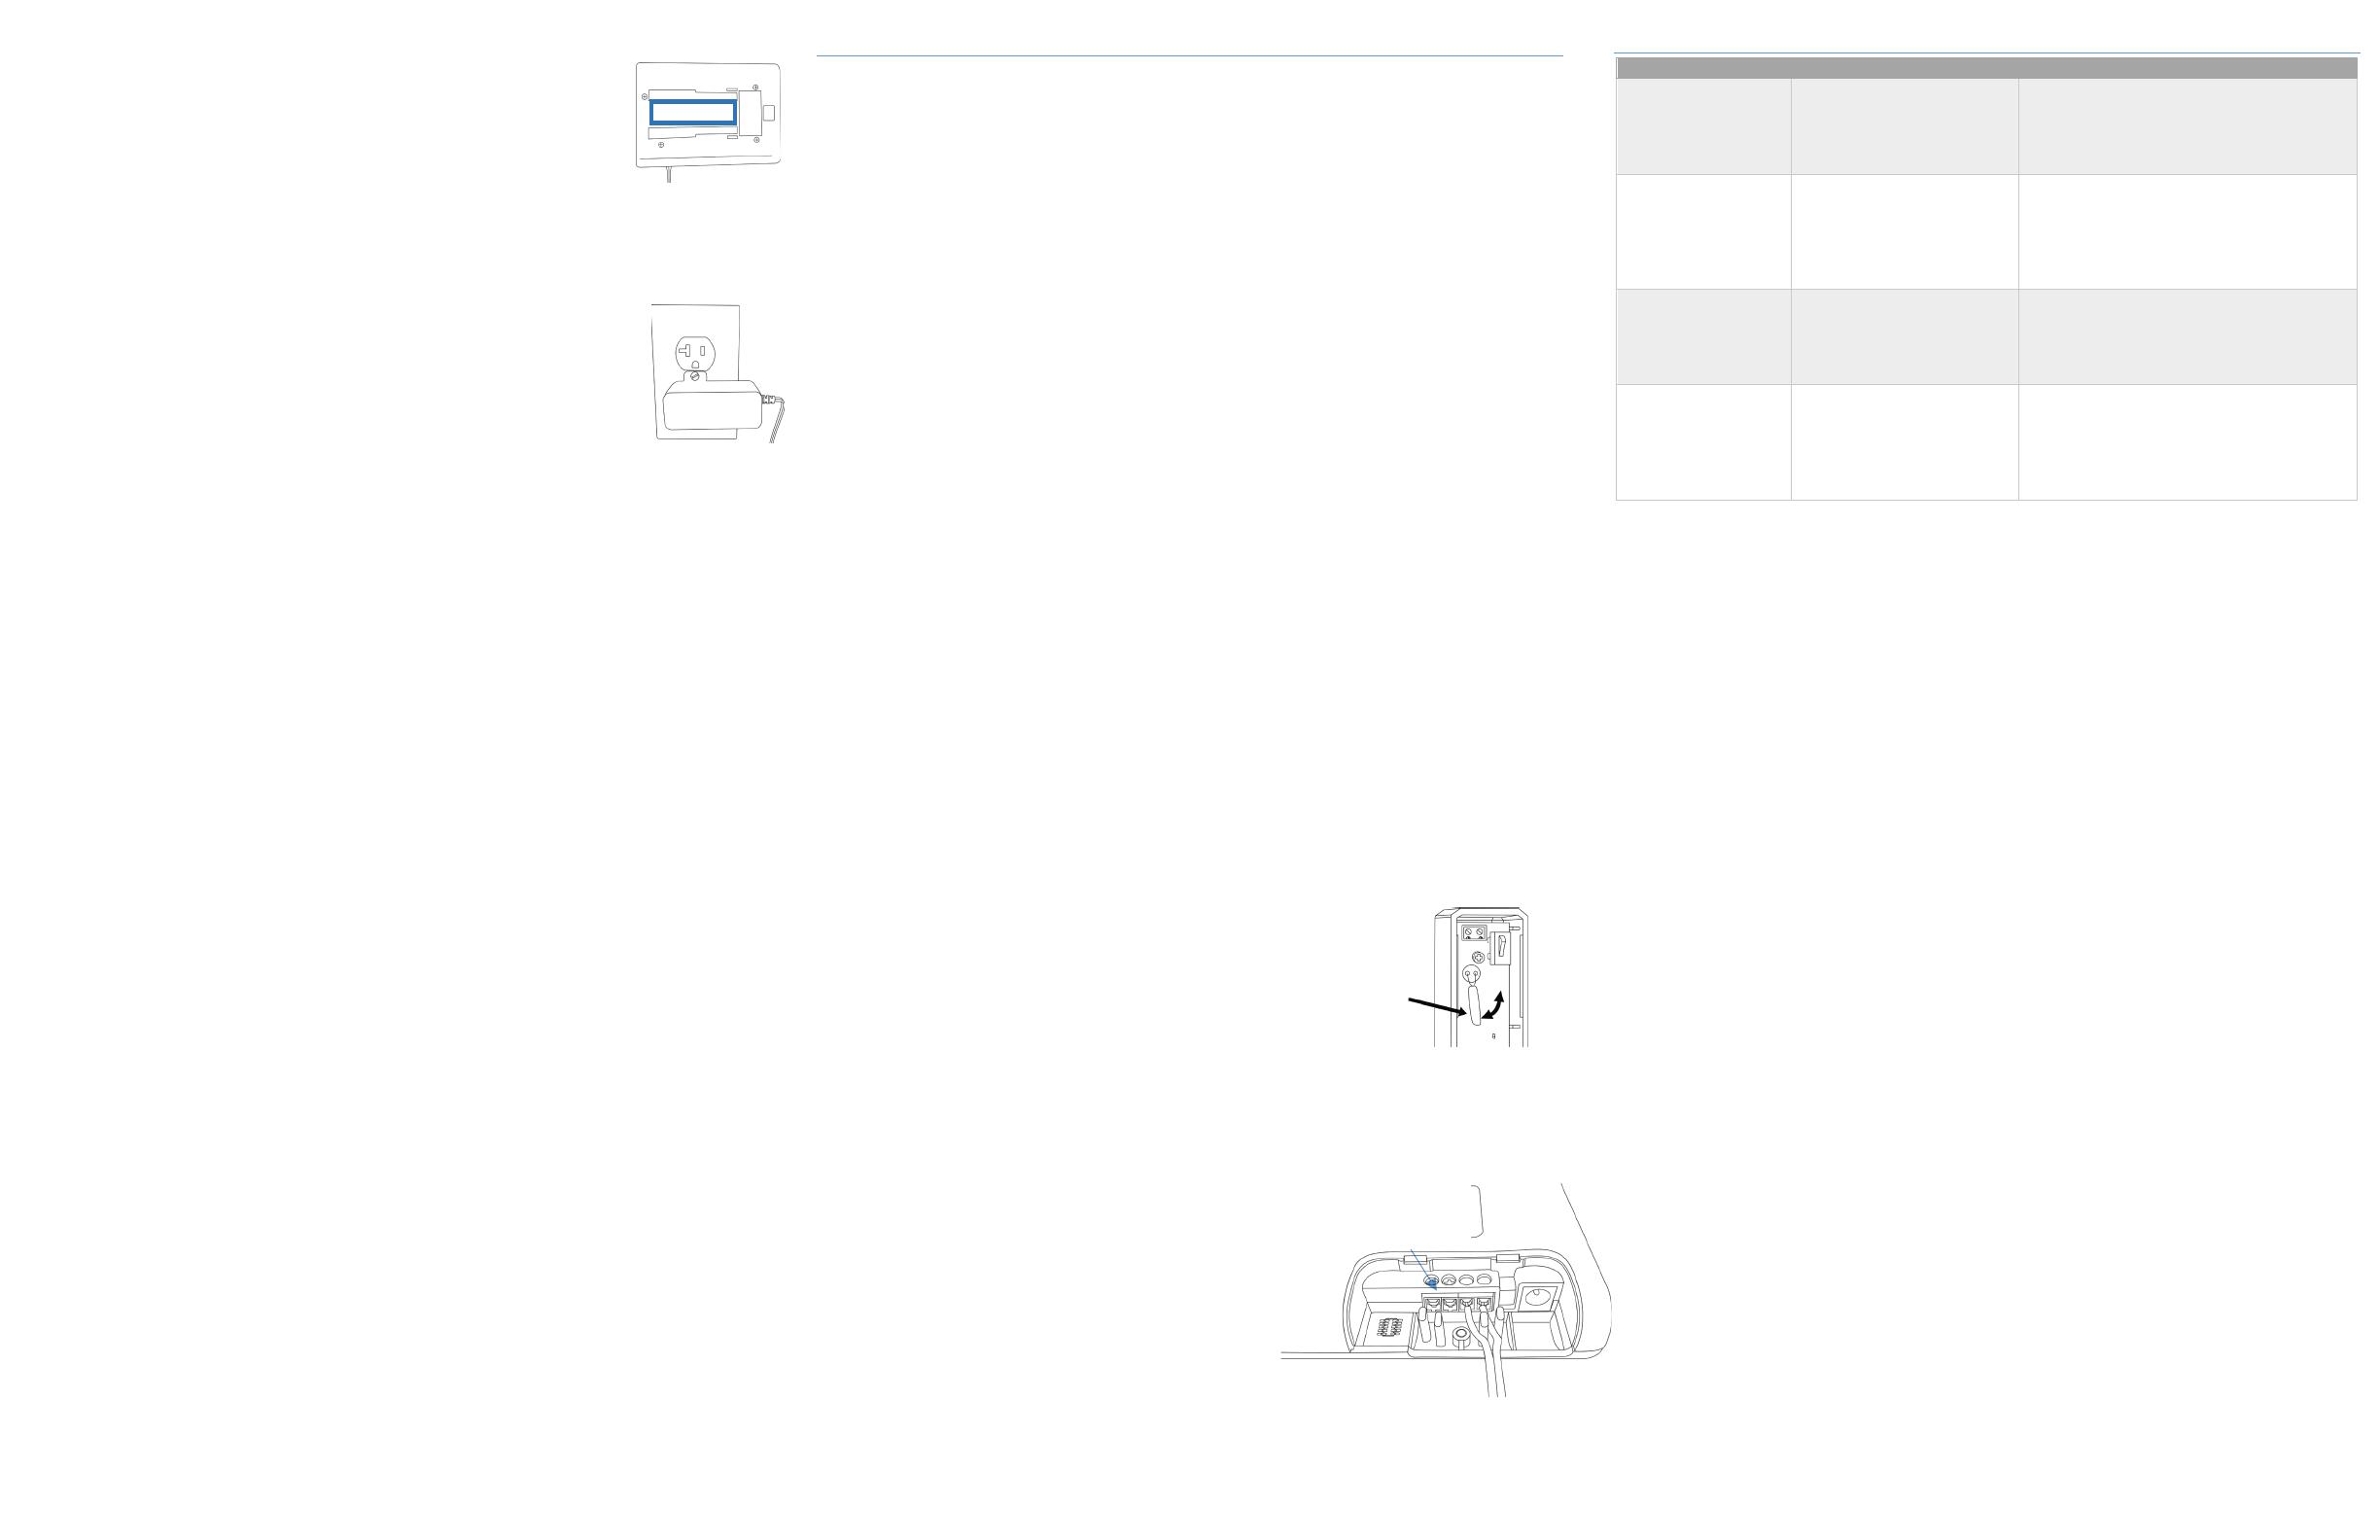
Adding an External Contact Switch or Sensor
Alternatively, the GDZW7-ECO can pair with an
external contact to monitor the state of the garage
door. If connected and added the external contact
will be used instead of a tilt sensor.
To add a hardwired external contact:
1. Connect external contact’s wires to the
GDZW7-ECO’s blue terminal block.
2. Locate and press the tilt button. There will
be a short beep and the status LED will blink red.
3. Trigger the external contact to the “open” state.
4. If pairing is successful, the warning light will blink white and beep for one second.
Troubleshooting
to Z-Wave network
excluded from a previous
Z-Wave network
Try removing the device by putting the Z-Wave
controller into exclusion mode and then pressing
the GDZW7-ECO’s Hub button.
You can also factory reset the device in the case
of a missing or inoperative Z-Wave controller.
commands don’t do
anything and warning
lights flashes 3 times
- Tilt sensor is lost
- Tilt sensor is tampered
- Tilt sensor count out of sync
- Previous close/open
Make sure the tilt sensor has a good battery and
the covering is properly closed.
For all other causes, manually operate the garage
door opener via the push-button wall console to
resync the tilt sensor and GDZW7-ECO.
beeps during the
unattended wait
period, but the door
Device detected a vibration
during the unattended wait
period and cancelled the
original close command.
Send the close command again. If this is a
recurring issue, consider lowering the
accelerometer sensitivity (Configuration
Parameter #5)
activated, but the door
does not move
Make sure the relay switch wires are connected
to the correct terminals on the garage door
opener terminal. They should be connected to
the garage door opener’s push-button wall
console terminals. Do not disconnect any wires
from the garage door opener.
FCC Compliance Statement
FCC ID: XQC-GDZW7LR IC ID: 9863B-GDZW7LR
This device complies with part 15 of the FCC Rules. Operation is subject to the following two conditions:
(1)
This device may not cause harmful interference, and
(2)
this device must accept any interference received, including interference that may cause undesired operation.
This equipment has been tested and found to comply with the limits for Class B digital devices, pursuant to Part 15 of the FCC
Rules. These limits are designed to provide reasonable protection against harmful interference in a residential installation.
This equipment generates uses and can radiate radio frequency energy and, if not installed and used in accordance with the
instruction manual, may cause harmful interference to radio communications. However, there is no guarantee that
interference will not occur in a particular installation. If this equipment does cause harmful interference to radio or television
reception, which can be determined by turning the equipment off and on, the user is encouraged to try to correct the
interference by one or more of the following measures:
•
Re-orient or relocate the receiving antenna
•
Increase the separation between the equipment and receiver
•
Connect the equipment to an outlet on a different circuit from the receiver
•
Consult the dealer or an experienced radio/TV contractor for help.
Warning: Changes or modifications not expressly approved by Ecolink Intelligent Technology Inc. could void the user’s
authority to operate the equipment.
IC Compliance Statement
This device complies with Industry Canada licence-exempt RSS standard(s). Operation is subject to the following two
conditions: (1) this device may not cause interference, and (2) this device must accept any interference, including
interference that may cause undesired operation of the device.
C’et appareil est conforme la norme d'Industrie Canada exempts de licence RSS. Son fonctionnement est soumis aux deux
conditions suivantes: (1) c’et appareil ne peut pas provoquer d'interférences, et (2) c’et appareil doit accepter toute
interférence, y compris les interférences qui peuvent causer un mauvais fonctionnement de la dispositif.
Trademarks
Chamberlain is a registered trademark of The Chamberlain Group LLC.
Z-Wave is a registered trademark of Z-Wave Alliance Inc.
All trademarks, logos and brand names are the property of their respective owners. All company, product and service names
used in this document are for identification purposes only. Use of these names, trademarks and brands does not imply
endorsement.
Warranty
Ecolink Intelligent Technology Inc. warrants that for a period of 1 year from the date of purchase that this product is free
from defects in material and workmanship. This warranty does not apply to damage caused by shipping or handling, or
damage caused by accident, abuse, misuse, misapplication, ordinary wear, improper maintenance, failure to follow
instructions or as a result of any unauthorized modifications.
If there is a defect in materials and workmanship under normal use within the warranty period Ecolink Intelligent Technology
Inc. shall, at its option, repair or replace the defective equipment upon return of the equipment to the original point of
purchase.
The foregoing warranty shall apply only to the original buyer, and is and shall be in lieu of any and all other warranties,
whether expressed or implied and of all other obligations or liabilities on the part of Ecolink Intelligent Technology Inc. neither
assumes responsibility for, nor authorizes any other person purporting to act on its behalf to modify or to change this
warranty, nor to assume for it any other warranty or liability concerning this product. The maximum liability for Ecolink
Intelligent Technology Inc. under all circumstances for any warranty issue shall be limited to a replacement of the defective
product. It is recommended that the customer check their equipment on a regular basis for proper operation.
© 2023 Ecolink Intelligent Technology Inc.
REV & REV Date: A08 02/28/2023
External Contact Switch or
Sensor Wiring Points (BLUE)

