Brandt DFH14617W Owner's manual
- Category
- Dishwashers
- Type
- Owner's manual
This manual is also suitable for
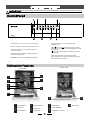
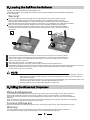
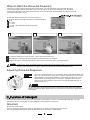
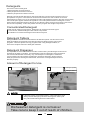
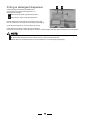
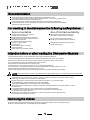
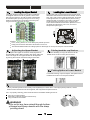
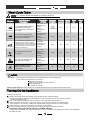
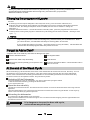
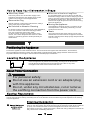
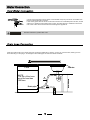
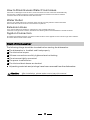
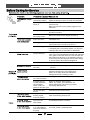
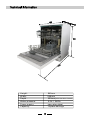
Brandt DFH14617W is a dishwasher with a capacity of 14 place settings, featuring a water softener, adjustable rinse aid dispenser, and a variety of wash programs for different types of dishes and levels of dirt. It has a user-friendly control panel with LED indicators for salt and rinse aid levels, as well as a time delay function for added convenience. The dishwasher also boasts a self-cleaning filter system, ensuring hassle-free maintenance.
Brandt DFH14617W is a dishwasher with a capacity of 14 place settings, featuring a water softener, adjustable rinse aid dispenser, and a variety of wash programs for different types of dishes and levels of dirt. It has a user-friendly control panel with LED indicators for salt and rinse aid levels, as well as a time delay function for added convenience. The dishwasher also boasts a self-cleaning filter system, ensuring hassle-free maintenance.


-
 1
1
-
 2
2
-
 3
3
-
 4
4
-
 5
5
-
 6
6
-
 7
7
-
 8
8
-
 9
9
-
 10
10
-
 11
11
-
 12
12
-
 13
13
-
 14
14
-
 15
15
-
 16
16
-
 17
17
-
 18
18
-
 19
19
-
 20
20
-
 21
21
-
 22
22
-
 23
23
-
 24
24
-
 25
25
-
 26
26
-
 27
27
-
 28
28


Brandt DFH14617W Owner's manual
- Category
- Dishwashers
- Type
- Owner's manual
- This manual is also suitable for
Brandt DFH14617W is a dishwasher with a capacity of 14 place settings, featuring a water softener, adjustable rinse aid dispenser, and a variety of wash programs for different types of dishes and levels of dirt. It has a user-friendly control panel with LED indicators for salt and rinse aid levels, as well as a time delay function for added convenience. The dishwasher also boasts a self-cleaning filter system, ensuring hassle-free maintenance.
Ask a question and I''ll find the answer in the document
Finding information in a document is now easier with AI
Related papers
-
Brandt DFS1010B User manual
-
Groupe Brandt DFH15624X Owner's manual
-
Groupe Brandt DFH1210S Owner's manual
-
-
Groupe Brandt DFS1010W Owner's manual
-
Brandt VS1010X User manual
-
Brandt VS1010J User manual
-
-
Groupe Brandt DVH15423J Owner's manual
-
 De Dietrich DVH1342J Owner's manual

Other documents
-
 De Dietrich DVH1044X User manual
-
Teka DW8 70 FI User manual
-
Glen DW 7618 K User manual
-
-
Bellini BDW86S-F User guide
-
-
Seiki SC-1000AU7DW User manual
-
 De Dietrich DVH1044J User manual
-
Whirlpool ADG 4550/1 IX Owner's manual
-
Whirlpool GCF 2960 BK User guide

