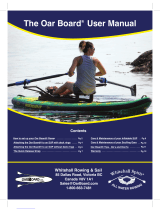
Brookstone BodyForm User manual

Type
User manual

Brookstone BodyForm is a rowing machine designed for in-home physical exercise by adults. It features magnetic resistance for a smoother, more satisfying workout. The device has a monitor that displays various metrics such as time, repetitions, calories burned, and total count. The rower's seat is adjustable, and the footpads are designed for a comfortable and secure rowing experience. Safety features include adjustable height stabilizers for added stability, ensuring a safe and effective workout.

Brookstone BodyForm is a rowing machine designed for in-home physical exercise by adults. It features magnetic resistance for a smoother, more satisfying workout. The device has a monitor that displays various metrics such as time, repetitions, calories burned, and total count. The rower's seat is adjustable, and the footpads are designed for a comfortable and secure rowing experience. Safety features include adjustable height stabilizers for added stability, ensuring a safe and effective workout.

656751_INS_Rowing Machine_Instructions Doc. Size: 5.5”W x 8.5”H_Output at 100% Prints 1/0 Black
WITH MAGNETIC RESISTANCE FOR A
SMOOTHER, MORE SATISFYING WORKOUT.
Rowing Machine
BodyForm
®
1
TABLE OF CONTENTS
Important Safety Information …………………………………………………… 2
Included Parts ………………………………………………………………… 4
Parts Package Contents ……………………………………………………… 5
Helpful Hints! ………………………………………………………………… 6
Assembly ……………………………………………………………………… 6
Monitor ………………………………………………………………………… 12
Exercise ……………………………………………………………………… 14
Care and Maintenance ……………………………………………………… 16
Warranty ……………………………………………………………………… 18
2
IMPORTANT SAFETY INFORMATION
Please read all safety and operating instructions carefully before use and keep
these for future reference.
BATTERY PRECAUTIONS
• Dispose of the old batteries properly. Do not dispose of the old batteries in a fire.
• Do not leave the batteries where a child or pet could play with or swallow them.
If the batteries are swallowed, contact a physician immediately.
• The batteries may explode if mistreated. Do not attempt to recharge
non-rechargeable batteries, or disassemble the batteries in any way.
• Use only fresh batteries of the required size and type. Do not mix old
and new batteries, different types of batteries, or rechargeable batteries
of different capacities.
IMPORTANT:
• Please consult a physician before beginning any fitness program.
• Maximum user weight limit for this exercise machine is 265 lbs.
• This product has been designed for in-home use. These instructions are intended
to provide important information for use and maintenance of the equipment as well
as for your personal safety. Keep this user manual safe for future reference.
WARNING!
• This product is made for home use only.
• This product is designed for physical exercise by adults. This product is not
suitable for use by persons under 14 years of age.
• Never allow more than one person on the equipment at a time.
• Ensure that those present are aware of possible hazards, e.g., movable parts
during training.
• Ensure that sufficient space is available to use the rowing machine.
• Please ensure that liquids or perspiration do not come in contact with the machine
or electronics.
• This product is designed to be used and stored indoors. Do not store the product
outside, or in damp/dusty environments.
• Warranty and manufacturer’s liability do not extend to any damage to the product
caused by commercial use.
• Consult your doctor before starting any exercise program to receive advice
on training.
• Incorrect/excessive training can cause health problems or injuries.
• If you feel nausea, chest pain, dizziness or unusual or erratic breathlessness
during your training, immediately stop the training and consult your doctor.
656751_INS_Rowing Machine_Instructions Doc. Size: 5.5”W x 8.5”H_Output at 100% Prints 1/0 Black
3
PRODUCT PREPARATION
• Ensure the rowing machine is on a flat, level surface with at least 20 inches
of clear area surrounding the rowing machine.
• Ensure that training only starts after correct assembly, adjustment and inspection
of the product.
• Follow the steps of the assembly instructions carefully.
• Use only suitable tools for assembly and ask a friend for assistance if necessary.
• Use only original parts as delivered.
SAFETY CHECKS BEFORE EVERY USE
• Tighten all adjustable parts to prevent sudden movement while training.
• Tighten all nuts and bolts.
• Check that the seat is secure.
• Check that the foot pads are secure.
• Check that the tension knob is secure.
• Do not use the product without shoes or with loose shoes.
• Be aware of non-fixed or moving parts while mounting or dismounting
the product.
• Do not wear loose or poorly fitting clothing that may become trapped
in the product.
4
INCLUDED PARTS
1. Main Unit
2. Oar Bar
3. Monitor Arm
4. Resistance Knob
5. Sliding Rail Connector
6. Center Support
7. Seat Rail
8. Seat
9. Pedal Support
10. Front Foot with Wheels
11. Rear Foot with Height Adjusters
12. Pedals (2)
13. Seat Support
14. Monitor
15. Parts Package*
*See following page for contents of parts package.
656751_INS_Rowing Machine_Instructions Doc. Size: 5.5”W x 8.5”H_Output at 100% Prints 1/0 Black
27 2pcs
9 4pcs
25 2pcs
19 3pcs
28 2pcs
15 2pcs
L4 2PCS
L6 1PC
L13-L17 1PC
26 2pcs
4 2pcs
22 4pcs
8 12pcs
7 8pcs
13 2pcs
23 4pcs
10 4pcs
3 2pcs
6 8pcs
24 2pcs
7
6
5
4
3
2
8
9
10
11
15
14
13
12
1
5
PARTS PACKAGE CONTENTS
2 Allen Wrenches (L4)
1 Allen/Phillips Tool (L6)
4 Endcaps (15)
1 Wrench (L13-L17)
3 Screws (19)
2 Bolts (25)
4 Rubber Stoppers (9)
2 Round Nut Covers (27)
2 Pedal Support Tubes (24)
8 Screws (6)
2 Screws (3)
4 Screws (23)
4 Screws (10)
2 Washers (13)
8 Locking Washers (7)
12 Flat Washers (8)
2 Arc Washers (4)
2 Nuts (26)
4 Washers (22)
The small parts of the rower come
on cards. The first number is the
amount of each piece, followed
by the part name and part number.
For your convenience during
assembly, you will be instructed
to use parts by amounts, then by
name and part number.
24 (2 pcs.)
6 (8 pcs.)
3 (2 pcs.)
23 (4 pcs.)
10 (4 pcs.)
13 (2 pcs.)
7 (8 pcs.)
22 (4 pcs.)
8 (12 pcs.)
4 (2 pcs.)
26 (2 pcs.)
L4 (2 pcs.)
L6 (1 pc.)
15 (4 pcs.)
19
(3 pcs.)
25 (2 pcs.)
L13-LL17 (1 pc.)
27
(2 pcs.)
9 (4 pcs.)
HELPFUL HINTS!
The rower is easier to assemble with two people.
Assemble the rower in the room where it will be used. It is portable, but it is a large
item to move from room to room or up and down stairs.
Lay out all of the components of the rower before assembling. Read through these
instructions and make sure all parts are accounted for, and that you have all the nuts,
bolts, and washers described on the Included Parts and Parts Package Contents pages.
When tightening screws, nuts and bolts, finger-tighten first, then use the appropriate
tool to tighten, taking turns with each, until all are secure.
ASSEMBLY
1. Attach the FRONT SUPPORT WITH WHEELS to the MAIN UNIT with the included
ALLEN WRENCH using the 2 SCREWS (3) with 2 ARC WASHERS (4). Make sure
the wheels on the FRONT SUPPORT are facing away from the MAIN UNIT.
2. Attach the REAR FOOT WITH HEIGHT ADJUSTERS to the SEAT RAIL, ensuring
the Brookstone
®
logo is face up and the angle of the REAR FOOT matches the
example below, using 4 SCREWS (6), 4 LOCKING WASHERS (7) and 4 FLAT
WASHERS (8). Tighten with the ALLEN WRENCH.
6
656751_INS_Rowing Machine_Instructions Doc. Size: 5.5”W x 8.5”H_Output at 100% Prints 1/0 Black
8
7
6
16
5
Wheels
1
2
3
4
3. Attach the SEAT to the SEAT SUPPORT with 3 SCREWS (19). Use the included
ALLEN WRENCH to finish tightening them and make sure they are secure.
4.
Attach 2 RUBBER STOPPERS (9) on the end of the SEAT RAIL with the REAR
FOOT SUPPORT with 2 SCREWS (10) and 2 FLAT WASHERS (8)
. Tighten with
the ALLEN WRENCH.
5. Slide the SEAT onto the SEAT RAIL, ensuring that the SEAT is facing in the
correct direction.
7
18
19
17
6.
Insert all the ENDCAPS (15) on the SEAT RAIL
.
7. Slide the SEAT RAIL onto the SEAT RAIL CONNECTOR.
8. Push the SEAT towards the far end of
the SEAT RAIL. Lift the SEAT RAIL into
an upright position and slide the SEAT back
down the rail to rest on the MAIN UNIT
(see illustration at right). This will allow you
to attach the SEAT RAIL to the
CONNECTOR with 4 SCREWS (6),
4 LOCKING WASHERS (7) and 4 FLAT
WASHERS (8).
9. Mount the 2 remaining RUBBER
STOPPERS to the SEAT RAIL at the
front of the rail using 2 SCREWS (10)
and 2 FLAT WASHERS (8).
8
10. Connect the CONTROL PANEL wires together.
11. Attach the FOOTPADS, ensuring you have the left and right on the correct
sides of the PEDAL SUPPORT (see below for the correct placement and hardware).
You must tighten the SCREWS (23) on both sides of each PEDAL simultaneously
with the two included ALLEN WRENCHES (L4).
9
22
22
23
23
24
23
22
24
22
23
12. Situate the PEDAL SUPPORT under the main unit so that PEDALS are facing
back towards the SEAT and the holes in the MAIN UNIT'S bracket line up with
the bolt holes on the PEDAL SUPPORT. Use 2 Bolts (25), 2 Flat Washers (13)
and 2 nuts (26) to secure and tighten with the WRENCH (L13-L17).
13. Push the ROUND NUT COVERS (27) over both NUTS (26).
10
656751_INS_Rowing Machine_Instructions Doc. Size: 5.5”W x 8.5”H_Output at 100% Prints 1/0 Black
11
14. Attach the MONITOR to the MONITOR ARM with its included screws, insert the
batteries (see page 12 for steps), and plug in the monitor wire.
15. Use the LOCKING HANDLE to position the SEAT BAR CONNECTOR for
either storage with the SEAT RAIL up (as shown below) or for use
with the SEAT RAIL down.
16 . Use the HEIGHT ADJUSTERS on the REAR SEAT SUPPORT to level the rower
during use.
Monitor Wire
Note: Two screws are
pre-installed on the
back of the monitor.
Remove the screws
prior to assembly.
MONITOR
BATTERY INSTALLATION AND MONITOR CONNECTION
1. Press the BATTERY COMPARTMENT tab with your thumb, and remove the
BATTERY COMPARTMENT cover.
2. Insert 1 AA battery according to the polarity indicators inside the compartment.
3. Close the BATTERY COMPARTMENT securely, ensuring the tab on the cover is
seated correctly.
ROWING MACHINE MONITOR READOUTS
The following abbreviations appear on the MONITORS screen:
Scan SCAN
Time TMR
Repetitions REPS
Calories CAL
Total Count TTR
12
656751_INS_Rowing Machine_Instructions Doc. Size: 5.5”W x 8.5”H_Output at 100% Prints 1/0 Black
13
OPERATION OF MONITOR
Activating the monitor
Press the button or start rowing and the MONITOR will automatically activate.
Timer:
To view the time you are continuously using the rower, press the button on the
MONITOR until TMR appears at the bottom of the screen. The timer keeps track of
how long you are actively using the machine. The time range is 0:00-99:59 seconds.
Reps:
To view the repetitions you have completed on the machine, press the button until
REPS appears at the bottom of the screen. The reps keeps track of how many
repetitions you have performed. The rep range is 1- 9999.
Calories:
To view how many calories you have burned, press the button until CAL appears.
The calories you have burned during your workout will now appear on the screen.
The calorie range is 0.1-999.9 Kcal.
Scan:
To scan through your time on the machine, reps you have performed, and calories
you have burned, press the button until SCAN appears on the screen. Your results
will continuously scroll during your workout, updating as you go. Each result will
appear for five seconds.
Total Count:
To view the total number of reps you have performed on the machine to date,
press the button until TTR appears on the screen. The total count range is 1- 9999.
RESET
To reset all numbers, including the TTR (Total Count), press and hold the MONITOR
button for 2 seconds or until you see that the numbers have reset to zero. Reset may
be performed while in any mode.
14
EXERCISE
1. Wear comfortable, close-fitting clothes and sneakers.
2. Carefully sit on the seat facing the MONITOR.
3. Put your feet on the FOOT PADS and secure with the hook and loop straps.
4. Activate the monitor (see page 13 for monitor instructions).
5. For first time use, set the TENSION KNOB at the number 1 resistance setting.
6. With your knees bent, grasp the OAR BAR overhand with one hand on either
side of the cord.
7. Keeping your arms extended and, keeping your elbows loose (not locked),
push away from the PEDALS until your legs are nearly straight.
8. As you are reaching the length of your legs, pull the OAR BAR back to your chest.
656751_INS_Rowing Machine_Instructions Doc. Size: 5.5”W x 8.5”H_Output at 100% Prints 1/0 Black
9. Allow yourself to slide back towards the front of the machine and push your arms
forward to begin the motion again.
10. This rowing motion will become more smooth with practice. It is a great workout
for your arms, legs and core.
11. As you get used to the machine and the motion, adjust the resistance with the
RESISTANCE KNOB to challenge yourself.
12. Create different workouts by altering the length of time and changing the resistance.
13. Time yourself or work out for the length of your favorite TV show or movie.
14. Getting in shape has never been as fun as it is now, using your Brookstone
BodyForm
®
Rowing Machine!
15
16
CARE AND MAINTENANCE
CLEANING
• Wipe the rower down with a soft, clean cloth.
• You may use a damp cloth if needed.
• DO NOT use any harsh abrasives, alcohol-based cleaners or bleach.
STORAGE
• Remove the LOCKING HANDLE.
• Push the SEAT towards the far end of the SEAT RAIL.
• Lift the SEAT RAIL up, resting the SEAT on the MAIN UNIT.
• Replace the LOCKING HANDLE in the threaded hole under the SEAT RAIL.
• Tip the entire rower so that it rests on the SUPPORT WITH WHEELS.
• Roll to a safe, secure storage location.
16
656751_INS_Rowing Machine_Instructions Doc. Size: 5.5”W x 8.5”H_Output at 100% Prints 1/0 Black
17
NOTES
18
ONE (1) YEAR LIMITED WARRANTY
Brookstone
®
warrants this product against defects in materials and/or workmanship
under normal use for a period of ONE (1) YEAR from the date of purchase by the
original purchaser (“Warranty Period”). If a defect arises and a valid claim is received
within the Warranty Period, at its option, Brookstone will either 1) repair the defect
at no charge, using new or refurbished replacement parts, or 2) replace the product
with a new product that is at least functionally equivalent to the original product, or
3) provide a store credit in the amount of the purchase price of the original product.
A replacement product or part, including a user-installable part installed in accordance
with instructions provided by Brookstone, assumes the remaining warranty of the original
product. When a product or part is exchanged, any replacement item becomes your
property and the replaced item becomes Brookstone’s property. When a store credit
is given, the original product must be returned to Brookstone and becomes
Brookstone’s property.
Obtaining Service: To obtain warranty service, call Brookstone Limited Warranty Service at
1-800-292-9819. Please be prepared to describe the product that needs service and the
nature of the problem. A purchase receipt is required. All repairs and replacements must
be authorized in advance. Service options, parts availability and response times will vary.
You are responsible for delivery and the cost of delivery of the product or any parts to the
authorized service SIMULTANEOUSLY for replacement, per our instructions.
Limits and Exclusions: Coverage under this Limited Warranty is limited to the United
States of America, including the District of Columbia and the U.S. Territories of
Guam, Puerto Rico, and the U.S. Virgin Islands. This Limited Warranty applies only
to products manufactured for Brookstone that can be identified by the “Brookstone”
trademark, trade name, or logo affixed to them or their packaging. The Limited
Warranty does not apply to any non-Brookstone products. Manufacturers or
suppliers other than Brookstone may provide their own warranties to the purchaser,
but Brookstone, in so far as permitted by law, provides these products “as is.This warranty
does not apply to: a) damage caused by failure to follow instructions relating to product’s
use or the installation of components; b) damage caused by accident, abuse, misuse, fire,
floods, earthquake or other external causes; c) damage caused by service performed by
anyone who is not a representative of Brookstone; d) accessories used in conjunction
with a covered product; e) a product or part that has been modified to alter functionality or
capability; f) items intended to be periodically replaced by the purchaser during the normal
life of the product including, without limitation, batteries or light bulbs; g) any product sold
“as is” including, without limitation, floor demonstration models and refurbished items; or
h) a product that is used commercially or for a commercial purpose.
BROOKSTONE SHALL NOT BE LIABLE FOR INCIDENTAL OR CONSEQUENTIAL
DAMAGES RESULTING FROM THE USE OF THIS PRODUCT, OR ARISING
OUT OF ANY BREACH OF THIS WARRANTY. TO THE EXTENT PERMITTED BY
APPLICABLE LAW, BROOKSTONE DISCLAIMS ANY AND ALL STATUTORY OR
IMPLIED WARRANTIES, INCLUDING, WITHOUT LIMITATION, WARRANTIES OF
MERCHANTABILITY, FITNESS FOR A PARTICULAR PURPOSE AND WARRANTIES
AGAINST HIDDEN OR LATENT DEFECTS. IF BROOKSTONE CANNOT LAWFULLY
DISCLAIM STATUTORY OR IMPLIED WARRANTIES, THEN TO THE EXTENT
PERMITTED BY LAW, ALL SUCH WARRANTIES SHALL BE LIMITED IN DURATION
TO THE DURATION OF THIS EXPRESS WARRANTY.
Some states disallow the exclusion or limitation of incidental or consequential damages or
how long an implied warranty lasts, so the above exclusions or limitations may not apply
to you. This warranty gives you specific legal rights and you may also have other rights,
which vary from state to state.
656751_INS_Rowing Machine_Instructions Doc. Size: 5.5”W x 8.5”H_Output at 100% Prints 1/0 Black
656751
Merrimack,NewHampshireUSA03054•800-846-3000•www.Brookstone.com
  • Page 1 1
  • Page 2 2
  • Page 3 3
  • Page 4 4
  • Page 5 5
  • Page 6 6
  • Page 7 7
  • Page 8 8
  • Page 9 9
  • Page 10 10
  • Page 11 11
  • Page 12 12
  • Page 13 13
  • Page 14 14
  • Page 15 15
  • Page 16 16
  • Page 17 17
  • Page 18 18
  • Page 19 19
  • Page 20 20

Brookstone BodyForm User manual

Type
User manual

Brookstone BodyForm is a rowing machine designed for in-home physical exercise by adults. It features magnetic resistance for a smoother, more satisfying workout. The device has a monitor that displays various metrics such as time, repetitions, calories burned, and total count. The rower's seat is adjustable, and the footpads are designed for a comfortable and secure rowing experience. Safety features include adjustable height stabilizers for added stability, ensuring a safe and effective workout.

Ask a question and I''ll find the answer in the document

Finding information in a document is now easier with AI