Installation Instructions
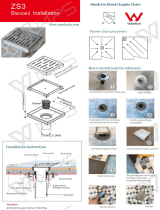
821 Series Shower Pan Drain with Tile-Insert Head
Sioux Chief Manufacturing Company | P: 1.800.821.3944 | F: 1.800.758.5950 | www.siouxchief.com
07-20
Before installation, the suboor MUST be properly prepared for the installation, meet local code requirements, and Tile Council
of North America (TCNA) guidelines.
Determine the location of the drain. For a wood suboor installation cut a 4" diameter hole where the drain body will be
positioned. Disassemble the shower drain. Secure the shower drain base in the opening so that the ange is supported by the
suboor. Be sure the drain base is level and any fasteners used will not damage the waterproof pan liner. Solvent weld the drain
pipe into the drain base using the appropriate solvent cement.
A preformed sloped base material can be used in place of a primary mortar bed. If a pre-sloped base is used, be sure to follow
manufacturer’s instructions for installation. If installing a primary mortar bed, cover the drain base to protect it from mortar/
debris. Apply primary mortar bed over the suboor at 1/4" per foot slope from the wall framing down to the top edge, but not
over the ange of the drain base. The sloped mortar bed should be ush with the top of the drain base as shown. Take care not
to damage the surface of the drain base. Remove mortar and do not let any mortar harden in any area on the surface of the
drain base.
When the primary mortar bed has cured, remove the cover from the drain base and be sure the top surface is clean and free of
debris. Install the waterproof pan liner in the shower area according to the pan liner manufacturer’s recommendations and local
plumbing code.
Carefully cut an opening in the pan liner that matches the size and position of the opening in the drain base. Carefully cut closely
around the four bolt holes on the drain base to allow for insertion of the bolts. DO NOT cut close to the groove in the top of the
drain base. Screw the four collar bolts into the bolt holes approximately 2-3 threads deep. Install clamping collar, turning to lock
under the four bolt heads. Note: The clamping collar can be inverted if additional height is needed for the drain head. Make sure
the waterproof pan liner makes clean, even contact with the drain body and clamping collar. The clamping collar and ange are
designed to work together to form the seal with the pan liner - no adhesive is necessary. Tighten the four clamping collar bolts.
Finish installing pan liner according to manufacturer’s recommendations. Perform a ood test of the pan liner according to
plumbing codes and TCNA guidelines. The DoubleDuty™ Test Plug can be used to seal the drain body during this test. Make sure
the drain is connected to the plumbing system. After a successful ood test, drain the water from the shower pan.
Screw the threaded drain head into the clamping collar to the desired height and orientation. NOTE: Consider the thickness
of the oor tile, and set height of the head so there will be at least 3/4" of mortar around/under the head adapter per TCNA
guidelines. Before installing the secondary mortar bed, place some pea gravel over clamping collar to prevent weep holes from
clogging.
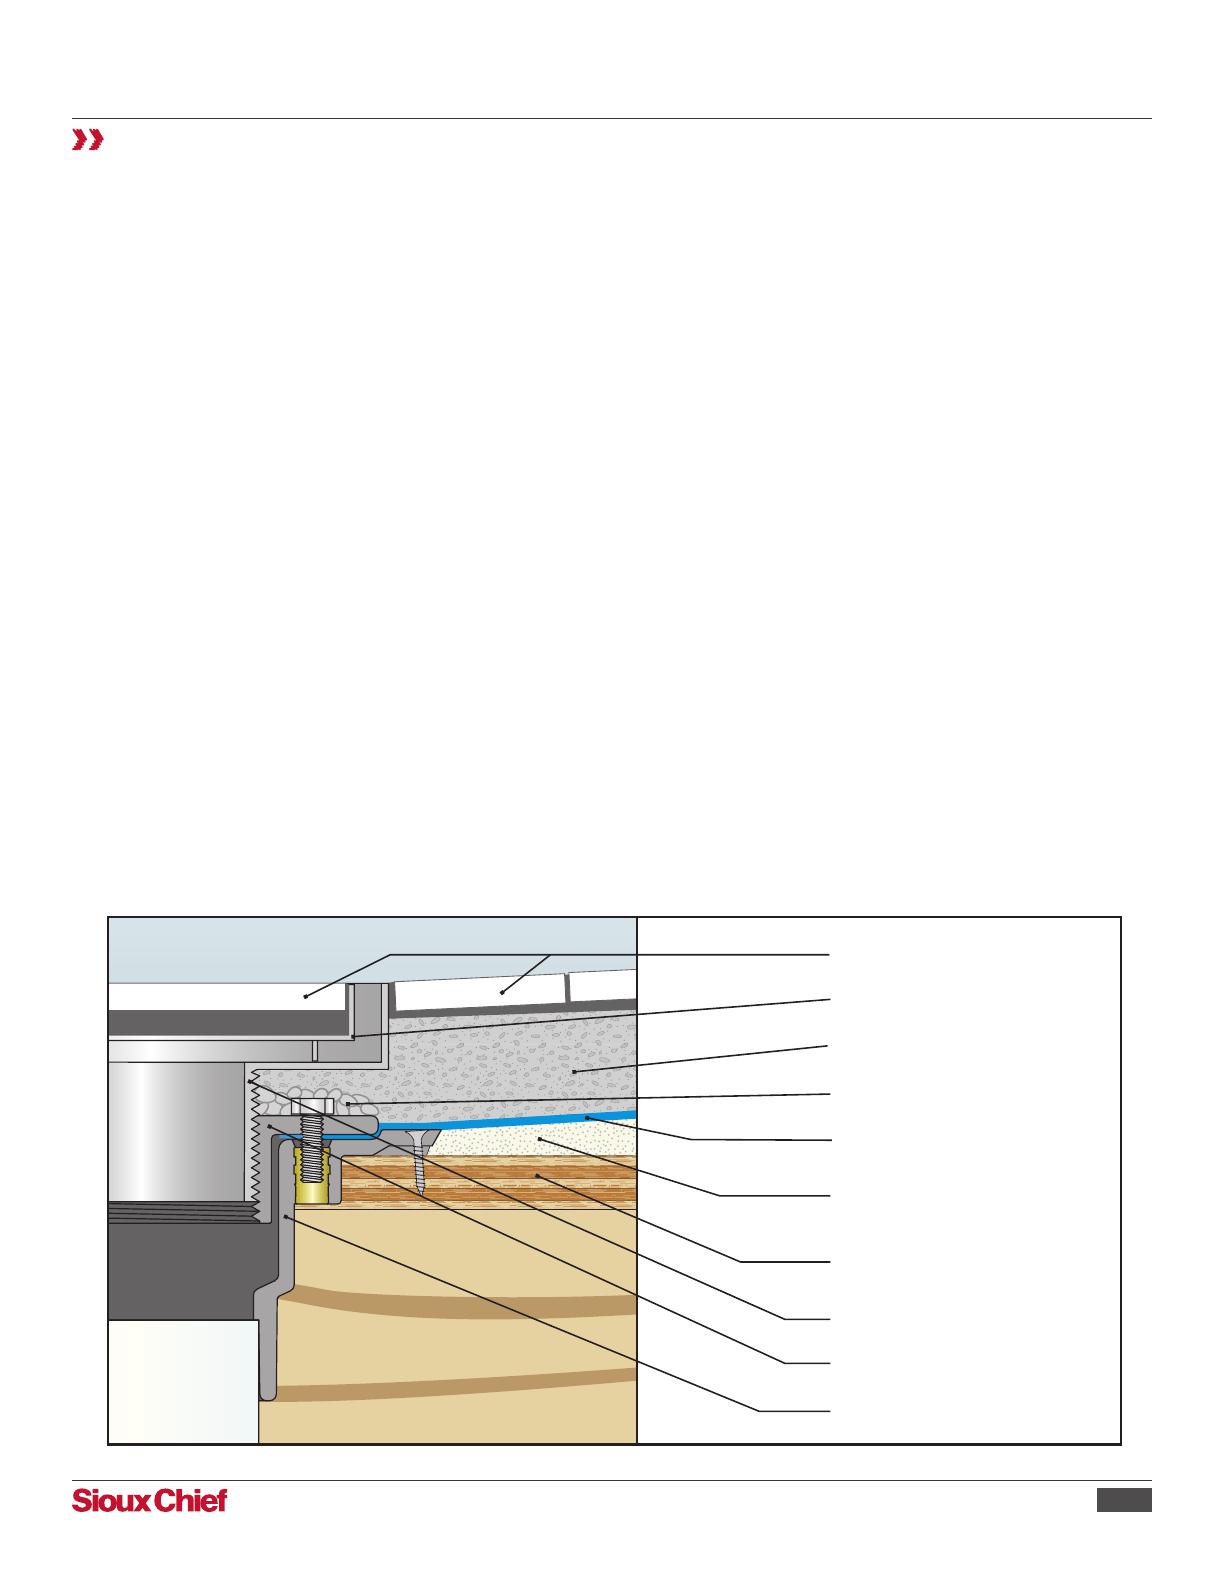
After the secondary mortar bed has set, proceed with installation of shower oor tile. Install thin-set/mortar and tile/grout into
tile tray to match the height of the drain head and surrounding oor tile. Tile tray is loose set and can be lifted out for drain
access or maintenance
Tile
Tile tray
Waterproof pan liner
Pea gravel
Primary mortar bed, or
preformed base - sloped
Threaded drain head
Drain base
Secondary mortar bed
Properly prepared
Sub oor
Clamping collar