Kathrein BZD 40 User manual
- Category
- Television antennas
- Type
- User manual
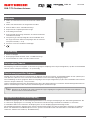
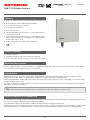
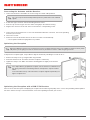
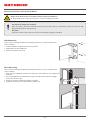
Kathrein BZD 40: Enhance your digital TV experience with an active VHF/UHF antenna designed for DVB-T/T2 signals. Enjoy crystal-clear reception with its integrated amplifier and low noise figure. Simple installation options for wall, mast, or balcony mounting.
Kathrein BZD 40: Enhance your digital TV experience with an active VHF/UHF antenna designed for DVB-T/T2 signals. Enjoy crystal-clear reception with its integrated amplifier and low noise figure. Simple installation options for wall, mast, or balcony mounting.


-
 1
1
-
 2
2
-
 3
3
-
 4
4
-
 5
5
-
 6
6
-
 7
7
-
 8
8
-
 9
9
-
 10
10
-
 11
11
-
 12
12


Kathrein BZD 40 User manual
- Category
- Television antennas
- Type
- User manual
Kathrein BZD 40: Enhance your digital TV experience with an active VHF/UHF antenna designed for DVB-T/T2 signals. Enjoy crystal-clear reception with its integrated amplifier and low noise figure. Simple installation options for wall, mast, or balcony mounting.
Ask a question and I''ll find the answer in the document
Finding information in a document is now easier with AI
in other languages
- Deutsch: Kathrein BZD 40 Benutzerhandbuch
Related papers
-
Kathrein BZD 40 User manual
-
-
Kathrein BZD 30 Quick start guide
-
-
Kathrein BZD 32 User manual
-
Kathrein HDM 143 User manual
-
-
-
-
Kathrein CAS 06 User manual
Other documents
-
König KN-DVBT-IN42L Datasheet
-
Strong SRT ANT 45 User manual
-
Strong SRT ANT 15 Owner's manual
-
-
-
Wentronic DIA-12 User manual
-
Megasat DVB-T antenna T4 User manual
-
Hama 00044298 Owner's manual
-
Megasat DVB-T 40 User manual
-
Wentronic DOA-57 User manual