Page is loading ...

CMOS: TM8727-XXX, LCD-478, BATTERY 2 x AAA
Model: C8191 AWB SIZE:A4 PANTONE: 445C
Weather Station With
Atomic Clock
Model IWA-80051
User’s Instructions
Please read these instructions carefully and store them
in a safe place for future reference.
FEATURES
• Multi-language calendar: English/German/
French/Spanish
• Manual time setting
• Daily alarm with snooze
• Indoor temperature (°C / °F selectable)
• E.L. Backlight
• mb/hPa or inHg selectable
• 12 to 24 hour weather forecast
• Daylight Saving Time (DST)
• Moon phase display
• Time zone display: Eastern, Central, Mountain
& Pacific
FUNCATION KEYS
SNOOZE/LIGHT bar:
TIME key:
ALM SET key:
UP key:
DOWN key:
°C/°F key :
mb/hPa or inHg key:
RESET key:
ALARM ON/OF switch:
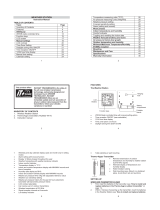
PRODUCT DESCRIPTIONS
1. LCD display
2. UP key
3. TIME key
4. ALM SET key
5. DOWN key
6. °C/°F key
7. mb/hPa or inHg key
8. ALARM ON/OFF switch
9. SNOOZE/ LIGHT bar
10. RESET key
11. Battery compartment
DISPLAY SYMBOLS
LCD display
1. Weather forecast & moon phase display
2. Clock display
3. Year/ month & date/alarm time display
4. Daylight savings time indicator
5. Signal strength indicator
6. Time zone map
7. Second /day of the week display
8. Atmosphere pressure display
9. Temperature display
NOTE:
Seconds and Day of the Week Display: Automatically
toggles every 30 seconds from Day to Seconds.
Toggles back to Seconds after 92 seconds.
INSTALLING OR REPLACING THE BATTERIES
• Begin by opening the battery compartment cover
at the back of the clock.
• Insert 2 AAA batteries (not included) into the battery
compartment and make sure the polarity is correct
by following the (+ or -) symbols engraved inside.
• Replace the battery whenever the display becomes
dim or difficult to read.
SELECT THE TIME ZONE ( WWVB VERSION ONLY)
Make sure the time zone is already set to appropriate
location. The default time zone is Pacific zone. If your
location is not of Pacific zone, please press the UP
key to set the desired Time zone.
RADIO CONTROLLED TIME FEATURE
After the first signal is received, the clock will
automatically seeks the atomic clock signal that is
transmitted by the National Institute of Standards and
Technology in Fort Collins, Colorado. Delete all other
words after “Colorado”.
SIGNAL STRENGTH INDICATOR FOR RADIO
CONTROLLED TIME SETTING
The signal indicator displays signal strength in 3 levels.
Wave segment flashing means time signals are being
received. The signal quality is indicated:
If the RC clock receives a successful signal, a
sync-time symbol will appear on the LCD.
Stop alarm sound and turn on
E.L. backlight. Pressing and
holding it for 8 seconds can
stop the current RC reception.
In normal time mode, press it
once to toggle between month
& date and year display. Keep
it pressed for 2 seconds to
enter time setting mode. In
setting mode, press it to step
the setting items.
In normal time mode, press it
to display Alarm time. In
Alarm time mode, keep it
pressed for 2 seconds to enter
alarm time setting mode. In
alarm time setting mode, press
it to step the setting items.
In setting mode, increase the
setting value. For WWVB
version, pressing UP key can
set the desired Time Zone.
In setting mode, decrease the
setting value. In normal time
mode, press it to toggle between
12 and 24hour format.
Toggle between °C and °F
format. Keep it pressed for 3
seconds to seek RC signal
instantly.
Toggle between mb/hPa and
inHg display.
In case of mal-function after
insert of battery, use a pin to
press the RESET key to
restart the clock.
In case of no display on LCD
while inserting batteries, use
a pin to press the RESET key
to activate the clock.
Switch alarm & snooze function
on or off.
10
11
1
2
3
4
5
6
7
8
9
1
2
3
4
5
6
8
9
7
ABOUT THE DAYLIGHT SAVINGS TIME (DST)
This clock has been pre-programmed to automatically
switch when daylight savings time is in effect. Your
clock will show “DST” on the display during this time.
NOTE:
With the pre-programmed DST feature, if you live in
an area where Daylight Savings Time is not observed,
the time display on your clock will read +/- one hour
during the DST time period.
SETTING THE TIME MANUALLY
To set the time, please follow these steps:
• In normal time mode, press the TIME key for 2
seconds until the HOUR digit flashes.
• Press UP or DOWN key to change the value of the
flashing digit.
• Press the TIME key again to step the setting items.
The setting sequence will be: Hour > Minute >
Second > Year > Month > Date > Day language.
• Press the UP or DOWN key to select the day
language:
GB=English FR=French DE=German ES=Spanish
IT=Italian
• Press TIME key to exit the setting mode.
NOTE:
In normal time mode, pressing the DOWN key will
toggle between the 12 and 24 hour formats.
SETTING THE ALARM
• In normal time mode, press ALM SET key to enter
alarm time mode.
• Press the ALM SET key for 2 seconds until the
alarm hour digit flashes.
• Press UP or DOWN key to increase or decrease the
value of flashing digit.
• Press ALM SET again to move through each setting.
The sequence will be: Hour > Minute.
NOTE:
12/24hour format of alarm time display are based on
the normal time format.
USING THE ALARM AND SNOOZE FUNCTION
• To activate the alarm, slide the [ALARM ON/OFF] to
the [ON] position, the bell indicator will appear on
the display.
• To deactivate alarm, slide the [ALARM ON/OFF]
button to the [OFF] position, the bell indicator will
disappear.
NOTE:
The snooze will be on automatically after activating
the alarm.
Normal Display
Hour Setting
Day Language Setting
Date Setting
Second Setting
Minute Setting
Month Setting
Year Setting
Alarm Mode Alarm Hour Setting
Alarm Minute Setting

• Don’t start reception in a moving article such as
vehicle or train.
• During the night, the atmospheric disturbances are
usually less severe and reception is possible in
most cases. A single daily reception is adequate to
keep the accuracy within 1 second.
NOTE:
It is recommended that for the first use of the clock,
you set the clock manually and then allow the Radio
Control signal to update the time setting each day.
CARE OF YOUR CLOCK
• Replace the battery promptly when necessary and
store the clock without batteries when not in use. It
is time to replace the batteries when the LCD display
becomes dim.
• Clean your clock with a soft cloth or paper towel. Do
not use corrosive cleaners or chemical solutions
on the clock.
• Avoid putting the clock in a highly humid environment
such as poolside or in a bathroom.
• Do not expose the clock to direct sunlight, extreme
hot or cold temperatures.
NOTE:
Attention! Please dispose of used unit and batteries in
an ecologically safe manner.
• When the alarm is sounding, pressing [SNOOZE/
LIGHT] can stop the current sound and advance to
enter snooze period.
• When the Alarm function is sounding, if you do not
activate the snooze button the 4-step crescendo
alarm will automatically snooze once every 4 minutes
for a total of 3 times. The alarm duration is 60
seconds.
ABOUT THE MOON PHASE:
The unit has 8 different moon phases. It will change
according to the lunar calendar.
1. New moon 5. Full moon
2. Waxing crescent 6. Waning Gibbous
3. First quarter 7. Last quarter
4. Waxing Gibbous 8. Waning crescent
NOTE:
The moon and stars are displayed only when the
weather is fine and in between 8:00PM to the next day
6:00AM. The weather condition is based on the
atmospheric pressure data collected.
WEATHER FORECAST
The built-in barometer can notice atmospheric pressure
changes. Based on the data collected, it can predict
the weather condition in the next 12-24 hours. The
effective coverage area ranges from 20 to 30 miles.
NOTE:
1. The accuracy of a general pressure-based weather
forecast is about 70 to 75%.
2. The weather forecast is meant for next 12 to 24
hours. It may not necessarily reflect the current
situation.
3. The sun can only appear from 6:00AM to 8:00PM.
ATOMIC CLOCK FEATURE
NOTE:
At any time, you can press and hold the [°C/ °F]
button for three seconds to make the clock seek the
atomic radio signal and set itself automatically. The
signal strength indicator will blink on the display as the
clock seeks out the signal.
In case of no display on LCD while inserting batteries,
use a pin to press the RESET key to activate the clock.
When the signal icon on the clock flashes, this indicates
that the clock is receiving the radio signals. When the
time code is received the signal icon turns on. If the
signal icon does not appear at all and the time is not
yet set, please take note of the following:
• We recommend keeping the minimum distance of 8
feet from any interfering source like TV’s or computer
monitors.
• Within concrete rooms (basements, superstructures,
office buildings), the received signal will be
weakened. In extreme cases, the unit should be
placed close to a window.
• Avoid placing the unit on or close to any metal
objects or surfaces.
Slightly cloudy
Cloudy
Storm
Sunny
Rainy
DECLARATION OF CONFORMITY
The following information is not to be used as contact
for support or sales. Please call our customer service
number (listed on our website at
www.oregonscientific.com or on the warranty card for
this product) for all inquiries instead.
We
Name: Oregon Scientific, Inc.
Address: 19861 SW 95th Place, Tualatin,
Oregon 97062 USA
Telephone No.: 1-800-853-8883
Fax No.: 1-503-684-3332
ABOUT OREGON SCIENTIFIC
Visit our website (www.oregonscientific.com) to learn
more about Oregon Scientific products.
If you're in the US and would like to contact our
Customer Care department directly, please visit:
www2.oregonscientific.com/service/support.asp
OR
Call 1-800-853-8883.
For international inquiries, please visit:
www2.oregonscientific.com/about/international.asp.
/