Barco Ex-Tri-combo Owner's manual

Type
Owner's manual

Barco Ex-Tri-combo is a powerful and versatile video processor designed to deliver exceptional visual experiences in a wide range of applications. With its advanced capabilities, it excels in demanding environments such as live events, broadcast studios, and post-production facilities. This device combines three key functionalities: video processing, scaling, and switching, providing users with the flexibility to handle various video sources and formats.

Barco Ex-Tri-combo is a powerful and versatile video processor designed to deliver exceptional visual experiences in a wide range of applications. With its advanced capabilities, it excels in demanding environments such as live events, broadcast studios, and post-production facilities. This device combines three key functionalities: video processing, scaling, and switching, providing users with the flexibility to handle various video sources and formats.

Info-T 1420: 1 / 10
Barco Inc, Image Processing | 3078 Prospect Park Drive, Rancho Cordova, CA , 95670, USA
Registered office: Barco NV | President Kennedypark 35, 8500 Kortrijk, Belgium
www.barco.com
Event Master EX expansion box reimaging
General
Phenomenon
The Event Master EX expansion box may experience a slow linking connectivity issue when using a static IP
address.
Solution
Reimage the unit with an ISO image from a bootable USB drive.
After reimaging, the EX expansion box must use Event Master Software version 6.2 or higher.
Scope
This document applies to all Event Master EX processors and provides procedures for creating a bootable flash
drive from the provided ISO and reimaging the EX processor with a new software release.
Equipment needed
The equipment listed in the following table is required to perform the reimaging procedure.
Equipment Description Qty
Cables DisplayPort (male-to-male), 2m 1
Mini-DisplayPort to DisplayPort cable 1
Misc. Monitor (DisplayPort capable) 1
USB keyboard 1
USB mouse 1
Blank USB thumb drive (8GB or larger) 1
USB 2.0 Hub 4 port 1
Philips screwdriver PH1 1
Philips screwdriver PH2 1
Preparations
CAUTION: Reimaging the EX unit erases existing data. To avoid losing data, back up your system
setup to a computer or a secure site, then reimage the unit.
A. Must modification, Barco will provide the necessary
components to perform this modification at no charge.
B. Improves the reliability of the product.
C. Improves the general working conditions of the product.
D. For information only.
Serial Number : 1420
Date : 2019-04-26
Product : Event Master EX processors
Priority Code* : C
Barco service bulletin
Info-T 1420: 2 / 10
Barco Inc, Image Processing | 3078 Prospect Park Drive, Rancho Cordova, CA , 95670, USA
Registered office: Barco NV | President Kennedypark 35, 8500 Kortrijk, Belgium
www.barco.com
Overview
Create a bootable USB thumb drive
Determine the system
Access the mini-DisplayPort port
Connect to an external monitor, USB keyboard, USB thumb drive, and power on
Create a bootable USB thumb drive
How to create a bootable USB thumb drive
To create a bootable USB thumb drive
1. Insert a blank USB drive into the PC.
2. Download the EX ISO image into the PC.
Find the EX ISO image on the...
Drivers & firmware Ex web page (Article number: R9004776) at https://www.barco.com/en/support/ex/drivers.
...or on the...
Drivers & firmware Ex-Tri-combo web page (Article number: R9004787) at
https://www.barco.com/en/support/ex-tri-combo/drivers.
3. Open a web browser and navigate to https://rufus.ie/.
4. Download Rufus 3.4 from the website.
5. Double-click on the rufus-3.4.exe to launch the application.
Image 2-1: Rufus 3.4 dialog box: Properties
6. Verify the settings shown in the image above:
1. Device: The USB that will be burned.
2. Boot Selection: Click SELECT to open a window browser window. Locate the target ISO file and press OK.
3. Partition Scheme: Select GPT.
4. Target System: Select UEFI (non CSM).
7. Click START to proceed.
Info-T 1420: 3 / 10
Barco Inc, Image Processing | 3078 Prospect Park Drive, Rancho Cordova, CA , 95670, USA
Registered office: Barco NV | President Kennedypark 35, 8500 Kortrijk, Belgium
www.barco.com
8. Select Write in DD Image mode and click on OK.
Image 2-2: ISOHybrid image detected
9. Select OK.
Image 2-3: Warning
10. Select OK.
It takes a moment for the ISO to be burned on the USB. Once finished, the READY status appears.
Image 2-4: Rufus 3.4 dialog box: Status READY
11. Click on CLOSE.
12. Eject and remove the USB thumb drive from the EX unit.
Info-T 1420: 4 / 10
Barco Inc, Image Processing | 3078 Prospect Park Drive, Rancho Cordova, CA , 95670, USA
Registered office: Barco NV | President Kennedypark 35, 8500 Kortrijk, Belgium
www.barco.com
Determine the system
How to determine the system
In order to access the operating system and the command line of the system, you must connect the EX to an
external monitor.
1. Look at the rear panel of the unit.
2. Connect to the DisplayPort connector labelled Diag on the rear panel.
See Image 2-5 for the location of the rear-panel DisplayPort connector.
Image 2-5: Rear-panel DisplayPort connector
Note: If the EX unit does not have a DisplayPort connector, you must access the mini-DisplayPort port
on the motherboard.
Access the mini-DisplayPort port
CAUTION: During maintenance operations, always switch off the unit and unplug the power cords
before removing the cover, unless otherwise stated. For further safety instructions, refer to the EX
Safety Guide (R5906020).
How to access the mini-DisplayPort port
1. Remove the seven flat head, 4-40 screws from the top of the unit.
The middle screw along the rear edge of the top cover is under the tamper-evident label. Removing the screw
may be easier, if you first remove the label.
2. Remove the six pan head, 6-32 screws from the sides of the unit.
3. Lift the top cover from the unit.
Info-T 1420: 5 / 10
Barco Inc, Image Processing | 3078 Prospect Park Drive, Rancho Cordova, CA , 95670, USA
Registered office: Barco NV | President Kennedypark 35, 8500 Kortrijk, Belgium
www.barco.com
Image 2-6: Top cover removal
1 Flat Head, 82° UC, 4-40 screws
2 Pan Head, 6-32 screws
3 Top cover
4 Tamper-evident label
5 Chassis
4. Locate the mini-DisplayPort port on the motherboard.
The mini-DisplayPort port is located on the motherboard near the DC power-cable assembly. Refer to Image 2-7.
Image 2-7: Mini-DisplayPort port on the motherboard
1 Mini-DisplayPort port on the motherboard
2 DC power-cable assembly
3 Power supply
4 Event Master I/O card
Info-T 1420: 6 / 10
Barco Inc, Image Processing | 3078 Prospect Park Drive, Rancho Cordova, CA , 95670, USA
Registered office: Barco NV | President Kennedypark 35, 8500 Kortrijk, Belgium
www.barco.com
Connect to an external monitor, USB keyboard, USB thumb drive,
and power on
How to connect to an external monitor, USB keyboard, USB thumb drive, and power on
1. Connect an external monitor either through the DisplayPort connector on the rear panel or through the mini-
DisplayPort port on the motherboard.
Note: If you connect to the mini-DisplayPort port, you must use a mini-DisplayPort-to-DisplayPort cable to
connect to a monitor.
Note: The external monitor must be connected prior to powering on the unit.
2. Connect a USB hub to the front-panel USB port.
3. Connect a USB keyboard and the USB thumb drive to the USB hub.
4. Connect the power cable to the EX unit.
Warning: Do not touch the power supply while the unit is connected to external power. Touching the power
supply while the unit is connected to external power could result in fatal electric shock.
Reimaging procedure
Load the ISO image into the EX unit
Make sure that the external monitor, USB keyboard, and USB thumb drive are connected to the EX
unit, before the unit is powered on.
How to load the ISO image into the EX unit
1. Power on the EX unit.
2. Change the boot option to Boot from USB Drive.
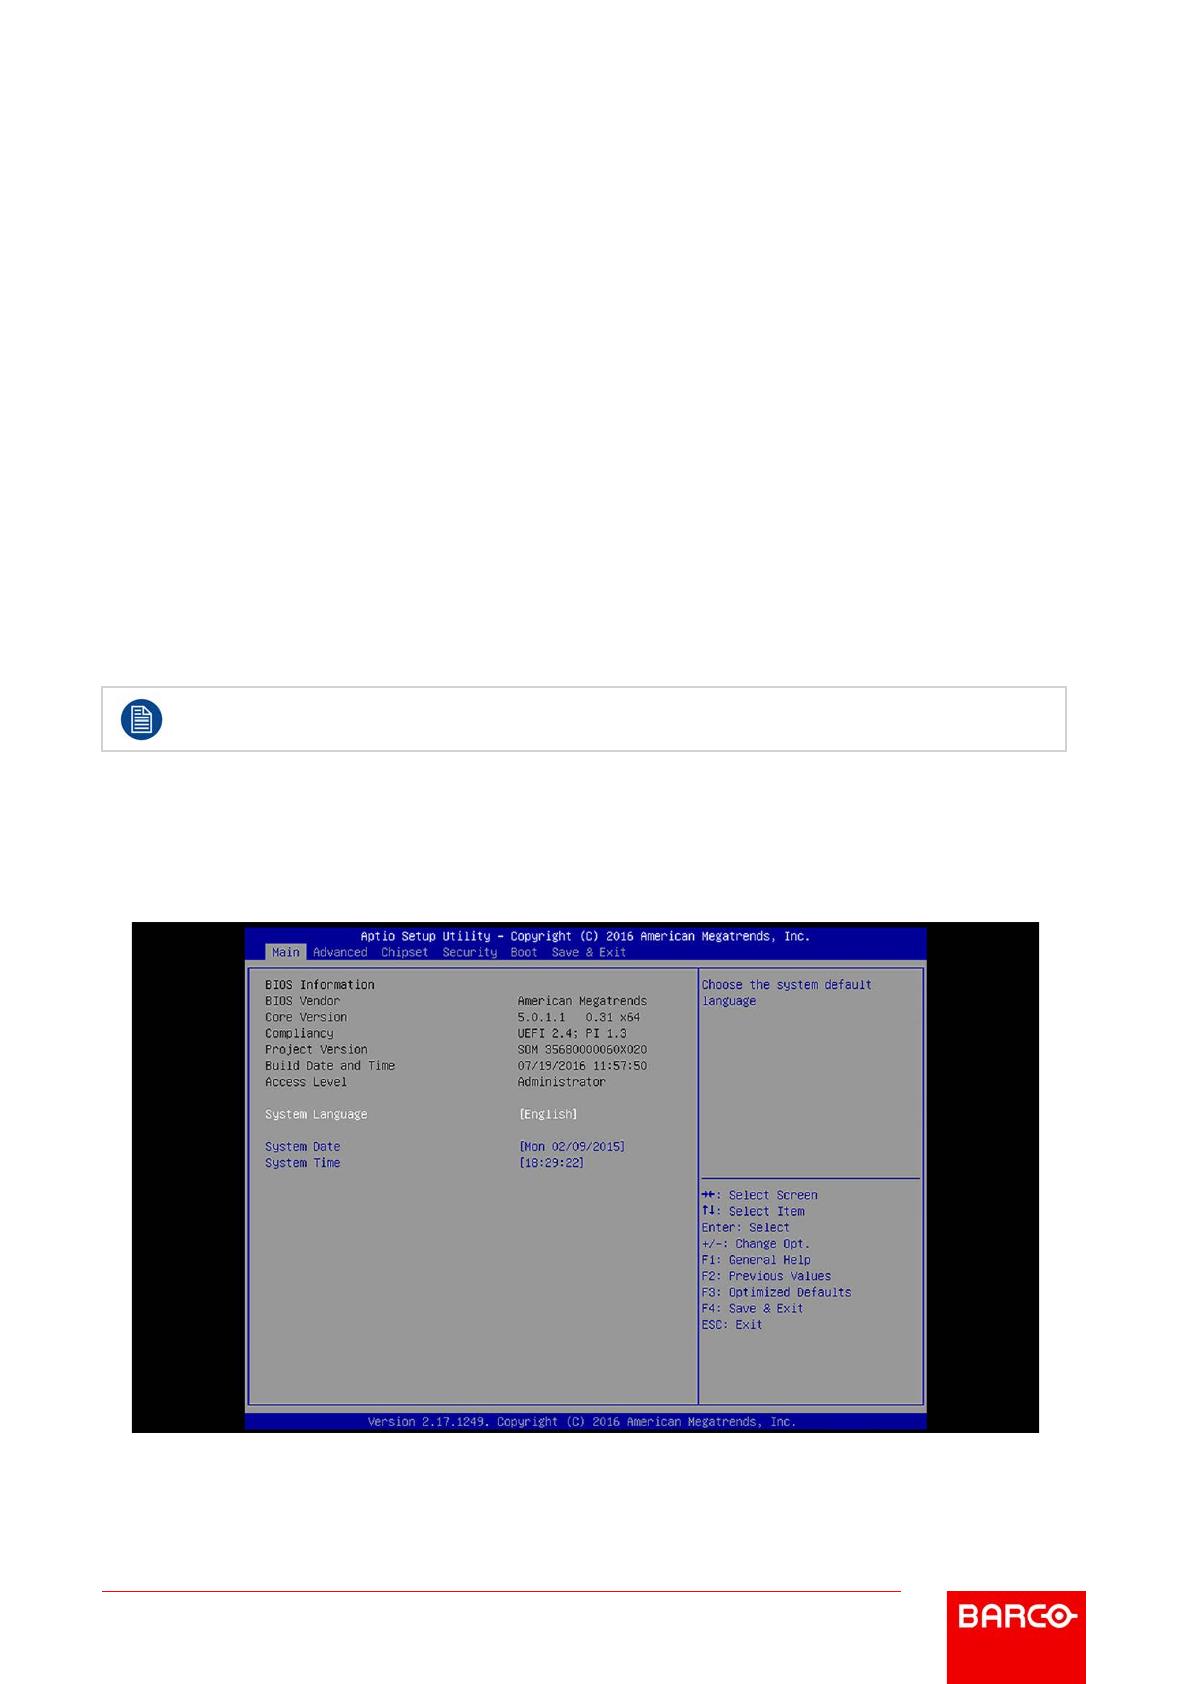
1. Press the Del key on the attached USB keyboard repeatedly to enter the Setup Utility.
Image 3-8: Aptio Setup Utility: Main tab
2. Select the Boot tab.
Use the arrow keys to navigate.
Info-T 1420: 7 / 10
Barco Inc, Image Processing | 3078 Prospect Park Drive, Rancho Cordova, CA , 95670, USA
Registered office: Barco NV | President Kennedypark 35, 8500 Kortrijk, Belgium
www.barco.com
3. Set Boot Option #1 to Flash Drive
Image 3-9: Aptio Setup Utility: Boot tabBoot Option #1
4. Press the Enter key.
5. Press the F4 key to bring up the Save & Exit Setup dialog box.
Image 3-10: Aptio Setup Utility: Boot tab Save & Exit Setup
6. Select Yes, and press the Enter key.
The system displays the Clonezilla welcome screen. Although no action is required at this pointthe program
will continue automaticallyyou can press the Enter key to proceed.
Info-T 1420: 8 / 10
Barco Inc, Image Processing | 3078 Prospect Park Drive, Rancho Cordova, CA , 95670, USA
Registered office: Barco NV | President Kennedypark 35, 8500 Kortrijk, Belgium
www.barco.com
Image 3-11: Clonezilla welcome screen
3. Press the Y key, when prompted, and then press the Enter key.
Image 3-12: Clonezilla Partclone start
Clonezilla continues, as shown below.
Info-T 1420: 9 / 10
Barco Inc, Image Processing | 3078 Prospect Park Drive, Rancho Cordova, CA , 95670, USA
Registered office: Barco NV | President Kennedypark 35, 8500 Kortrijk, Belgium
www.barco.com
Image 3-13: Clonezilla Partclone continued
4. Use the arrow keys to select poweroff.
Image 3-14: Clonezilla Partclone poweroff
5. Press the Enter key to complete the shutdown process.
Info-T 1420: 10 /
10
Barco Inc, Image Processing | 3078 Prospect Park Drive, Rancho Cordova, CA , 95670, USA
Registered office: Barco NV | President Kennedypark 35, 8500 Kortrijk, Belgium
www.barco.com
Image 3-15: Clonezilla shutdown
6. Remove power from the unit.
7. Remove the USB thumb drive and the USB keyboard from the USB hub, and then remove the USB hub.
8. Disconnect the external monitor.
9. If you had to remove the top cover to gain access to the mini-DisplayPort port on the motherboard, replace the
top cover.
  • Page 1 1
  • Page 2 2
  • Page 3 3
  • Page 4 4
  • Page 5 5
  • Page 6 6
  • Page 7 7
  • Page 8 8
  • Page 9 9
  • Page 10 10

Barco Ex-Tri-combo Owner's manual

Type
Owner's manual

Barco Ex-Tri-combo is a powerful and versatile video processor designed to deliver exceptional visual experiences in a wide range of applications. With its advanced capabilities, it excels in demanding environments such as live events, broadcast studios, and post-production facilities. This device combines three key functionalities: video processing, scaling, and switching, providing users with the flexibility to handle various video sources and formats.

Ask a question and I''ll find the answer in the document

Finding information in a document is now easier with AI