Gardena smart SILENO city - 2018 Owner's manual

Type
Owner's manual
Quick guide
SILENO city, smart SILENO city
gardena.com
P01 QG_EN_3.indd 1 2017-12-14 13:45:25
1. STOP button
2. LED for function check of the
boundary and guide wires
3. Charging station
4. Display
5. Keypad
6. ON/OFF button
7. Start button
1. Installing the charging station
See chapters 3.2 and 3.3 in the supplied operator’s manual or on the
GARDENA website (www.gardena.com).
1. Place the charging station on a flat, level surface where there is open space.
2. Connect the low voltage cable to the charging station and the power supply.
3. Connect the power supply to a 100-240 V wall socket.
4. Press the ON/OFF button to turn the robotic lawnmower on. Place the robotic
lawnmower in the charging station to charge the battery while the boundary wire is
laid.
2. Laying the boundary wire
See chapter 3.5 in the supplied operator’s manual or on the
GARDENA website (www.gardena.com).
1. Lay the boundary wire so that it forms a loop around the
whole working area.
2. Make an eyelet at the point on the boundary wire where the
guide wire is later connected.
30 cm / 12
10 cm / 4”
0 cm / 0
10 cm / 4”
35 cm / 14”
3
2
1
5
4
1
3
2
2
1
6
7
GETTING STARTED WITH
THE GARDENA ROBOTIC LAWNMOWER
P01 QG_EN_3.indd 2 2017-12-14 13:46:03
1. STOP button
2. LED for function check of the
boundary and guide wires
3. Charging station
4. Display
5. Keypad
6. ON/OFF button
7. Start button
3. Connecting the boundary wire
See chapter 3.6 in the supplied operator’s manual or on the
GARDENA website (www.gardena.com).
1. Open the connector and lay the boundary wire in the connector.
2. Press the connector and the wire together by using a pair of pliers.
3. Cut off any surplus boundary wire. Cut off the wire 1 to 2 cm after the connectors.
4. Press the boundary wire connectors onto the contact pins marked L (left) and R (right)
on the charging station.
NOTE: The right-hand wire must be connected to the right-hand contact pin on the
charging station, and the left-hand wire to the left-hand pin.
5. Mark the wires with the accompanying cable markers. This makes it easier to reconnect
the wires correctly.
4. Laying and connecting the guide wire
See chapter 3.7 in the supplied operator’s manual or on the
GARDENA website (www.gardena.com).
1. Push the guide wire through the slot in the bottom of the charger station.
2. Fit the connector to the guide wire in the same way as for the boundary wire,
according to the instructions above.
3. Press the guide wire connector onto the contact pin marked Guide on the charging
station.
4. Pull the guide wire a minimum of 1 meter straight out from the front edge of the
charging station.
5. Lay the guide wire from the charging station to the point on the boundary wire
(eyelet) where the connection is made.
NOTE: Do not lay the guide wire at an acute angle.
6. Cut the boundary wire at the centre of the eyelet that was made in step 2.2.
7. Connect the guide wire to the boundary wire by inserting the boundary wires and
guide wire in the coupler, and pressing the coupler together with a multi-grip
pliers.
As a complement to this Quick Guide. There are step by step
installation movies available on the GARDENA website,
www.gardena.com.
Power supply
(the appearance of the power supply
may differ depending on market)
Low voltage cable
Boundary wire and
couplers
Pegs Connectors
Measurement
gauge
1
2
4
5
3
7
4
1
min 1 m / 3.3 ft
P01 QG_EN_3.indd 3 2017-12-14 13:46:09
www.gardena.com
5. Starting and stopping the robotic lawnmower
See chapters 4.1 - 4.5 in the supplied operator’s manual or on the GARDENA website
(www.gardena.com).
To start the robotic lawnmower
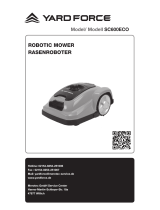
1. Open the hatch to the keypad.
2. Press the ON/OFF button. The display is lit up.
NOTE: The first time, a start-up sequence begins where, for example, a four-digit PIN code is
chosen.
3. Enter the PIN code by using the up/down arrow keys, and press the OK button.
To stop the robotic lawnmower
1. Press the STOP button.
The right to make changes without prior notice is reserved.
Copyright © 2017 GARDENA Manufacturing GmbH. All rights reserved.
www.gardena.com
6. Changing the settings of the robotic
lawnmower
See chapters 3.11 - 3.18 in the supplied operator’s manual or on
the GARDENA website (www.gardena.com).
All settings for your robotic lawnmower are done via the menu functions.
Read the operator’s manual and become familiar with the menus and settings of
the robotic lawnmower.
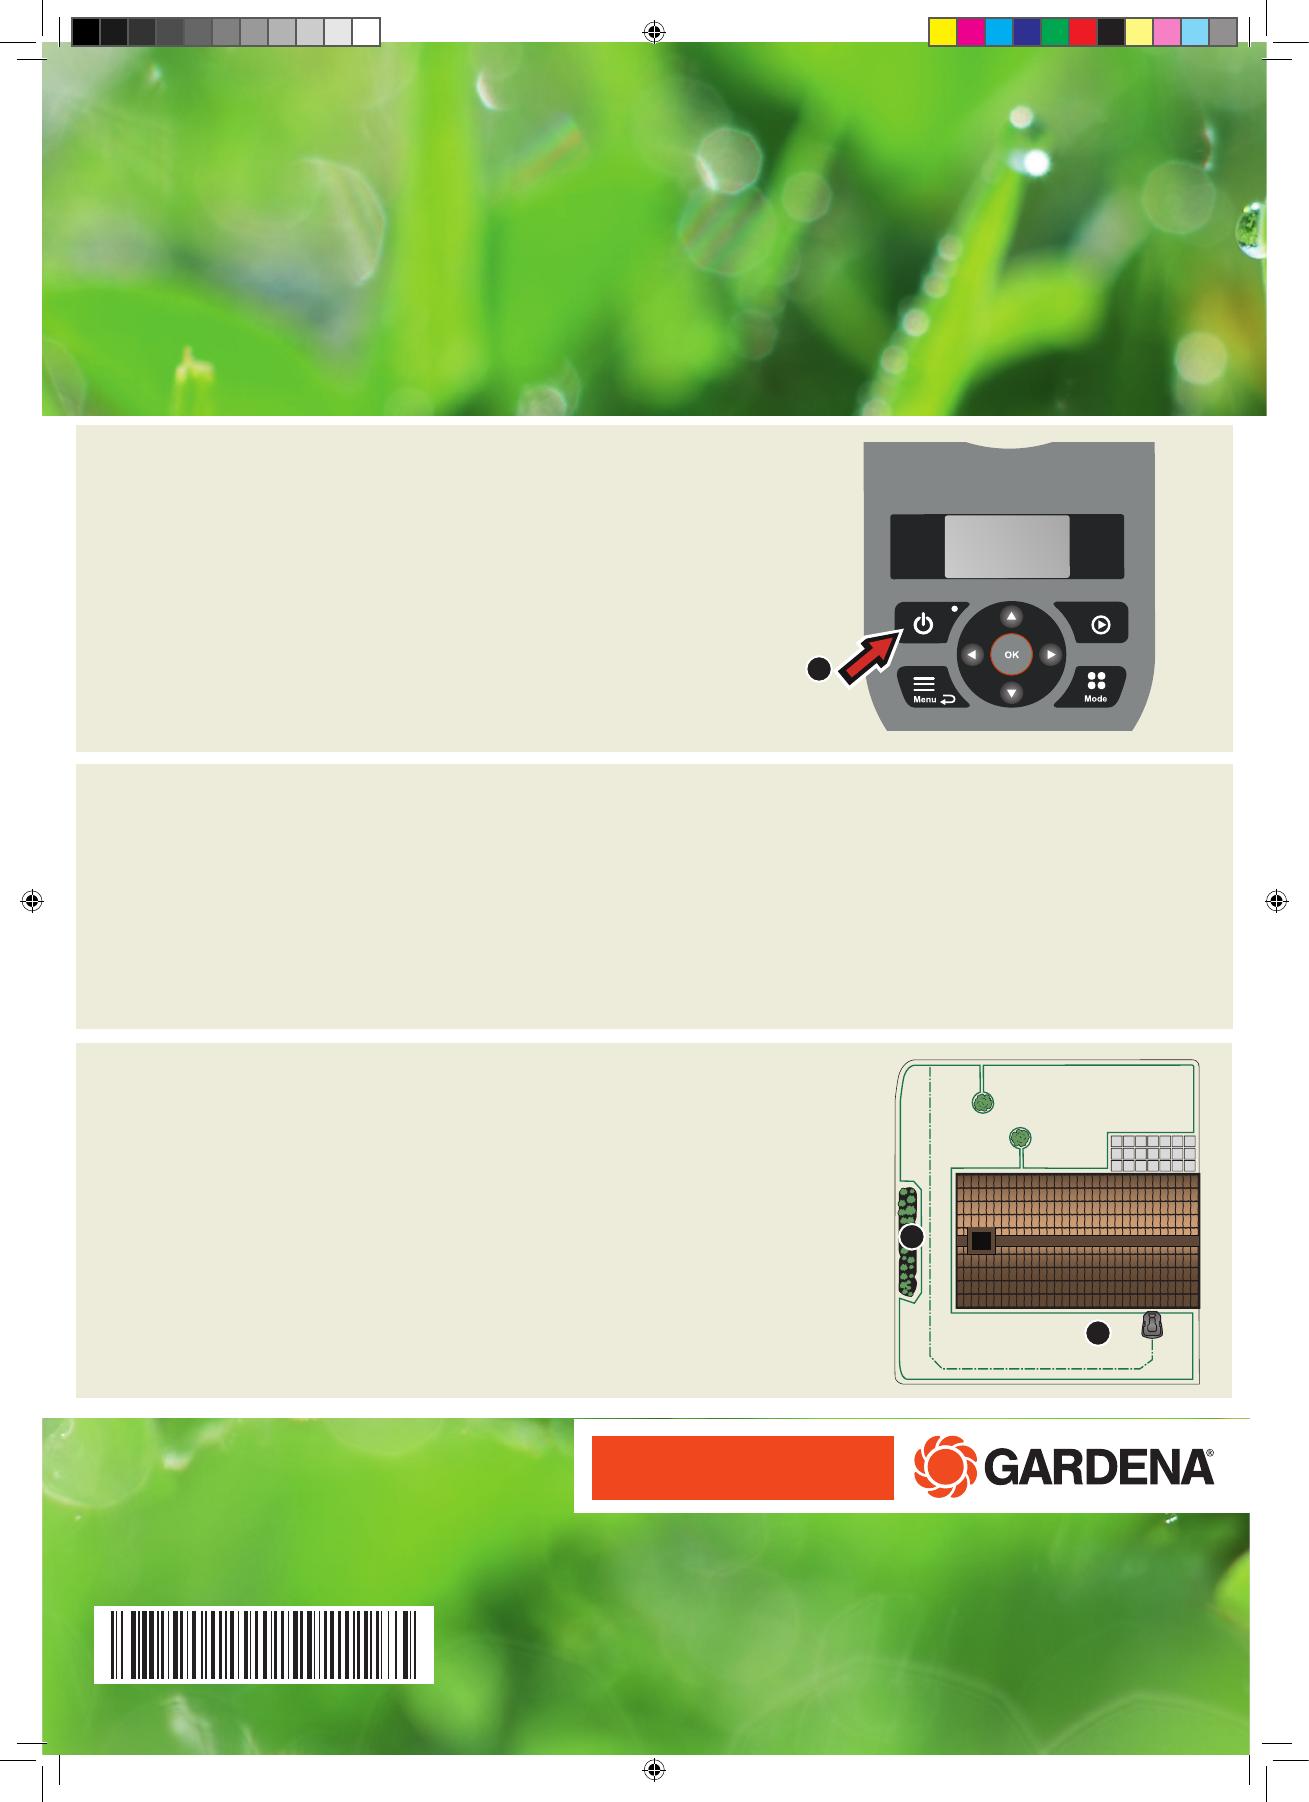
Test run the mower through narrow passages
Narrow passages in the garden can make it difficult for the mower to find the charging station. Use the
Test
function to test that the mower can travel through the narrow passage.
1. Place the robotic lawnmower in the charging station.
2. Select
Test
in the robotic lawnmower’s menu (
Settings > Lawn coverage > More > Test
) and press OK.
Then press the Start button and close the hatch.
3. Check that the robotic lawnmower follows the guide wire through the passage.
a. If the robotic lawnmower runs through the passage, the test is complete.
b. If the robotic lawnmower does not get through the passage: Check that the guide wire has been laid
according to the instructions in chapter 3.7 in the operator’s manual.
Adjust the mower to suit the size of your lawn
Adjust the mowing time to suit your garden by using the
Schedule
function. If the
robotic lawnmower is allowed to mow too often, the lawn may appear flattened.
Schedule
Use the scheduling wizard to set a suitable schedule depending on the size of the
lawn. If you want to change the schedule settings for individual days use the
Schedule - Advanced
menu.
2017-11-22
115 89 46-26
3
1
2
P01 QG_EN_3.indd 4 2017-12-14 13:46:12
  • Page 1 1
  • Page 2 2
  • Page 3 3
  • Page 4 4

Gardena smart SILENO city - 2018 Owner's manual

Type
Owner's manual

Ask a question and I''ll find the answer in the document

Finding information in a document is now easier with AI