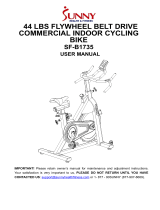
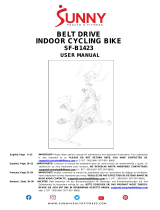
OWNER’S MANUAL V122021 ENGLISH
S-100 BIKE
This manual can be downloaded from www. salter.es
S-100 BIKE
MANUAL DEL USUARIO
OWNER’S MANUAL

OWNER’S MANUAL V122021 ENGLISH
S-100 BIKE
This manual can be downloaded from www. salter.es
1. SAFETY INSTRUCTIONS
1. Read all warnings posted on the equipment.
2. Read this Owner's Manual and follow it carefully before using the equipment.
3. We recommend that two people be available for assembly of this product.
4. Keep children and pets away from the equipment. Do not allow children and pets to use or play on the
equipment.
5. Make sure it is correctly assembled before start using it.
6. Place the equipment in a dry area away from humid, saline or corrosive environments.
7. Set up and operate the equipment on a solid level surface. Do not position the equipment on loose rugs
or uneven surfaces.
8. Inspect the equipment for worn or loose components prior to each use.
9. Replace any loose or worn components prior to using the equipment and/or or keep the equipment out
of service until it has been completely repaired.
10. Do not wear loose or dangling clothing while using the equipment.
11. Never exercise in bare feet or socks; always wear correct footwear, such as running, walking or cross-
training shoes.
12. Be careful to maintain your balance while using, mounting, dismounting, or assembling the equipment
loss of balance may result in a fall and serious bodily injury.
13. Keep both feet firmly and securely on the foot pedals or on the band (in case of treadmills) while
exercising.
14. The equipment should not be used by persons weighing over 120 kg.
15. The equipment should be used by only one person at a time.
16. The equipment is for home usage.
17. Make sure that adequate space is available for access to and passage around the equipment; keep at
least a distance of 1 meter from any obstruction object while using the machine.
18. Do the maintenance of the equipment indicated in this manual.
ATTENTION: Before starting any exercise or conditioning program you should consult with your personal
physician to see if you require a complete physical exam. If, at any time during exercise, you feel faint, dizzy,
or experience pain, stop and consult your physician. Follow your physician's recommendations in developing
your own personal fitness program. Always choose the workout which best fits your physical strength and
flexibility level. Know your limits and train within them. Always use common sense when exercising.

OWNER’S MANUAL V122021 ENGLISH
S-100 BIKE
This manual can be downloaded from www. salter.es
2. ASSEMBLY INSTRUCTIONS
S6
36#
53# d10*20*1.5 4PCS
88# M10*15*S6 4PCS
1
88
53
89
88
53
89
S6
36#
53# d10*20*1.5 4PCS
52# M10*25*S6 4PCS
52
53
1
7
6
52
53
S14
S15
S13
S13-14-15
35#
1
23L
15
23R
16
32
32
STEP 2:
Attach the Front and Rear Stabilizers (No.6 & No.7) to the
Main Frame (No.1) using 4 Screws (No.52) and 4 Flat
Washers (No.53). Tighten and secure with Allen Wrench
(No.36).
STEP 3 :
WARNING! Read instructions carefully as improper
assembly may cause permanent damage to your bike.
(Before you begin, immobilize the cranks by turning
the tension knob all the way to the right).
Attach Left Pedal (No. 23L) counter-clockwise into its
corresponding Left Crank (No. 15). Once screwed in
place, secure with Spanner(No. 35).
Attach Right Pedal (No. 23R) clockwise
into its
corresponding Right Crank (No.16). Once screwed in
place, secure with Spanner (No. 35).
Rotate the L-shaped knob (No.32) clockwise by hand
into the hole of the Main Frame (No.1).
STEP 1:
Remove Shipping Tubes (No.89) from Main Frame (No. 1) by
removing 4 Screws (No. 88) and 4 Washers (No. 53) with Allen
Wrench (No. 36).
You can save these parts for future packaging and
transportation of the bike if desired. {Screws (No.88), Washers
(No. 53), Shipping Tubes (No. 89)}

OWNER’S MANUAL V122021 ENGLISH
S-100 BIKE
This manual can be downloaded from www. salter.es
10
11
1
4
32
STEP 5:
1. First install the handle assembly (No.8) on the
main frame assembly (No.1) on the riser, and then
lock the handle with wrench (No.36) using 4
screws (No.37 ) and 4 gaskets (No.38 ).
2. Attach the table bracket bonding (No.24) on the
handle bonding (No.8), and lock 2 screws
(No.34 ) and 2 gaskets (No.86) with a wrench
(No.35 ). Then attach the electronic watch (No.9)
on the table bracket bonding (No.24), tighten
and secure with lock 4 screws (No.85) by a
wrench (No.35 ).
3. As shown in the figure, connect the electronic
watch wire (9a) with the sensor wire (No.11),
and then attach the handle cover (No.58) on the
handlebar (No.8).
4. Install the left and right kettle holder (No.90)
and (No.91)
according to the diagram, first
remove the screw (No.34) on the handle (No.8),
align the left kettle holder (No.90) to the hole
position on the handle (No.8), then install the
screw (No.34) to the corresponding hole position
with the wrench (No.35), repeat the above
action to install the kettle holder (No.91), then
complete the installation of the kettle holder.
The assembly is now complete!
STEP 4:
1. First, connect the Spring Line (No.11) on the Riser
assembly (No.4) with the Induction Line (No.10)
on the Main frame (No.1).
2. Then loosen the L Knob
(
No.32
)
counterclockwise
and insert the Riser Assembly (No.4) into the Main
Frame (No.1).

OWNER’S MANUAL V122021 ENGLISH
S-100 BIKE
This manual can be downloaded from www. salter.es
3. ADJUSTMENTS & USAGE GUIDE
+
63
63
62
32
5
2
66
-
A
B
68
74
4
ADJUSTING THE BALANCE
In order to achieve a smooth and comfortable ride, you
must ensure that the stability of the bike is secured. If
you notice that the bike is unbalanced during use, you
should adjust the foot levelers located beneath the Front
and Rear Stabilizers of the bike. To do so, turn the foot
pad clockwise (direction A) by hand to loosen and adjust
the height. Turn counter-clockwise (direction B) and
tighten to reduce the height until it is parallel to the
surface of the bike. When you adjust the front and rear
foot pads, adjust as described above to ensure that the
front and rear foot tubes are level with the ground. If
necessary, repeat this procedure to adjust the balance
ADJUSTING THE SEAT
The seat of this bike is fully adjustable as it moves Up,
Down, Fore (forward), Aft (backward).
To adjust the height of the Seat Slider Tube (No. 5),
loosen and pull the Adjustment Knob (No. 62)
outward, then raise or lower the seat to the desired
height. Once adjusted, re-insert and tighten the
Adjustment Knob (No.62) to secure the seat in place.
To adjust the seat back and forth, loosen and pull
Adjustment Knob (No. 74) outward, then slide the
Seat Post (No.2)
to the desired position. Once
positioned, re-insert and tighten the Adjustment
Knob (No. 74) to secure the seat slider tube in place.
ADJUSTING THE HANDLEBAR
It is important that the handlebar and seat are both
set to the correct height of your body. To adjust the
handlebar height, loosen and pull the Adjustment
Knob (No. 32) outward, then slide the Handlebar Post
(No. 4) up or down to the desired height. Once
adjusted re-insert and tighten the Adjustment Knob
(No.32) to secure the handlebar post in place.
ADJUSTING THE RESISTANCE
Adjust the resistance of the bike using the Tension
Knob (No. 63). Increase the level of resistance by
turning the tension knob to the RIGHT (clockwise),
decrease the level of resistance by turning the tension
knob to the LEFT (counter-clockwise).
EMERGENCY BRAKE
During use, users can stop the bike completely by
pushing down on the Tension Knob (No. 63). Pushing
down on the tension knob will enforce the brake and
bring the bike to an immediate stop.

OWNER’S MANUAL V122021 ENGLISH
S-100 BIKE
This manual can be downloaded from www. salter.es
6
8
32
TRANSPORTING THE BIKE
To move the bike, first ensure that the Handlebar
(No. 8) is properly secured. If the handlebar is loose,
tighten the Adjustment Knob (No. 32) to secure it.
Next, stand at the front of the bike so that you’re
directly in front of the handlebar. Firmly grasp and
hold each side of the Handlebar(No.8), place one
foot on the front stabilizer and tilt the bike towards
you until the transportation wheels on the front
stabilizer touch the ground. With the wheels on the
ground, you can transport the bike to the desired
location with ease.
NOTE: When moving the bike, always use caution as
unexpected impact, such as dropping the bike, may
cause injury to you and affect the bike’s performance.

OWNER’S MANUAL V122021 ENGLISH
S-100 BIKE
This manual can be downloaded from www. salter.es
4. EXPLODED DRAWING
S14
S6
S15
S13
S13-14-15
36#
35#
1
2
3
4
5
7
6
8
10
12
14
13
15
16
17
18
19
20
21
21
18
22
23L
23R
25
26
27
28
29
30
32
31
31
33
37
38
38
39
40
40
40
41
42
42
43
43
44
46
45
47
47
48
48
48
49
50
51
51
52
53
52
53
54
55
56
57
57
58
59
60
61
64
62
63
65
66
68
68
68
68
67
69
70
72
71
73
74
75
29
46
45 71
76
76
77
77
77
77
78
79
80
81
82
82
83
83
84
87
88
53
89
88
53
89
9a
34
34
34
34
90
91
9
85
24
34
86
11

OWNER’S MANUAL V122021 ENGLISH
S-100 BIKE
This manual can be downloaded from www. salter.es
5. PARTS LIST
No. Especificaciones Cant No. Especificaciones Cant
1
N/A
1
47
M6*10*ф12
2
2
N/A
1
48
ST4.2*19*Φ8
8
3
N/A
1
49
M4*12*Φ8
1
4
N/A
1
50
ф20*ф10.5*2.0
1
5 N/A 1 51 ST4.2*20*ф8 2
6
N/A
1
52
M10*25*S6
4
7
N/A
1
53
φ10*φ20*1.5
8
8
N/A
1
54
D6*ф20*2.0
1
9
L=100
1
55
849.5*470*83
1
10
Φ6*26 L=750 1 56 849.5*470*83 1
11
L=500mm
1
57
Φ227*Φ50*11
2
12
6004-2RZ
2
58
125*80*42
1
13 23*20*5 3 59
PT100*40*PT80*30*20
3
1
14 φ20*170*4-M8*φ90 1 60
PT100*40*PT80*30*20
3
1
15L
32*152
1
61
82*50*37
1
16R
32*152
1
62
Φ52*70.5*M16.*1.5
1
17
6.5KG*Φ400
1
63
Φ65*39*M10
1
18
M6*50*Φ12.3*2.5
2
64
F17*17*150
1
19
Φ18*Φ12.2*31
1
65
6PJ550
1
20
Φ12*135*M12*1.0
1
66
98-2
1
21
6201-2RS
2
67
ф50*ф30*27
1
22
φ26φ21*0.3
1
68
Φ45*10*M10*20
4
23L/R
9/16
1
69
104.5*44.5*10
1
24 weld assembly 1 70 104.5*44.5*10 1
25
φ1.6*φ12*N14*45
1
71
ф71*ф19*24
2
26
φ25*φ20.2*4
1
72
170*65*15
1
27
φ10*270*M10*20*M6*30
1
73
30*30*8
1
28
□15*15*25
1
74
Φ50*57*M10*22
1
29
608ZB
4
75
Φ260*20*Φ20.1*4
1
30
φ20*1.1
1
76
60*30*30
2
31 30*11.3*11.8*T1.5 2 77 80*40*20 4
32
M16*1.5*25*78*89
1
78
Φ17*Φ11*2.0
1
33
φ15.5*φ12*0.3
1
79
Φ16
1
34
M6*8
8
80
23*12*0.5
6
35
S
=
13
、
14
、
15
1
81
φ17*14.5*φ10
1
36
S6
1
82
Φ17*Φ14*19
2
37
M8*16*S6
4
83
Φ22*10
2
38
D8*φ16*1.5
8
84
φ15*φ12*φ4*12.5
1
39
M8*10*S6
4
85
M5*10
4

OWNER’S MANUAL V122021 ENGLISH
S-100 BIKE
This manual can be downloaded from www. salter.es
6. COMPUTER INSTRUCTIONS
■ FUNCTIONAL BUTTONS:
1. MODE
① Select the window to be set.
② When exercise (icon display), scan (with
icon )or display : SPEED / AVG.
SPEED / MAX SPEED, CALORIES/RPM.
③ Reset: hold for 2 seconds to reset all data.
2. SET
① Set the values of the relevant display window, hold for
quick increase.
② In other modes, scan (with icon ) or display: SPEED
/ AVG. SPEED / MAX SPEED, CALORIES/RPM.
3. RESET
During SET, reset the value of the relevant display window.
4 .ALL RESET
Press it at any time to reset all display values
■ FUNCTION
1. SPEED / AVG. SPEED / MAX SPEED: Window A displays
The current exercise speed, and the avg. speed & max speed during exercise.
2. TIME: Window B displays
① Count the cumulative time from the exercise start to the end, and it will automatically stop timing if
without exercise signal over 6 seconds.
② Exercise time can be set, MAX 99 minutes, each press to add 1 minute, countdown to zero, the TIME
will flash and beep for 5 seconds.
3. DISTANCE: Window C displays
① Count the cumulative distance from the exercise start to the end in KM
② Exercise distance can be set, MAX 99 KM, each press add 0.1, countdown to zero, the DIST will flash
and beep for 5 seconds.
4.CALORIES/RPM: Window D displays
① Count the cumulative calories consumed from exercise start to the end, and also the current RPM (or
cadence).
② The calorie value can be set, MAX 999, each press add 1, countdown to zero, the CAL will flash and
beep for 5 seconds.
5.AUTO OFF
40
M6*H6*S10
3
86
φ12*φ6*1.2
4
41
M10*1.5*H5*S17
1
87
T3*60*18
1
42
M10*1.25*H7.5*S14
2
87
T3*60*18
1
43
M12*1.0*S19*H6
4
88
M10*15*S6
4
44
M6*H5*S10
2
89
2
45
M6*12*S5
3
90
1
46
φ7.8*30*M6*1*S5
3
91
1

OWNER’S MANUAL V122021 ENGLISH
S-100 BIKE
This manual can be downloaded from www. salter.es
Without any exercise signal or operation over 4 minutes, the computer will turn off automatically and
memorize the current data.
■ INSTALLATION
1.Take off the computer back’s battery cover, put 2pcs 1.5V AAA battery inside correctly.
2. Fix the computer on the front place of exercise bike by screw.
3. Install the magnet and speed sensor on the related place of the bike. Make sure the distance less than
10mm between the magnet and sensor.
4. Connect the speed signal cable plug and the computer back’s signal plug.
5. Ride the bike, and if the speed value changes, means the installation is correct. Or else check the
installation of magnet and sensor, and also the plug connections between sensor and computer.
■ OPERATION
1. RESET
In any displays, Press ALL RESET to reset all the data.
2. SET THE TARGET PARAMETERS
When stop exercise (icon not display), press MODE to choose the window to be set or reset, the
corresponding window displays SET, meanwhile, the window’s digit flash, press RESET to clear the value,
and press SET to set the flashing window’s value. Hold the button to quick increase.
Set the value as: TIME→DIST→CAL.
3. CHECK THE EXERCISE DATA
① In non-set mode, press SET or during exercise, icon displays, press MODE to separately check
the SPEED / AVG. SPEED / MAX SPEED, CALORIES/RPM.
② When icon displays, means the computer is scan the display. It will scan display the value in
corresponding window every 6 seconds.
■ REPLACE BATTERY
When the display color fades, or with flash when operate buttons, means the battery has no enough
power. Take off the battery cover, and use 2pcs new 1.5V AAA UM-4 battery to replace the old battery.
7. ENVIRONMENTAL NOTE
The symbol with which is marked this unit (waste bin with wheels) indicates that it cannot
be thrown for any reason to the domestic waste. When disposing of the product should be
taken to a proper recycling point.
If properly dispose of the product may be reused and recycled, and it will help to conserve
natural resources, preserve the environment and significally reduce the potential negative
impact on our environment.
For more information about the return system, collection and recycling of these products contact your City
Council or the retailer.

/