Windon Bay W0132C Installation guide

Category
Faucets
Type
Installation guide

This manual is also suitable for

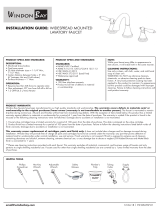
Windon Bay W0132C is a widespread mounted lavatory faucet that combines style with functionality. It features a durable brass construction with a 25-year drip-free warranty. The faucet's 1.2 GPM aerator promotes water conservation without compromising performance. Its easy-to-operate handles require less than 5 pounds of force and offer a 90-degree turn from full off to full on. Installation is made simple with a 3-hole mount and a maximum surface thickness of 1 inch.

Windon Bay W0132C is a widespread mounted lavatory faucet that combines style with functionality. It features a durable brass construction with a 25-year drip-free warranty. The faucet's 1.2 GPM aerator promotes water conservation without compromising performance. Its easy-to-operate handles require less than 5 pounds of force and offer a 90-degree turn from full off to full on. Installation is made simple with a 3-hole mount and a maximum surface thickness of 1 inch.

email@windonbay.com 02.22.19
|
92-WB-WLF-02
INSTALLATION GUIDE: WIDESPREAD MOUNTED
LAVATORY FAUCET
PRODUCT SPECS AND STANDARDS:
DESCRIPTION:
• Machined brass bodies
• Cast brass spout
• (3) Hole diameter sizes = 1-1/4” Min.,
1-1/2” Max.
• Center distance between holes = 3” Min.
(6” between Hot and Cold valves)
• Surface thickness = 1” Max.
OPERATION:
• Requires less than 5LB force to operate valve
• Flow adjustment: 90° turn from full off to full on
• 1.2 GPM (4.5 L/min) Aerator
PRODUCT SPECS AND STANDARDS:
STANDARDS:
• IAPMO/UPC Certified:
• ASME A112.18.1-2012/CSA B 125.1-12
• NSF/ANSI 61-2012
• NSF/ANSI 372-2011 (Lead Free)
• Watersense approved
WARRANTY:
• 25 Year drip-free warranty
• Product to be free of defects in material
or workmanship
PRODUCT WARRANTY:
Windon Bay faucets have been manufactured to our high quality standards and workmanship. The warranty covers defects in materials and/ or
workmanship to the original purchaser/home owner (warranty is not transferable to another person). The faucet is warranted to remain
drip-free during normal use. All parts and finishes will be free from manufacturing defects. With the exception of items listed below, this product has a limited
warranty against defects in materials or workmanship for a period of 1 year from the date of purchase. The warranty is voided if the product is found to be
misused or the following cleaning instructions were not followed. Damage due to accidents or installation is not warranted.
1. Faucet valve cartridges have a limited warranty for a period of 25 years from the date of purchase. This date is stamped on the valve cartridge.
2. Product finish has a limited warranty for a period of 25 years from the date of purchase. Failure to follow the cleaning instructions listed below voids all
finish warranty. Damage due to accidents or installation is not warranted.
This warranty covers replacement of cartridges, parts and finish only. It does not include labor charges and/or damage incurred during
installation. Windon Bay will provide free of charge all parts and cartridges found to be covered under the warranty; any part that proves defective in
material and/or workmanship under normal installation, use and service. Finish warranty is not covered if finish is exposed to extreme use of cleaners
containing abrasives and alcohol, extreme cleaning, extreme chemical use, or any damage due to abuse or neglect (Oil Rubbed Bronze and Matte Black
finish is warranted for 1 year).
**Please see cleaning instructions provided with each faucet. This warranty excludes all industrial, commercial, and business usage of faucets and only
pertains to single dwelling residential use. Faucets used for other than single dwelling residential use are covered by a 1-year limited warranty from the date
of purchase.
NOTE:
While your faucet may differ in appearance to
item shown, it will install with in the same manner.
CLEANING INSTRUCTIONS:
Use only a clean, soft cloth, water, and mild hand
soap to clean unit.
WARNING: Do NOT use abrasive cleaners,
chemicals, or abrasive cleaning pads to clean
fixture. A very hard protective coating has been
applied to this product to maintain it’s appearance,
but this product could be damaged with improper
cleaning. Failure to follow cleaning instructions will
void product warranty.
HELPFUL TOOLS
Adjustable
Wrench
Safety
Glasses
Plumber’s
Putty
Tubing
Cutter
Supply
Hoses
Hex Key
Wrench
Phillips
Screwdriver
email@windonbay.com 02.22.19
|
92-WB-WLF-02
INSTALLATION GUIDE: WIDESPREAD MOUNTED
LAVATORY FAUCET
1
1
4
"
MIN
1
1
2
"
MAX
6”
3” MIN
TURN OFF WATER SUPPLIES.
Ensure mounting surface requirements are
as follows:
• Three (3) Hole diameter sizes = 1-1/4” Min.,
1-1/2” Max.
• Center distance between holes = 3” Min.
(6” between Hot and Cold valves)
• Surface thickness = 1” Max.
1
SPOUT INSTALLATION:
Remove Mount Nut and Mount Bracket from
spout assembly. Assemble Spout to sink
surface. Re-assemble spout Mount Nut and
Mount Bracket to Spout Shank and tighten.
Assemble Spout Tee (with washer) to Spout
Shank and tighten.
2
VALVE BODY INSTALLATION:
Remove Handles and Flanges from valve
body assemblies. From bottom side of sink,
insert Valve Bodies with Mount
Nuts/Washers through surface holes.
From top side of sink, assemble Flanges onto
bodies and hand tighten. Tighten body
Mount Nuts and Screws to secure valve
bodies. Reassemble Handle to Valve body
ensuring proper alignment in the "OFF"
position.
3
1
2
3
INSTALLATION GUIDE: WIDESPREAD MOUNTED
LAVATORY FAUCET
email@windonbay.com 02.22.19
|
92-WB-WLF-02
CALIFORNIA PROPOSITION 65:
WARNING: This product can expose you to chemicals including lead, which is known to the State of California to cause cancer and birth
defects or other reproductive harm. For more information go to www. P65Warnings.ca.gov.
Wash hands after installation, repair, or removal of this product.
ASSEMBLE WATER SUPPLY LINES.
Connect Widespread Hoses from bodies to
Spout Tee and tighten. Connect water
supply lines to valve bodies and tighten.
4
PREPARE AND INSTALL
POP UP DRAIN ASSEMBLY
When assembling pop-up drain assembly to
sink, apply plumbers putty to bottom of
flange, silicon sealant between mack
washer and threads. Apply thread sealant
to tailpiece threads.
5
PREPARE AND INSTALL
LIFT ROD DRAIN ASSEMBLY
From beneath, insert Drain Assembly
through drain hole in sink. Attach supplied
Flange Washer or plumber’s putty to the
underside of the Flange. Secure Flange to
the Drain Assembly. From beneath, tighten
mounting nut. Place one end of Spring Clip,
on Pivot Rod. Insert Pivot Rod through a hole
in the Lift Rod Strap. Secure with Spring
Clip. Place Drain into the open position by
pressing downward on the Pivot Rod. Insert
Lift Rod into Strap. Adjust height of Lift Rod,
and tighten Thumb Screw.
5
TURN ON WATER AND FLUSH
THE SYSTEM.
Remove aerator (if installed) using aerator key
and flush thoroughly to remove any debris.
Re-install aerator.
6
CONFIRM PROPER INSTALLATION
Check for leaks and proper operation of faucet.
7
OR
Accepts a 3/8”
Compression
Fitting
*SUPPLY STOPS NOT INCLUDED
1
4
POP UP DRAIN ASSEMBLY
5
6
LIFT ROD DRAIN ASSEMBLY
5
4
  • Page 1 1
  • Page 2 2
  • Page 3 3

Windon Bay W0132C Installation guide

Category
Faucets
Type
Installation guide
This manual is also suitable for

Windon Bay W0132C is a widespread mounted lavatory faucet that combines style with functionality. It features a durable brass construction with a 25-year drip-free warranty. The faucet's 1.2 GPM aerator promotes water conservation without compromising performance. Its easy-to-operate handles require less than 5 pounds of force and offer a 90-degree turn from full off to full on. Installation is made simple with a 3-hole mount and a maximum surface thickness of 1 inch.

Ask a question and I''ll find the answer in the document

Finding information in a document is now easier with AI