DOOR INSTALLATION INSTRUCTIONS
Required Tools and Materials
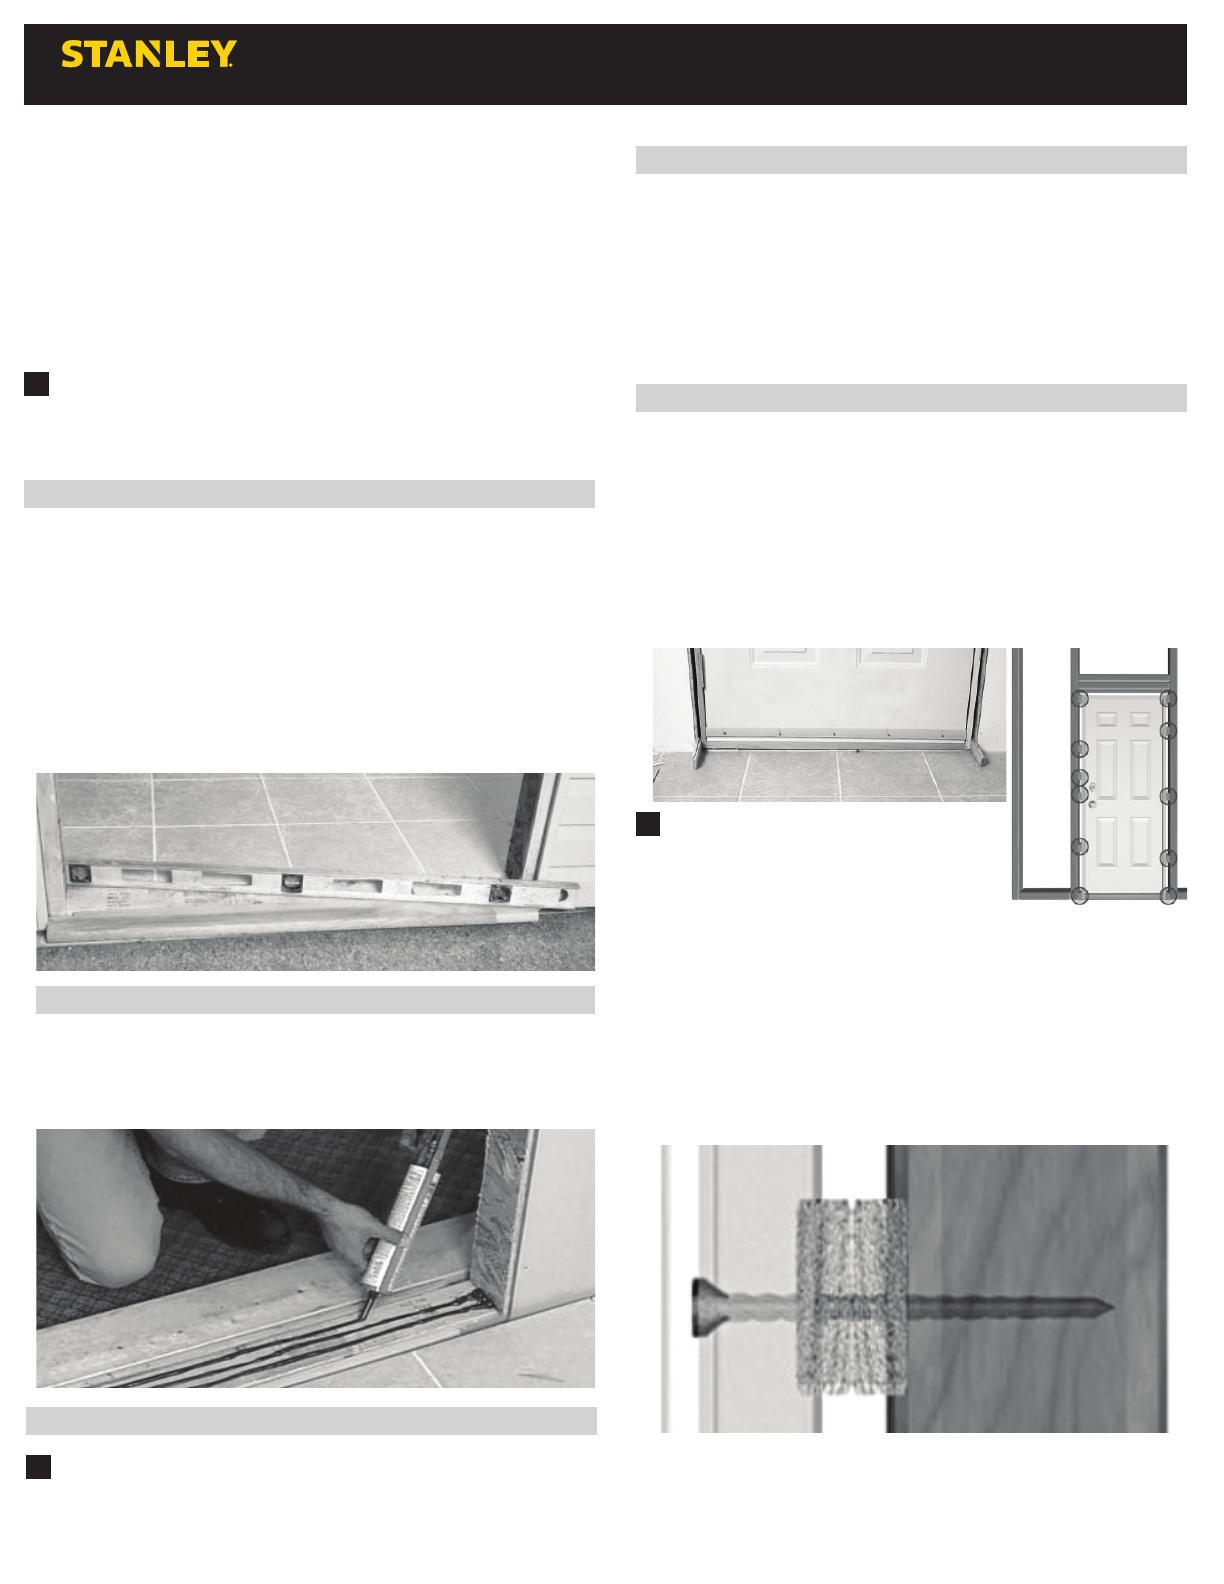
• Level (for sub-sill only)
• Shims
• Hammer
• Drill
• #2 Flat and Philips Screw Driver
• Low-expansion foam (or fiberglass) insulation
+ Important Point: Although all steps are critical, this symbol identifies
procedures requiring extra attention.
Check Your Work: This symbol identifies when the work should be checked
for correctness before continuing with installation.
Ensure the following conditions are met:
• The rough opening is ideally 1” wider and ½” taller than the outside frame
dimensions of the door system.
• The RO is plumb, square and level
• The old frame has been completely removed in retrofit installation
• The existing sub-sill is at least 6” deep for 4 5/8” frames and at least 8 ¾”
deep for 7 ¼” frames.
+ Because a solid, level sub-sill is absolutely essential for proper door
system installation, do not proceed with the until the sub-sill is both solid and
level.
Stand on the outside of the doorway. With the door facing out, tilt the door
back toward the outside. Place the sill in the RO and tilt the door up and into
the opening.
+ Do not leave the door wide open during installation.
The weight of the door may cause it to fall and cause injury.
Apply three ¼” lines of caulk (acrylic caulk is recommended) along the length
of the sub-sill, the first line starting approximately 1” from the inside edge.
The lines should be about 1” apart.
Remove the top screw from each hinge.
With the door closed and from the inside shim directly behind the vacant
hinge screw hole in each hinge, until there is a consistent 1/8”gap between
the hinge-side jamb and the door slab edge along the entire height of the
door. There should be a 1/8” gap between the latch-side jamb and the door
slab edge at the top and bottom of the door only. Drive a 3” installation
screw through the vacant hole in each hinge, through the jamb, shims and
into the stud.
From the outside and with the door closed,
ensure that the frame is in a straight vertical
plane (not twisted). To do this check that the
weather-stripping on the latch side is evenly
compressed along the entire height of the door
slab without any pinching or gaps.
Stand on the inside of the door and center the door in the opening. Shim
tightly at the bottom corners of the door unit. This will keep the door cen-
tered and the frame tight against the sill. Shim the top of the door on the
latch side. Install shims until there is a consistent 1/8” gap between the top
of the door slab and the frame header.
Shim the hinge side of the frame. This will hold the door tight in its position
relative to the frame. The door should operate freely with nothing but shims
holding it in place.
Remove all packaging materials such as nails, staples and screws
Make sure the door swings freely in the frame.
C
C
C
STEP 1: PREPARE ROUGH OPENING
STEP 4: PLACE DOOR IN ROUGH OPENING
STEP 5: SHIM AND FASTEN
STEP 2: CAULK THE SUB-SILL
STEP 3: REMOVE PACKAGING MATERIALS
INSTALLATION INSTRUCTIONS


