Page is loading ...

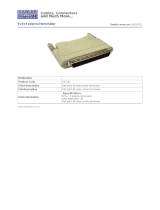
2 x 2 SCSI Matrix Switch
AUGUST 2002
SC120A-R2
SC121A
CUSTOMER
SUPPORT
INFORMATION
Order toll-free in the U.S.: Call 877-877-BBOX (outside U.S. call 724-746-5500)
FREE technical support 24 hours a day, 7 days a week: Call 724-746-5500 or fax 724-746-0746
Mailing address: Black Box Corporation, 1000 Park Drive, Lawrence, PA 15055-1018
Web site: www.blackbox.com • E-mail: [email protected]

1
FCC/IC RFI STATEMENTS, EU DECLARATION OF CONFORMITY
FEDERAL COMMUNICATIONS COMMISSION AND INDUSTRY CANADA
RADIO-FREQUENCY INTERFERENCE STATEMENTS
This equipment generates, uses, and can radiate radio-frequency energy, and if not
installed and used properly, that is, in strict accordance with the manufacturer’s
instructions, may cause interference to radio communication. It has been tested
and found to comply with the limits for a Class A computing device in accordance
with the specifications in Subpart B of Part 15 of FCC rules, which are designed to
provide reasonable protection against such interference when the equipment is
operated in a commercial environment. Operation of this equipment in a
residential area is likely to cause interference, in which case the user at his own
expense will be required to take whatever measures may be necessary to correct the
interference.
Changes or modifications not expressly approved by the party responsible for
compliance could void the user’s authority to operate the equipment.
This digital apparatus does not exceed the Class A limits for radio noise emission from digital
apparatus set out in the Radio Interference Regulation of Industry Canada.
Le présent appareil numérique n’émet pas de bruits radioélectriques dépassant les limites
applicables aux appareils numériques de la classe A prescrites dans le Règlement sur le
brouillage radioélectrique publié par Industrie Canada.
EUROPEAN UNION DECLARATION OF CONFORMITY
This equipment complies with the requirements of the European EMC directive
89/336/EEC.

2
2 X 2 SCSI MATRIX SWITCH
NORMAS OFICIALES MEXICANAS (NOM)
ELECTRICAL SAFETY STATEMENT
INSTRUCCIONES DE SEGURIDAD
1. Todas las instrucciones de seguridad y operación deberán ser leídas antes de
que el aparato eléctrico sea operado.
2. Las instrucciones de seguridad y operación deberán ser guardadas para
referencia futura.
3. Todas las advertencias en el aparato eléctrico y en sus instrucciones de
operación deben ser respetadas.
4. Todas las instrucciones de operación y uso deben ser seguidas.
5. El aparato eléctrico no deberá ser usado cerca del agua—por ejemplo, cerca
de la tina de baño, lavabo, sótano mojado o cerca de una alberca, etc..
6. El aparato eléctrico debe ser usado únicamente con carritos o pedestales que
sean recomendados por el fabricante.
7. El aparato eléctrico debe ser montado a la pared o al techo sólo como sea
recomendado por el fabricante.
8. Servicio—El usuario no debe intentar dar servicio al equipo eléctrico más allá
a lo descrito en las instrucciones de operación. Todo otro servicio deberá ser
referido a personal de servicio calificado.
9. El aparato eléctrico debe ser situado de tal manera que su posición no
interfiera su uso. La colocación del aparato eléctrico sobre una cama, sofá,
alfombra o superficie similar puede bloquea la ventilación, no se debe colocar
en libreros o gabinetes que impidan el flujo de aire por los orificios de
ventilación.
10. El equipo eléctrico deber ser situado fuera del alcance de fuentes de calor
como radiadores, registros de calor, estufas u otros aparatos (incluyendo
amplificadores) que producen calor.
11. El aparato eléctrico deberá ser connectado a una fuente de poder sólo del
tipo descrito en el instructivo de operación, o como se indique en el aparato.

3
NOM STATEMENT
12. Precaución debe ser tomada de tal manera que la tierra fisica y la polarización
del equipo no sea eliminada.
13. Los cables de la fuente de poder deben ser guiados de tal manera que no
sean pisados ni pellizcados por objetos colocados sobre o contra ellos,
poniendo particular atención a los contactos y receptáculos donde salen del
aparato.
14. El equipo eléctrico debe ser limpiado únicamente de acuerdo a las
recomendaciones del fabricante.
15. En caso de existir, una antena externa deberá ser localizada lejos de las lineas
de energia.
16. El cable de corriente deberá ser desconectado del cuando el equipo no sea
usado por un largo periodo de tiempo.
17. Cuidado debe ser tomado de tal manera que objetos liquidos no sean
derramados sobre la cubierta u orificios de ventilación.
18. Servicio por personal calificado deberá ser provisto cuando:
A: El cable de poder o el contacto ha sido dañado; u
B: Objetos han caído o líquido ha sido derramado dentro del aparato; o
C: El aparato ha sido expuesto a la lluvia; o
D: El aparato parece no operar normalmente o muestra un cambio en su
desempeño; o
E: El aparato ha sido tirado o su cubierta ha sido dañada.

4
2 X 2 SCSI MATRIX SWITCH
TRADEMARKS USED IN THIS MANUAL
BLACK BOX and the logo are registered trademarks of Black Box
Corporation.
Microsoft, Windows, and Windows NT are registered trademarks or trademarks of
Microsoft Corporation in the United States and/or other countries.
UL is a registered trademark of Underwriters Laboratories Incorporated.
Any other trademarks mentioned in this manual are acknowledged to be the property of the
trademark owners.

5
TABLE OF CONTENTS
Contents
Chapter Page
1. Specifications ..........................................................................................................7
2. Introduction ..........................................................................................................10
2.1 About the SCSI Switch ..................................................................................10
2.2 Features ..........................................................................................................10
2.2.1 LCD Panel..............................................................................................11
2.2.2 Front-Panel Controls ............................................................................11
2.3 Technical Description....................................................................................11
2.3.1 Available SCSI Switch Interfaces..........................................................11
2.3.2 General Hardware Description............................................................12
2.3.3 Ultra2 SCSI Compatibility ....................................................................12
2.3.4 SCSI Switch Installation........................................................................12
3. Installation ............................................................................................................15
3.1 What’s Included ............................................................................................15
3.2 AC Line Voltage ............................................................................................15
3.3 Switch Placement ..........................................................................................15
3.4 Power Equipment Off....................................................................................15
3.5 SCSI Interface Cabling ..................................................................................16
3.6 RS-232 Serial Port Cabling ............................................................................16
3.7 Ethernet LAN Port Cabling ..........................................................................16
4. Operator Controls and Indicators ......................................................................17
4.1 AC Power Switch ............................................................................................17
4.2 LCD Display, Keypad, and Indicators ..........................................................17
4.2.1 LCD Display ..........................................................................................17
4.2.2 Keypad ..................................................................................................18
4.2.3 Indicators ..............................................................................................18
4.3 LCD Display Control Menus ........................................................................18
4.4 SCSI Switch Port Configuration....................................................................21
4.5 SCSI Switch Default Configuration ..............................................................21
5. Configuration and Operation..............................................................................22
5.1 SCSI Cable Interface Requirements ............................................................22
5.2 Internal Terminator Selection......................................................................22
5.3 Selecting Internal Terminator Power ..........................................................25
5.4 Selecting External Terminator Power ..........................................................25
5.5 Serial-Port Pinout ..........................................................................................26
5.6 LAN/Serial-Port Commands ........................................................................27
5.7 ASCII Character Reference for SCSI Switch Box Selection........................33

6
2 X 2 SCSI MATRIX SWITCH
Chapter Page
5. Configuration and Operation (continued)
5.8 Graphical User Interface (GUI) ................................................................33
5.9 Connecting Multiple SCSI Switches ..........................................................34
5.10 Typical Application......................................................................................34
5.11 Network Control of SCSI Switch ................................................................35
5.11.1 LAN Port Configuration ..................................................................35
5.11.2 Cfgswitch Utility................................................................................36
5.11.3 Apconcmd Utility..............................................................................37
6. SCSI Technical Information ................................................................................38
6.1 SCSI Basics......................................................................................................38
6.1.1 SCSI-1 ....................................................................................................38
6.1.2 SCSI-2 ....................................................................................................38
6.1.3 SCSI-3 ....................................................................................................38
6.1.4 Signal Wiring ........................................................................................38
6.1.5 Common Problems ..............................................................................39
6.1.6 Passive Terminators ..............................................................................39
6.1.7 Active Terminators................................................................................39
6.2 SCSI Installation Tips ....................................................................................39
6.3 SCSI Interface Signal Descriptions ..............................................................40
7. Troubleshooting....................................................................................................50
7.1 Calling Black Box ..........................................................................................50
7.2 Shipping and Packaging................................................................................50

7
CHAPTER 1: Specifications
1. Specifications
SCSI Interface
Maximum Port Switching Delay: 3 ns
Maximum Signal Skew: 2 ns
Internal Terminator Power: 1 amp
Rear-Panel Connectors: 68-pin high-density
SCSI-1, SCSI-2, and SCSI-3 (also Ultra160 SCSI [“Ultra3 SCSI”] for SC120A-R2),
SPI-2 compatible; asynchronous and synchronous compatible; conforms to
ANSI X3.131 and X3T9.2
Single-Ended (SE) SCSI (SC120A-R2 Only)
Maximum Data Rate (8-bit Narrow): 20 MBps
Maximum Data Rate (16-bit Wide): 40 MBps
Maximum Port Cable Length: 6 meters (20 ft.)
Internal Terminator Impedance: 100 ohms
Terminator Disconnect Capacitance: 3 pF
Active Internal Bus Termination
Differential (DE) SCSI (SC121A Only)
Maximum Data Rate (8-bit Narrow): 40 MBps
Maximum Data Rate (16-bit Wide): 80 MBps
Maximum Port Cable Length: 25 meters (82 ft.)
Internal Terminator Impedance: 110 ohms
Terminator Disconnect Capacitance: 5 pF
Passive Internal Bus Termination

8
2 X 2 SCSI MATRIX SWITCH
Low-Voltage Differential (LVD) SCSI (SC120A-R2 Only)
Maximum Data Rate (8-bit Narrow): 40 MBps for Ultra2 SCSI (narrow transfers
aren’t officially supported in the Ultra160 SCSI standard)
Maximum Data Rate (16-bit Wide): 160 MBps
Maximum Port Cable Length: 25 meters (82 ft.)
Internal Terminator Impedance: 105 ohms
Terminator Disconnect Capacitance: 3 pF
Active Internal Bus Termination
Serial Interface
Baud Rate: 9600 or 19,200 bps
Data Format: No parity, 8 bits, 1 stop bit (fixed)
Maximum Cable Length: 15 meters (50 ft.)
Rear-Panel Connectors: DB9
LAN Port
Protocol: TCP/IP
Interface: Ethernet
Data Rate: 10 MBps
Rear-Panel Connector: RJ-45
Agency Approvals
UL
®
, CUL, FCC Class A, CE

9
CHAPTER 1: Specifications
Physical
Temperature: 32 F to 149°F (0 to 65°C)
Humidity: Up to 90% relative humidity, noncondensing
Power: 95 to 260 VAC ± 10% (25 watts)
Size: 4.5"H x 11.3" W x 9.7"D (11.4 x 28.7 x 24.6 cm)
Weight: 5.1 lb. (2.3 kg)

10
2 X 2 SCSI MATRIX SWITCH
2. Introduction
2.1 About the SCSI Switch
The 2 x 2 SCSI Matrix Switch is a high-performance electronic crosspoint switch
for use with the SCSI (Small Computer System Interface) bus. This product
enables two independent SCSI buses to be selected and electrically connected in
any combination via internal electronic switching circuits. The 2 x 2 SCSI Matrix
Switch eliminates the need to swap and reconfigure SCSI cables and bus
terminators when alternate system configurations are required.
In conjunction with the 2 x 2 SCSI Switch dual RS-232 serial interface, a
Graphical User Interface (GUI) allows the system administrator to remotely
operate and control SCSI-port configuration and termination, report SCSI-bus
activity, gather performance statistics, and set internal temperature points for
alarm notification. Standard DOS or modem software can also be used to control
the switch using simple ASCII control commands.
Up to 32 SCSI Switches can be connected together and controlled by one serial
port.
2.2 Features
• Ultra2, Ultra, and Fast SCSI compatible. SC120A-R2 is also Ultra160 SCSI
(a.k.a. “Ultra3 SCSI”) compatible.
• 80-MBps or (SC120A-R2 only) 160-MBps throughput (LVD).
• Easy-to-use LCD panel.
• Daisychain up to 32 switches.
• Share up to 32 SCSI peripherals.
• SC121A supports differential SCSI. SC120A-R2 supports single-ended or LVD
SCSI.
• Transparent electronic switching.
• LAN port for TCP/IP-based network control, RS-232 ports for serial control.
• Does not require SCSI-bus ID.
• User-installable.

11
CHAPTER 2: Introduction
2.2.1 LCD P
ANEL
The 2 x 2 SCSI Matrix Switch features an easy-to-use, menu-driven LCD panel with
soft-touch MENU, ENTER, and directional keys. The LCD is lighted, which allows
for easy viewing and operation.
2.2.2 F
RONT
-P
ANEL
C
ONTROLS
• Set and configure SCSI ports.
• Set termination.
• Set switch number.
• View power-supply status.
• View internal temperature.
• Set internal-temperature alarm.
• Set serial-port configuration.
• Display SCSI-bus busy status.
• Display port configuration.
2.3 Technical Description
2.3.1 A
VAILABLE
SCSI S
WITCH
I
NTERFACES
The 2 x 2 SCSI Matrix Switch is available in the following configurations:
• Single-ended/LVD interface (SC120A-R2)
• Differential interface (SC121A)
NOTE
Make sure that the SCSI Switch you’re installing is used with the
appropriate interface. Single-ended/LVD and differential SCSI devices
cannot be installed on the same switch unless a SCSI differential
converter is used.

12
2 X 2 SCSI MATRIX SWITCH
2.3.2 G
ENERAL
H
ARDWARE
D
ESCRIPTION
The 2 x 2 SCSI Matrix Switch’s rear panel identifies each of the independent SCSI
ports. SCSI ports A and B have two daisychained connectors per port and SCSI
ports 1 and 2 have single connectors for installation of SCSI devices. You can install
the SCSI Switch at any point on the SCSI bus.
Each port has internal termination that can be turned on or off from the LCD
panel. External “terminator power” (TERMPWR) for devices and terminators are
provided by internal resettable fuses.
The SCSI Switch does not require a device ID and is completely transparent to
all computers and peripherals on the SCSI bus. No additional software is needed
for installation and operation. A universal switching power supply automatically
adapts to input voltages between 95 VAC and 260 VAC.
2.3.3 U
LTRA
2 SCSI C
OMPATIBILITY
The SCSI Switch supports Ultra2 SCSI, 80-MBps (wide) SCSI host adapters,
computers, and peripherals in asynchronous and synchronous mode. (SC120A-R2
also supports Ultra160 SCSI, 160-MBps devices.) The SCSI Switch conforms to
ANSI X3.131 and X3T9.2 specifications for single-ended devices. Disconnect and
reselect functions are fully supported to ensure complete SCSI compatibility.
2.3.4 SCSI S
WITCH
I
NSTALLATION
Ports A and B are fully bidirectional to ports 1 and 2 (see Figures 2-1 through 2-3).
You determine where to connect computers, host adapters, and peripherals. In
general, if daisychained ports are required for connection to external peripherals,
use ports A or B.
The LCD panel is used to select port connections and enable or disable each
internal SCSI port terminator. Refer to Chapter 4 for complete instructions on
operating the LCD keypad.
You can selectively enable or disable any internal terminator to meet system
configurations and requirements.
NOTES
1. For proper operation of any SCSI bus, there must not be a “hanging”
line or cable. Termination should be enabled on active SCSI ports that
are not connected through to another port.
2. Connections can be made to either connector on the appropriate port.
3. In Figures 2-1 and 2-3, “Term” shows where terminators should be
installed.

13
CHAPTER 2: Introduction
Figure 2-1. SC121A block diagram.
Figure 2-2. SC120A-R2 block diagram.
SCSI Switch Ports

14
2 X 2 SCSI MATRIX SWITCH
Figure 2-3. Typical switch installation.
SCSI Switch (SC120A-R2)

15
CHAPTER 3: Installation
3. Installation
3.1 What’s Included
• (1) 2 x 2 SCSI Matrix Switch
• (1) AC power cord
• (1) 10-ft. (3-m) DB9-male-to-DB9-female RS-232 cable
• (1) DB9-male-to-DB25-female RS-232 adapter
• (1) SCSI Matrix Switch control software CD-ROM
• This users’ manual
If anything is missing or damaged, call Black Box at 724-746-5500.
3.2 AC Line Voltage
You can connect the SCSI Switch to any AC input voltage between 95 and 260 volts.
Unless otherwise specified, the switch will be shipped with a 110-volt power cord
for use in the USA. For a power cord that will work in your country (outside the
USA), call Black Box Technical Support.
3.3 Switch Placement
Place the SCSI Switch in a convenient location near the host computer or
peripherals. Keep SCSI cable lengths short to provide the best performance and
reliability. Make sure that the dual fans and ventilation slots on the sides of the
switch receive adequate airflow. Do not place the switch on or near any devices that
generate excessive heat.
3.4 Power Equipment Off
Power off all equipment and peripherals connected to the SCSI interface before
installing cables or terminators.

16
2 X 2 SCSI MATRIX SWITCH
3.5 SCSI Interface Cabling
Both versions of the 2 x 2 SCSI Matrix Switch have 68-pin high-density connectors.
Single-ended devices can have cable lengths up to 20 ft. (6 m). Differential or low-
voltage differential (LVD) devices can be connected with up to 82 ft. (25 m) of
cable.
Connect the host adapter or peripheral to the rear-panel connector using a
proper SCSI cable. Section 6.1 describes standard SCSI-interface requirements.
When you connect devices to ports A and B, use one of the port connectors, not
both.
NOTE
Do not intermix single-ended/LVD and differential devices on any SCSI
chain unless a SCSI differential converter is used to convert from one
bus type to the other.
Figure 3-1. The SCSI Switch’s rear panel.
3.6 RS-232 Serial Port Cabling
The SCSI Switches have a DB9 female RS-232 serial port on their rear panel,
pinned so that you can use a straight-through-pinned DB9 male-to-female serial
cable (such as the one provided with the SCSI Switch) to connect it to the DB9
male serial ports on a PC. Pins 1, 2, 3, 5, and 6 (CD, TD, RD, SGND, and DSR
respectively) are functional on the SCSI Switch’s RS-232 port; Pins 4 and 8 (DTR
and CTS) are tied together; and Pins 7 and 9 (RTS and RI) have no function.
3.7 Ethernet LAN Port Cabling
The SCSI Switches have an RJ-45 female 10BASE-T Ethernet port on their rear
panel. Use a standard straight-through-pinned twisted-pair cable (CAT5 or higher)
to connect this port to an Ethernet hub, switch, or router. To connect this port
directly to a 10BASE-T port on a computer, you’ll need to use a cross-pinned cable.

17
CHAPTER 4: Operator Controls and Indicators
4. Operator Controls and
Indicators
4.1 AC Power Switch
The AC power switch is located on the SCSI Switch’s rear panel. Move it to the “|”
position to turn on the switch.
NOTE
Always turn on the SCSI Switch before powering SCSI devices and
computers. This will ensure that devices are found when the system
boots up.
4.2 LCD Display, Keypad, and Indicators
4.2.1 LCD D
ISPLAY
The LCD display shows the selection parameters available.
Figure 4-1. The LCD display’s main menu.
> SET TEMP LIMIT
DISPLAY VERSION
DISPLAY POWER TEMP
FRONT PANEL LOCK
> SET SERIAL PORTS
SET SWITCH NUMBER
SET PORTS
> SET TERMINATION
DISPLAY PORTS
DISPLAY ACTIVITY

18
2 X 2 SCSI MATRIX SWITCH
4.2.2 K
EYPAD
Use the keypad to select menu and setup parameters for the SCSI Switch.
• MENU: Returns to the SCSI Switch setup and configuration menu.
• ENTER: Selects the highlighted setup parameter.
• UP, DOWN, RIGHT, LEFT Arrows: Scrolls the cursor to enable menu
selection.
4.2.3 I
NDICATORS
The indicators provide SCSI Switch status information.
• POWER: Indicates that the SCSI Switch is powered.
• BUSY: Indicates that there is SCSI activity on one or more SCSI ports.
• ALARM: A visual and audible alarm indicates a failure of an internal power
supply or that the SCSI Switch has exceeded the set temperature limit.
NOTE
To disable the audible alarm, press the front-panel MENU key. The
ALARM light will remain lit until the condition is corrected.
4.3 LCD Display Control Menus
SET PORTS
SET TERMINATION
SET TERMINATION
| A *| B| 1| 2|
SET PORTS
12
A| * | |
B| | * |

19
CHAPTER 4: Operator Controls and Indicators
DISPLAY PORTS
SET SERIAL PORTS
SET SWITCH NUMBER
DISPLAY POWER, TEMPERATURE
DISPLAY POWER, TEMP
PWR SUPPLY GOOD
+25.5°C
SET SWITCH NUMBER
01
USE UP/DOWN KEYS
SET SERIAL PORTS
COM 1 9600 * 19200
COM 2 9600 * 19200
DAISYCHAIN Y * N
DISPLAY PORTS
| A 1 | A 2 |
| B 1 | B 2 |
/