Page is loading ...

1 "
2"
2 "
3
–
8
1
–
2
1 "
2 "
3
–
4
1
–
4
DOOR THICKNESS
1 "
2"
2 "
3
–
8
1
–
2
1 "
2 "
3
–
4
1
–
4
DOOR THICKNESS
NO INSERT
1 "
1"
1
–
8
ARROWS INDICATE
LATCH PLATE WIDTH
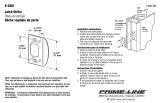
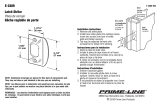
59375
STRIKE AND LATCH TEMPLATE
GABARIT DE GÂCHE ET LOQUET
PLANTILLA PARA CERROJO Y ENCASTRE DEL CERROJO
The Porter-Cable 59375 Strike and Latch
Template will help your router create strike
and latch mortises for your doors and door
frames. The following instructions assume:
1. Door is the proper size for door frame
2. Door is pre-drilled for the doorknob and
bolt hardware that is sold separately
SIZING THE TEMPLATE WINDOW
The template can be used to create strike and
latch plate mortises for the following standard
sizes:
1. 1” wide and 2-¼” tall. For this size, use
the top window with both inserts (A and
B) Fig. 1 oriented as shown.
2. 1-1/8” wide and 2-¼” tall. For this size,
use the top window with insert (A) Fig.
1 removed and insert (B) oriented as
shown in Fig. 2.
NOTE: For these fi rst two sizes, the corre-
sponding strike plate template is formed by
removing insert (B) Fig. 1 and 2.
3. 1-1/8” wide and 2-¾” tall. For this size,
use the bottom window with short insert
(C) Fig. 3 in place.
NOTE: On this size, the standard cor-
responding strike plate is T-shaped. The
proper template for this T-shaped mortise is
created by removing the short insert (C).
NOTE: To allow clearance for router bit
guide bearing, template guide windows are
1/8" larger than actual strike or latch plate
size.
DOOR THICKNESS STOPS
Once the template window is sized, move
peg (D) Fig. 4 to proper door thickness stop
(E). (Stops are included for doors 1-3/8” to
2-1/2” thick). Insert and twist peg clockwise
to lock. Repeat for other end.
NOTE: Two extra pegs are included.
SETTING THE BIT DEPTH
Make sure router is discon-
nected from power supply.
Read your router’s instruction
A21351 - 11-17-06
INSTRUCTIONS
INSTRUCCIONES
Fig. 1
Fig. 2
Fig. 3
Fig. 4
Fig. 5
Fig. 6
Fig. 7
Fig. 8
Fig. 9
Fig. 10
Fig. 11
A
B
B
C
D
E
F
G
H
H
J
K
L
Fig. 12
M
N
O
P
Q
Q
S
DOOR OPENS THIS WAY
LA PORTE OUVRE DE CETTE FAÇON
LA PUERTA ABRE ESTA MANERA
DOOR OPENS THIS WAY
LA PORTE OUVRE DE CETTE FAÇON
LA PUERTA ABRE ESTA MANERA
manual before installing the bit.
Install included bit, turn router upside down and place template and
strike plate (or latch plate) on top of the sub-base as shown in Fig. 5.
Adjust the bit so it is fl ush with plate.
NOTE: Bit included is ½" cutting diameter with 5/8" diameter bearing.
(Recommended replacement bit is Porter-Cable model 43671PC.)
NOTE: If you need to cut a latch and strike plate mortise for the same
door, we suggest you start with the latch plate mortise. If you are only
cutting a strike plate mortise, proceed to CENTERING THE TEMPLATE
ON DOOR FRAME.
CENTERING THE TEMPLATE OVER BOLT HOLE
Mark a center line (F) Fig. 6 across the door’s pre-drilled bolt hole as
shown. Align the center lines of the template (G) Fig. 6 with line (F).
NOTE: Be sure template is oriented with door thickness pegs resting on
the side of the door that opens into the room.
With door thickness pegs snug against the door, nail template fi rmly in
place at holes (H) Fig. 6 using supplied three-penny double-headed nails.
ROUTING THE LATCH PLATE MORTISE
Read your router’s instruction manual before making the cut.
Be sure door is secured and will not move while cut is made.
Rout the latch plate mortise into the door. Start router slowly into the
wood and gradually guide the router bit’s bearing around the template
clockwise until proper mortise is cut.
REMOVING THE TEMPLATE
Use a claw hammer to carefully pull out nails and remove template from
door.
NOTE: If single-headed replacement nails are used, insert claw hammer
under the lip (J) Fig. 7 that extends off the end of the template to raise
nail head above template. Then insert claw under the nail head (K) Fig. 8
and carefully remove nail.
NOTE: For square-cornered latch plates, chisel corners to fi t plate. (Fig.
9)
Figure 10 illustrates a fi nished latch plate mortise.
Install latch plate and door knob/bolt to door.
CENTERING THE TEMPLATE ON DOOR FRAME
Move door to frame and make marks (L) Fig. 11 at the top and bottom
of bolt (M). Find the center (N) between marks (L) and transfer this center
line to the door frame (O) Fig. 12 where the strike plate will be installed.
Be sure the bit depth is set properly for the strike plate. (See SETTING
THE BIT DEPTH).
Align template center lines (P) Fig. 12 to the center line (O) on door frame
and nail in place at holes (Q).
NOTE: For standard strike plates, remove the template’s forward insert
(B) Fig. 1 before making the cut. For T-shaped strike plates, remove in-
sert (C) Fig. 3 before making the cut.
NOTE: Be sure template is aligned so the pins are resting against the
face of the frame where you made marks (L) Fig. 11. Be sure the Porter-
Cable logo side is oriented into the room where the door opens.
ROUTING THE STRIKE PLATE MORTISE
Read your router’s instruction manual before making the cut.
Rout the strike plate mortise into door frame (S) Fig. 12. Start router
slowly into the wood and gradually guide the router bit’s bearing around
the template clockwise until all material is removed.
REMOVING THE TEMPLATE
Use claw hammer to carefully pull nails and remove template from frame.
NOTE: If single-headed replacement nails are used, insert claw hammer
under the lip (J) Fig. 7 that extends off the end of the template to raise
nail head above template. Then insert claw under the nail head (K) Fig. 8
and carefully remove nail.
NOTE: For square-corner strike plates, chisel corners to fi t plate. (Fig. 9)
Figure 13 illustrates a fi nished mortise for a standard strike plate. Figure
14 illustrates a fi nished mortise for a T-shaped strike plate.
COMPLETING THE TASK
Install the strike plate onto door frame following the plate manufacturer’s
directions.
Fig. 13
Fig. 14
/