Page is loading ...

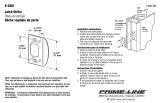
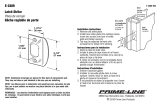
InteriorDoor Kit
Use Power Router with
Standard 1/2” Bit
and 5/8” TurnLock or other Guide Bushing
1293
Model
TM
Safety warning:
Always wear safety glasses or eye shields before commencing power
tool operation. Read, understand, and follow your power tool manufacturer's instructions for
safety. Always keep hands at a safe distance from spindles and cutting tools. Always disconnect
power source before adjusting power tools.
Please consult the many DIY books and articles on installing doors and
door hardware, as this is beyond the scope of this manual.
1
2
10
11
13
12
4
5
6
7
3
8
9
Item QtyPart # Item QtyPart #
1
29900 1
6
5
4
3
2
29906
29905
29904
29902
29901
1
1
1
1
1
11
10
9
8
29951
29950
29952
29953 2
2
1
1
129916
7
29914
1
12
13
29903
1
© 2008 Milescraft • www.milescraft.com
29955 • 07/08
1
Parts List
Patent # 5524684 / Patent Pending

© 2008 Milescraft • www.milescraft.com 2
1. Door Clamp Assembly
2. Template for 3.5” Hinge
3. Template for 3” Hinge
4. Template for 1“ x 2.25” Standard Lock
& Deadbolt
5. Template Positioner
6. Adaptor Plates
7. Template Fasterners/Door Shim
1
2
4
5
6
3
7
DOOR MORTISING INSTRUCTION BOOK
Items Needed That Are Not Supplied
1. Router equipped with a 5/8 inch Diameter TurnLock or other
guide bushing and a 1/2 inch Diameter cutting bit.
2. Tape measure.
3. Sharp pencil or knife for making accurate positioning marks.
4. Corner chisel.
5. Screw driver (Blade Type and Phillips).
CAUTION: Always use protective eye goggles when
operating power or striking tools.
Door Mortising
1. Select the proper template required.
Note: Although each template is identified, it is recommended you place whatever plate or hinge for which
you are mortising into the window of the template and check for proper fit: (See Fig. 1)
A) Door Lock Plates: Look for a 1/16 inch gap on all four sides of the template window.
B) Hinges: Look for a 1/16 inch gap on top and bottom of hinge.
2. Attach the selected template onto the door holding clamp with screws and
nuts provided.
Note: For lock plate templates, you must first attach 2 adaptor plates with
screws and nuts provided (See Fig. 2). Make certain the adaptor* plate locator
buttons are positioned properly in the holding clamp holes before tightening
the screws.
Note: It is not necessary to excessively tighten the nuts with a wrench.
*Do not use adaptor plates with hinge templates.
Figure 1
Section I
Door Mortising System For:
•
Hinges
Standard Lock Plates
Dead Bolt Lock Plates
•
•
Figure 2

© 2008 Milescraft • www.milescraft.com
3
s
3. Measure and Mark
A. Mortising for Lock Plates: The lock/bolt hole will be your mark unless you choose to drill the hole later. Up and
down positioning accuracy for the lock plates is not as critical as it is for the hinges.
B. Mortising for Hinges:
CAUTION: With a sharp pencil or knife mark hinge center-lines across door or jamb with a square. This is important
for this system to produce the desired result.
With 2 small nails, lightly attach the door spacer shim to the top edge of the door. Now, with a tape measure
hooked onto the spacer shim, make accurate marks where you want the hinge center lines to be (See Fig. 3A).
Keep note of these measurements in the event of mortising for hinges on a matching jamb.
For replacing a door in an existing jamb with hinges already mounted, you must first make an accurate mark at the
center of each hinge. Then take a measurement from the top of the jamb door opening (See Fig. 3B) down to each
hinge center line. With the door spacer shim in position on the top of the door, transfer the jamb hinge center line
measurements directly to the door.
CAUTION: Prior to replacing a door in an existing jamb, check for squareness and level of the jamb hinge section
and the jamb header. Fit the new door accordingly. Then begin set-up to mortise for hinges according to the prior
instructions.
Figure 4
4. Position and Secure holding clamp to the door. For 1 3/8 inch doors, the adaptor pads must be in the active
"down" position (See Fig. 4). For 1 3/4 inch doors, the adaptor pads must be in the inactive “u p” position.
A) Mortising for Lock Plates:
With proper template attached, position the clamp so the centering arrows are in line with the latch hole or a mark
if the latch hole is not drilled yet. Normally, the hole is present prior to mortising for the lock plate. By tightening
the wing nuts, secure clamp to door (only finger tighten to avoid marking the door). Clamp may be damaged if a
wrench is used and accurate centering of the clamp may be affected.
B) Mortising for Hinges:
When mortising for hinges, more accurate positioning is required than for lock plates. Although centering arrows
are indicated on the hinge templates, a more accurate positioning device is provided. This device will give you the
exact accuracy of your layout marks and lines.
After selecting and securing the proper hinge template, insert the positioning device into the hinge template
window. Now, position the entire clamp assembly on to the door and slide it up or down until the mark lines up
with the points in the positioning device (See Fig. 5).
Secure holding clamp to the door by tightening the wing nuts.
Figure 5
Figure 3

© 2008 Milescraft • www.milescraft.com
4
5. Router Set-Up:
Mortising for Lock Plates and Hinges:
Your router must be equipped with a 5/8 inch Diameter TurnLock or other guide bushing and have a 1/2 inch
Diameter cutting bit in order for this system to produce correct results. With the holding clamp secured in position
on the door, place your router (do not turn router on) on to the suspension rails and adjust the height of the cutter
until it comes in contact with the door wood surface. Remove router and adjust the cutter to the proper depth
required for the lock plates or hinges you are using.
6. Routing: Place router on to the holding clamp, but keep the cutting bit away from the wood surface. Now, turn
on router and plunge cut into the wood until the router base rests on the suspension rails of the holding clamp.
Slowly follow the template window with the router guide bushing. It is very important to avoid hitting the tem-
plate window edges with any force while cutting since you may knock the holding clamp assembly out of posi-
tion. Although the holding clamp grips very well with finger tightening pressure, it is not nailed to the door. It
takes only seconds to carefully mortise, so to hurry and hit the edges with force will not save anytime, only reduce
your accuracy. Carefully travel around the template until all material is removed. Only then turn the router off. Wait
until the cutting bit stops rotating completely before removing the router base from the holding clamp suspen-
sion rails. Failure to follow this point will ultimately result in damage to the template and possibly your router
cutting bit. One slight nick in the template will appear in your mortise every time you use it again. However,
replacement templates are available.
NOTE: To achieve square corners, use a corner chisel or a utility knife.
Hinges
1
2
4
5
6
7
3
1. Jamb Clamp Assembly
2. Template for ‘ T ’ Strike Plate
3. Template for ‘Square’ Strike Plate
4. Template for 3.5” Hinge
5. Template for 3” Hinge
6. Template Fasteners/Door Shim
7. Template Positioner
8. Adaptor Plates
Section II
Jamb Mortising System for:
Strike Plates
Dead Bolt Receiving Plates
8
•
•
•
JAMB MORTISING INSTRUCTION BOOK
Items Needed That Are Not Supplied
1. Router equipped with a 5/8 inch Diameter TurnLock or other guide bushing and a 1/2 inch Diameter cutting bit.
2. Tape measure.
3. Sharp pencil or knife for making accurate positioning marks.
4. Corner chisel.
5. Screw driver (Blade Type and Phillips).
Figure 1
CAUTION: Always use protective eye goggles when
operating power or striking tools.
TM

© 2008 Milescraft • www.milescraft.com
5
NOTE: For the holding clamp in this system to work properly on jambs, with casing attached, the casing must be
positioned so at least 1/8th of an inch of jamb is exposed. If jamb edge is not exposed, it will be necessary to
remove casing.
Jamb Mortising
1. Select the proper template required.
Note: Although each template is identified, it is recommended you place which ever strike plate or hinge for
which you are mortising, into the window of the template and check for proper fit (See Fig. 1).
A) Strike Plates: Look for a 1/16 inch gap on all sides except for the tongue area of the plate (the template will
allow the cutter to exit the jamb in the tongue area).
B) Dead Bolt Receiver Plates: Look for a 1/16 inch gap around all four sides.
C) Hinges: Look for a 1/16 inch gap on top and bottom of hinge.
2. Attach the selected template onto the holding clamp with the screws and nuts provided.
Note: For strike plate and dead bolt receiver plate templates-you must first attach the 2 adaptor plates with
screws and nuts provided (seeFig.2 A). Make certain the adaptor plate locator buttons are positioned in the holes
provided in the-clamp before tightening the screws. (Do not use adaptor plates with hinge templates.)
Note: It is not necessary to excessively tighten nuts with a wrench.
3. Measure and Mark
A) For mortising strike plates and dead bolt receiver
plates, use the latch hole in the jamb (that was
transferred from the door) for your template arrow
centering mark. Up and down positioning for these
plates is not as critical as it is for hinges.
B) Mortising for hinges:
CAUTION: Use very accurate positioning marks with a
sharp pencil or knife. This is important for this system to
produce the desired results.
Using a tape measure, butt the tape end to the upper
horizontal section of the door jamb and make accurate
marks where you want the hinge center lines to be
(See Figure 3A). Keep note of these measurements if you
are mortising for hinges in a matching door.
For replacement of a jamb, and use of an existing door
with hinges already mortised and mounted, you must
take accurate measurements from the top of the door
to each hinge center line. (For proper clearance
between top of door and jamb header, use door spacer
shim provided. Lightly nail shim on top of door.)
(See Fig. 3B) Butt the tape measure to the top of the
horizontal section of the jamb. Use the same door
hinge center measurements to mark the jamb.
CAUTION: Always check jambs and doors for plumb
and square prior to mortising for the hinges.
4. Position and Secure the holding clamp to the jamb.
Note: The jamb holding clamp attaches the same way
for both 1 3/8 inch door jambs and 1 3/4 inch door
jambs
First, place the 2 clamp feet in position on the jamb. Now,
while holding the unit on the jamb, disengage the
Figure 2

© 2008 Milescraft • www.milescraft.com
6
Figure 3
Figure 4
Figure 5
positioning
device
adjustable clamp plate from the adjustment slots
on the clamp bar and slide it to the slot on the
clamp bar that is in a close position to the
particular jamb size (See Fig. 4).
Allowthe return/control spring to engage the
clamp plate into the proper slot. You may have to
"back off" the clamp screw prior to repositioning
the clamp plate. Rotate the clamp screw until the
clamp bushing pilot point engages into the clamp
plate pilot hole. Lightly tighten so the whole
assembly can slide up and down the jamb until
the unit is in position.
A) Mortising For Strike Plate and Dead Bolt Receiver
Plate: With proper template attached, and with
holding clamp lightly tightened on jamb, slide it up
and down until you see the template centering arrows lined up with
the center of the bolt hole in the jamb. You may also line up on a
measured mark. Once lined up, tighten the clamp screw with light
pressure only. Just a small amount of tension will hold very securely.
Any more pressure and you may leave impressions on the jamb.
B) Mortising for Hinges: When mortising for hinges, more accurate
positioning is required than for strike plates. Although centering
arrows are indicated on the hinge templates, a more accurate
positioning device is provided. This device will give you the exact
accuracy of your layout marks or lines. After selecting and securing the
proper hinge template, insert the positioning device into the hinge
template window. With the holding clamp lightly secured to the jamb,
slide it into position according to the sight on the positioning device
(See Fig. 5). Secure template holding clamp assembly by lightly
tightening the clamp screw. Do not over-tighten or use a wrench.
5. Router Set-Up: Mortising for strike plates, dead bolt receiver plates, and hinges
requires that your router be equipped with a 5/8 inch Diameter TurnLock or other
guide bushing and have a ½ inch Diameter cutting bit for this system to produce the
correct results. With the template holding clamp secured in position on the jamb, place
your router (do not turn your router on yet) on to the suspension rails and adjust the height of the cutting bit until
it comes in contact with the jamb wood surface. Remove router and adjust the cutting bit to the proper depth
required for the strike plate, dead bolt receiver plate, or hinges for which you are mortising.
6. Routing: Place router in position in the template on the holding clamp, but keep the cutting "bit" away from the
wood surface. Now turn on router and plunge cut into the wood until the router base rests on the suspension rails
of the holding clamp. Slowly follow the template window with the router guide bushing. It is very important to
avoid hitting the template window edges with any force while cutting since you may knock the holding clamp out
of position. While the holding clamp grips very well with light tightening pressure, it is not nailed to the jamb. It
takes only seconds to carefully mortise. To hurry and hit edges with force, will not save any time, only reduce accu-
racy.
Carefully travel around the template until all material is removed. Only then turn router off!
Wait until the cutting bit stops rotating completely before removing the router base from the holding clamp
suspension rails. Failure to follow this point will ultimately result in damage to the template and possibly your
router cutting bit. One slight nick in the template will appear in your mortise every time you use it again. However,
replacement templates are available.
NOTE: To achieve square corners, use a corner chisel or a utility knife.
TM

Two Upgrade Kits Are Available to Add Versatility to
your InteriorDoorKit
TM
1.) #29964 - InteriorDoorKit Upgrade
Additional templates for the following door hardware
1 3/8” Doors AND Jambs:
4” Hinges
4“ Hinges with 5/8” Radius Rounded Corners
3 1/2” Hinges with 5/8” Radius Rounded Corners
3” Hinges with 5/8” Radius Rounded Corners
1 3/8“ Jambs Only:
4 7/8” “Tall T” Strike Plate
1 1/8” x 2 3/4” Dead Bolt & Strike Plate
1” x 2 1/4” Dead Bolt & Strike Plate
3 5/8” x 1 1/4” Dead Bolt Plate
2.) #29965 - ExteriorDoorKit Upgrade
Templates for the following door hardware
1 3/4” Doors AND Jambs:
5” Hinges
4 1/2” Hinges
4” Hinges
4” Hinges with 5/8” Radius Rounded Corners
3 1/2” Hinges
3 1/2” Hinges with 5/8” Radius Rounded Corners
1 3/4” Jambs Only:
1 1/8” x 2 3/4” Dead Bolt & Strike Plate
1” x 2 1/4” Dead Bolt & Strike Plate
“T” Strike Plate
“Square” Strike Plate
4 7/8” “Tall T” Strike Plate
Offset “T” Strike Plate
3 5/8” x 1 1/4” Dead Bolt & Strike Plate
Commercial Doors Only:
1 1/8” x 2 1/4” Commercial Door Lock Plate
Contact Milescraft customer service for ordering details
at
info@milescraft.com or (847) 683-9200
/