Page is loading ...

OPERATOR’S MANUAL
44 Inch Lawn Sweeper
LP39088
OM #41448
8/21/15
(English)
North American Edition
Printed in USA

Original instructions. All information, illustrations and specications in
this manual are based on the latest information available at the time of
publication.
The right is reserved to make changes at any time without notice.
Using Your Operator’s Manual
Read this entire operator’s manual, especially the safety
information, before operating.
This manual is an important part of your machine. Keep
all manuals in a convenient location so they can be
accessed easily.
Use the safety and operating information in the
attachment operator’s manual, along with the machine
operator’s manual, to operate and service the attachment
safely and correctly.
If your attachment manual has a section called Preparing
the Machine, it means that you will have to do something
to your tractor or vehicle before you can install the
attachment. The Assembly and Installation sections of
this manual provide information to assemble and install
the attachment to your tractor or vehicle. Use the Service
section to make any needed adjustments and routine
service to your attachment.
If you have any questions or concerns with the assembly,
installation, or operation of this attachment, see your
local John Deere dealer.
Warranty information on this John Deere attachment can
be found in the warranty statement included in this
manual.
Introduction
Table of Contents
Introduction 2
Product Compatibility 2
Safety 3
Assembly 4
Installing 11
Operation 12
Removing and Storing 12
Service 13
Troubleshooting 13
Repair Parts 14
Product Compatibility
This lawn sweeper is designed for use with lawn and
garden tractors only.
Read Safety in Machine Operator’s Manual
Read the general safety operating precautions in your
machine operator’s manual for additional safety
information.
Operate Safely
• This attachment is intended for use in lawn care and
home applications. Do not tow behind a vehicle on a
highway or in any high speed application. Do not tow at
speeds higher than maximum recommended towing
speed.
• Towing speed should always be slow enough to maintain
control. Travel slowly over rough ground.
• Do not let children or an untrained person operate
machine.
• Do not let anyone, especially children, ride on machine
or attachment. Riders are subject to injury such as being
struck by foreign objects and being thrown off. Riders
may also obstruct the operator’s view, resulting in the
machine being operated in an unsafe manner.
• Check machine brake action before you operate. Adjust
or service brakes as necessary.
• Keep all nuts and bolts tight to be sure the equipment is
in safe working condition.
• Keep all parts in good condition and properly installed.
Fix damage immediately. Replace worn of broken parts.
Replace all worn or damaged safety and instruction
decals.
• Do not modify machine or safety devices. Unauthorized
modicationstothemachineorattachmentmayimpair
its function and safety.
• Do not obstruct the operator’s view during use.
Parking Safely
• Stop vehicle on a level surface, not on a slope.
• Lock park brake.
• Stop engine.
• Remove key.
• Before you leave the operator’s seat, wait for engine and
all moving parts to stop.
• Disconnect the negative battery cable or remove the
spark plug wires (for gasoline engines) before servicing
the machine.
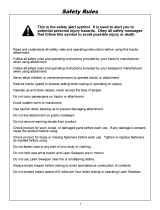
Safety
2

Safety
Wear Appropriate Clothing
• Always wear eye protection when operating the
machine.
• Wearclosettingclothingandsafety
equipment appropriate for the job.
• While operating this machine, always wear substantial
footwear and long trousers. Do not operate the
equipment when barefoot or wearing open sandals.
• Wear a suitable protective device such as earplugs.
Loud noise can cause impairment or loss of hearing
3
Towing Loads Safely
• Stopping distance increases with speed and weight of
towed load. Travel slowly and allow extra time and
distance to stop. Total towed weight must not exceed
limitsspeciedintowingvehicleoperator’smanual.
• Excessive towed load can cause loss of traction and
loss of control on slopes. Reduce towed weight when
operating on slopes.
• Never allow children or others in or on towed equipment.
• Use only approved hitches. Tow only with a machine that
has a hitch designed for towing. Do not attach towed
equipment except at the approved hitch point.
• Follow the manufacturer’s recommendations for weight
limits for towed equipment and towing on slopes. Use
counterweights or wheel weights as described in the
machine operator’s manual.
• Do not turn sharply. Use additional caution when turning
or operating under adverse surface conditions. Use care
when reversing.
• Do not shift to neutral and coast downhill.
Protect Bystanders
• Keep bystander away when you operate a towed
attachment.
• Before you back machine and attachment, look carefully
behind attachment for bystanders.
Keep Riders Off Towed Attachment
• Keep riders off of a towed attachment.
• Riders on a towed attachment are subject to injury, such
as being struck by objects and being thrown off the
attachment during sudden starts, stops and turns.
• Rider obstruct the operator’s view, resulting in the
attachment being used in an unsafe manner.
• Keep riders off of hitch bracket.
Avoid Injury From Drawbar
• Before you disconnect and attachment from machine
hitch plate:
• Unload attachment.
• Stop attachment on level ground.
• Stop machine engine.
• Lock machine park brake
• Block attachment wheels.
• Make sure hands, feet or other body parts are not under
drawbar.

Assembly
4
Parts in Carton
Description Qty
Drawbar Bracket (1) 2
Handle Holder (2) 1
Hopper Support Rod (3) 2
Bag Frame Tube (4) 1
Rear Hopper Tube (5) 2
Hitch Bracket (6) 1
Straight Hitch Bracket (7) 1
1
27425BLK
2
42661
6
3
4
12
14
13
5
10
9
11
27421BLK
8
42648
27424
40897
42539
42647
42904
42646
42020
42649
7
23014
24192
Description Qty
Drawbar (8) 1
Lower Handle Tube (9) 1
Hopper Bag (10) 1
Upper Handle Tube (11) 1
Bag Arm (12) 2
Lower Hopper Tube (13) 2
Upper Hopper Tube (14) 2

Assembly
5
Description Qty
Clevis Pin, 3/8 x 2-1/4” (15) 5
Bolt, 1/4-20 x 1” (16) 1
Hair Pin, 3/32 x 1.8” (17) 14
Clevis Pin, 1/4 x 1.11” (18) 6
Clevis Pin, 5/16 x 1-1/4” (19) 1
Carriage Bolt, 5/16-18 x 3” (20) 2
Hair Cotter Pin, 3/32 x 2-5/16” (21) 1
Clevis Pin, 3/8 x 1/2” (22) 2
Hair Cotter Pin, .08 x 1-1/8” (23) 1
Spacer, 3/4” (24) 2
Bolt, Hex 5/16-18 x 2-1/2” (25) 2
Description Qty
Nut, Nylock 5/16-18 (26) 2
Handle Grip (27) 1
Pivot Rod Support Bracket (28) 2
Pivot Rod Retainer (29) 2
U-Clamp (30) 1
Knob (31) 1
Wing Knob (32) 2
Hitch Pin (33) 1
Spacer (34) 2
Compression Spring (35) 2
Parts Bag Contents
HA23636
15 1816
20
21
17
22
27
28
29
33
30
31
32
35
19
23
48366
7071
48365
43259
42659
27426
26484
23878
23353
42651
23368
43720
41036
43978
HA3090
44217
43055
43343
34
24
44292
25
26
47810

Assembly
6
Assembly Step 1
1. Attach the drawbar (8) and both drawbar brackets (1)
to the sweeper using a 3/8 x 2-1/4” clevis pin (15) and
3/32” hair pin (17).
Assembly Step 2
1. Attach the drawbar and drawbar brackets to the
sweeper using two 5/16 x 3” carriage bolts (20), 3/4”
spacers (24), and wing knobs (32).
15
1
8
17
1
32
24
20
17
2
Assembly Step 3
1. Attach the handle holder (2) to the drawbar and
drawbar brackets using a 3/32” hair pin (17).
Assembly Step 4
1. Attach the bag arms (12) to the sweeper housing using
four 3/8 x 2-1/4” clevis pins (15) and 3/32” hair pins (17).
15
17
12

Assembly
28
29
1
2
7
Assembly Step 5
1. Assemble a pivot rod support bracket (28) and pivot
rod retainer (29) to each bag arm.
Assembly Step 6
1. Press a compression spring (35) into the end of each
pivot rod retainer.
35
17
18
13
13
5
18
17
14
14
5
Assembly Step 7
1. Install a rear hopper tube (5) onto the ends of the two
lower hopper tubes (13). Secure them with two 1/4 x
1.11” clevis pins (18) and 3/32” hair pins (17).
Assembly Step 8
1. Install a rear hopper tube (5) onto the ends of the two
upper hopper tubes (14). Secure them with two 1/4 x
1.11” clevis pins (18) and 3/32” hair pins (17).

8
17
22
Assembly
Assembly Step 9
1. Attach the upper and lower bag frame together using
two 3/8 x 1/2” clevis pins (22) and 3/32” hair pins (17).
10
Assembly Step 10
1. Slide the bag frame into the hopper bag (10).
4
Assembly Step 11
1. Slidethebagframetube(4)throughthefrontapof
the hopper bag.
3
3
Assembly Step 12
1. Insert the hopper support rods (3) into the holes of the
upperhoppertube.Then,exandinserttherodsintothe
holes in the bottom rear hopper tubes.

9
18
17
Assembly
Assembly Step 13
1. Secure the bag frame tube to the lower hopper tubes
using two 1/4 x 1.11” clevis pins (18) and 3/32” hair
pins (17)
Assembly Step 14
1. Snap the sides of the hopper bag to the bottom of the
hopper bag at the front corners.
Assembly Step 16
1. Assemble the upper handle tube (11) to the lower
handle tube (9) using a 1/4 x 1” bolt (16) and knob
(31). Then, assemble the handle grip (27) to the lower
handle tube (9).
Assembly Step 15
1. Starting from the bottom of the bag, secure the hopper
bag to the sides of the bag frame using the velcro
straps (1, 2 and 3). Secure the bag to the top of the
hopper frame using the tie straps (4).
1
2
3
4
4
31
16
11
27
9

10
23
19
30
Assembly
Assembly Step 17
1. Attach the upper handle tube to the rear hopper tube
using a U-clamp (30), 5/16 x 1-1/4” clevis pin (19), and
.08 x 1-1/8” hair cotter pin (23).
Assembly Step 18
1. Insert the bolts on the sweeper bag into the pivot rod
retainers on the bag arms.
TRACTOR HITCH
H"
Assembly Step 19
1. Measure the height of your tractor’s hitch.
Assembly Step 20
1. Arrange the hitch brackets (6,7) according to the
height of your tractor’s hitch. Assemble the hitch
brackets to the drawbar using two 5/16” x 2-1/2” hex
bolts (25) and 5/16” nylock nuts (26).
2. Assemble the hitch pin (33), the two spacers (34), and
the hair cotter pin (21) to the hitch brackets.
21
33
26
34
25
7" - 9"
HITCH
HEIGHT
9" - 11"
HITCH
HEIGHT
11" - 13"
HITCH
HEIGHT
6
7

Installing
11
9 in. - 11 in.
7 in. - 9 in.
11 in. - 13 in.
Installing Step 1
1. Attach the sweeper hitch to the tractor hitch. The
spacers can be arranged in three possible ways to
make the sweeper drawbar as level as possible.
1/2"
Installing Step 2
1. After the sweeper is attached to the tractor, adjust the
sweeper brush height by removing the pin in the
height adjustment lever, and moving the lever to the
desired setting. Brush penetration of approximately
1/2” down into the grass usually provides the best
results.

Operation
Using The Offset Hitch
1. Offset the drawbar to either side if desired. Loosen the
two knobs on the drawbar brackets, slide the drawbar
to the end of the drawbar tube and retighten the knobs.
Dumping the hopper bag
Never attach dump handle to tractor or any part of your
body. Always keep it secured to the sweeper while tractor
is moving. If any part of dump handle should become
damaged, stop use of sweeper and replace the damaged
part.
1. To empty the hopper bag, stop the tractor, turn off the
engine, and pull forward on the dump handle.
2. Avoidoverllingthehopperbag,especiallywhen
sweeping freshly mowed grass of other moist material.
Extremelyheavyloadswillbedifculttodump.
IMPORTANT:Keepsweeperawayfromre.Excessive
heat can damage the brushes and hopper bag and could
cause the bag and its contents to burn.
Adjusting the brush height for sweeping
1. Set the brushes to penetrate approximately 1/2” down
into the grass for most conditions.
Towing the sweeper
1. Tow the sweeper at approximately 3 m.p.h., adjusting
the speed according to conditions to obtain the best
results. Do not exceed 6 m.p.h. maximum speed.
Adjusting the brush height for transporting
1. Remove the pin and move the height adjustment
handle to the “T” position. Replace the pin.
2. Use the transport setting when moving across
pavement or areas you do not want to sweep. Do not
exceed 6 m.p.h. maximum speed.
Removing and Storing
Cleaning the sweeper
1. Clean the sweeper housing with a soft brush or cloth.
2. Clean debris from the hopper bag with a brush or
broom. Leaving debris in
3. Remove any debris that has wrapped around the
brushes or the ends of the brush shaft.
CAUTION: Never store the sweeper without
emptying the hopper bag. Spontaneous
combustion could occur.
12
CAUTION: Maximum towing speed is 6
m.p.h. Driving too fast may cause damage to
wheels and bearings.

John Deere Quality Continues with Quality Service
John Deere provides a process to handle your questions
or problems, should they arise, to ensure that product
quality continues with quality parts and service support.
Follow the steps below to get answers to any
questions you may have about your product.
1. Refer to your attachment and machine operator
manuals.
2. In North America or Canada, call Agri-Fab, Inc.
Customer Service at 1-800-448-9282 and provide
product serial number (if available) and model number.
Service and Troubleshooting
3
4
5
6
7
8
9
1
2
3
2
3
1
1
Wheels skid
when sweeping
• Brushes set too low - Adjust height
till brushes are 1/2" down into
grass.
• Brushes are jammed - Stop
sweeper. Remove obstruction
• Wheels are jammed - Remove one
wheel at a time to check for
obstruction or damage. Refer to
Maintenance section.
Troubleshooting
13
General Maintenance
Lubricate the wheel bearings once a year. Remove hub
cap and apply a few drops of light oil.
Lubricate the brush shaft bearings twice a year with a
few drops of oil.
Clean and lubricate ratchet gears and wheel gears every
two years. Do not remove both wheels at the same time;
parts are not interchangeable.
• Remove hub cap (1), bolt (2), washer (3), wheel (4), step
spacer (8), and nut (9) from axle.
• Remove snap ring (5), ratchet gear (6), and drive pin (7)
from brush shaft.
• Clean brush shaft, drive pin, and outer teeth and inner
teeth on ratchet gear.
• Lightly grease brush shaft and install ratchet gear (6),
drive pin (7) and snap ring (5). Pin must move freely in
shaft.
• Fill inside of ratchet gear with grease and lightly grease
outer teeth.
• Clean gear teeth on wheel and apply a light coat of
grease.
• Lightly grease axle and install wheel (4), washer (3), bolt
(2), step spacer (8), nut (9), and hub cap (1).
Note: Brushes should only move during forward rotation.
If brushes rotate in both directions, drive pin is jamming
the ratchet gear. Disassemble and make sure drive pin
moves freely.
Replace the Brushes
• Remove grass bag. Only loosen bolt and nut on the
single brush retainers (1). Do not loosen double brush
retainer (2).
• Note which side of brush the bristles overlap (3). Slide
brush out.
• Install new brush with bristles overlap (3) as before.

53
54
55
15
17
3
16
18
18
22
23
62
63
4
17
18
18
5
5
17
17
22
17
17
17
58
60
59
56
17
17
18
18
61
57
39
46
44
48
51
53
38
52
50
54
51
42
40
45
45
1
1
65
66
21
38
20
17
15
2
21
6
43
49
20
39
46
47
44
48
41
40
52
50
55
47
64
64
64
64
62
63
7
34
25
26
33
8
9
11
10
12
12
13
13
36
36
14
14
24
32
32
24
19
30
31
27
35
29
37
29
35
28
14
Repair Parts

REF QTY PART NO DESCRIPTION
1 2 27425BLK Drawbar Bracket
2 1 42661 Handle Holder
3 2 42646 Hopper Support Rod
4 1 42020 Bag Frame Tube
5 2 42649 Rear Hopper Tube
6 1 23014 Hitch Bracket
7 1 24192 Hitch Bracket (Straight)
8 1 27421BLK Drawbar
9 1 42648 Lower Handle Tube
10 1 42904 Hopper Bag
11 1 42647 Upper Handle Tube
12 2 27424 Bag Arm
13 2 40897 Lower Hopper Tube
14 2 42539 Upper Hopper Tube
15 5 HA23636 Clevis Pin, 3/8 x 2-1/4"
16 1 43978 Bolt, 1/4-20 x 1"
17 14 43055 Hair Pin, 3/32 x 1.8"
18 6 48365 Clevis Pin, 1/4 x 1.11"
19 1 43259 Clevis Pin, 5/16 x 1-1/4"
20 2 44217 Carriage Bolt, 5/16-18 x 3"
21 2 43343 Hair Cotter Pin, 3/32 x 2-5/16"
22 2 48366 Clevis Pin, 3/8 x 1/2"
23 1 HA3090 Hair Cotter Pin, .08 x 1-1/8"
24 2 42659 Spacer, 3/4"
25 2 44292 Bolt, Hex 5/16-18 x 2-1/2"
26 2 47810 Nut, Nylock 5/16-18
27 1 7071 Handle Grip
28 2 27426 Pivot Rod Support Bracket
29 2 26484 Pivot Rod Retainer
30 1 23878 U-Clamp
31 1 42651 Knob
32 2 43720 Wing Knob
33 1 23353 Hitch Pin
34 2 23368 Spacer
REF QTY PART NO DESCRIPTION
35 2 41036 Compression Spring
36 2 43432 Hex Bolt, 3/8-16 x 2-1/2"
37 1 67634JDG Sweeper Housing
38 2 41035 Dust Cover
39 4 48373 Pop Rivet
40 4 40001 Shim Washer
41 1 48651 Pinion Gear (LH)
42 1 48652 Pinion Gear (RH)
43 2 47046 Dowel Pin, 1/4 x 3/4"
44 2 42094 Retaining Ring
45 2 67407 Bearing Assembly
46 2 44008 Washer, 1-1/8"
47 2 1540-31 Washer, 1-1/4"
48 2 42093 Washer, .598"
49 1 40722 Brush Shaft
50 2 26538 Step Spacer
51 2 141 Washer, 1-1/4"
52 2 1038 Nylock Jam Nut, 3/8"
53 2 41017 Hub Cap
54 2 44961 Hex Bolt, 3/8-24 x 3-1/4"
55 2 40987AY Wheel
56 4 46780 Brush
57 8 43012 Hex Bolt, 1/4-20 x 3/4"
58 12 47189 Nylock Nut, 1/4"
59 4 23580 Brush Retainer (Double)
60 8 23581 Brush Retainer (SIngle)
61 4 43661 Hex Bolt, 1/4-20 x 1"
62 2 712-3008 Jam Nut, 3/8"
63 2 42210 Nylock Jam Nut, 3/8"
64 4 45088 Wheel Bearing
65 1 68539BLK Height Adjustment Tube
66 1 43038 Pivot Lock Pin 3/8" x 1-1/2"
1 41448 Owner's Manual
15
Repair Parts

/