Page is loading ...

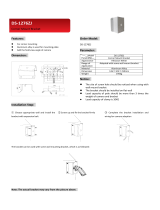
RoboDome10
Outdoor IP Camera housing
with heater and fan
Quick Installation Guide
20280/20100707 RoboDome10
TM
© ALL RIGHTS RESERVED MARMITEK®2008

©MARMITEK
2

SAFETY WARNINGS
x All the safety and operating instructions should be read before the units is operated.
x The wiring of your electrical installation is live (230 V) and extremely dangerous. Never
connect the module when plugged into the mains. Always turn off the main switch
before starting the installation. Precautions for anti-lightning and anti-surging should
be taken if necessary.
x During the course of transportation, storage and installation, the product should be
avoided from incorrect operations such as heavy pressing, strong vibration etc., which
can cause damage of the product as there are sophisticated optical and electronic
devices inside the machine.
x This product is for professional use and should be installed by a certified installer.
x Do not operate it in case temperature, humidity and power supply are beyond the
limited stipulations.
x Do not place this unit on an unstable stand,
tripod, bracket, or mount. The unit may fall,
causing serious injury to a person and
serious damage to the unit. Use only with a
stand, tripod, bracket, or mount
recommended by Marmitek or sold with the
product. Any mounting of the unit should
follow the manufacturer’s instructions and
should use mounting accessory
recommended by manufacturer.
x If necessary, use a commercial lens cleaning
paper to clear the lens windows. Gently wipe
the lens window until clean.
x In case of improper usage or if you have altered and repaired the product yourself, all
guarantees expire. Marmitek does not accept responsibility in the case of improper
usage of the product or when the product is used for purposes other than specified.
Marmitek does not accept responsibility for additional damage other than covered by
the legal product responsibility.
x This product is not a toy. Keep out of reach of children.
RoboDome 10
3

INTRODUCTION
The dome housing of the RoboDome10 is rain and dustproof to protect your IP
RoboCam IP Camera from adverse environment conditions. Constructed from
metal, the dome housing is compact and heavy duty. RoboDome10 has 2
brackets to make it suitable for the installation on different locations. The heater
has two elements so that it can operate as a heater and defroster. Cable entry is
from cable glands located conveniently on the top plate.
THE INSTALLATION OF THE SYSTEM
1. The Style of the Installation
©MARMITEK
4
1) Dimension of the Product
2) The Style of Installation
2.1 ) Wall Installation
2.2 ) Ceiling Installation

2. Steps of Installation (taking wall-installing style as example):
1) Unpack the carton and carefully take out the attachments.
2) Take out the cover of the wall-installed bracket (see Figure 1).
3) Take out system wires from the bracket (see Figure 2).
4) Fix the bracket on the wall (see Figure 3).
5) Rotate the vitreous cover counter clockwise and take it out (see Figure 4).
6) Fix the pedestal in the aluminium alloy ball (Figure 5). Install the ball on the
bracket (Figure 6).
RoboDome 10
5

2.1 Structure diagram of installation (Figure 6):
2.2 Structure diagram of pedestal assembly (Figure 5):
©MARMITEK
6

2.3 Steps to assemble pedestal with IP camera:
Step 1 : Link IP Camera power cord and Ethernet cable
1.1 Pass the IP camera DC jack and Ethernet cable through the dome base:
1.2 Pass the DC Plug through the dome base:
1.3 Seal the rubber (Q7: the sealed rubber) back to the dome base.
Make sure you also pass the power cord for the housing heater and fan through
the sealed rubber.
RoboDome 10
7

Step 2 : Pedestal Assembly
2.1 Fasten the 5cm Hex Nut (Q3: M3 x60) to the base bracket (BR003).
2.2 Fasten the base bracket (BR003) to the dome base with three Flat Head
fasteners (Q1: M4x13).
2.3 Fasten the bracket (BR002) to the Hex Nut of the bracket (BR003) with three
round head fasteners (Q6: M3 x7).
2.4 And then fasten two 3.5cm Hex Nut (Q4: M3 x20) to the bracket (BR002).
©MARMITEK
8

Step 3 : Installation of the IP Camera
3.1 Fix the IP Camera to the upper bracket (BR001).
PS: Please use the IP Camera stand’s Screw
3.2 Connect the IP camera to Power & Network.
3.3 Place the IP camera in the RoboDome10.
RoboDome 10
9

3.4 Fix it to the bracket (BR002) with two round head fasteners (Q6 M3*7)
3.5 Install the dome cover clock-wisely. Assembly finished.
DOME COVER CLEANING
To obtain constant clear videos, user should clean the dome cover periodically.
x Be cautious when cleaning. Hold the dome cover ring only to avoid direct
touch to the acrylic dome cover. The acid sweat mark of fingerprint will
corrode the coating of the dome cover and scratch on dome cover will cause
vague images.
x Use soft dry cloth or the substitute to clean the inner and outer surfaces.
x For hard contamination, use neutral detergent. Any cleanser for high grade
furniture is applicable.
©MARMITEK
10

TECHNICAL SPECIFICATIONS:
General
Input Voltage: 12V DC (included); 15W Dual-element heater is
thermostatically controlled.
Fan: activates at 45°C
deactivates at 30°C
Heater: activates at 5°C
deactivates at 10°C
Construction: Aluminum
Finish: Beige coated
Mounting Bracket: 1x Gooseneck pendent
1x 1 feet straight tube pendent
IP value: IP66
Ambient temperature: -35°C ~ 55°C
Weight Housing 4.2 Kg
Environmental Information for Customers in the European Union
European Directive 2002/96/EC requires that the equipment bearing this symbol on the
product and/or its packaging must not be disposed of with unsorted municipal waste. The
symbol indicates that this product should be disposed of separately from regular household
waste streams. It is your responsibility to dispose of this and other electric and electronic
equipment via designated collection facilities appointed by the government or local authorities. Correct
disposal and recycling will help prevent potential negative consequences to the environment and
human health. For more detailed information about the disposal of your old equipment, please contact
your local authorities, waste disposal service, or the shop where you purchased the product.
RoboDome 10
11

©MARMITEK
12
DECLARATION OF CONFORMITY
Hereby, Marmitek BV, declares that this RoboDome10 is in compliance with the essential
requirements and other relevant provisions of the following Directives:
DIRECTIVE 2004/108/EC OF THE EUROPEAN PARLIAMENT AND OF THE COUNCIL of 15
December 2004 on the approximation of the laws of the Member States relating to
electromagnetic compatibility
Directive 2006/95/EC of the European Parliament and of the Council of 12 December 2006 on the
harmonisation of the laws of Member States relating to electrical equipment designed for use
within certain voltage limits
Directive 2002/95/EC of the European Parliament and of the Council of 27 January 2003 on the
restriction of the use of certain hazardous substances in electrical and electronic equipment
Commission Regulation (EC) No 278/2009 of 6 April 2009 implementing Directive 2005/32/EC of
the European Parliament and of the Council with regard to ecodesign requirements for no-load
condition electric power consumption and average active efficiency of external power supplies
MARMITEK BV - P.O. BOX 4257 - 5604 EG EINDHOVEN – THE NETHERLANDS
Copyrights
Marmitek is a trademark of Pattitude BV
RoboDome10 is a trademark of Marmitek B.V. All rights reserved.
Copyright and all other proprietary rights in the content (including but not limited to model numbers,
software, audio, video, text and photographs) rests with Marmitek B.V. Any use of the Content, but
without limitation, distribution, reproduction, modification, display or transmission without the prior
written consent of Marmitek is strictly prohibited. All copyright and other proprietary notices shall be
retained on all reproductions.

RoboDome 10
13

©MARMITEK
14

RoboDome 10
15

©MARMITEK
16
/