Page is loading ...

Due to continuous research and development the specifications herein are subject to change without notice.
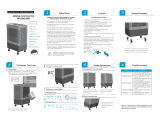
Evaporative Cooler
10 litre
Instructions Manual
Important! Please read these instructions carefully.
CWEC01
CPIN002026/2
CWEC01 Instructions copy.indd 1 15/07/10 2:02 PM

2
3
SAFETY INSTRUCTIONS
• Keep the ice packs (supplied) away from the
children as they contain chemical based
crystals.
• DO NOT use this unit for functions other than
those described in this instruction manual
• DO NOT tilt the unit. Always keep in upright.
Position on a flat and stable surface, where
it cannot be easily knocked over. Take extra
care when operating
• DO NOT cover or obstruct the air filter inlet or
outlet grilles
• DO NOT use the unit in a wet room, such as a
bathroom or laundry
• DO NOT sit or place articles on the unit
• DO NOT touch the unit with wet hands or bare
feet
• DO NOT let chemical substances come into
contact with the unit
• DO NOT use the unit in the presence of
inflammable substances or vapour such as
alcohol, insecticides, petrol etc.
• DO NOT use the mains plug to start and stop
the unit
• DO NOT pull the supply cord or place it near
a heat source. Always unwind the cord
completely to avoid overheating. If the supply
cord is damaged it must be replaced by the
service agent or a similarly qualified person,
in order to avoid a hazard
• DO NOT allow children to play with this
appliance. This appliance is not intended
for use by children or infirm persons without
supervision.
• DO NOT conduct repairs on this unit. It has
been built in accordance with relevant safety
and performance standards. An electrical
specialist must carry out all repairs.
• If the power cord is damaged, it must be
replaced by a qualified electrician
• DO NOT use the unit without the filter fitted
• DO NOT allow objects to enter any ventilation
or exhaust other than ice or water as
specified in these instructions
• This unit is intended for indoor use only.
• ALWAYS unplug the unit from the mains before
maintenance or cleaning
• ALWAYS use the switch on the control panel to
start and stop the unit
• ALWAYS keep a clearance of at least 20cm
from walls furniture and curtains
• ALWAYS turn off and unplug the unit when not
in use
• ALWAYS switch off, and unplug the unit before
filling up with water or ice
• Adequate clean water should be put into
the water tank within the water level limits
shown on the level indicator.
• Should you wish to move the unit any great
distance, or before storing it, always drain the
water from the tank using the plug provided at
the bottom of the unit.
• When draining the water tank always do this
over a bucket, outside so that water does not
damage the carpet or flooring
ENERGY SAVING TIPS
• Use the unit in the recommended room size of
up to 20m
2
(assuming standard 2.4m ceiling
height)
• Do not locate the air conditioner where
furniture or other objects can obstruct the air
flow.
• Keep blinds/curtains closed during the
sunniest part of the day
• Close the fireplace damper, floor and/or wall
registers, so cool air does not escape through
the chimney or duct work
• Keep the air filter clean
• Set the unit to maximum cooling and high
speed ventilation for the initial startup, then
adjust the unit down to a more comfortable
setting as required
CWEC01 Instructions copy.indd 2 15/07/10 2:02 PM

2
3
AIR CONDITIONER
1. Control panel
2. Air inlet filter
3. Cool air outlet
4. Horizontal louvers
5. Vertical louvers
6. Front body
7. Water level indicator
8. Water entrance
9. Caster wheels
10. Carry handle
11. Chiller bottles
12. Remote control
13. Ice Tray Door
1. Timer switch
2. Oscillate switch
3. Mode Switch
4. Power OFF switch
5. Fan Speed Switch
6. Cool switch
7. Power On switch
8. Time indicators – 0.5 Hr, 1 Hr, 2 Hr, 4 Hr
9. Oscillate Indicator
10. Mode indicators :–
1 Normal, 2 Breeze, 3 Circulate
11. Remote sensor window
12. Fan speed indicators :–
low, medium, high
13. Cool indicator
14. Power indicator
IDENTIFICATION
1. Control panel
2. Air inlet filter
3. Cool air outlet
4. Horizontal louvers
5. Vertical louvers
6. Front body
7. Water level indicator
8. Water entrance
9. Caster wheels
12. Remote control
11. Chiller bottles
10. Carry handle
CONTROL PANEL
8.
1. 2. 3. 4. 5. 6. 7.
9. 10. 11. 12. 13. 14.
13. Ice Tray Door
CWEC01 Instructions copy.indd 3 15/07/10 2:02 PM

4
5
OPERATION
Turning ON/OFF
Press the power ‘ON’ button to turn
on and ‘OFF’ button to turn off the
evaporative cooler.
Setting Fan SPEED
Press the speed button to set fan
speed. Press the button repeatedly to
change the fan speed – Low, Medium
and High
Setting the Mode
Change the mode to the desired type
(Normal, Breeze and Circulate) by
pressing the mode switch repeatedly.
Modes Explained
1. Normal mode – The fan speed
remains constant at set speed (Low
or Medium or High). This mode is
recommended normal operation.
2. Breeze mode – The fan speed varies
randomly (Low, Medium, High and off)
giving the effect of natural breeze. It is
recommended to set the fan speed at
high under this mode for better result.
3. Circulate (sleep) mode – The fan
speed switches on and off at set
speeds thus saving energy during
night. It is recommended to set the
fan speed at low under this mode for
quieter performance and less energy
consumption.
* Please make sure sufficient
water is in the storage tank before
operation.
Refer to Storage & Drainage section for
details.
Cool Function
Cool switch is used to operate the
automated water pump system. This
function is recommended for higher/
efficient cooling effect under any
mode.
Oscillate Function
(Regulating air flow direction)
Oscillate function switch is used to
direct the air flow automatically from
horizontally (side to side) by means of
the vertical louvers. This can be done
while the unit is in operation.
To control the air flow direction via
the horizontal louvers adjust louvers
manually (louvers interlocked).
Setting Timer
Set the Timer to the desired operating
time (0.5 Hour to 7.5 Hours) by
pressing the Timer switch repeatedly.
When the set time has been reached
the unit will shut off automatically.
CWEC01 Instructions copy.indd 4 15/07/10 2:02 PM

4
5
Remote Control
• This remote control requires 2 x AAA
alkaline 1.5V batteries.
• To install the batteries, remove
the battery cover then insert the
batteries in right polarities (+/-).
Replace the battery cover before
use.
• The remote control has all the same
functions as the buttons on the
control panel of the air cooler.
• To use the remote control, make
sure that the air cooler unit is
plugged into the mains supply, then
point the remote at the sensor on
the top of the main unit, and press
the desired button.
• The remote control operating range
is 7 meters. It is ideal not to have
any obstacles between the remote
and the sensor.
STORAGE AND DRAINAGE
Sufficient water needs to be stored in
the storage tank (at the bottom of the
unit) to ensure supply of cool air.
Before storing water in the unit, switch
the unit off and unplug from the
mains supply. Water is poured into
the storage tank through the water
entrance on the side of the unit as
shown below to appropriate level
(from the water level indicator in the
front of the unit).
Make sure that the water storage tank
is re-filled once it runs out.
To drain the water when the unit is not
in use.
1. Position a water tray flat on the floor,
beneath the drain hole.
2. Unscrew the drain cap at the bottom
of the unit and then remove the
water plug from the drain hole,
allowing the water to drain out.
(refer to figure below)
3. When the drain tray is almost full
replace the water plug into the drain
hole and empty the tray.
1. Mode
2. Louver Oscillation ON/OFF
3. Power ON
4. Cool ON/OFF
5. Fan Speed
6. Timer OFF
7. Power OFF
1.
2.
3.
4.
5.
6.
7.
Drain cap location
CWEC01 Instructions copy.indd 5 15/07/10 2:02 PM

6
7
Chiller Bottles
The chiller bottles provided with the
unit must be filled with water and must
be allowed to freeze in a refrigerating
unit (in an upright position) prior to
their use in the cooler unit.
Place chiller bottle into the side water
entrance. If desired a length of string
can be attached to bottle cap hook
provided for easier retrieval.
Place bottle in water entrance door and
leave string end out when closing the
door.
Ice Tray
For even more effective cooling, fill the
ice tray, located at the top of the cooler
with cube ice.
Fig 1.
Fig 2.
CWEC01 Instructions copy.indd 6 15/07/10 2:02 PM

6
7
SPECIFICATIONS
Model:
CWEC01
Wattage:
230-240V ~ 50Hz
Input power consumption:
60 Watt
Water Capacity:
10 Litres
Cleaning and Maintenance
• Always switch off and unplug
from the mains supply before
attempting any kind of cleaning and
maintenance.
• After extended period of use, replace
the water in the tank with fresh
water.
• The air filter (only) at the inlet at
the rear of the unit can be cleaned
if required. The foam filter should
be cleaned in a mild soapy solution,
then left to dry before replacing.
• External enclosure can be cleaned
with a damp cloth.
Cleaning the Air Filters
Unplug the power cord. To clean the
sliding air filter remove the ice tray
door out the top of the unit and remove
the sliding air filter from the top.
To clean the rear air filter, loosen the
screw as indicated and remove the air
filter.
In a smoky or dusty environment
the filters may appear gray after 1-2
months and will need to be cleaned. In
conditions without smoke or minimal
dust, the filters to be cleaned every 1-6
months depending on the condition of
the filters.
Wash the air filters with warm soapy
water and a soft brush. Place side
of filters with the light contact agent
facing upwards in the sun for at least
4 hours to re-generate the light contact
agent and re-fit it back in the unit.
Fig 1.
Sliding Air
Filter
Fig 2.
Rear Air
Filter
Loosen
screw
CWEC01 Instructions copy.indd 7 15/07/10 2:02 PM

8
CPIN002026/2
Coolway Guarantee
Coolway guarantees this product against defects
in materials and/or workmanship, under normal
domestic use and conditions for 12 months from
the date of purchase.
Except as otherwise provided for by
Trade Practices Act and State Consumer
Legislation, this guarantee becomes void if, in the
opinion of Coolway:
• The product has been misused or abused
• Used in a commercial application
• Installed incorrectly
• Modified or installed by an unauthorised
person
• Has been damaged in transit subsequent to
purchase
• Connected to electrical supply not
corresponding to the product’s specification
• The product has been used with type of
controller not recommended by Coolway.
If any part of the product proves defective within
the warranty period, such part will be repaired or
replaced free of charge at the discretion of
Coolway.
The purchaser of the fan is to be responsible for:
• Travel costs incurred where service is
requested at premises or at such time outside
normal areas or times as defined by Coolway
or their authorised agent.
• Transport and insurance costs if product or
parts have to be returned for repair or
replacement to Coolway or their authorised
agent.
• Repair of defects not covered by this warranty
To claim under this guarantee, the purchaser
must produce proof of purchase, plus proof of
installation (contractor invoice and contractor
licence number).
For Service enquiries
Phone: (03) 9727 8860
Fax: 1300 360 650
Email: customerservice@coolway.com.au
© This instruction leaflet is subject to copyright and must not be reproduced,
copied or otherwise used in any way or for any purpose without the consent in
writing of the owner.
CWEC01 Instructions copy.indd 8 15/07/10 2:02 PM
/