Page is loading ...

WARNING
!
www.waterco.com.au
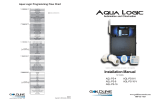
Owner's Manual
ELECTROCHLOR®
Mineral Chlorinator
This equipment must be installed and serviced by a qualified technician.
Improper installation can create electrical hazards which could result in
property damage, serious injury or death. Improper installation will void the
warranty.
Notice to Installer
This manual contains important information about the installation, operation
and safe use of this product. Once the product has been installed this manual
must be given to the owner/operator of this equipment.


SAVE THESE INSTRUCTIONS.
This equipment must be installed and serviced by a qualified technician.
Improper installation can create electrical hazards which could result in
property damage, serious injury or death. Improper installation will void
the warranty.
Electrochlor operates with 240 volts and must be installed by licensed
electricians and must be installed in accordance to the local statutory
authority regulations.
Electrochlor is not intended for use by persons (including children) with
reduced physical sensory or mental capabilities, or lack of experience and
knowledge, unless they have been provided supervision or instruction
concerning use of the appliance by a person responsible for their safety.
Children should be supervised to ensure they do not play with the
appliance.
In certain situations unexpected start up may occur when the appliance
is in automatic mode. The installer should assess the risk associated with
unexpected start-up of any connected device which, in any circumstance
should have no hazardous effect.
The appliance should be supplied through a residual current device (RCD)
having a rated residual operating current not exceeding 30mA.
Parts incorporating electrical components, except remote control devices,
must be located or fixed so that they cannot fall into the spa – pool.
Disconnect all AC power during installation.
Electrochlor should be deactivated if the pool or spa has been drained.
I
03
Electrochlor Mineral Chlorinator
Warning
Warning
Warning
Warning
Warning
Warning
Warning
Warning

GENERAL SAFETY RULES
1. The equipment mentioned in this manual is specially designed for the sanitizing of
water in swimming pools.
2. It is designed to work with clean water at a temperature not exceeding 35°C (95°F).
3. The installation should be carried out in accordance to the safety instructions of
swimming pools especially Standard HD 384.7.702 and the specific instructions for
each facility.
4. The rules enforced on accident prevention should be carefully followed.
5. Any modification of the chlorinator requires the prior consent of the manufacturer.
6. Original replacement parts and accessories authorised by the manufacturer ensure
a high level of safety. The manufacturer accepts no liability for the damage and
injuries caused by unauthorised replacement parts and accessories.
7. During operation, some parts of the chlorinator are subject to dangerous electric
voltage. Work may only be performed on the chlorinator or on the equipment
connected to it after disconnecting them and the starting device from the mains
power.
8. The user should make sure that assembly and maintenance tasks are carried out
by qualified authorised persons and that these persons have first carefully read the
Service and Installation Instructions.
9. The operating safety of the chlorinator is only guaranteed if the Installation and
Service instructions are correctly followed.
10. The limit values stated in the Technical Specifications should not be exceeded under
any circumstance.
11. In the event of defective operation or fault, contact the manufacturer’s Technical
Support Department or its nearest Authorized Agent.
12. If the supply cord is damaged, it shall be replaced by the manufacturer or its service
agent or similarly qualified person in order to avoid a hazard.
13. This appliance is not intended for use by persons (including children) with reduced
physical, sensory or mental capabilities, or lack of experience and knowledge, unless
they have been given supervision or instruction concerning use of the appliance by
a person responsible for their safety.
14. The appliance is not intended for use by young children. Young children should be
supervised to ensure that they do not play with the appliance.
These chlorinators are approved and conformed to AS3136 Swimming Pool Equipment,
as a prescribed article under Australian Registration.
These chlorinators conform to the Australian Electromagnetic Compatibility Standard
marked by the C-tick.
04
IElectrochlor Mineral Chlorinator


2. INTRODUCTION
Consistently maintained sanitiser levels in the pool water will prevent the growth of all
common algae and bacteria. A salt-water chlorinated pool requires much less attention
than a chlorine pool.
A chlorine generator’s main function is to produce chlorine for the pool. This keeps
a residual of chlorine in the pool that prevents algae and bacteria from growing. The
chlorine then turns back into salt and the system continues as long as the generator is
functioning properly.
Through the process of electrolysis, a saline solution passing over an electrolytic cell,
the saline solution is separated into its basic components: chlorine and sodium. The
chlorine is instantaneously transformed into hypochlorous acid; this the chlorine form
that kills algae and other harmful organisms in the water.
About the ELECTROCHLOR
Electrochlor Mineral Chlorinator consists of a Power Pack (power supply) and an
electrolytic salt cell (where the chlorine is produced).
Electrochlor Power Pack
The Power Pack monitors and regulates chlorine production by regulating the amount
of electrical energy supplied to the electrolytic salt cell.
Electrolytic Salt Cell
Waterco’s salt cell consists of a series of titanium electrodes with opposite charges.
Waterco’s clear salt cell housing, is constructed using clear U.V. stabilized acrylic, and
allows visual inspection of the salt cell plates.
Both anode and cathode of the self-clean chlorinator are made from uniquely coated
titanium plates for extra durability.
Self-Cleaning Cell - How it works
The Electrochlor Power Pack powers up the salt cell (anode and cathode) and holds
an electrical potential difference between them for a designated period of time. This
difference is reversed after that period of time has expired and then the anode becomes
the cathode and the cathode becomes the anode.
The reversing of polarity or electrical potential difference will then start to remove any
calcium build-up, which may have been deposited onto the cathode.
This continuous reversing of polarity will keep the cell clean from calcium deposits
during its operation, providing the chemical balance and flow of the pool water thru the
cell is maintained within normal parameters.
06
IElectrochlor Mineral Chlorinator

Electrochlor Main Features
Self-Cleaning
Waterco’s Self Clean Salt Cell has the added ability to reverse the polarity of the voltage
to clean calcium build up off its electrodes.
Battery Backup
The Power Pack comes with a battery incorporated to save your settings in the event
of a power failure.
Pump Protection
In case flow is not detected, Electrochlor will shut down the pump to protect it. It also
displays an alarm indicating the condition.
Salt Alarms
If the salt level is too low or too high, Electrochlor will reduce the output and display
the corresponding alarm. In case of high salt it will record the time it was kept operating
under these conditions.
Dual General Power Outlets (GPO)
Electrochlor provides two GPOs, one for the pool pump and one for the pool light or
any other auxiliary device that needs to be operated under a schedule. Please refer to
the technical specifications for the maximum allowable load of the Electrochlor.
Variable Speed Pump Control
Electrochlor can control a variable speed pump via communication cable. The control
includes switching on/off the pump, and controlling the pump speed. This function of
Electrochlor is only compatible with Waterco’s variable speed pumps.
Control of two Pumps (when variable speed pump is present)
When a Waterco (variable speed) pool pump is connected to Electrochlor using the
pump control cable, the pump can be connected to an independent GPO. This will leave
the pool GPO to be available for a second pump, for example a pressure cleaner pump
or infloor cleaning pump.
Pool Water Temperature Display
Electrochlor includes a temperature sensor that allows the display of the pool water
temperature on the LCD screen.
4 Independent Timers
Electrochlor includes 4 independent timers to control the pump light/auxiliary
equipment and caters for most of the possible operational conditions.
Super Chlorination Function
In this function, Electrochlor will raise chorine production to 100% during a period of
24 hours to Super-chlorinate the pool. After that period the chlorinator will return to its
pre-set operating conditions.
I
07
Electrochlor Mineral Chlorinator

8
IElectrochlor Mineral Chlorinator
Spa Mode/Low Chlorine Output
In this mode, Electrochlor will reduce the chlorine production to 10%, whilst active.
Diagnostic Menu
Electrochlor has a comprehensive diagnostic screen that allows the pool technician/
user to quickly assess the conditions of operation at any time.
Interlocking Functions
Electrochlor can be programmed to activate/control multiple equipment together
including a control valve and define the minimum required water flow for ancillary
functions.
Low Flow Condition
In the event of a “no-flow” condition Electrochlor will increase the pump speed to try
overcome it. If the “no-flow” condition is resolved, the Electrochlor will keep the new
speed to maintain water flow. This feature is only enable when a Waterco variable speed
pumps is installed.

3. INSTALLATION
Ensure that the electrolytic cell is the last piece of equipment installed
on the filtration system – this is so the chlorine produced will not damage
other equipment such as heaters.
The Power Pack should not be mounted in areas where corrosive
chemicals are stored (e.g. acid and chlorine).
The electrolytic cell may be installed above or below water level. If it is
below water level, an isolation valve must be installed so the unit can be
serviced without losing water from the pool.
Installing the Power Pack
Choose a location for the Power Pack close enough to the Cell/Housing and filtration
pump so that both may be connected/disconnected easily. The Power Pack should not
be mounted in areas where chemicals are stored (e.g. acid and chlorine). Also ensure
the Power Pack can be connected to the mains power outlet of the pool area. Note that
this outlet must meet the current applicable local standards at the time of installation.
1. Install the Power Pack in a protected location out of direct sunlight. At top rear of
the control panel locate two keyhole fixing points. Mount two pan head type screws
at 216mm centres using a spirit level on an adequately stable vertical surface. Align
the screw heads with the keyhole fixing points and allow the enclosure to slide down
on the screws.
Warning
Warning
Warning
I
09
Electrochlor Mineral Chlorinator

10
IElectrochlor Mineral Chlorinator
2. To access the Electrochlor for connection of cabling and sensors, there are screw
wells in each corner of the front panel. To open the panel, insert a flat blade screw
driver and half turn anti-clock wise to release the spring loaded locking pin. Ensure
the pins are fully released prior to opening the hinged front panel.
Electrochlor Mineral Chlorinator Power Outlets/Inputs
The Electrochlor has the following input/output connections:
1. A GPO for the pool pump or auxiliary equipment (AUX1) with a maximum current
output of 7.0A and 240V
2. A GPO for a pool light or auxiliary equipment (AUX2) with a maximum current
output of 1.0A and 240V
3. A 24VAC jack socket to supply power to valve actuator with a maximum current
input of 2.0A
4. Provision for 2 cables input/output for a variable speed control cable and for low
chlorine/spa signal cable (dry connection)
POOL PUMP / AUX1 LIGHT LED / AUX2
240V AC 7.0A MAX. 240V AC 1.0A MAX.
JACK SOCKET
24VAC 2.0A IN
Resetable
Fuse

I
11
Electrochlor Mineral Chlorinator
Installing/Connecting Electrolytic Cell
The Cell/Housing assembly should be plumbed into the pool return line after all other
accessories (and prior to any heating take-offs). Note water flow direction on the Cell/
Housing. The Cell will need to be removed from the housing periodically for cleaning –
do not install it where its removal can be difficult/obstructed.
The PUMP socket outlet in the base of the Power Pack is dedicated
to the filtration pump only. Do not use a double adaptor to connect
another pump as this will overload the system and void warranty.
Warning
PLUMBING DIAGRAM
Heat Pump
Water Out
Water By-pass
PUMP
Filter
Water In
From Spa From Pool
3 Way Valve
To Spa
SPA POOL
SPA POOL
Vertical Trap
Check
Valve
ELECTROCHLOR
ELECTROLYTIC CELL
To Pool

The cell must be positioned in such a way as to provide a gas trap. The
bottom of the cell must be above the top surface of the pipe from the
previous piece of equipment, as per the diagram above.
GAS TRAP:
The Electrolytic Cell is connected to Power Pack using the cell cable.
GAS TRAP
40/50mm glued
connections
Sell Clean Requires
Minimum Maintenance
12
IElectrochlor Mineral Chlorinator

I
13
Electrochlor Mineral Chlorinator
Ensure that the 4 connections (3 for cell power and 1 for flow detection) are not loose.
A loose connection is likely to cause arcing, which may damage the entire system.
Power
Connections
Flow Sensor
Cell Connections
Connect all plumbing to the Cell Housing taking care that all joints are
glued or tightened securely to prevent leaking.
Allow 24 hours for glue (solvent) to set before starting the Electrochlor.
NOTE:
NOTE:
Installing Temperature Sensor
1. The pool water temperature sensor should be installed prior to any heater or solar.
2. Immediately after the filter drill a 9.5mm hole in the side of the line as shown in the
image below.
3. Insert the special plug into the hole and rotate home.

14
IElectrochlor Mineral Chlorinator
The sensor should not be installed on top of any pipe work coming from
the pump as it is exposed to sunlight and accidental physical damage
may occur. It should be installed on an inside elbow of the pipe work
(as shown above). This will eliminate heating of the sensor by sunlight
–giving inaccurate readings, and minimise the risk of damage to the
sensor by pool users.
NOTE:
4. Insert the sensor holder by pushing into the plug fully up to the head. This is a tight
fit to ensure sealing. Lubricate with soap if necessary but do not use mineral oil or
grease.
5. Strap lead firmly to pipe to prevent any strain on the sensor holder or lead entry.
Pool Sensor Installation
Incorrect Position
Correct Position

I
15
Electrochlor Mineral Chlorinator
Step 2 – Lift the control housing off the pump to reveal the motor control box.
Step 3 – At the rear of the motor control box drill a 12mm hole at the position indicated
in the drawing below. Use stepped drill bit sizes starting at 4mm and working up to
12mm, otherwise there is a high risk of damaging (splitting) motor control box.
Step 4 – When the hole is drilled remove the locking nut from the cable gland and
thread the cable through the hole so that the plug is now located within the motor
control box. Thread the lock nut over the cable and screw onto the cable gland and
tighten.
Step 5 – Locate the motor control socket on the underside of the control housing and
insert the control cable plug and then reattach control housing to the motor control
housing.
Connection of Communication Cable to Waterco ECO Pumps
Waterco ECO pumps may be purchased with the communication cable fitted. Consult
your local Waterco sales office for order details.
Step 1 – Unscrew the 3 x Philips head screws holding the control housing to the motor.

16
IElectrochlor Mineral Chlorinator
Step 6 – Connect the communication cable the main board of the Electrochlor into the
Waterco ECO pumps socket.
Valve Actuator
The Electrochlor is optimized to operate Waterco FPI valve actuators and should be
installed in consultation with the product installation and operating instructions.
Main Board showing ECO Pumps Socket, Valve Actuator and
Low Chlorine/Pool cover connections.
Valve Actuator
Socket
Variable Speed
Pumps Socket
Low Chlorine/
Pool Cover
Socket

I
17
Electrochlor Mineral Chlorinator
Valve actuator is powered by a 24V AC transformer (sold separately) and connected to
the Electrochlor via the 24 VAC jack input.
Spa Mode/Low Chlorine Output
The Spa Mode/Low Chlorine OUTPUT is a 24V dry contact which is activated when
Spa Mode/Low Chlorine mode is enabled. This socket may be used on compatible
equipment e.g. reducing the chlorination level to the spa whilst in spa mode or when a
pool cover is activated.
This function can also be triggered by Waterco’s Aquamaster, whenever the Spa mode
in activated.
This mode can be activated automatically by connecting a Normally Open (N.O),/
Normally Close (N.C.) contacts directly the chlorinator main board.

18
IElectrochlor Mineral Chlorinator
4. PROGRAMING THE ELECTROCHLOR
a. The Wheel (Rotary Index Switch (RIS))
Located in the upper right side of the Electrochlor Power Pack there is a
wheel that is used to control the instrument. The wheel can be rotated in both
directions to scroll over the menus and/or pressed to confirm a highlighted
selection/value.
Scrolling through menus/options
Making/confirming a selection
Once changes are made press “” or “OK” to save and exit from submenu.
Select “x” or “Exit” to exit without saving.
NOTE:

I
19
Electrochlor Mineral Chlorinator
b. The Screen
Electrochlor LCD screen was designed to present to the user the most critical
information of the operation of the equipment continuously.
The main screen displays the current time, pool temperature, pool pump
status, and chlorine production level (when pump is on) among others.
Note: Please refer to page 46 for icons list and keys.
Digital Clock
Pool Pump ON
Mode
Temperature
Timer 1 ON
Light ON
Chlorine
Production Level

20
IElectrochlor Mineral Chlorinator
c. Switching STANDBY(Off)/ON Pool Pump
Rotate or push the wheel to access menu. Locate the STANDBY/ON option.
Press the wheel to confirm the selection.
d. Operating Modes:
Accessing Electrochlor Modes: rotate or push the wheel to access menu.
Locate the MODE menu. Press the wheel to enter menu.
When selecting STANDBY, Electrochlor switches the pool pump off and
disregards current timer cycle programming. The Electrochlor will resume
normal programming functions with the next timer cycle if AUTO or WINTER
modes are active.
/