Page is loading ...

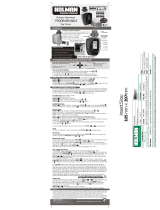
Holman Garden Lights
App Instruction Manual
Android manual
D
E
S
I
G
N
E
D
&
E
N
G
I
N
E
E
R
E
D
A
U
S
T
R
A
L
I
A
N


The LIGHTSOURCE range of lighting is DIY friendly and does
not require an electrician to install.
Install the controller near a 240V AC power point preferably
located in a house, garage, or exterior electrical cubicle. For ease
of operation, eye level placement is recommended. Ideally, your
controller location should not be exposed to rain or areas prone to
flooding or heavy water.
This controller comes with an internal transformer installed in a
weatherproof enclosure. The housing is designed for indoor or
outdoor installation but the power cable needs to be plugged into
an outdoor power point under cover.
Drill a hole suitable for a wall plug and a insert a screw with a
minimum 7mm wide screw-head. Hang the controller over the
screw head using the key hole slot positioned externally on the top
centre of the back of the controller. If your controller requires extra
support you can drill an additional hole and fasten it through the
spare holes positioned internally under the terminal cover.
Mounting the Controller

Ensure you have the compatible cables for your
controller.
RGB Light Controller 4-Pin Plug & Socket cables
White Light Controller 2-Pin Plug & Socket cables
Connect the power cable to an outdoor power
point. Ensure the socket is weatherproof if you
have mounted your controller outdoors.
Ensure the Plug & Socket cable ends are butting
up against each other and the caps are hand
tightened only. An end cap is provided on each
cable to weatherproof the last connector.
Connecting your Lights

Holman
iGardener App
LIGHTSOURCE
Controller
Controller
Power Cable
Plug & Socket
Connection Tee Cable
Plug & Socket
Extension Cable
Deck LightsPath Light
Weatherproof
end cap
screwed on
Spotlight
• Only use lights within one colour system, either RGB (4-Pin cables) or White (2-Pin cables).
• One LIGHTSOURCE controller has 60 watts capacity. Power is consumed by your lights
and also the cable. It is best to connect no more than 55 watts of lights to the controller.
• The LIGHTSOURCE controller has an automatic power overload switch that will turn the
lights off if too much power is being consumed.
Lighting Set up Example
(Connect up to 60W of Lights)
Connecting your Lights

STEP 1
Download the iGardener app from
Google Play.
STEP 2
Ensure your controller is connected to power
and your phone Bluetooth is turned on.
Operating the App
STEP 3
Open the iGardener app and navigate to
Lighting.
For controllers purchased in 2017 and early
2018, select 2017 Controller.
Select 2018 Controller for new models,
which have a New 2018 sticker on the back
of their packaging.

Bluetooth compatible LIGHTSOURCE controllers
are designed to be operated via the HOLMAN
iGardener app. The White Light (CLW60) controller
is manually operated and does not require the app.
Operating the App
Manual OperationBluetooth App Operation

Operating the App
Key Functions
1. HELP
You can access the help page throughout
the app.
2. ADD CONTROLLER
Ensure you have selected a scene (at the
bottom of the screen) and add a lighting
controller using the + button. Follow the
Device Conguration screen
(page 9) to congure your lights.
3. LIGHT CONTROLLER COLOUR
Your initial light colour will be red (if you
connected coloured lights) or white (if you
connected white lights). If you have coloured
lights, press on the coloured dots above
your fader to change the colour using a
colour wheel (page 11). If you are using
white lights, pressing on the white dot
will do nothing as white is the only colour
available.
4. FADER
The rectangle is a fader that allows you to
dim or brighten the light. Set at 100 it will be
the brightest possible. Set at 1 it will be the
dimmest possible. Set at 0 it will be o. Hold
and slide the fader button up or down.
5. CONTROLLER NAMES
AND SETTINGS
Beneath each fader is the name of the light.
Pressing the name will take you to the Edit
My Lights screen (page 10) allowing you to
rename and change settings (auto eects
and light colour) for each controller.
6. ENABLED FEATURES
Fx shows you have an auto eect enabled.
The Bluetooth icon shows you have a
Bluetooth connection to the light/s and
any changes made will take immediate
eect. For example, change the colour from
blue to red and you should see the light/s
immediately change from blue to red.
Note: If the Bluetooth icon is red this indicates you
have NO CONNECTION to the light/s. Any changes
you make will not occur until you are able to establish
a Bluetooth connection.
1
2
3
4
5
6
7
7. SCENES
The large scene boxes are shown at the
bottom of the screen which you can scroll
through horizontally.
The rst scene box is O and if pressed will
turn all the lights o. You will be unable to
access any of the faders in this scene.
Scene 1, Scene 2, Scene 3 and Scene
4 boxes allow you to set up four dierent
lighting congurations (scenes). When you
press a particular scene your light/s will
display as per these fader settings. You will
be able to access and change any of the
faders in this scene.
Beneath each scene box is the name of the
scene. Pressing the name will take you to
the Edit My Scene screen allowing you to
set up the timed operation of your scene.
If a timer is set for a scene a Clock Icon will
appear in the right hand corner of the scene
box.
This screen enables you to manage up to
four light controllers. Each controller can
have up to 60W of lights.

1. NAME
Rename your controller name here.
For example, if the lights connected to
this controller are for your back garden,
you may want to name the controller,
‘Backyard’.
2. FIRMWARE
Shows which rmware version is installed on
your controller.
3. TYPE
This will display the type of light controller
you have connected (Colour or White).
4. DELETE CONTROLLER
You can delete the controller via the Delete
button at the bottom of the screen.
Operating the App
Device Conguration
This screen allows you to congure
your controller.
1
3
4
2

Operating the App
Edit My Lights
1
2
3
4
5
1. NAME
This will display the current light name.
To update this press > to go to the Device
Conguration screen. Note you can also
delete the light from the app in this screen.
2. TYPE
This will display the type of light controller
you have connected - Colour or White.
3. OUTPUT COLOUR
If you have coloured lights, to change the
colour press > to go to the Colour Selector
screen.
If you have white lights there is no > sign as
white is the only colour available.
4. OUTPUT LEVEL
Displays the current level of brightness of
the fader.
5. FX (AUTO EFFECTS)
This will display if Fx have been enabled
or disabled. Press > to go to the Select Fx
screen.
This screen allows you to move to other
screens to control your light(s).

Operating the App
Colour Selector
1
2
3
1. COLOUR WHEEL
Press and rotate the colour wheel to choose
a new colour. The colour chosen will be the
colour underneath the white V at the top of
the wheel and also displayed in the single
box on the bottom left hand side of the
colour wheel.
2. COOL WHITE
It is possible to choose white (cool white) as
a colour. Press on the white box at the top
right hand side of the colour wheel.
3. PRESET COLOURS
To save a colour, tap on the colour shown
in the single box on the left hand side of the
colour wheel. You will see this colour saved
to the rst position of the row of eight colour
boxes underneath the colour wheel (Preset
Colours).
To save more Preset Colours, rotate the
colour wheel to a new colour and tap the
colour in the single box on the left hand
side of the colour wheel again.
To choose a Preset Colour, tap on the
colour to enable it.
When you have nished press Done.
If you press Cancel, anything you have
done on the Colour Selector screen will be
lost. You will return to the My Lights screen
with the previous colour set and if you
have saved any Presets these will not be
remembered.

Operating the App
FX Screen
This screen allows you to set up special
auto eects for your light/s.
1
2
3
1. ENABLE FX
Press the button to enable auto eects.
2. FX SPEED
Choose the speed of the Fx by moving the
bar. Moving it to the right will increase the Fx
speed. Moving it to the left will decrease the
Fx speed.
3. FX TYPE
Choose the desired Fx.
When you have nished press Done.
If you press Cancel anything you have done
on the Select Fx screen will be lost.

4
5
6
Operating the App
Edit My Scene
1
3
Press the button to enable the timer.
1. Press the button to enable the
Start Time.
2. Set the desired Start Time. If a Start
Time has been previously set it will show
that start time otherwise it will show the
default start time. The Start Time will
show in white if the Start Time has been
enabled.
3. Enable/Disable the appropriate days
of the week for the Start Time to
commence.
4. Press the button to enable the
Stop Time.
5. Set the desired Stop Time. If a Stop
Time has been previously set it will show
that stop time otherwise it will show the
default stop time. The Stop Time will
show in white if the Stop Time has been
enabled. Note: The Stop Time applies
to every day of the week. If this scene
is active at the Stop Time then it will be
turned o. Note: If you want the scene to
run continuously disable the Stop Time.
6. When you have nished press Done
(located at the top of the screen).
This screen allows you to set up timed
operation of your light/s.
2
NOTES REGARDING THE TIMER
• If you access the app while a timer is operating then you will override and take control of the lights
and the timer will be automatically stopped and not function again until the next day it is scheduled to
start.
• If you are setting up a start time before the actual time it will not work until the next day. For example
if it is 7pm and you set a start time of 6pm and stop time of 8pm it will not work until the next day at
6pm.
• If you set up the timer for all four scenes to start at the same time then the rst scene fader settings
will be the only ones to display at the appropriate start time.
• If the all the lights are o then the timer will start the lights as per the scene fader settings and then at
the stop time the lights will all turn o.
• If some of the lights are on then the timer will start the lights as per the scene fader settings and then
at the stop time the lights will return to their previous settings.

Troubleshooting
LIGHTS ARE NOT TURNING ON
Ensure the controller is connected to a power point and turned on. Check all Plug & Socket
cables are properly connected. Check that you have not connected too many lights to one
controller – do not exceed 60W. If you are using a Bluetooth controller check the lights are
switched on via the iGardener app.
LIGHTS ARE TOO DIM OR NOT TURNING ON
Connecting excessive lengths of cable will result in wattage loss. Try to use the least length of
cable as possible.
I CAN’T FIND THE APP ON THE GOOGLE PLAY STORE
Use Google to search for the app if it is not available in the Google Play Store.
THE APP DOESN’T RUN ON MY PHONE
The iGardener app is only compatible with Samsung Galaxy 5S and above and Google Pixel.
The app is geo-blocked for China and India so mobile devices purchased overseas may have
trouble connecting.
I CAN’T CONNECT TO THE LIGHTS USING THE APP (DEVICE NOT FOUND OR RED
BLUETOOTH ICON)
1. Ensure you are in Bluetooth range of the controller - stand next to the controller to be sure.
1. If another smart device is already paired to the controller you can either delete the
connection via the app on the other smart device or turn the controller power o,
leave o for at least 5 minutes and then turn the controller power on.
2. The battery life % is too low on your smart device to make a Bluetooth connection.
IT TAKES A LONG TIME TO MAKE A BLUETOOTH CONNECTION TO THE LIGHTS
When starting the app it may take up to one minute or more to make a Bluetooth connection
to your existing lights depending on the type of Android phone you use.
Note: Your ability to connect to your lights using an Android phone is aected by how
Bluetooth runs on your phone. In particular some Android phones use low energy modes
that may aect how fast a Bluetooth connection is made and how close to the controller you
need to be to make a reliable connection

Troubleshooting
Ensure you check for iGardener app updates and keep the app up to date with the latest version.
Not updating your app will limit its functionality.
DECK LIGHTING IS DISPLAYING THE WRONG COLOURS
Ensure the connections are not forced and in the correct position. You must align the plug
and socket correctly.
This may also be a result of too many lights being connected together and not grouped back
to the main line. You may nd that the lights do not display any blue based colours.
LIGHTS FLICKERING AT HIGH SPEED (WITHOUT FX BEING USED)
This may indicate the lights are connected to a dierent controller, an AC controller and not
our DC controller.
LIGHTS FLASHING AT SLOW SPEED (WITHOUT FX BEING USED) (RED FOR A
COLOUR LIGHT OR WHITE FOR A WHITE LIGHT)
This may indicate:
• the light/s need to be added to the app or
• if already added to the app it shows the transformer is overloaded and you need to remove
some lights.
I WANT TO CONTROL THE LIGHTS FROM MORE THAN ONE SMART PHONE/
DEVICE
The app should only be used from one mobile device. If more than one mobile device is
trying to control the lights there may be connection issues.

Warranty
The manufacturer guarantees to the original purchaser that any
product supplied by the manufacturer will be free from defects in
materials and workmanship for a period of two years from the date
of purchase. Any product found to have defects in material
or workmanship within the period of this Guarantee shall be
repaired or replaced by the manufacturer FREE OF CHARGE.
The guarantor does not guarantee the fitness for a particular
purpose of its products and does not make any guarantee,
expressed or implied, other than the guarantee contained
herein. The guarantor shall not be liable for any loss from use of
the product or incidental or consequential damages including
damages to other parts of any installation of which this product
is part.
The guarantee shall not apply to any equipment which is found to
have been improperly installed, set up or used in any way not in
accordance with the instructions supplied with this equipment,
or to have been modified, repaired or altered in any way without
the express written consent of the company. This guarantee shall
not apply to any batteries or accessories used in the equipment
covered under this guarantee or to any damage which may be
caused by such batteries.
If your Controller or Lights develop a fault, the product must
be returned in adequate packing with:
• A copy of your original invoice.
• A description of any fault.
It is the purchaser’s responsibility to return the controller to the
manufacturer or their agent by prepaid freight.
HOLMAN INDUSTRIES
Copyright © 2019 Holman Industries

Contact Us
1300 716 188
www.holmanindustries.com.au
11 Walters Drive, Osborne Park 6017 WA
/