Page is loading ...

®
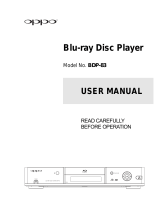
USER MANUAL
READ CAREFULLY BEFORE OPERATION
Blu-ray Disc Player BDP-95


i
Table of Contents
Important Information ............................................................... 1
Important Safety Instructions .................................................................................... 1
Precautions ................................................................................................................. 2
FCC Statement ............................................................................................................ 2
Trademarks ................................................................................................................. 2
Compatible Disc Types ............................................................................................... 3
'LVFVWKDWFDQQRWEHSOD\HG
'LVFFDUHDQGKDQGOLQJ
1RWHVDERXW%'520FRPSDWLELOLW\
Copyright Protection ................................................................................................... 4
5HJLRQPDQDJHPHQWLQIRUPDWLRQ
Accessories ................................................................................................................. 4
INSTALLATION .......................................................................... 5
Front Panel Controls ................................................................................................... 5
Front Panel Display Window ....................................................................................... 5
Rear Panel Connectors ............................................................................................... 6
Remote Control ........................................................................................................... 7
5HPRWH&RQWURO%XWWRQV
%DFN6LGH
%DWWHU\,QVWDOODWLRQ
8VLQJWKH5HPRWH&RQWURO
&KDQJLQJWKH5HPRWH&RGH
Connecting to a Display (Recommended Methods) ................................................. 10
+'0,&RQQHFWLRQWRDVLQJOH79
+'0,&RQQHFWLRQWR7ZR79V
'9,&RQQHFWLRQ
&RPSRQHQW9LGHR&RQQHFWLRQ
Connecting to an Audio System ............................................................................... 14
&RQQHFWLQJWRD5HFHLYHU$PSOLILHUZLWK+'0,,QSXW2XWSXW
&RQQHFWLQJWRD5HFHLYHU$PSOLILHUZLWKFKFK$XGLR,QSXW
&RQQHFWLQJWRD5HFHLYHU$PSOLILHUZLWK'ROE\'LJLWDORU'76'HFRGHU
&RQQHFWLQJWRD6WHUHR$XGLR6\VWHPWKURXJK5&$VW\OH&DEOH
&RQQHFWLQJWRD6WHUHR$XGLR6\VWHPWKURXJK;/5%DODQFHG&DEOH
Connecting to a Display and Audio System using Dual HDMI ................................. 19
Connecting to the Internet ....................................................................................... 20
,QWHUQHWFRQQHFWLRQWKURXJK(WKHUQHWFDEOH
,QWHUQHWFRQQHFWLRQWKURXJKZLUHOHVVDGDSWRU
Custom Installation ................................................................................................... 22

ii
([WHUQDO,5,QIUDUHG5HPRWH,QVWDOODWLRQ
56&RQWURO
Setting Up the Player - Easy Setup Wizard .............................................................. 23
$FFHVVWKH(DV\6HWXS:L]DUG
&KRRVHWKH3ULPDU\9LGHR2XWSXW
6HOHFWWKH%HVW2XWSXW5HVROXWLRQ
'HWHUPLQHWKH'LVSOD\$VSHFW5DWLR
6HOHFWWKH$XGLR6HWWLQJ
&RPSOHWHWKH(DV\6HWXS:L]DUG
BASIC OPERATIONS ................................................................ 28
Disc Playback ............................................................................................................ 28
Fast Playback ............................................................................................................ 28
Pause and Frame-by-Frame ...................................................................................... 29
Slow Playback ........................................................................................................... 29
Blu-ray Disc Menu Playback ..................................................................................... 30
DVD Menu Playback .................................................................................................. 30
On-Screen Display ..................................................................................................... 30
Volume Control ......................................................................................................... 31
Mute ........................................................................................................................... 31
Audio Language/Track Selection ............................................................................. 32
Subtitle Selection ..................................................................................................... 32
Angle Selection ......................................................................................................... 32
Picture-in-Picture and Secondary Audio .................................................................. 33
BD-Live ...................................................................................................................... 33
ADVANCED OPERATIONS ....................................................... 35
TV System Selection ................................................................................................ 35
Output Resolution ..................................................................................................... 35
Zooming and Aspect Ratio Control .......................................................................... 36
=RRP/HYHOVIRU+'0,2XWSXW
=RRP/HYHOVIRU+'0,$QDORJ&RPSRQHQW9LGHR2XWSXW
Subtitle Shift ............................................................................................................. 39
Repeat Playback ....................................................................................................... 39
Repeat a Selected Section ....................................................................................... 40
Shuffle and Random Playback .................................................................................. 40
Playback by Chapter or Track Number .................................................................... 40
Playback from a Specific Location .......................................................................... 41
'9'DQG%OXUD\'LVFV
&'DQG6$&'GLVFV
Memory and Automatic Resume .............................................................................. 43
Viewing Pictures on DVD-Audio Discs ..................................................................... 43

iii
MEDIA FILE PLAYBACK ........................................................... 44
Playback from a USB or e-SATA Drive ..................................................................... 44
The Home Menu ......................................................................................................... 45
Playing Music Files.................................................................................................... 46
Playing Movie Files.................................................................................................... 47
Viewing Photo Files................................................................................................... 48
Adding Background Music ........................................................................................ 49
SETUP MENU OPTIONS ........................................................... 50
Using the Setup Menu System .................................................................................. 50
Playback Setup .......................................................................................................... 53
Video Setup ............................................................................................................... 55
Picture Adjustment ......................................................................................................................... 58
HDMI Options ................................................................................................................................ 61
Audio Format Setup................................................................................................... 63
Audio Signal Reference Chart ....................................................................................................... 66
Recommended Audio Format Options .......................................................................................... 67
Audio Processing Setup ............................................................................................ 69
Speaker Configuration ................................................................................................................... 69
Other Audio Processing Settings ................................................................................................... 73
Device Setup ............................................................................................................. 75
Network Setup ........................................................................................................... 78
REFERENCES ........................................................................... 82
Useful Notes .............................................................................................................. 82
Troubleshooting ........................................................................................................ 82
Specifications ............................................................................................................ 84
User Manual Updates Online .................................................................................... 84
Language Code List .................................................................................................. 85
LIMITED WARRANTY ............................................................... 86
OPPO Digital, Inc. Limited One Year Warranty ........................................................ 86
Pure Audio Mode ....................................................................................................... 43

1
Important Information
CAUTION
RISK OF ELECTRIC SHOCK.
DO NOT OPEN.
CAUTION: TO REDUCE THE RISK OF ELECTRIC
SHOCK, DO NOT REMOVE COVER (OR BACK).
NO USER-SERVICEABLE PARTS INSIDE. REFER
SERVICING TO QUALIFIED SERVICE
PERSONNEL.
The lightning flash with arrowhead symbol, within an
equilateral triangle, is intended to alert the user to the
presence of uninsulated “dangerous voltage” within
the product's enclosure that may be of sufficient magnitude to
constitute a risk of electric shock to persons.
The exclamation point within an equilateral
triangle is intended to alert the user to the
presence of important operation and maintenance
(servicing) instruction in the literature
accompanying the appliance.
WARNING:
TO REDUCE THE RISK OF FIRE OR ELECTRIC SHOCK,
DO NOT EXPOSE THIS APPLIANCE TO RAIN OR
MOISTURE. DANGEROUS HIGH VOLTAGES ARE
PRESENT INSIDE THE ENCLOSURE. DO NOT OPEN
THE CABINET. REFER SERVICING TO QUALIFIED
PERSONNEL ONLY.
THE APPARATUS SHALL NOT BE EXPOSED TO
DRIPPING OR SPLASHING AND THAT NO OBJECTS
FILLED WITH LIQUIDS, SUCH AS VASES SHALL BE
PLACED ON THE APPARATUS.
CAUTION:
DANGER OF EXPLOSION IF BATTERY IS INCORRECTLY
REPLACED. REPLACE ONLY WITH THE SAME OR
EQUIVALENT TYPE.
THIS PRODUCT UTILIZES A LASER. USE OF CONTROLS
OR ADJUSTMENTS OR PERFORMANCE OF
PROCEDURES OTHER THAN THOSE SPECIFIED HEREIN
MAY RESULT IN HAZARDOUS RADIATION EXPOSURE.
DO NOT OPEN COVERS AND DO NOT REPAIR
YOURSELF. REFER SERVICING TO QUALIFIED
PERSONNEL.
CLASS I LASER
PRODUCT
This label is located on the laser protective housing inside the
product.
Important Safety Instructions
1) Read these instructions.
2) Keep these instructions.
3) Heed all warnings.
4) Follow all instructions.
5) Do not use this apparatus near water.
6) Clean only with dry cloth.
7) Do not block any ventilation openings. Install in
accordance with the manufacturer’s instructions.
8) Do not install near any heat sources such as radiators,
heat registers, stoves, or other apparatus (including
amplifiers) that produce heat.
9) Do not defeat the safety purpose of the polarized or
grounding-type plug. A polarized plug has two blades
with one wider than the other. A grounding type plug
has two blades and a third grounding prong. The wide
blade or the third prong is provided for your safety. If
the provided plug does not fit into your outlet, consult
an electrician for replacement of the obsolete outlet.
10) Protect the power cord from being walked on or
pinched, particularly at plug, receptacle, and the point
where it exits from the apparatus.
11) Only use attachments/accessories specified by the
manufacturer.
12) Use only with the cart, stand, tripod,
bracket, or table specified by the
manufacturer, or sold with the
apparatus. When a cart is used, use
caution when moving the
cart/apparatus combination to avoid
injury from tip-over.
13) Unplug this apparatus during lightning storms or when
unused for long periods of time.
14) Refer all servicing to qualified service personnel.
Servicing is required when the apparatus has been
damaged in any way, such as power-supply cord or plug
is damaged, liquid has been spilled or objects have fallen
into the apparatus, the apparatus has been exposed to
rain or moisture, does not operate normally, or has been
dropped.
15) Batteries (battery pack or batteries installed) shall not be
exposed to excessive heat such as sunshine, fire or the
like.

IMPORTANT INFORMATION
2
Precautions
x Before connecting the AC power cord to the
appliance, make sure the voltage designation of the
appliance corresponds to the local electrical supply. If
you are unsure of your power supply, contact your
local power company. The acceptable power input
range is AC ~ 115V/~230V, 50/60Hz.
x The player is still receiving power from the AC power
source as long as it is connected to the wall outlet,
even if the player itself has been turned off.
x Unplug the power cord if you are not going to use the
product for an extended period of time. Hold the
power plug when unplugging. Do not pull on the cord.
x The main plug is used as the mechanism for cutting
off power, therefore make sure it is easy to unplug.
x To ensure proper ventilation around this product, do not
place this product on a sofa, bed or rug. When installing
this product on a wall or bookshelf, you need to provide
appropriate space. We recommend leaving 4 inches
(10 cm) of free space at the top, the sides and the rear.
x High temperature will lead to abnormal operation of this
unit. Do not expose this unit or batteries to direct
sunlight or near other heating objects.
x When moving the player from a cold location to a warm
one, or vice versa, moisture may condense on the laser
pickup unit inside the player. Should this occur, the
player may not operate properly. In such a case please
turn the unit on for 1-2 hours (without a disc) to facilitate
moisture evaporation.
FCC Statement
This equipment has been tested and found to comply with the
limits for a Class B digital device, pursuant to Part 15 of the FCC
Rules. These limits are designed to provide reasonable
protection against harmful interference in a residential installation.
This equipment generates, uses, and can radiate radio frequency
energy and, if not installed and used in accordance with the
instructions, may cause harmful interference to radio
communications. However, there is no guarantee that
interference will not occur in a particular installation. If this
equipment does cause harmful interference to radio or television
reception, which can be determined by turning the equipment off
and on, the user is encouraged to try to correct the interference
by one or more of the following measures:
x Reorient or relocate the receiving antenna.
x Increase the separation between the equipment and
receiver.
x Connect the equipment into an outlet on a circuit different
from that to which the receiver is connected.
x Consult the dealer or an experienced radio/TV technician
for help.
Any unauthorized changes or modifications to this equipment
would void the user’s authority to operate this device.
This device complies with Part 15 of the FCC Rules. Operation is
subject to the following two conditions: (1) This device may not
cause harmful interference, and (2) this device must accept any
interference received, including interference that may cause
undesired operation.
Trademarks
x “Blu-ray Disc”, “Blu-ray 3D”, “BONUSVIEW” and “BD-
Live” are trademarks of Blu-ray Disc Association.
x Java and all Java-based trademarks and logos are
trademarks or registered trademarks of Sun
Microsystems, Inc. in the United States and other
countries.
x DVD Logo is a trademark of DVD Format/Logo
Licensing Corp., registered in the U.S., Japan and
other countries.
x Super Audio CD, SACD and the SACD logo are joint
trademarks of Sony Corporation and Philips Electronics
N.V. Direct Stream Digital (DSD) is a trademark of
Sony Corporation.
x “AVCHD” and the “AVCHD” logo are trademarks of
Panasonic Corporation and Sony Corporation.
x Designed for Windows Media, Microsoft, HDCD, and
the HDCD logo are trademarks or registered
trademarks of Microsoft Corporation in the United
States and/or other countries.
x “480p/720p/1080i/1080p” up-converting arrow logo,
“Source Direct” and “True 24p” logos are trademarks of
OPPO Digital, Inc.
x “Netflix” is a registered trademark of Netflix, Inc.
x “Qdeo” and “QuietVideo” are trademarks of Marvell or its
affiliates.
x Manufactured under license under U.S. Patent #’s:
5,451,942; 5,956,674; 5,974,380; 5,978,762; 6,226,616;
6,487,535; 7,392,195; 7,272,567; 7,333,929; 7,212,872 &
other U.S. and worldwide patents issued & pending. DTS
and the Symbol are registered trademarks, & DTS-HD,
DTS-HD Master Audio | Essential and the DTS logos are
trademarks of DTS, Inc. Product includes software. ©
DTS, Inc. All Rights Reserved.
x Manufactured under license from Dolby Laboratories.
“Dolby” and the double-D symbol are trademarks of
Dolby Laboratories.
x HDMI, the HDMI logo and High-Definition Multimedia
Interface are trademarks or registered trademarks of
HDMI Licensing LLC.
x “DivX” and “DivX Plus” are trademarks of DivX, Inc.
x “Pandora” is trademark of Pandora, Inc.
x All other trademarks are the properties of their respective
owners.

IMPORTANT INFORMATION
3
Compatible Disc Types
Type/Logo Features Manual Icon
%'9LGHR
+LJK'HILQLWLRQ+'PRYLHDQGPXVLFGLVFV
%'520DQG%'5(%'5GLVFVLQ%'09DQG%'$9PRGHLQFOXGLQJFP
GLVFVVLQJOHOD\HUDQG'/GLVFV
TM
'LVFVVXSSRUWLQJ'%OXUD\FRQWHQWVSOD\EDFN'FRPSDWLEOH
GLVSOD\VDQGDFWLYHVKXWWHUJODVVHVDUHUHTXLUHGIRUIXOO'PRYLHH[SHULHQFH
'LVFVVXSSRUWLQJ%2186VIEWWKDWDOORZV9LUWXDO
SDFNDJHVRU3LFWXUHLQ3LFWXUHIXQFWLRQVWREHXVHG
'LVFVVXSSRUWLQJ%'/LYH%'520YHUVLRQ3URILOHWKDWSURYLGHV
LQWHUDFWLYHIHDWXUHVZKHQWKHSOD\HULVFRQQHFWHGWRWKH,QWHUQHW
'9'9LGHR
+LJKTXDOLW\PRYLHDQGPXVLFGLVFV
&RPPHUFLDOO\UHOHDVHG'9'GLVFV'9'5:'9'5'9'5:'9'5LQ
'9'9LGHRIRUPDWILQDOL]HG
'9'$XGLR
0XOWLFKDQQHORUVWHUHRKLJKUHVROXWLRQDXGLRZLWKFRPSUHVVHGGLJLWDOYLGHRRU
VWLOOSLFWXUHV6RPH'9'$XGLRGLVFVDOVRFRQWDLQD'9'9LGHRSRUWLRQ
'9'$
6XSHU$XGLR&'
6$&'+LJKUHVROXWLRQDXGLRRQO\GLVFZLWKVWHUHRDQGRUPXOWLFKDQQHODXGLR
+\EULGGLVFZLWKERWKKLJKUHVROXWLRQDQG&'FRPSDWLEOHOD\HUV
6$&'
&'
&RPSDFW'LVFV&'WKDWFRQWDLQDXGLRWUDFNV
$9&+'
+LJKGHILQLWLRQGLJLWDOYLGHRFDPHUDIRUPDWXVLQJHIILFLHQWGDWDFRPSUHVVLRQ
FRGLQJWHFKQRORJ\
Discs that cannot be played
x %'VZLWKFDUWULGJH
x '9'5$0V
x +''9'V
x 'DWDSRUWLRQRI&'([WUDV
x %'9LGHR'9'9LGHRZLWKDGLIIHUHQWUHJLRQFRGH
x 6RPH'XDO'LVFV$'XDO'LVFLVDWZRVLGHGGLVFZLWK
'9'RQRQHVLGHDQGGLJLWDODXGLRRQWKHRWKHUVLGH7KH
GLJLWDODXGLRVLGHGRHVQRWPHHWWKHWHFKQLFDO
VSHFLILFDWLRQVRIWKH&RPSDFW'LVF'LJLWDO$XGLR&''$
IRUPDWVRSOD\EDFNLVQRWJXDUDQWHHG
x 0XVLFGLVFVHQFRGHGZLWKFRS\ULJKWSURWHFWLRQ
WHFKQRORJLHVLIWKHGLVFVGRQRWFRQIRUPWRWKH&'
VWDQGDUGWKH\PD\QRWEHSOD\DEOHRQWKLVSOD\HU
Disc care and handling
x 7RNHHSWKHGLVFFOHDQIURPVFUDWFKHVRUILQJHUSULQWV
KDQGOHWKHGLVFE\LWVHGJH'RQRWWRXFKWKHUHFRUGHG
VXUIDFH
x %OXUD\'LVFVUHFRUGGDWDLQYHU\KLJKGHQVLW\DQGWKH
UHFRUGHGOD\HULVYHU\FORVHWRWKHGLVFVXUIDFH)RU
WKLVUHDVRQ%OXUD\'LVFVDUHPRUHVHQVLWLYHWRGXVW
DQGILQJHUSULQWVWKDQ'9'6KRXOG\RXHQFRXQWHU
SOD\EDFNSUREOHPVDQGVHHGLUW\VSRWVRQWKHGLVF
VXUIDFHFOHDQWKHGLVFZLWKDFOHDQLQJFORWK:LSHWKH
GLVFIURPWKHFHQWHURXWDORQJWKHUDGLDOGLUHFWLRQ'R
QRWZLSHWKHGLVFLQDFLUFXODUPRWLRQ
x 'RQRWXVHUHFRUGFOHDQLQJVSUD\VRUVROYHQWVVXFKDV
EHQ]HQHWKLQQHUDQGDQWLVWDWLFVSUD\
x 'RQRWDWWDFKODEHOVRUVWLFNHUVWRGLVFVDVWKLVPD\
FDXVHWKHGLVFWRZDUSEHFRPHLPEDODQFHGRUWRRWKLFN
UHVXOWLQJLQSOD\EDFNSUREOHPV
x $YRLGH[SRVLQJWKHGLVFVWRGLUHFWVXQOLJKWRUKHDW
VRXUFHV
x 'RQRWXVHWKHIROORZLQJGLVFV
o 'LVFVZLWKH[SRVHGDGKHVLYHIURPUHPRYHGVWLFNHUV
RUODEHOV7KHGLVFPD\JHWVWXFNLQVLGHWKHSOD\HU
o :DUSHGRUFUDFNHGGLVFV
o ,UUHJXODUO\VKDSHGGLVFVVXFKDVKHDUWRUEXVLQHVV
FDUGVKDSHV

IMPORTANT INFORMATION
4
Notes about BD-ROM compatibility
6LQFHWKH%OXUD\'LVFVSHFLILFDWLRQVDUHQHZDQGHYROYLQJVRPHGLVFVPD\QRWSOD\SURSHUO\GHSHQGLQJRQWKHGLVFW\SHYHUVLRQ
DQGHQFRGLQJ,WLVSRVVLEOHWKDWD%OXUD\GLVFPDQXIDFWXUHGDIWHUWKHSOD\HUZDVPDQXIDFWXUHGXVHVFHUWDLQQHZIHDWXUHVRIWKH
%OXUD\'LVFVSHFLILFDWLRQV7RHQVXUHWKHEHVWSRVVLEOHYLHZLQJH[SHULHQFHWKHSOD\HUPD\QHHGDILUPZDUHRUVRIWZDUHXSGDWH
IURPWLPHWRWLPH3OHDVHYLVLW2332'LJLWDO¶VZHEVLWHZZZRSSRGLJLWDOFRP
WRFKHFNLIXSGDWHVDUHDYDLODEOH
Copyright Protection
7KLVSURGXFWLQFRUSRUDWHVFRS\ULJKWSURWHFWLRQWHFKQRORJ\WKDWLVSURWHFWHGE\86SDWHQWVDQGRWKHULQWHOOHFWXDOSURSHUW\ULJKWV8VHRIWKLV
FRS\ULJKWSURWHFWLRQWHFKQRORJ\PXVWEHDXWKRUL]HGE\0DFURYLVLRQ&RUSRUDWLRQDQGLVLQWHQGHGIRUKRPHDQGRWKHUOLPLWHGYLHZLQJXVHV
RQO\XQOHVVRWKHUZLVHDXWKRUL]HGE\0DFURYLVLRQ&RUSRUDWLRQ5HYHUVHHQJLQHHULQJRUGLVDVVHPEO\LVSURKLELWHG
Region management information
7KLVSOD\HULVGHVLJQHGDQGPDQXIDFWXUHGWRUHVSRQGWRWKHUHJLRQPDQDJHPHQWLQIRUPDWLRQ,IWKHUHJLRQQXPEHURID%'9LGHR
RU'9'GLVFGRHVQRWFRUUHVSRQGWRWKHUHJLRQQXPEHURIWKLVSOD\HUWKLVSOD\HUFDQQRWSOD\WKHGLVF
%'9LGHR7KLVSOD\HUSOD\V%'9LGHRZLWKPDUNVFRQWDLQLQJWKHUHJLRQFRGH$
'9'9LGHR7KLVSOD\HUSOD\V'9'9LGHRZLWKPDUNVFRQWDLQLQJWKHUHJLRQFRGHDQG$//
Accessories
3OHDVHFKHFNWKDWWKHIROORZLQJSDUWVDUHLQFOXGHGLQ\RXU%'3SDFNDJH
2QH8VHU0DQXDO
2QHIRRW+'0,&DEOH
2QH86%W\SH:LUHOHVV1$GDSWHUXSWR
0ESVEJQFRPSDWLEOH*+]
2QH86%([WHQVLRQ&DEOHDERXWIHHW
2QH3RZHU&DEOHDERXWIHHW
2QH5HPRWH&RQWUROZLWK2QH3DLURI
$$%DWWHULHV

5
INSTALLATION
Front Panel Controls
1 32 4 5 6 7 8
1. POWER Button
2. POWER Status
Indicator
3. Front Panel Display
Window
4. Disc Tray
5. OPEN/CLOSE Button
6. IR Sensor Window
7. Playback Control and
Navigation Buttons
8. USB 2.0 Port
Front Panel Display Window
3
4
5
6
7
8
15
14
12
17
11
9
10
2
16
1
13
1. Audio Type Indication – Indicates the type of audio
tracks being played
2. Mute Icon – Indicates that the audio is muted
3. Title – When illuminated, the displayed time applies to
a title
4. Group – When illuminated, the displayed time applies
to a group
5. Chapter – When illuminated, the displayed time applies
to a chapter
6. Track – When illuminated, the displayed time applies to
a track
7. Total – When illuminated, the displayed time is the total
play time
8. Remaining – When illuminated, the displayed time is
the remaining play time
9. Audio Channel Indication – Indicates whether the audio
being played is 2ch stereo or multi-channel surround
10. Playback Status – Indicates playback status such as
Play, Pause, Repeat, Repeat All, Random/Shuffle, and A-
B Repeat
11. Internet – Indicates the internet is being accessed
12. Ethernet – Indicates that an active Ethernet cable is
attached
13. Wireless – Indicates a Wireless hotspot is connected
14. HDMI Indication – Indicates the active HDMI output(s)
15. Angle Icon – Indicates that the scene contains additional
camera angle(s)
16. Disc Type – Indicates the type of the disc that is playing
17. Main Display – Text messages and numeric display

INSTALLATION
6
Rear Panel Connectors
1 4 5 6 7 9 10
11
12
13
3
2
8
1. Ethernet LAN Port
2. HDMI 2 Output (3D Compatible)
3. Balanced Stereo Audio Output
4. Composite Video Output
5. Component Video Outputs
6. IR IN Port
7. USB 2.0 Port
8. Stereo Audio Output
9. e-SATA Port
10. HDMI 1 Output (3D Compatible)
11. Coaxial and Optical Digital Audio
Output
12. RS-232C Port
13. 7.1ch / 5.1ch / Stereo Audio
Output
In addition to the above connectors, the AC power inlet and the AC voltage switch are also located on the rear
panel. The inlet is the IEC60-320 C14 type. The AC voltage switch can be manually adjusted to work at
100V~120V (labeled as ‘115’) or 200V~240V (labeled as ‘230’), please flip the switch according to your power
line AC voltage. Only the included AC power cord or an approved power cord with an IEC60-320 C14 type
plug should be used.

INSTALLATION
7
Remote Control
Remote Control Buttons
1
2
3
4
5
6
7
8
9
10
11
2
12
13
14
15
16
17
18
19
20
21
22
23
24
25
26
27
28
29
30
31
32
33
34
35
36
37
38
1. POWER: Toggle power
STANDBY and ON
2. ON/OFF: Discrete on/off
power buttons
3. PURE AUDIO: Turn
off/on video
4. NUMBER Buttons: Enter
numeric values
5. CLEAR: Clear numeric
input
6. TOP MENU: Show BD
top menu or DVD title
menu
7. ARROW and ENTER
Buttons: Navigate menu
selection
8. SETUP: Enter the
player Setup Menu
9. COLOR Buttons:
Function varies by
content
10. PLAY: Start playback
11. STOP: Stop playback
12. REV: Fast reverse play
13. PREV: Skip to previous
14. SUBTITLE: Change
subtitle language
15. AUDIO: Change audio
language or channel
16. SAP: Turn on/off
Secondary Audio
Program
17. A-B REPLAY: Repeat
play the selected
section
18. RESOLUTION: Switch
output resolution
19. SOURCE: Select the
internet media or
application source
20. OPEN: Open/close the
disc tray
21. P/N: Switch output TV
system: NTSC, PAL or
MULTI
22. DIMMER: Dim the front
panel display
23. VOLUME +/-:
Incre
ase/Decrease
volume
24. MUTE: Mute audio
25. HOME: Go to Home
Menu to select media
source
26. PAGE UP/DOWN:
Show the previous/next
page
27. GOTO: Play from a
specified location
28. DISPLAY: Show/hide
the On-Screen Display
29. POP-UP MENU: Show
BD pop-up menu or
DVD menu
30. RETURN: Return to the
previous menu or mode
31. PAUSE: Pause
playback
32. FWD: Fast forward play
33. NEXT: Skip to the next
34. ANGLE: Change the
camera angle
35. ZOOM: Zoom in/out
and adjust aspect ratio
36. PIP: Show/hide the
Picture-in-Picture
37. REPEAT: Repeat play
38. LIGHT: Activate the
back light for the
remote control
NOTE
When a button is pressed but its function is invalid or unavailable at the moment, the TV
screen displays a circle with a diagonal line:

INSTALLATION
8
Back Side
1
2
3
4
5
With Battery Cover Battery Cover Removed
1. Index Finger Notch 1: When your index finger is
placed at this notch while holding the remote control,
your thumb is within easy reach of the navigation
buttons (ARROW, ENTER, TOP MENU and POP-
UP MENU).
2. Index Finger Notch 2: When your index finger is
placed at this notch while holding the remote control,
your thumb is within easy reach of the playback
control buttons (STOP, PLAY, PAUSE, PREV,
NEXT, REV, FWD).
3. Battery Cover: Remove to replace batteries or set
remote code.
4. Batteries: Use (2) size AA or LR6 batteries.
5. Remote Code Switch: Adjust the position of the
switch to set the remote control to use the indicated
remote code (see details on page 9).
Battery Installation
1. Remove the battery
compartment cover
2. Insert batteries
3. Replace the battery
compartment cover
Using the Remote Control
When using the remote control, the front window of the remote control should be pointed to the infrared sensor
on the front panel within an angle of ±30° and a range of about 26 ft.
Within about 26ft

INSTALLATION
9
Changing the Remote Code
The remote control supports one of three remote codes. The default is “Code 1”. If you have other OPPO
products placed close to the BDP-95, they may inadvertently respond to the BDP-95 remote control. In this
case you can select a different remote code to avoid conflicts.
To select a new remote code, open the battery compartment cover of the remote control, and then use a ball
point pen to flip the switch to one of the positions marked as “1”, “2”, or “3”. Close the battery compartment
cover. Make sure that the BDP-95 player is turned on and the disc tray is ejected. Aim the remote control at
the player. Press and hold the ENTER button for 5 seconds. The player will start using the new remote code.
Remote Code Switch
Battery Compartment
CAUTIONS
x Never drop the remote control or expose it to moisture.
x Never expose the infrared remote sensor on the front panel to direct sunlight or other
strong light sources.
x Remote may not operate consistently when batteries become low. Replace them if
operation deteriorates.
x If the remote control will not be used for a long time, please remove the batteries.
x Use the batteries correctly to avoid possible leakage and corrosion. Do not leave the
batteries exposed to direct sunlight or high temperature environment for a long
period of time. Do not heat or expose to flame. Do not mix old and new batteries.
Do not use batteries of different types at the same time. Do not attempt to recharge
the batteries.
x If battery leakage occurs, do not touch the liquid with bare hands. Wipe out any
liquid inside the battery compartment, and insert new batteries.

INSTALLATION
10
Connecting to a Display (Recommended Methods)
HDMI Connection to a single TV
HDMI Cable (to HDMI 1 or 2)
Composite Video Cable (Optional)
HDMI In
Video In
Rear Panel
Method 1 – HDMI Connection Directly to a single TV
x If your TV has an HDMI (High-Definition Multimedia Interface) input, you can use the included
HDMI cable to connect the player to the TV. This connection method delivers both video and
audio in a pure digital format via a single cable. The HDMI video output of the player allows for
the highest possible video quality and resolution.
x There are two HDMI output terminals (HDMI 1 and HDMI 2) on the rear panel of BDP-95, both
of which can be connected to your TV. We recommend to use HDMI 1 since it benefits from the
dedicated Marvell QDEO video processor, and set the “Primary Output” option in the setup
menu to “HDMI 1” (please refer to page 55 for more details).
x You may connect the composite video cable (not included) to the TV for troubleshooting
purposes, in the event that there is a problem with HDMI video. However it is not
recommended to use the composite video as the primary method of video delivery to the TV,
because it only produces a standard definition video signal and forfeits the advantage of high
definition video.

INSTALLATION
11
HDMI Connection to Two (2) TVs
Composite Video Cable
(optional)
Rear Panel
HDMI In
Video In
HDMI In
Video In
HDMI Cables
TV 1
TV 2
Method 2 –HDMI Connection Directly to two TVs
x The two HDMI outputs (HDMI 1 and HDMI 2) available on the rear panel of BDP-95 can be
connected to two TVs at the same time, and each output can deliver the digital video and audio
signals.
x We recommend to connect your main TV (the one with larger screen size or the one that you
would watch more often) to HDMI 1 thus to benefit from the dedicated video processor, and set
the “Primary Output” option in the setup menu to “HDMI 2” to make sure that the HDMI 2 can
output high bit rate audio signals (please see more details on page 55).
x You may connect the composite video cable to one of your TVs for trouble-shooting purpose,
please refer to page 10 for more details.

INSTALLATION
12
DVI Connection
HDMI
(from HDMI 1 or 2)
- DVI Cable
Composite Video Cable
(optional)
Video In
Rear Panel
DVI
Audio
Audio Cable
DVI
Method 3 – DVI Connection to TV
x If your TV has a DVI input that supports HDCP*, you can purchase an HDMI-DVI adapter cable
to connect the player to the TV. This connection method delivers digital video to the TV without
any signal degradation. The HDMI video output of the OPPO Blu-ray Disc player presents the
highest possible video quality and resolution. We recommend to use HDMI 1 since it can
benefit from the dedicated video processor, and set the “Primary Output” option in the setup
menu to “HDMI 1” (please see more details on page
55).
x P
lease use the Red/White audio cables (not included) to connect the STEREO AUDIO OUT
terminals of the player to the TV. Make sure the audio cables are connected to the same input
terminal group on the TV as the DVI input. Usually the input terminals are marked as “DVI
Audio” or “PC Audio”. On some TVs you may need to use an RCA-3.5mm Mini-Jack adapter
cable to connect the audio.
x You may connect the composite video cable to the TV for trouble-shooting purpose
, please
refer to page 10 for more details.
*NOTE
HDCP stands for High-bandwidth Digital Content Protection. The HDMI output of the OPPO
Blu-ray Disc player uses HDCP to encrypt the digital audio and video content. The TV needs
to support HDCP so it can decrypt the content and properly display it.

INSTALLATION
13
Component Video Connection
Component
Video Cables
R
ear
P
ane
l
Y
Pb/Cb
Pr/Cr
Audio
Audio Cable
Component
Video
Method 4 – Component Video Connection to TV
x If your TV has no digital video input but has component video inputs, please use a set of
component video cables to connect the component video output of the player to the TV, and
remember to set the “Primary Output” option in the setup menu to “Analog” (please see more
details on page 55). The connectors are color coded, so please make sure the cable
connections match on both ends. The component video connection will produce a very clear
picture with high color accuracy.
x Please use
the
Red/White audio cables to connect the STEREO AUDIO OUT terminals on the
rear panel of the player to the TV. Make sure the audio cables are connected to the same input
terminal group on the TV as the chosen component video input.
x If the “Primary Output” option in the “Video Setup” section of the Setup menu is set to “HDMI
1” or “HDMI 2” (see page 55 for details), the component video connection will not output video
when playing a Blu-ray Disc with 1080p 24Hz content, or will only output video
with a
low
resolution (480i/576i) when playing a DVD. This is not a malfunction. You must set “Primary
Output” to “Analog” in order to properly use the component video connection.
x When playing a Blu-ray Disc, video resolution over the component output can be up to 1080i.
1080p content will be interlaced into 1080i signal for the component output.
x Video up-conversion over the component output is only available for unencrypted discs such as
home video and consumer-created contents. Most commercially pressed DVD discs are CSS-
e
ncrypte
d and will be limited to 480i/480p resolution. This restriction applies to the component
output only. The HDMI output is protected with HDCP and has no such restriction.
x You may connect the composite video cable to the TV for trouble-shooting purpose, please
refer to page 10 for more details.

INSTALLATION
14
Connecting to an Audio System
Connecting to a Receiver/Amplifier with HDMI Input/Output
HDMI Cable
HDMI Cable
(to HDMI 1 or 2)
HDMI In
Rear Panel
HDMI InHDMI Out
AUDIO/VIDEO MULTI- CHANNEL
RECEIVER
Method 5 – HDMI Connection to Receiver and TV
x If you have an HDMI-capable receiver that can support HDMI audio, you can simply run an
HDMI cable from the player to your receiver and enable HDMI audio on the receiver (see your
receiver’s owners’ manual for more information). The receiver usually has an HDMI output that
you can connect to your TV to pass the video signal.
x Either of the HDMI output terminals (HDMI 1 and/or HDMI 2) on the rear panel of the BDP-95
can be connected to your receiver. Preference should be given to HDMI 1 for video since it’s the
only output on the machine to benefit from the superior Marvell QDEO video processing solution,
and set the “Primary Output” option in the setup menu to “HDMI 1” (please refer to page 55).
NOTE
HDMI is a single cable that can transport both audio AND video from your player to your display.
Be aware, however, that HDMI is an evolving standard, and there could be compatibility issues. A
receiver that supports audio input over HDMI is required. Some receivers offer HDMI ports solely
for video switching. If your receiver does not have audio input capability, please read the following
sections regarding other connection methods.
In order to play multi-channel audio for all formats, the receiver must support HDMI v1.1 or later.
For Blu-ray Disc, a receiver that supports HDMI v1.3 with decoding capability for Dolby TrueHD
and DTS-HD Master Audio is preferred. Please check the specifications of your receiver to ensure
that it meets the requirements.
The HDMI outputs on the BDP-95 are HDMI v1.4, which is compatible with HDMI v1.3 and earlier
versions.

INSTALLATION
15
Connecting to a Receiver/Amplifier with 7.1ch/5.1ch Audio Input
Audio Interconnect Cables
Rear Panel
AUDIO/VIDEO MULTI- CHANNEL
RECEIVER
Receiver/Amplifier with 7.1ch Audio Input
FRONT SURROUND SUBWOOFER S. BACK
L
R
L
R
L
R
CENTER
Method 6 – 7.1ch Analog Audio Connection
x Please use 8 RCA-style audio interconnect cables (not included) to connect the FL (Front Left),
FR (Front Right), SL (Surround Left), SR (Surround Right), C (Center), SW (SubWoofer), SBL
(Surround Back Left) and SBR (Surround Back Right) analog output terminals of the OPPO Blu-
ray Disc player to the corresponding multi-channel analog audio input jacks of your A/V receiver
or amplifier.
x If the A/V receiver or amplifier only has 5.1ch audio input, do not connect the SBL (Surround
Back Left) and SBR (Surround Back Right) terminals.
/