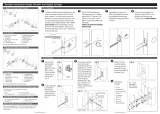
Baldwin 85345.003.LENT Installation guide

Type
Installation guide
H1705.000.00015A
© 2005 BALDWIN HARDWARE CORPORATION, READING, PA, U.S.A.
2-POINT TUBULAR LOCK
INSTALLATION INSTRUCTIONS
TOOLS REQUIRED
1. Pencil
2. No. 2 and No. 3 Phillips Head Screwdrivers
3. No. 1 and No. 2 Slotted Screw Drivers
4. 1/8" Allen Head Wrench
5. 3/4" Wood Chisel or Corner Chisel
6. Measuring Device
7. Lock Face Template
8. Combination Square
9. Awl
10. Drill & Assorted Bits: 1/8", 5/32", 3/4", 1", 2-1/8"
11. Screw Wax or Soap
12. Powdered Chalk or Graphite
NOTE: In order to successfully install a tubular lock and trim, a minimum of average skill level is required with use of the
above listed tools. Backset is located from low side of beveled door, please adjust accordingly for non-beveled doors.
Read and understand the provided instructions BEFORE attempting to mark or cut the door and/or frame. If there are any
questions before you begin installation, phone or visit your nearest Baldwin Distributor or contact the Technical Service
Department at Baldwin at 1-800-437-7448.
INSIDE
Diagram A
OUTSIDE
THRU-
BOLTING
Fasteners
#10-32 x 2-5/8” PAN
HEAD SCREW
SCREW
BASE
LATCH
ASSEMBLY
DEADBOLT
ASSEMBLY
INTERIOR
SUBASSEMBLY
EXTERIOR
SUBASSEMBLY
DEADBOLT
CYLINDER
CYLINDER
SCREWS
Thru-bolting shown is for 1-3/4"
to 2” thick doors
CYLINDER
RING
CYLINDER
COLLAR
TURNPIECE
MOUNTING
SCREWS
KNOB
LEVER
***
THIMBLE
MOUNTING
SCREWS
SET SCREW
SCREW
COVER
THRU-
BOLTING
DOOR PULL
#8-32 x 3/4" FLAT
HEAD
COMBINATION
SCREW
#10-32 x 2-1/2” FLAT
HEAD SCREW
#10-32 x 1-1/4” FLAT
HEAD SCREW
#8-32 x 3/4
OVAL HEAD
SCREW
#6-32 x 7/16
OVAL HEAD
SCREW
SHOWN ACTUAL SIZE
*** MAY COME PREASSEMBLED
WAVE
WASHER
STYLE SHOWN
:
ASHTON
LANDON
H1705.000.00015A
© 2005 BALDWIN HARDWARE CORPORATION, READING, PA, U.S.A.
1
DETERMINE HOLE LOCATIONS &
MARK THE DOOR
For non-prepped
doors: Mark the door
at 38" above finished
floor. Fold the paper
template and tape in
place at the centerline
of the lower 2-1/8"
hole (C). Determine /
Mark the backset &
all other hole
locations per the
purchased style.
For factory prepped
doors: Align template
to existing holes and
mark the lower 2-1/8”
hole (C) and
appropriate door pull
location (D).
SHOWN
ACTUAL SIZE
2
DRILL 2 POINT LOCK &
DEADBOLT HOLES
For non-prepped doors:
Remove the paper template. Using a 2-1/8"
hole saw, bore the deadbolt (A) and 2 point
lock (B & C) holes at the marked locations.
For factory prepped door:
Only drill the lower 2-1/8” hole (C) and skip
to Step 6.
3
DRILL EDGE HOLES FOR LATCH
& DEADBOLT
Using the 1" spade bit, drill into the door
edge at the marked locations.
** Do not drill into lower 2-1/8” hole (C) **
See below for depth.
2-3/8" BACKSET: 3-1/2" DEPTH
2
-
3/4"
BACKSET:
3
-
7/8" DEPTH
4
SCORE FACEPLATE CHISEL
GUIDES
Insert the deadbolt and latch assemblies
into the door. Using a utility knife, carefully
score around the faceplates of each
assembly.
5
CHISEL FACEPLATE CAVITIES
Remove the deadbolt and latch assemblies.
Chisel faceplate cavity 5/32" deep.
6
DRILL DOOR PULL HOLE
Drill door pull hole (D) as previously marked
from door template (Step 1).
7
ADJUST LATCH & DEADBOLT
FOR PROPER BACKSET
2-3/4 BACKSET:
Latch: Pull latch hub laterally.
Deadbolt: Twist the faceplate 180°.
8
MOUNT DEADBOLT & LATCH
ASSEMBLIES
Insert deadbolt & latch assemblies into door.
Drill 1/8" pilot holes per faceplate locations.
Secure with (4) #8 combination screws so
faceplates are flush with door edge.
9
INSTALL INTERIOR SIDE TRIM
Mount interior trim. Insert spindle through
latch hub and slide inside mechanism body
over latch case.
LATCH
DEADBOLT
#8-32 x 3/4"
FLAT HEAD
COMBINATION
SCREWS
2.50
A
B
C
D
A
B
C
A
B
C
(
REFERENCE TABLE
ON TEMPLATE FOR
PROPER DOOR PULL
LOCATION)
© 2005 BALDWIN HARDWARE CORPORATION, READING, PA, U.S.A.
H1705.000.00015A
13
INSTALL INTERIOR PLATE &
SCREW COVER
15
INSTALL KNOB / LEVER
16
INSTALL DEADBOLT
12
CHECK ALIGNMENT & TEST
OPERATION
Check alignment of exterior assembly with
door edge.
Test Operation:
A) Operate thumbpiece to retract latch
B) Temporarily place knob / lever over
interior assembly to operate latch
C) Push in & rotate turn button to lock
thumbpiece.
D) Insert key to test cylinder and retract
latch.
E) Unlock turn button and remove knob or
lever
Note: If operation is binding / not smooth,
loosen thru-bolting & do the following:
A) Check tailpiece to spindle alignment
B) Check spindle to latch alignment
C) Realign interior and exterior
assemblies to door edge.
D) Retighten thru-bolting
Install interior plate and thread thimble onto
housing. Tighten with supplied tool. Secure
interior plate with (2) #6 screws to interior
mechanism
.
Install
Place mounting plate over tailpiece. Insert
(2) #10-32 x 2-5/8” long screws through
plate, deadbolt assembly and into cylinder.
Orient exterior plate properly. Tighten
screws.
Slide knob or lever onto the mechanism
housing. Tighten ¼” set screw with supplied
allen wrench. Operate knob / lever, turn
button, thumbpiece & cylinder.
Place interior deadbolt assembly over
tailpiece. Secure with (2) #8-32 x 3/4”
screws.
Operate turnpiece & cylinder to retract
and throw deadbolt.
Note: If binding occurs do the following.
A) Remove interior deadbolt assembly
B) Loosen screws and adjust alignment
C) Retighten screws
D) Reinstall interior deadbolt assembly
14
INSTALL MOUNTING PLATE
Install (3) #10-32 screws through interior
assembly into exterior assembly screw
posts. DO NOT OVERTIGHTEN. Ensure
wave washer is installed over subassembly.
Install bottom door pull thru-bolt.
11
INSTALL SCREWS
17
INSTALL DEADBOLT INTERIOR
ASSEMBLY
18
TEST DEADBOLT OPERATION
10
INSTALL EXTERIOR ASSEMBLY
Install exterior assembly.
A) Turn tailpiece vertical
B) Insert cylinder tailpiece into spindle
C) Align screw posts with interior
mechanism body.
D) Engage thumbpiece with interior
mechanism. Thumbpiece arm must be
under tab of interior mechanism.
TAB FOR
THUMBPIECE
ENGAGEMENT
#10-32 x 2-1/2”
SCREW
#10-32 X 1-1/4”
SCREWS
#6-32 x 7/16”
SCREWS
THIMBLE
(MAY BE
PREASSEMBLED)
SCREW
COVER
¼” SET
SCREW
Make sure deadbolt is thrown.
Slide cylinder assembly through the
cylinder ring and collar. Insert tailpiece
through hub in deadbolt assembly.
#10-32 x 2-5/8”
SCREWS
#8-32 x 3/4”
SCREWS
WAVE
WASHER
© 2005 BALDWIN HARDWARE CORPORATION, READING, PA, U.S.A.
H1705.000.00015A
22
INSTALL DEADBOLT DUST BOX &
REINFORCING STRIKE
23
INSTALL DEADBOLT STRIKE
PLATE
Using the reinforcing strike as a guide, pre-
drill the screw holes. Install dust box and
reinforcing strike. Ensure 3" screws for
reinforcing strike are installed on the stop side
of the plate.
Install deadbolt strike plate. Using the strike as a guide, pre-drill the
screw holes. Install strike plate.
24
INSTALL LATCH DUSTBOX &
STRIKE PLATE
General Notes:
Paper template is designed for 1-3/4" thick doors. For extra
thick doors, measure backset from center of door edge. Tape
supplied template to the door to locate placement of hole pattern
of lock and trim. ** Paper template is located on the low side
of the bevel on the door.
When installing hardware on metal doors, ensure the door was
designed to accommodate tubular locks. If in doubt, check with
your local door distributor or door manufacturer.
Removal of hardware from doors is recommended before
painting and finishing of the door. Allow finishing materials to
fully cure before reinstalling hardware, usually ten days to two
weeks. Check paint manufacturer instructions.
Retain these instructions in a safe place should you need to
disassemble the lock trim or require Baldwin Hardware
Corporation's assistance.
DEADBOLT
DUSTBOX
REINFORCING
STRIKE
SECURITY
SCREWS
DEADBOLT
STRIKE PLATE
LATCH
STRIKE PLATE
STRIKE PLATE
SCREWS
STRIKE PLATE
SCREWS
STRIKE SCREWS
19
* Apply any weather-
stripping before
installing strike(s).
Mark deadbolt with chalk,
lipstick or pencil. Shut
door and throw deadbolt
to transfer location to
doorjamb. Using the
supplied template, align
strike hole template with
center point. Mark center
holes of latch bolt and
outer corners of both
strikes with a pencil.
Mark drill point 5/16" above & below the
center points.
Deadbolt: (2) 1" holes x 1-1/4" deep
Latch: (2) 1" holes x 1" deep
Very carefully score strike plate outlines
with utility knife.
Chisel out strike plate cavities.
Deadbolt: cavity to be 7/32" deep
Latch: cavity to be 3/32" deep
MARK JAMB WITH STRIKE
TEMPLATE
20
DRILL HOLES & SCORE STRIKE
PLATE OUTLINES
21
CHISEL STRIKE PLATE
CAVITIES
STRIKE PLATE INSTALLATION
  • Page 1 1
  • Page 2 2
  • Page 3 3
  • Page 4 4

Baldwin 85345.003.LENT Installation guide

Type
Installation guide

Ask a question and I''ll find the answer in the document

Finding information in a document is now easier with AI