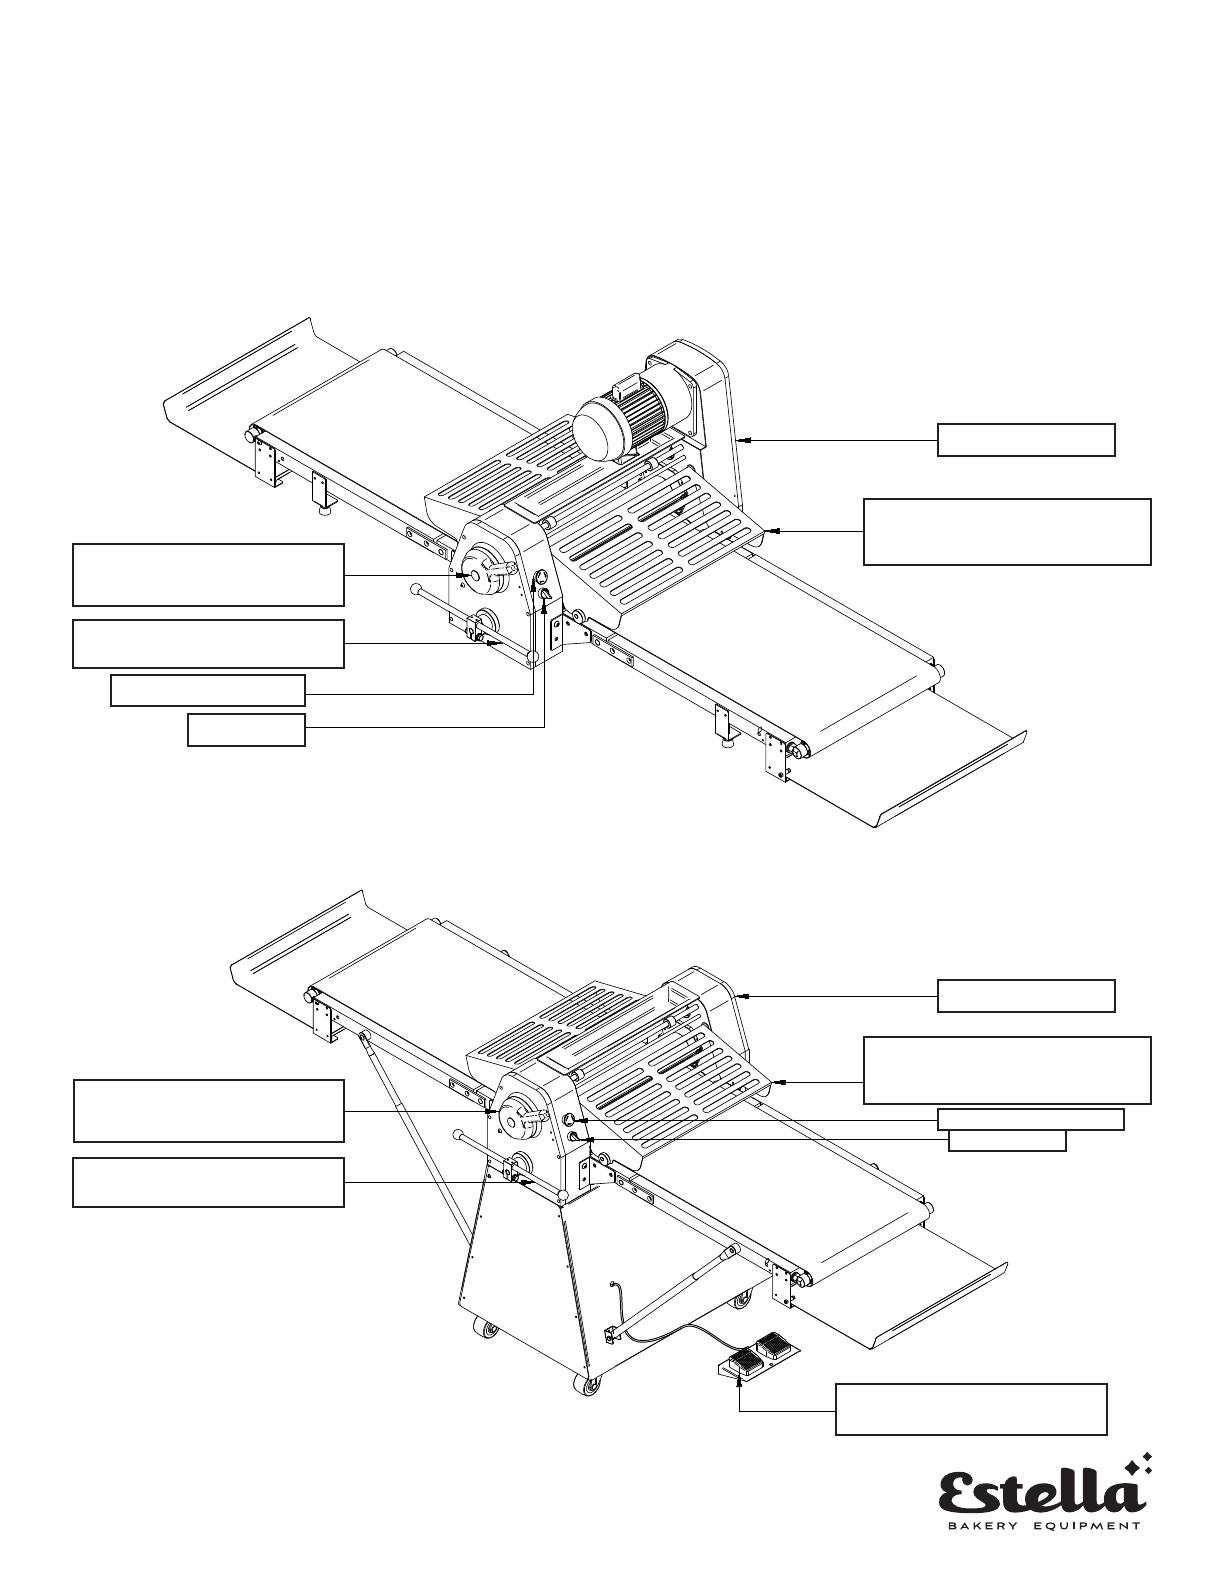
Swing the handle to the corresponding
scale to adjust the roller spacing of the
pressing surface.
Swing the left and right levers to change
the belt conveying direction.
Don't open this cover.
When the safety net is opened, the
machine will be stopped immediately,
and when it is put down, the machine
will continue to work.
Emergency stop
switch
Power switch
Operating Steps:
1. Turn on the power switch. (Before start the switch, you need to check whether the emergency stop switch is turned on and safety nets are
all put down)
2. Swing the handle to the corresponding scale to adjust the pressure roller spacing.
3. Swing the left and right levers to change the direction of the conveyor belt.
4. When the machine is running, if the safety protection net is opened, the machine will stop immediately. And then when the net is put down,
the machine will continue to work.
5. If meeting the emergency, please press the emergency stop immediately.
6. When the operation is completed, swinging the left and right levers to the horizontal, and then turning off the power switch.
Swing the handle to the corresponding
scale to adjust the roller spacing of the
pressing surface.
Swing the left and right levers to change
the belt conveying direction.
Stepping on the foot switch to jog the
conveyor belt (turn left and right)
Power switch
Emergency stop switch
When the safety net is opened, the machine
will be stopped immediately, and when it is
put down, the machine will continue to work.
Don't open this cover.
TT-D19A-1
Dough Sheeter
Operating Steps:
1. Turn on the power switch. (Before start the switch, you need to check whether the emergency stop switch is turned on and safety nets are all
put down)
2. Swing the handle to the corresponding scale to adjust the pressure roller spacing.
3. Swing the left and right levers to change the direction of the conveyor belt.
4. When the machine is running, if the safety protection net is opened, the machine will stop immediately. And then when the net is put down, the
machine will continue to work.
5. If meeting the emergency, please press the emergency stop immediately.
6. When the operation is completed, swinging the left and right levers to the horizontal, and then turning off the power switch.
Estella Dough Sheeters are designed to be used by qualified and trained pastry chefs and bakers.
Estella and its dealers will not be responsible for machine damage, personal injuries, or other incidental
damage caused by improper use or untrained operators.
IMPROPER USE OF THIS MACHINE
Don't open this cover.
Power Switch
Emergency Power Switch
Swing the left and right levers to
change the belt conveying direction.
Swing the handle to the
corresponding scale to adjust the
roller spacing of the pressing surface.
When the safety net is opened, the
machine will stop immediately. When it
is put down, the machine will resume.
Swing the handle to the
corresponding scale to adjust the
roller spacing of the pressing surface.
Swing the left and right levers to
change the belt conveying direction.
Don't open this cover.
When the safety net is opened, the
machine will stop immediately. When it
is put down, the machine will resume.
Power switch
Emergency stop switch
Stepping on the foot switch to jog
the conveyor belt (turn left and right)
5.


