Page is loading ...

User Guide
Personal Writing and Drawing Machine
AxiDraw
®
V3
AxiDraw Version 3.5
Guide Revision: 3.7, August 14, 2018

2
0. Preliminaries
0.1 Welcome
Welcome to AxiDraw!
This is the user guide for the AxiDraw V3 family of personal writing and drawing
machines. This guide is here to help you get started. There is a lot here–covering
how you set up and use the machine, and pointing you towards additional re-
sources for the future.
This guide covers operation of the following AxiDraw models:
• AxiDraw V3
• AxiDraw V3 XLX
• AxiDraw V3/A3
• AxiDraw SE/A3
0.2 This guide is a work in progress!
This guide is a continuing work in progress, and we want to suggest you to check
back occasionally for the latest version of this manual, and to check that you have
the latest version of the software.
Recent changes to this guide include updates to the current software version,
which is v1.7.8, additions to the sections about text, and about vectorizing images.
You can download the latest version of this at http://axidraw.com/guide
Look at the front cover of the guide to find the date and version number of the
guide that you are looking at.

3
Contents
0. Preliminaries .........................................................2
0.1 Welcome .................................................................2
0.2 This guide is a work in progress! .........................2
1. Introducing the AxiDraw ......................................5
1.1 Credits and History: ...............................................6
2. Checking out your AxiDraw ................................7
2.1 Parts and accessories ............................................ 7
2.2 AxiDraw Anatomy .................................................8
2.3 Unboxing .............................................................. 10
2.4 Safe handling of the AxiDraw ............................ 13
3: Overview: Getting Started with AxiDraw ........14
4: Software for AxiDraw ........................................ 15
4.1 Installing software ................................................ 15
4.2 Inkscape and the extensions ............................. 15
4.3 Aside: Alternative software and APIs .............. 15
5: The Home Corner ............................................... 16
6: Workholding ....................................................... 17
6.1 Printing on large workpieces .............................. 17
6.2 Workholding with the Clip Easel ........................17
6.3 Using multiple Clip Easels .................................. 18
6.4 Moving beyond the Clip Easel .......................... 19
7: Connecting Power and USB .............................. 19
8: Pens and Getting Ready for Printing ............. 20
8.1 Pen choices .......................................................... 20
8.2 Setting the pen angle ........................................ 20
8.3 Inserting a pen ......................................................21
8.4 Pen up and pen down positions ........................22
8.5 Positioning your paper ...................................... 24
8.6 Summary ..............................................................26
9: Plotting with the AxiDraw ................................ 26
9.1 Making your first plot ..........................................26
9.2 Plotting multiple copies .....................................29
9.3 Pausing, resuming, and canceling plots .......... 30
9.4 Plotting with multiple layers and colors .......... 31
9.5 The Timing tab and basic speed control .......... 34
9.6 Pen lift speeds .................................................... 36
9.7 Advanced options ................................................ 37
9.8 Preview Mode ..................................................... 38
9.9 Manual Controls ................................................. 40

4
9.9 Model and Version ............................................. 42
9.10 Plotting away from home ................................ 43
10: Designing for AxiDraw ....................................44
10.1 General considerations ..................................... 44
10.2 Visualizing paths in your document ............... 45
10.3 Fonts, characters, and languages ................... 46
10.4 About outline fonts ...........................................47
10.5 Stroke fonts ...................................................... 49
10.6 Hershey Text .................................................... 49
10.7 Capturing signatures and handwriting ........... 51
10.8 Aside: Tracing of scanned handwriting ........... 51
10.9 Filling text and shapes ......................................52
10.10 Vectorizing images ......................................... 54
11: Maintenance and troubleshooting .................. 56
11.1 No lubrication required ..................................... 56
11.2 Cleaning .............................................................. 56
11.3 Storage ................................................................ 56
11.4 Belt tension ........................................................ 56
11.5 The wrenches ..................................................... 56
11.6 Wiring .................................................................. 56
11.7 The pen-lift servo motor ....................................57
11.8 Loss of position ...................................................57
11.8 Service, repair, and parts support ....................57
12. AxiDraw Tips and Tricks ................................... 58

5
1. Introducing the AxiDraw
The AxiDraw is a simple, modern, precise, and versatile pen plotter, capable of
writing or drawing on almost any flat surface. It can write with your favorite foun-
tain pens, permanent markers, and other writing implements to handle an end-
less variety of applications. Its unique design features a writing head that extends
beyond the machine, making it possible to draw on objects bigger than the ma-
chine itself.
The AxiDraw is an extremely versatile machine, designed to serve a wide variety
of everyday and specialized drawing and writing needs. You can use it for almost
any task that might normally be carried out with a hand-held pen.
It allows you to use your computer to produce writing that appears to be hand-
made, complete with the unmistakable appearance of using a real pen (as op-
posed to an inkjet or laser printer) to address an envelope or sign one’s name.
And it does so with precision approaching that of a skilled artist, and — just as
importantly — using an arm that never gets tired.

6
1.1 Credits and History:
The AxiDraw project has been active since 2014, when it was first created by Dr.
Lindsay Robert Wilson of IJ Instruments Ltd. in the UK.
Early AxiDraw units had a dierent de-
sign. It had a smaller format with a chas-
sis made from machined Delrin plastic. It
had two independent timing belts, one
driven by a stepper motor on the base,
and the other by a stepper motor on the
moving carriage. For software, it used a
modified version of the WaterColorBot
driver developed at Evil Mad Scientist.
AxiDraw V2
In 2015, Wilson began collaborating with
Windell Oskay and Lenore Edman of Evil
Mad Scientist Laboratories towards a new
AxiDraw model that would be principally
designed and manufactured in the USA.
This second-generation AxiDraw was en-
larged to reach twice the travel area, to
cover a full page of A4 or US Letter paper.
Its geometry was changed to use a single
drive belt, with two larger stepper motors
stationary on the base. Its major components would now be made of aluminum
(machined or stamped and folded), and the new pen holder could be mounted
vertically or at 45° to the paper.
AxiDraw V3
The third generation, AxiDraw V3, is a full
redesign of the machine for higher perfor-
mance. While previous models had steel
shafts and linear ball bearing slides, this new
version features custom aluminum extrusions
with rolling wheels. The vastly increased sti-
ness of the structures allow the machine to
operate at roughly twice the speed of the previous version, without a loss in quality.
The AxiDraw V3 family is currently available in several models that dier principal-
ly in available travel area: AxiDraw V3, AxiDraw V3 XLX, and the AxiDraw V3/A3.
There is also a Special Edition, AxiDraw SE/A3, which features a base machined
from a solid block of aluminum.
AxiDraw, 2014
AxiDraw V2, 2016
AxiDraw V3

7
2. Checking out your AxiDraw
Here are the parts that come with AxiDraw:
1. The AxiDraw itself
2. Clip Easel and binder clips (4 on AxiDraw V3, 8 on larger models)
3. Plug-in power supply
4. USB cable
5. Hex drivers and wrenches
Sizes include 2 mm, 2.5 mm, and 3 mm hex drivers, and low-profile 8 mm
and 10 mm wrenches. Of these, only the smallest (2 mm) hex driver is
used in normal operation.
6. Not shown: Extra rubber feet (AxiDraw V3 and V3 XLX only)
Normally not needed. But, just in case a rubber foot gets bumped o of
the base during shipping, these are spares.
7. Not shown: Rubber bands
These can be used to add a little extra pen force if needed.
See the last chapter, AxiDraw Tips and Tricks.
8. Not shown: Special accessories included only with AxiDraw SE/A3
The SE/A3 also includes an XL pen clip and an italic pen adapter.
These are available separately for use with other AxiDraw models.
To learn more about available AxiDraw accessories, please visit: emsl.us/902
3. Power
supply
4. USB Cable
2. Clip Easel
(Binder clips)
1. AxiDraw
5. Hex drivers and wrenches
2.1 Parts and accessories

8
Let us look at the dierent parts of the AxiDraw. We will refer to these parts
by name throughout this guide. These features are common to each model of
AxiDraw, though appearences may vary slightly. For example, the AxiDraw V3/
A3 and SE/A3 have extended “outrigger” feet, and the AxiDraw SE/A3 base is
colored black and covers the two motors.
Pen holder
Central strut
Base; central strut
Left motor & cover
Right motor
& cover
Cable Guides
(not handles!)
Carriage (X-axis part)
2.2 AxiDraw Anatomy
Pen holder
Top View
Carriage (Y-axis part)
Timing (drive) belt

9
§2.2, AxiDraw anatomy, continued:
Top View
Detail: Left side of base
Rubber
Feet
Power Jack
EBB
Cover
Stepper motor
Pause Button
“EBB” Control board
USB Port
Home Position Indicator
Detail: Pen holder
Pen-lift
servo motor
Vertical slide
Thumbscrew
Pen Clip
Pen Clip
Screws
Vertical shafts
Note: AxiDraw ships with its pen clip disconnected; see the next section.
Y Carriage

10
The pen-lift motor cable and the pen clip are disconnected for shipping.
Locate the disconnected cable end
on the left hand side of the base.
The cable has three wires: Black, red, and white.
Plug its connector into the bottom three pins on
the EBB Control Board as shown. The black wire
faces back, towards the edge of the board.
2.3 Unboxing

11
The pen clip is also
disconnected for shipping.
2 mm ball-end
hex wrench
Thumbscrew
Vertical slide
(Appearance may vary; see next page.)
Thread the black plastic thumbscrew into the pen clip.
Attach the pen clip to the vertical slide with the two small black M3 screws, using
the 2 mm hex wrench, which has a ball end for easier access. The pen clip may be
attached either in a vertical or diagonal orientation, depending on what kind of a
writing implement you are using. (Continues on next page.)
Pen clip
M3 Screws
for pen clip
§2.3, Unboxing, continued:

12
Your vertical slide may have either two or four threaded holes for the pen clip.
Both styles have the same function, but they do look a little bit dierent. In either
case, use exactly two screws to attach the pen clip in place.
Current production two-hole slide with the pen clip mounted in the diagonal
(left) and vertical (right) configurations.
Older AxiDraw units may have a four-hole slide, with only two holes in the pen
clip. Here it is shown with the pen clip mounted in the diagonal (left) and ver-
tical (right) configurations.

13
2.4 Safe handling of the AxiDraw
1). Lifting: Lift AxiDraw by the central strut of the base, or by the stepper
motors if necessary. Do not lift by the cables, cable guides, carriages, or pen
holder. The AxiDraw SE/A3 has a handle milled into the back of the central
strut, to provide an additional lifting point in the middle of the machine.
2). Heat: Please note that the two stepper motors may get warm. This is nor-
mal, but it is helpful to be aware of it. They should not get too hot to touch.
3). Moving parts: AxiDraw has exposed moving parts. Keep fingers, hair, and
other things that could get caught, crushed, or tangled safely away from the
belt and the pinch points between the moving carriage, the pen holder, and
the motor covers.
!
Warning: Keep fingers away from pinch
points while AxiDraw is operating.

14
3: Overview: Getting Started with AxiDraw
In brief, here are the steps to getting started with the AxiDraw:
1) Install the software.
2) Open or create the artwork that you would like to plot.
3) By hand, move the carriage to the upper-left Home Corner.
4) Connect power and USB cables.
5) Check pen-up and pen-down heights.
6) Set up your pen and paper.
7) Begin plotting from within the AxiDraw software.
Part 4 of this guide goes through the first item on the list: Installing the soft-
ware. Parts 5 through 8 go through setting up your AxiDraw for use. Part 9 walks
through making your first plot, and various options available while plotting. Part
10 talks about designing for AxiDraw. It is followed by sections on various tips
and tricks for using your machine.

15
4: Software for AxiDraw
4.1 Installing software
You will need to install software on your computer to operate the AxiDraw.
Current instructions and download links are available at: http://axidraw.com/sw
From there, follow the directions specific for your operating system:
• For Mac and Windows, there are easy installers that you can download.
• For Linux, one or more manual steps are required.
The software that you will install includes Inkscape, the superb (and free) drawing
program, and a set of extensions that operate the AxiDraw from within Inkscape.
4.2 Inkscape and the extensions
Once you have installed the software, launch Inkscape. The AxiDraw software will
appear in the menu at Extensions > AxiDraw. All machine control is performed
from within the AxiDraw Control panel. A second extension, Hatch Fill, is provid-
ed as well, to help with filling in shapes.
4.3 Aside: Alternative software and APIs
RoboPaint is an alternative driver software available for painting and drawing
robots. It requires a separate install process, but does support AxiDraw.
Programming is not required to operate the AxiDraw. In the case that you
would like to program it or remotely send data to it, we do have interfaces and
documentation available. All of our software is open source.
For more information about RoboPaint or our APIs, please see the documen-
tation on our wiki site at http://axidraw.com/docs
Beyond these options, a stand-alone command line version of our (otherwise)
Inkscape-based software is in development, and available in beta to AxiDraw
users. If you would like early access, please contact us directly:
https://shop.evilmadscientist.com/contact

16
5: The Home Corner
Before you start plotting, the pen holder must be moved to the Home Corner.
This is as far left and as far back as it will go: where the pen holder is closest to the
left side of the base, that is when the pen holder is closes to the engraved label
“Home”, and the USB port.
Home Position
Indicator
Home
Corner
When a plot finishes, the AxiDraw will return to its Home Corner automatically,
leaving it ready for the next plot.
Slide the carriage to the Home Corner by
hand. You can move it diagonally by holding
the solid block of metal behind the verti-
cal side of the pen holder. Do not push the
vertical side of the pen holder directly.
The carriage should only be moved when
the power to the motors is o. If it does
not move easily, turn o the motors so that
you are not trying to force them.
To do so, use the “Raise pen, turn o motors” command in the Setup tab of Axi-
Draw Control (see page 22). If necessary, you can also physically disconnect
the AxiDraw from power.

17
6: Workholding
Whatever workpiece the AxiDraw is to write or draw upon – whether that is pa-
per, wood, or cookies – needs to be reasonably fixed in place so that it does not
move while plotting.
6.1 Printing on large workpieces
For large workpieces such as the
large poster board shown here, the
AxiDraw may be placed directly on
top of the workpiece. Other ex-
amples of large workpieces that
AxiDraw can sit upon might include
things like fabric, wooden surfaces,
or large whiteboards.
With some awkwardly shaped workpieces (framed art, irregular objects, etc.), you
may need to prop up the base of AxiDraw to make it tall enough to reach.
6.2 Workholding with the Clip Easel
A simple board with clips, the Clip Easel, is included with the AxiDraw for holding
smaller workpieces – principally dierent shapes and sizes of paper – that are not
large enough to be held down by the AxiDraw itself. This is a great way to mount
paper when getting started with the AxiDraw.
The AxiDraw V3 Clip Easel is 9 × 12 inches (about 23 x 30 cm) in size, with rubber
feet and four small binder clips. (Larger easels are included with the larger-sized
AxiDraw models.) You can mount dierent sizes of to it, including US letter size
(or A4) paper, and smaller sizes including envelopes, cards, and invitations. With
smaller paper, you can also potentially mount several pieces at the same time.
The clips can be positioned as needed to hold the paper flat, and avoid the areas
where you will be writing.

18
A
C
B
D
The examples shown above are:
A) A certificate to be filled out (Letter size, landscape orientation)
B) Mailing address (#10 envelope, landscape orientation)
C) A formal invitation (6 ⅜ × 8 ⅞ inch, portrait orientation)
D) A page of mixed text and drawing (Letter size, portrait orientation)
In every case, line up the corner of the paper with the upper left corner of the
Clip Easel, such that the corner of the paper is closest to the Home Corner.
If your document is wider than it is tall (or square), it is said to be in landscape
orientation, and your paper should be oriented as in examples A and B above. If
is taller than it is wide, it has portrait orientation; turn your paper “sideways” as
in examples C) and D) above. (This default behavior can be overridden. See “9.7
Advanced options” on page 37.)
6.3 Using multiple Clip Easels
A common technique is to use more than one clip easel, such that you can quick-
ly swap out your completed workpiece for the next one. The key advantage is that
one page can be plotting while you unclip and clip the next page. You can use
tape marks or hard end stops on your table (like a carpenter’s square) to facilitate
quick alignment.
§6.2, Workholding with the Clip Easel, continued

19
7: Connecting Power and USB
In the next section, when setting the pen heights, it is necessary to plug in the
AxiDraw. When it is time to do so, connect the power and USB cables to the
AxiDraw as shown above. Connect the USB cable to any available USB port on
your computer.
The plug-in power adapter included with the AxiDraw (9 V dc, regulated, center
positive) works with worldwide mains power (100-240 V ac). Outside of the US,
it may require an inexpensive plug-shape adapter.
Once your cables are connected, make sure that the AxiDraw has room to move.
As the carriage moves (left to right, back and forward), it is important that it can-
not get caught on stray cables.
USB Cable
Power Adapter Cable
A second method can be used when your workpieces are substantially smaller
than the working area of your machine. For example, if you are labeling small
note cards with the AxiDraw, or if you are plotting two side-by-side letter (A4)
size pages with the AxiDraw V3/A3 or AxiDraw V3 XLX. Using two small easels
side by side, you can designate one “A” and one “B”, and alternate plotting on the
“A” or “B” side. If you change out each side when it finishes, you can plot contin-
uously without ever pausing to swap out the paper.
6.4 Moving beyond the Clip Easel
While the Clip Easel is versatile, its use is entirely optional. Paper can be also held
in place with tape, clamps, tacks, paper clips, magnets, other types of clipboards,
the weight of the AxiDraw itself, or by other means that you see fit.
If your AxiDraw is used as a single-purpose machine (that is, if you use the same
pen and paper size consistently), you may prefer to make a workholding solution
tailored for your specific application. In some cases, making a fixture that is per-
manently mounted to a tabletop or work surface can save you a great amount
of time.

20
8: Pens and Getting Ready for Printing
In this section we will discuss dierent types of pens, configuring the pen angle,
the pen-up and pen-down positions, setting the pen height, and how to set the
paper position relative to the pen.
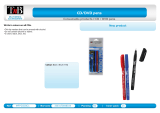
8.1 Pen choices
The pen holder on the AxiDraw fits pens up to ⅝ inch (16 mm) in diameter. The
maximum recommended pen weight is 1.6 oz (45 g). The design is such that the
pen rests on the surface by its own weight. That allows it to ride over surfaces
that are textured or otherwise uneven, however it also means that the pen holder
does not apply much if any downward pressure.
Good choices for pens include fountain pens, permanent markers, rollerball pens,
technical pens, (small-bodied) whiteboard markers, liquid chalk markers, and oth-
er writing and drawing instruments that do not require significant pressure. While
we refer to writing and drawing instruments as “pens” to be concise, other instru-
ments such as automatic pencils, chalk, charcoal, and brushes can also work well
in many cases. Others, like traditional ball point pens, may work poorly because
they require a substantial amount of downward pressure to operate.
8.2 Setting the pen angle
The pen may be mounted vertically or diagonally at 45° to the paper by mounting
the Pen Clip in either the vertical or angled position.
To detach the pen clip, loosen and remove the two black M3 screws on the front
of the pen clip, using the 2 mm hex wrench, which has a ball end for easy access.
Use the same two screws to reattach the pen clip, either in the vertical or diago-
nal orientation. (See pictures starting on page 11.)
The 45° angle position is optimal for use with fountain pens, but will work well
with most rollerball and fine point markers. The vertical position is more suited
/