Page is loading ...

The Trusted Source
®
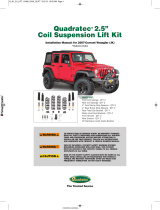
Quadratec®2 or 4 Bike
Receiver Bike Racks
TO REDUCE RISK OF SERIOUS INJURY OR PROPERTY DAMAGE:
READ ALL SAFETY MESSAGES AND UNDERSTAND ALL INSTRUC-
TIONS AND PROCEDURE NOTICES BEFORE ATTEMPTING TO
INSTALL OR USE THIS PRODUCT. FOLLOW ALL INSTRUCTIONS
AND WARNINGS WITH PRODUCT & VEHICLE OWNERS MANUAL.
RISK OF EYE INJURY! SAFETY GLASSES MUST BE WORN AT ALL
TIMES WHILE INSTALLING OR MAINTAINING THIS PRODUCT.
TORQUE AND RECHECK FASTENERS AFTER 250 MILES AND
FREQUENTLY THEREAFTER. INSPECT RECEIVER HITCH AND
RACK BEFORE USE. DO NOT USE IF DAMAGED.
CHECK STATE AND LOCAL HIGHWAY SAFETY LAWS REGARDING
PERMITTED BUMPER TYPES AND HEIGHTS.
Installation Manual: Designed for Jeep Vehicles
with 2” Receiver Style Hitches
#92034.1000 and #92034.1001
PARTS LIST:
Receiver Base & Main Rack System - QTY 1
Installation Hardware - SEE PAGE 3
REQUIRED TOOLS:
Safety Glasses
SUPPLIED TOOLS:
3/4” Wrenches - QTY 2
5mm Allen Wrench - QTY 1
Q_BIKE_RACKS_92034_100X_Layout 1 10/24/14 4:28 PM Page 1
10242014162918

TO REDUCE RISK OF SERIOUS INJURY OR PROPERTY DAMAGE:
INSTALL ACCORDING TO INSTRUCTIONS. TORQUE AND RECHECK
FASTENERS AFTER 250 MILES AND FREQUENTLY THEREAFTER.
INSPECT AND DO NOT USE RECEIVER/RACK IF DAMAGED.
ALWAYS FOLLOW ALL SAFETY WARNINGS, CAUTIONS AND NOTICES
IN THE INSTALLATION INSTRUCTIONS AND DOCUMENTATION THAT
CAME WITH YOUR BIKE RACK AND HITCH. THIS DOCUMENT ONLY
REFERS TO BIKE RACK ASSEMBLY AND INSTALLATION.
CHECK STATE AND LOCAL HIGHWAY SAFETY LAWS REGARDING
PERMITTED BUMPER TYPES AND HEIGHTS.
The Trusted Source
®
2
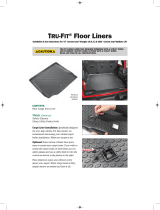
Before You Begin Installation:
Congratulations on your purchase of
the Quadratec 2 or 4 Bike Receiver Style
Bike Rack for vehicles with a 2” Receiver
Hitch. When unpacking, check to make
sure all parts are included and not dam-
aged due to shipping.
If any part is missing or broken, please
call Customer Service at 800-745-6037
as soon as possible.
Regarding Hitch Safety: Always consult
the instructions that came with your
hitch.
Thank you again for your purchase
and let’s start the installation process.
a hazardous situation which, if not avoided, could result in death or
serious injury. You CAN be KILLED or SERIOUSLY HURT if you don’t
follow instructions.
a hazardous situation which, if not avoided, could result in minor or
moderate injury. You CAN be moderately HURT and also may suffer
property damage if you don’t follow instructions.
Careful attention is required to this instruction or operation but does
generally not relate to personal injury. Damage to your Quadratec®
product or other property may result if you don’t follow instructions.
A Few Words About Product Safety:
Your Receiver Mount Bike Rack is
intended to enhance the utility and
enjoyment of your off road capable
vehicle. Before installation, please take a
moment to review the following safety
information and installation instruc
tions. Important safety information is
generally preceded by one of three sig-
nal words indicating the
relative risk of injury.
The signal words mean:
Q_BIKE_RACKS_92034_100X_Layout 1 10/23/14 2:49 PM Page 2
10232014145010

The Trusted Source
®
3
Installation Hardware:
PARTS LIST: Receiver Bike Rack Kit
Hardware:
A) Main Rack Assembly QTY 1
B) Receiver Base QTY 1
C) Webbed Retainer Strap QTY 1
D) 3/4” Wrenches QTY 2
E) 1/2” Pivot Bolt w/2 thick
flat washers & nylock nut QTY 1
F) 1/2” Retaining Bolt
w/Flat Washer & Lock Washer QTY 1
G) Cotter Pin QTY 1
H) 5mm Allen Wrench QTY 1
I) Rubber Bike Retaining Straps:
For Two Bike Rack: QTY 4
For Four Bike Rack (shown) QTY 8
E
C
D
FG
HI
B
A
Q_BIKE_RACKS_92034_100X_Layout 1 10/24/14 3:42 PM Page 3
10242014154300

Install the supplied 1/2” pivot bolt
through the lower hole with a flat
washer on either side of the rack. Attach
the nylock nut and tighten using the
two supplied 3/4” wrenches.
Position the Bike cradles vertically on
the upper arm as shown and snug the
Allen bolts with the supplied 5mm allen
wrench. Final adjustment of the bike
cradles can be made later when the rack
is installed.
The Trusted Source
®
4
Bike Rack Assembly:
Put on safety glasses. Place the main
rack assembly of the bike rack into the
lower receiver base.
Install pin and retaining clip in the
upper hole through both pieces.
Figure 1 Figure 2
Figure 4 Figure 5
Q_BIKE_RACKS_92034_100X_Layout 1 10/23/14 2:49 PM Page 4
10232014145011

The Trusted Source
®
5
Bike Rack Installation:
Install the round end of the rubber re-
taining straps by pulling them over the
square retaining tabs on the cradles.
As shown in Figure 6, slide the Bike rack
receiver tube into the receiver hitch on
your vehicle. Align the hole in your
hitch with the hole in the bike rack. In-
stall the threaded retaining bolt from
the right hand side along with the lock
washer & flat washer. ONLY INSTALL
THE BOLT FROM THE RIGHT HAND
SIDE. Tighten bolt using the supplied
3/4” wrench.
Figure 5 Figure 6
NOTE: There are two mounting holes
on the receiver tube. Use the hole that
provides the best clearance for your
spare tire. (Spare tire sizes vary)
Now install the Cotter pin on the oppo-
site side of the bolt as shown in Figure 7
Figure 7
Q_BIKE_RACKS_92034_100X_Layout 1 10/23/14 2:49 PM Page 5
10232014145011

Adjust the thumb screw on the back of
the vertical arm of the rack until it is
snug in order to eliminate rattling.
Place the bike into the cradles as shown.
(The position of the cradles can be ad-
justed using the provided 5mm allen key
as shown previously in the assembly
portion.)
Pull the rubber retaining straps over the
frame of the bike and secure it on the
rectangular hook.
The Trusted Source
®
6
Bike Rack Installation:
Remove the retaining pin from the
upper hinge and swing the rack arms
into place. Reinstall the pin and
retaining clip into the lower hole.
Figure 9 Figure 10
Figure 11
Q_BIKE_RACKS_92034_100X_Layout 1 10/24/14 2:17 PM Page 6
10242014141810

Thread the provided safety strap
through the loop on the back of the ver-
tical arm of the rack.
Continue the thread the strap through
both wheels and secure it using the
buckle.
In order to recline the bike rack and gain
access to your tailgate or cargo area,
start by removing the bicycles from the
rack. Lower the upper arm by removing
the retaining pin and reinstalling it in
the upper hole.
This is the reverse of the steps shown in
figures 9 & 10.
Now remove the retaining pin from the
lower hinge and carefully recline the
main rack. Be sure to reinstall all
pins and retaining clips when you
are finished and before operating
your vehicle.
7
Bike Rack Installation:
Figure 12 Figure 13
Figure 14 Figure 15
The Trusted Source
®
Q_BIKE_RACKS_92034_100X_Layout 1 10/24/14 2:17 PM Page 7
10242014141811

The Trusted Source
®
8
Quadratec® Exclusive
Three Year Limited Warranty
Your Quadratec®branded accessories are
covered by the following Limited Warranty
provided exclusively by Quadratec, Inc., 1028
Saunders Lane, West Chester PA 19380.
This Limited Warranty is the only warranty
made in connection with your purchase.
Quadratec neither assumes nor authorizes any
vendor, retailer or other person or entity to as-
sume for it any other obligation or liability in
connection with this product or Limited War-
ranty. This Limited Warranty does not apply
and is not cumulative to any accessory or part
distributed by Quadratec for which the Manu-
facturer provides a separate written warranty.
What is Covered: Subject to the terms, exclu-
sions and limitations herein and with respect
only to Quadratec branded accessories first sold
in the United States, Quadratec warrants to the
initial retail purchaser only that your
Quadratec accessory shall be free of defects in
material and workmanship: for a period of
three (3) years from date of retail purchase.
This Limited Warranty is not assignable and
shall terminate upon sale of the vehicle upon
which the Quadratec accessory is installed or
other transfer third persons.
All other warranties are hereby disclaimed, ex-
cept to the extent prohibited by applicable law
in which case any implied warranty of mer-
chantability or fitness for a particular purpose
on this product is limited to 3 year from date of
initial retail sale. Quadratec reserves the rights
to: (a.) require invoice or other proof your ac-
cessory is within the terms of this Limited
Warranty as a condition of warranty service
and, (b.) make future revisions to this product
and Limited Warranty without prior notice or
obligation to upgrade your product.
What is Not Covered:
Your Quadratec Limited Warranty does not
cover products or parts Quadratec determines
to have been damaged by or subjected to:
(a.) installation damage, alteration, modifica-
tion, combination with other parts, failure to
maintain or improper repair or service, (b.) nor-
mal wear & tear, cosmetic damage or damage
from moisture or water immersion, (c.) Acts of
God, accidents, misuse, negligence, inadequate
mounting or impact with vehicle(s), obstacles
or other aspects of the environment, (d.) theft,
vandalism or other intentional damage.
Remedy Limited to Repair/Replacement:
The exclusive remedy provided hereunder shall,
upon Quadratec inspection and at Quadratec’s
option, be either repair or replacement of prod-
uct or parts (new or refurbished) covered under
this Limited Warranty. Customers requesting
warranty consideration should first contact
Quadratec to obtain a RGA number
(610-701-3336). All labor, removal, shipping
and installation costs are customer’s
responsibility.
Other Limitations - Exclusion of Damages -
Your Rights Under State Law:
In consideration of the purchase price paid, nei-
ther Quadratec nor any independent Quadratec
distributor/licensee are responsible for any time
loss, rental costs, or for any incidental, conse-
quential, punitive or other damages you may
have or incur in connection with any part or
product purchased. Your exclusive remedy
hereunder for covered parts is repair/replace-
ment as described above.
This Limited Warranty gives you specific rights.
You may also have other rights that vary from
state to state. For example, some states do not
allow limitations of how long an implied war-
ranty lasts and /or do not allow the exclusion
or limitation of incidental or consequential
damages, so the limitations and exclusions
herein may not apply to you.
©Quadratec, Inc. 2014. All Rights Reserved.
10.24.14 LTR Version
Part #12999.3017
Q_BIKE_RACKS_92034_100X_Layout 1 10/23/14 2:49 PM Page 8
10232014145028
/