Page is loading ...

TRANSISTORIZED INVERTER
FR-E500
FR-E520-0.1KN to 7.5K-KN
INSTRUCTION MANUAL
OUTLINE
PARAMETERS
SPECIFICATIONS
INSTALLATION
AND WIRING
OPERATION/
CONTROL
PROTECTIVE
FUNCTIONS
Chapter 6
Chapter 5
Chapter 4
Chapter 3
Chapter 2
Chapter 1

A - 1
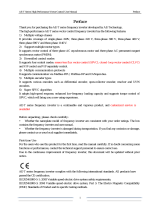
Thank you for choosing the Mitsubishi Transistorized inverter.
This instruction manual gives handling information and precautions for use of this
equipment.
Incorrect handling might cause an unexpected fault. Before using the inverter,
please read this manual carefully to use the equipment to its optimum.
Please forward this manual to the end user.
This section is specifically about safety matters
Do not attempt to install, operate, maintain or inspect the inverter until you have read
through this instruction manual and appended documents carefully and can use the
equipment correctly.
Do not use the inverter until you have a full knowledge of the equipment, safety
information and instructions.
In this manual, the safety instruction levels are classified into "WARNING" and
"CAUTION".
Assumes that incorrect handling may cause hazardous
conditions, resulting in death or severe injury.
Assumes that incorrect handling may cause hazardous
conditions, resulting in medium or slight injury, or may
cause physical damage only.
Note that even the CAUTION level may lead to a serious consequence according to
conditions. Please follow the instructions of both levels because they are important
to personnel safety.
WARNING
CAUTION

A - 2
SAFETY INSTRUCTIONS
1. Electric Shock Prevention
WARNING
!
While power is on or when the inverter is running, do not open the front cover.
You may get an electric shock.
!
Do not run the inverter with the front cover removed. Otherwise, you may access
the exposed high-voltage terminals or the charging part of the circuitry and get an
electric shock.
!
If power is off, do not remove the front cover except for wiring or periodic
inspection. You may access the charged inverter circuits and get an electric
shock.
!
Before starting wiring or inspection, switch power off, wait for more than 10
minutes, and check for residual voltage with a meter (refer to chapter 2 for further
details) etc.
!
Earth the inverter.
!
Any person who is involved in the wiring or inspection of this equipment should be
fully competent to do the work.
!
Always install the inverter before wiring. Otherwise, you may get an electric shock
or be injured.
!
Operate the switches and potentiometers with dry hands to prevent an electric
shock.
!
Do not subject the cables to scratches, excessive stress, heavy loads or pinching.
Otherwise, you may get an electric shock.
!
Do not change the cooling fan while power is on.
It is dangerous to change the cooling fan while power is on.
!
While power is on, do not move the station number and baudrate setting switches.
Doing so can cause an electric shock.
2. Fire Prevention
CAUTION
!
Mount the inverter and brake resistor on an incombustible surface. Installing the
inverter directly on or near a combustible surface could lead to a fire.
!
If the inverter has become faulty, switch off the inverter power. A continuous flow
of large current could cause a fire.
!
When a brake resistor is used, use an alarm signal to switch power off.
Otherwise, the brake resistor will overheat abnormally due a brake transistor or
other fault, resulting in a fire.
!
Do not connect a resistor directly to the DC terminals P (+), N (
−
). This could
cause a fire.

A - 3
3. Injury Prevention
CAUTION
!
Apply only the voltage specified in the instruction manual to each terminal to
prevent damage etc.
!
Ensure that the cables are connected to the correct terminals. Otherwise,
damage etc. may occur.
!
Always make sure that polarity is correct to prevent damage etc.
!
While power is on and for some time after power-off, do not touch the inverter or
brake resistor as they are hot and you may get burnt.
4. Additional instructions
Also note the following points to prevent an accidental failure, injury, electric shock, etc.
(
1
)
Transportation and installation
CAUTION
!
When carrying products, use correct lifting gear to prevent injury.
!
Do not stack the inverter boxes higher than the number recommended.
!
Ensure that installation position and material can withstand the weight of the
inverter. Install according to the information in the Instruction Manual.
!
Do not operate if the inverter is damaged or has parts missing.
!
Do not hold the inverter by the front cover or operation panel; it may fall off.
!
Do not stand or rest heavy objects on the inverter.
!
Check the inverter mounting orientation is correct.
!
Prevent screws, wire fragments or other conductive bodies or oil or other
flammable substance from entering the inverter.
!
Do not drop the inverter, or subject it to impact.
!
Use the inverter under the following environmental conditions:
Ambient
temperature
Constant torque : -10
°
C to +50
°
C (non-freezing)
Ambient humidity 90%RH or less (non-condensing)
Storage
temperature
-20
°
C to +65
°
C*
Ambience
Indoors (free from corrosive gas, flammable gas, oil mist, dust
and dirt)
Environment
Altitude, vibration
Maximum 1000m above sea level for standard operation. After
that derate by 3% for every extra 500m up to 2500m (91%).
5.9m/s
2
or less (conforming to JIS C 0400)
*Temperatures applicable for a short time, e.g. in transit.

A - 4
(
2
)
Wiring
CAUTION
!
Do not fit capacitive equipment such as a power factor correction capacitor,
radio noise filter or surge suppressor to the output of the inverter.
!
The connection orientation of the output cables U, V, W to the motor will affect
the direction of rotation of the motor.
(
3
)
Trial run
CAUTION
!
Check all parameters, and ensure that the machine will not be damaged by a
sudden start-up.
(
4
)
Operation
WARNING
!
When you have chosen the retry function, stay away from the equipment as it
will restart suddenly after an alarm stop.
!
The load used should be a three-phase induction motor only. Connection of any
other electrical equipment to the inverter output may damage the equipment.
!
Do not modify the equipment.

A - 5
CAUTION
!
The electronic overcurrent protection does not guarantee protection of the motor
from overheating.
!
Do not use a ma
g
netic contactor on the inverter input for frequent
starting/stopping of the inverter.
!
Use a noise filter to reduce the effect of electromagnetic interference. Otherwise
nearby electronic equipment may be affected.
!
Take measures to suppress harmonics. Otherwise power harmonics from the
inverter may heat/damage the power capacitor and generator.
!
When parameter clear or all clear is performed, each parameter returns to the
factory setting. Re-set the required parameters before starting operation.
!
The inverter can be easil
y
set for hi
g
h-speed operation. Before chan
g
in
g
its
setting, fully examine the performances of the motor and machine.
!
In addition to the inverter's holdin
g
function, install a holdin
g
device to ensure
safety.
!
Before runnin
g
an inverter which had been stored for a lon
g
period, alwa
y
s
perform inspection and test operation.
(
5
)
Emergency stop
CAUTION
!
Provide a safet
y
backup such as an emer
g
enc
y
brake which will prevent the
machine and equipment from hazardous conditions if the inverter fails.
(
6
)
Maintenance, inspection and parts replacement
CAUTION
!
Do not carry out a megger (insulation resistance) test on the control circuit of the
inverter.
(
7
)
Disposing of the inverter
CAUTION
!
Treat as industrial waste.
(
8
)
General instructions
Man
y
of the dia
g
rams and drawin
g
s in this instruction manual show the inverter
without a cover, or partially open. Never operate the inverter in this manner. Always
replace the cover and follow this instruction manual when operating the inverter.

CONTENTS
I
1 OUTLINE 1
1.1 Pre-Operation Information ..........................................................................................1
1.1.1 Precautions for operation.....................................................................................1
1.2 Basic Configuration.....................................................................................................3
1.2.1 Basic configuration...............................................................................................3
1.3 Structure .....................................................................................................................4
1.3.1 Appearance and structure....................................................................................4
1.3.2 Functions..............................................................................................................5
1.3.3 Inverter communication specifications..................................................................5
1.3.4 CC-Link Ver. 1.10.................................................................................................6
1.3.5 Communication with remote devices....................................................................6
1.3.6 Removal and reinstallation of the front cover.......................................................7
1.3.7 Removal and reinstallation of the wiring cover.....................................................8
1.3.8 Removal and reinstallation of the accessory cover ..............................................9
1.3.9 Exploded view ....................................................................................................10
2 INSTALLATION AND WIRING 11
2.1 Installation.................................................................................................................11
2.1.1 Instructions for installation..................................................................................11
2.2 Wiring........................................................................................................................13
2.2.1 Terminal connection diagram.............................................................................13
2.2.2 Wiring of the Main Circuit...................................................................................16
2.2.3 Wiring of the control circuit.................................................................................20
2.2.4 Wiring of CC-Link communication signals..........................................................23
2.2.5 Connection to the PU connector.........................................................................26
2.2.6 Connection of stand-alone option units..............................................................29
2.2.7 Design information .............................................................................................31
2.3 Other Wiring..............................................................................................................32
2.3.1 Power supply harmonics ....................................................................................32
2.3.2 Japanese harmonic suppression guideline ........................................................33
2.3.3 Inverter-generated noise and reduction techniques...........................................36
2.3.4 Leakage currents and countermeasures............................................................40
2.3.5 Peripheral devices..............................................................................................41
Contents

II
2.3.6 Instructions for compliance with U.S. and Canadian Electrical Codes...............45
2.3.7 Instructions for compliance with the European standards..................................46
3 OPERATON/CONTROL 48
3.1 Inverter Setting..........................................................................................................48
3.1.1 Pre-operation checks..........................................................................................48
3.1.2 Inverter station number setting...........................................................................49
3.1.3 Setting of the transmission baudrate setting switch ...........................................50
3.1.4 Power on............................................................................................................50
3.1.5 Confirmation of the operation mode...................................................................51
3.2 Function Overview ....................................................................................................52
3.2.1 Function Block Diagram .....................................................................................52
3.2.2 Function overview...............................................................................................53
3.3 Communication Specifications..................................................................................55
3.3.1 I/O signal list.......................................................................................................55
3.3.2 Assignment of remote registers..........................................................................57
3.3.3 Instruction Codes ...............................................................................................58
3.4 Programming Examples............................................................................................59
3.4.1 Reply code definitions ........................................................................................59
3.4.2 Program example for reading the inverter status................................................60
3.4.3 Operation mode setting program example.........................................................61
3.4.4 Program example for setting the operation commands......................................62
3.4.5 Program example for monitoring the output frequency ......................................62
3.4.6 Parameter reading program example.................................................................63
3.4.7 Parameter writing program example...................................................................64
3.4.8 Running frequency setting program example.....................................................65
3.4.9 Alarm definition reading program example.........................................................66
3.4.10 Inverter resetting program example..................................................................67
3.4.11 Instructions.......................................................................................................68
4 PARAMETERS 69
4.1 Parameter List...........................................................................................................69
4.1.1 Parameter list.....................................................................................................69
4.1.2 List of parameters classified by purpose of use .................................................75
4.1.3 Parameters recommended to be set by the user ...............................................76

III
4.2 Parameter Function Details ......................................................................................77
4.2.1 Torque boost (Pr. 0, Pr. 46)................................................................................77
4.2.2 Output frequency range (Pr. 1, Pr. 2, Pr. 18)......................................................78
4.2.3 Base frequency, base frequency voltage (Pr. 3, Pr. 19, Pr. 47) .........................79
4.2.4 Multi-speed operation (Pr. 4, Pr. 5, Pr. 6, Pr. 24 to Pr. 27, Pr. 232 to Pr. 239)...80
4.2.5 Acceleration time (Pr. 7, Pr. 8, Pr. 20, Pr. 21, Pr. 44, Pr. 45).............................81
4.2.6 Electronic overcurrent protection (Pr. 9, Pr. 48) .................................................83
4.2.7 DC injection brake (Pr. 10 to Pr. 12)...................................................................84
4.2.8 Starting frequency (Pr. 13) .................................................................................85
4.2.9 Load pattern selection (Pr. 14)...........................................................................85
4.2.10 Stall prevention (Pr. 22, Pr. 23, Pr. 66).............................................................87
4.2.11 Acceleration/deceleration pattern (Pr. 29)........................................................89
4.2.12 Regenerative brake duty (Pr. 30, Pr. 70)..........................................................90
4.2.13 Frequency jump (Pr. 31 to Pr. 36)....................................................................91
4.2.14 Speed display (Pr. 37)......................................................................................92
4.2.15 Up-to-frequency sensitivity (Pr. 41) ..................................................................93
4.2.16 Output frequency detection (Pr. 42, Pr. 43)......................................................93
4.2.17 Monitor display (Pr. 52) ....................................................................................94
4.2.18 Automatic restart after instantaneous power failure (Pr. 57, Pr. 58).................96
4.2.19 Shortest acceleration/deceleration mode (Pr. 60 to Pr.63)...............................97
4.2.20 Retry function (Pr. 65, Pr. 67 to Pr. 69)............................................................99
4.2.21 Applied motor (Pr. 71)....................................................................................101
4.2.22 PWM carrier frequency (Pr. 72, Pr. 240)........................................................102
4.2.23 Reset selection/disconnected PU detection/PU stop selection (Pr. 75) .........103
4.2.24 Parameter write disable selection (Pr. 77)......................................................105
4.2.25 Reverse rotation prevention selection (Pr. 78) ...............................................106
4.2.26 Operation mode selection (Pr. 79)..................................................................107
4.2.27 General-purpose magnetic flux vector control selection (Pr. 80).........................108
4.2.28 Offline auto tuning function (Pr. 82 to Pr. 84, Pr. 90, Pr. 96)..........................109
4.2.29 Computer link operation (Pr. 117 to Pr. 124, Pr. 342)....................................115
4.2.30 Output current detection function (Pr. 150, Pr. 151).......................................127
4.2.31 Zero current detection (Pr. 152, Pr. 153)........................................................128
4.2.32 Stall prevention (Pr. 156)................................................................................129
4.2.33 User group selection (Pr. 160, Pr. 173 to Pr. 176) .........................................131
4.2.34 Actual operation hour meter clear (Pr. 171) ...................................................132
Contents

IV
4.2.35 Input terminal (remote output) function selection (Pr. 180 to Pr. 183)............132
4.2.36 Output terminal (remote input) function selection (Pr. 190 to Pr. 192)...........134
4.2.37 Cooling fan operation selection (Pr. 244).......................................................135
4.2.38 Slip compensation (Pr. 245 to Pr. 247)...........................................................136
4.2.39 Ground fault detection at start (Pr. 249).........................................................137
4.2.40 Stop selection (Pr. 250)..................................................................................138
4.2.41 Output phase failure protection selection (Pr. 251)........................................139
4.2.42 Communication error "E.OPT" operation selection (Pr. 500 to Pr. 502).........140
5 PROTECTIVE FUNCTIONS 142
5.1 Errors (Alarms)........................................................................................................142
5.1.1 Operation at Alarm Occurrence........................................................................142
5.1.2 Error (alarm) definitions....................................................................................143
5.1.3 To know the operating status at the occurrence of alarm.................................149
5.1.4 Correspondence between digital and actual characters...................................150
5.1.5 Resetting the inverter .......................................................................................150
5.1.6 How to Check for Error using the LEDs............................................................151
5.2 Troubleshooting......................................................................................................154
5.2.1 Motor remains stopped.....................................................................................154
5.2.2 Motor rotates in opposite direction ...................................................................154
5.2.3 Speed greatly differs from the setting...............................................................154
5.2.4 Acceleration/deceleration is not smooth...........................................................155
5.2.5 Motor current is large........................................................................................155
5.2.6 Speed does not increase..................................................................................155
5.2.7 Speed varies during operation..........................................................................155
5.2.8 Operation mode unswitched to CC-Link operation mode.................................156
5.2.9 Inverter unstarted in CC-Link operation mode..................................................156
5.2.10 Parameter write cannot be performed............................................................156
5.3 Precautions for Maintenance and Inspection..........................................................157
5.3.1 Precautions for maintenance and inspection....................................................157
5.3.2 Check items......................................................................................................157
5.3.3 Periodic inspection ...........................................................................................158
5.3.4 Insulation resistance test using megger...........................................................158
5.3.5 Pressure test....................................................................................................158
5.3.6 Daily and Periodic Inspection...........................................................................159

V
5.3.7 Replacement of parts.......................................................................................162
5.3.8 Measurement of main circuit voltages, currents and powers............................164
6 SPECIFICATIONS 166
6.1 Standard Specifications..........................................................................................166
6.1.1 Model specifications.........................................................................................166
6.1.2 Common specifications ....................................................................................167
6.1.3 Outline dimension drawings .............................................................................169
APPENDIX 173
APPENDIX 1 Data Code List........................................................................................173
Contents

C H A P T E R 1
O U T L I N E
This chapter gives information on the basic "outline" of this
product.
Always read the instructions before using the equipment.
1.1 Pre-Operation Information ..........................................1
1.2 Basic Configuration.....................................................3
1.3 Structure.....................................................................4
<Abbreviations and generic names>
!
PU
Parameter unit (FR-PU04)
!
Inverter
Mitsubishi transistorized inverter
FR-E500 series
!
Pr.
Parameter number
!
CC-Link
Control & Communication Link
CHAPTER 1
OUTLINE
Chapter 1
Chapter 2
Chapter 3
Chapter 4
Chapter 5
Chapter 6

OUTLINE
1
1.1 Pre-Operation Information
1 OUTLINE
1.1 Pre-Operation Information
1.1.1 Precautions for operation
This manual is written for the FR-E500 series Control & Communication Link (hereafter
referred to as "CC-Link") type transistorized inverters.
Incorrect handling may cause the inverter to operate incorrectly, causing its life to be
reduced considerably, or at the worst, the inverter to be damaged. Handle the inverter
properly in accordance with the information in each section as well as the precautions
and instructions of this manual to use it correctly.
For handling information on the parameter unit (FR-PU04), stand-alone options, etc.,
refer to the corresponding manuals.
(
1
)
Unpacking and product check
Unpack the inverter and check the capacity plate on the front cover and the rating plate
on the inverter side face to ensure that the product agrees with your order and the
inverter is intact.
1) Inverter type
Inverter type Serial number
Capacity plate
Rating plate
Capacity plate
Rating plate
FR-E520-0.1KN/
Inverter type
Input rating
Output rating
Serial number
MITSUBISHI
MODEL
INVERTER
FR-E520-0.1KN
INPUT :
OUTPUT :
SERIAL :
XXXXX
XXXXX
PASSED
Products
supporting CC-Link
Ver.1.10 has a logo.
"
Inverter type
FR E520 0.1 K N
Symbol Voltage class
200V class
CC-Link t
y
p
e
E520
Inverter
Indicates capacity
"kW".
2) Accessory
Instruction manual
If you have found any discrepancy, damage, etc., please contact your sales
representative.

OUTLINE
2
(
2
)
Preparation of instruments and parts required for operation
Instruments and parts to be prepared depend on how the inverter is operated. Prepare
equipment and parts as necessary. (Refer to page 48.)
(
3
)
Installation
To operate the inverter with high performance for a long time, install the inverter in a
proper place, in the correct direction, with proper clearances. (Refer to page 11.)
(
4
)
Wiring
Connect the power supply, motor and operation signals (control signals) to the terminal
block. Note that incorrect connection may damage the inverter and peripheral devices.
(See page 13.)
(5) Grounding
To prevent an electric shock, always use the motor and inverter after grounding them.
The ground cable provided for reduction of induction noise from the power line of the
inverter is recommended to be run by returning it up to the ground terminal of the
inverter. (Refer to page 39)
1

OUTLINE
3
1.2 Basic Configuration
1.2 Basic Configuration
1.2.1 Basic configuration
The following devices are required to operate the inverter. Proper peripheral devices
must be selected and correct connections made to ensure proper operation. Incorrect
system configuration and connections can cause the inverter to operate improperly, its
life to be reduced considerably, and in the worst case, the inverter to be damaged.
Please handle the inverter properly in accordance with the information in each section
as well as the precautions and instructions of this manual. (For connections of the
peripheral devices, refer to the corresponding manuals.)
AJ61
BT11
CPU
(MC)
(NFB)
or
(ELB)
Ground
Ground
DC reactor
(FR-BEL)
AC reactor
(FR-BAL)
Earth leakage
circuit breaker
or no-fuse breaker
Power supply
Magnetic
contactor
Inverter
Manuals for CC-Link master station
Master station
Terminal resistor
CC-Link dedicated cable
Up to 42 inverters can be connected.
Terminal resistor
AJ61BT11/A1SJ61BT11 Control &
Communication Link System Master/
Local module User's Manual ... IB-66721
AJ61QBT11/A1SJ61QBT11 Control &
Communication Link System Master/
Local module User's Manual ... IB-66722
QJ61BT11 Control &
Communication Link System Master/
Local module User's Manual ... IB-080016
Power supply
Japanese Harmonic Suppression Guideline
The "harmonic suppression guideline for household appliance and general-purpose
products" issued by Ministry of Economy, Trade and Industry (formerly Ministry of
International Trade and Industry) in September, 1994 applies to 3-phase 200V class
inverters of 3.7kW or less. By installing the power factor improving reactor (FR-BEL
or FR-BAL), inverters comply with the "harmonic suppression techniques for
transistorized inverters (input current 20A or less)" established by the Japan
Electrical Manufacturers' Association.

OUTLINE
4
1.3 Structure
1.3 Structure
1.3.1 Appearance and structure
(1) Front view
POWER lamp
(yellow)
Accessory cover
ALARM lamp (red)
Operating status
indicator LEDs
Rating plate
Front cover
Capacity plate
Wirin
g
cover
(2) Without accessory cover and front cover
POWER lamp (yellow)
Operating status indicator LEDs
Control logic changing connector
Control circuit terminal block
PU connector*
ALARM lamp (red)
Transmission baud rate settin
g
switch
CC-Link terminal block
Main circuit terminal block
Wiring cover
Station number setting switches
* Use the PU connector for the FR-PU04 (option) and RS-485 communication.
1

OUTLINE
5
1.3.2 Functions
Name Function
Station number setting
switches
×
10
0
9
8
7
6
5
4
3
2
1
×
1
0
9
8
7
6
5
4
3
2
1
Used to set the inverter station number
between 1 and 64.
For details, refer to page 49.
Transmission baud
rate setting switch
Switch used to set the transmission speed.
For details, refer to page 50.
POWER lamp (yellow) Lit to indicate that power is input (present).
ALARM lamp (red) Lit to indicate that a protective function is activated.
Operating status
indicator LEDs
L.RUN: Lit to indicate normal receipt of refresh data. Extinguished
when data is interrupted for some time.
SD : Extinguished to indicate that send data is "0".
RD : Lit to indicate detection of carrier in receive data.
L.ERR : Lit to indicate the communication error of the station itself.
Flickers to indicate that the switch or other setting was
changed while power is on.
1.3.3 Inverter communication specifications
Form Terminal block connection system (disconnectable from
inverter front)
Number of units connected Maximum 42 units (1 station/unit occupied), other models
may also be used.
Terminal block connected 6-terminal block (M2
×
6 screws)
Cable size 0.75 to 2mm
2
Station type Remote device station
Number of stations occupied One inverter occupies one station
Connection cable CC-Link dedicated cable, CC-Link Version 1.10 compatible
CC-Link dedicated cable

OUTLINE
6
1.3.4 CC-Link Ver. 1.10
The conventional CC-Link products, whose inter-station cable lengths have equally
been changed to 20cm (7.87 inch) or more to improve the inter-station cable length
restriction, are defined as CC-Link Ver. 1.10. In comparison, the conventional products
are defined as CC-Link Ver. 1.00.
Refer to the CC-Link Master Module Manual for the maximum overall cable lengths and
inter-station cable lengths of CC-Link Ver. 1.00 and Ver. 1.10.
(
1
)
CC-Link Ver. 1.10 compatibility conditions
1) All modules that comprise a CC-Link system should be compatible with CC-Link Ver.
1.10.
2) All data link cables should be CC-Link Ver. 1.10 compatible, CC-Link dedicated
cables. (CC-Link Ver. 1.10 compatible cables have a
logo or Ver. 1.10
indication.)
Note: In a system that uses the CC-Link Ver. 1.00 and Ver. 1.10 modules and
cables together, the maximum overall cable length and inter-station cable
length are as specified for CC-Link Ver. 1.00.
(
2
)
How to confirm the CC-Link Ver. 1.10 compatible products
Only the FR-E520-KN units manufactured in and after September 2001 are CC-Link
Ver. 1.10 compatible.
1) Product having SERIAL of numbers shown below or later on its body and shipping
carton
(The shipping carton has only three upper digits of the six-digit control number.)
Type SERIAL
FR-E520-0.1KN X19
FR-E520-0.2KN, 0.4KN Y19
FR-E520-0.75KN Z19
FR-E520-1.5KN, 2.2KN X19
FR-E520-3.7KN V19
FR-E520-5.5KN, 7.5KN W19
X 1 9
Symbol Year Month Control number
SERIAL number
2) Product having a logo on its body
Refer to page 1 for the SERIAL and logo positions on the body.
1.3.5 Communication with remote devices
(
1
)
When the CPU has automatic refresh function (example: QnA series
CPU)
Through communication with the corresponding devices using sequence ladder
logic, data is automatically transferred to/from the refresh buffer of the master
station at the execution of the END instruction to perform communication with the
remote devices.
(
2
)
When the CPU does not have automatic refresh function (example:
AnA series CPU)
Data is transferred to/from the refresh buffer of the master station directly by
sequence ladder logic to perform communication with the remote devices.
1

OUTLINE
7
1.3.6 Removal and reinstallation of the front cover
"
""
"
Removal
(For the FR-E520-0.1KN to 3.7KN)
The front cover is secured by catches in positions A and B as shown below.
Push either A or B in the direction of arrows, and using the other end as a
support, pull the front cover toward you to remove.
1
)
2
)
3
)
A
B
(For the FR-E520-5.5KN, 7.5KN)
The front cover is fixed with catches in positions A, B and C.
Push A and B in the directions of arrows at the same time and remove the
cover using C as supporting points.
1
)
2
)
3
)
C
B
C
A
"
""
"
Reinstallation
When reinstalling the front cover after wiring, fix the catches securely.
With the front cover removed, do not switch power on.

OUTLINE
8
Note:1. Make sure that the front cover has been reinstalled securely.
2. The same serial number is printed on the capacity plate of the front cover
and the rating plate of the inverter. Before reinstalling the front cover, check
the serial numbers to ensure that the cover removed is reinstalled to the
inverter from where it was removed.
1.3.7 Removal and reinstallation of the wiring cover
"
""
"
Removal
The wiring cover is fixed by catches in positions 1) and 2).
Push either 1) or 2) in the direction of arrows and pull the wiring cover
downward to remove.
1)
2)
Wirin
g
hole
"
""
"
Reinstallation
Pass the cables through the wiring hole and reinstall the cover in the original
position.
1
/