* 0 4 9 0 5 1 1 2 - 0 1 *
04905112 08-02-1N
1
2
3
1
2
3
4
4
Driver Installation Guide
Copyright © 2008 ROLAND CORPORATION
All rights reserved. No part of this publication may be reproduced in any
form without the written permission of ROLAND CORPORATION.
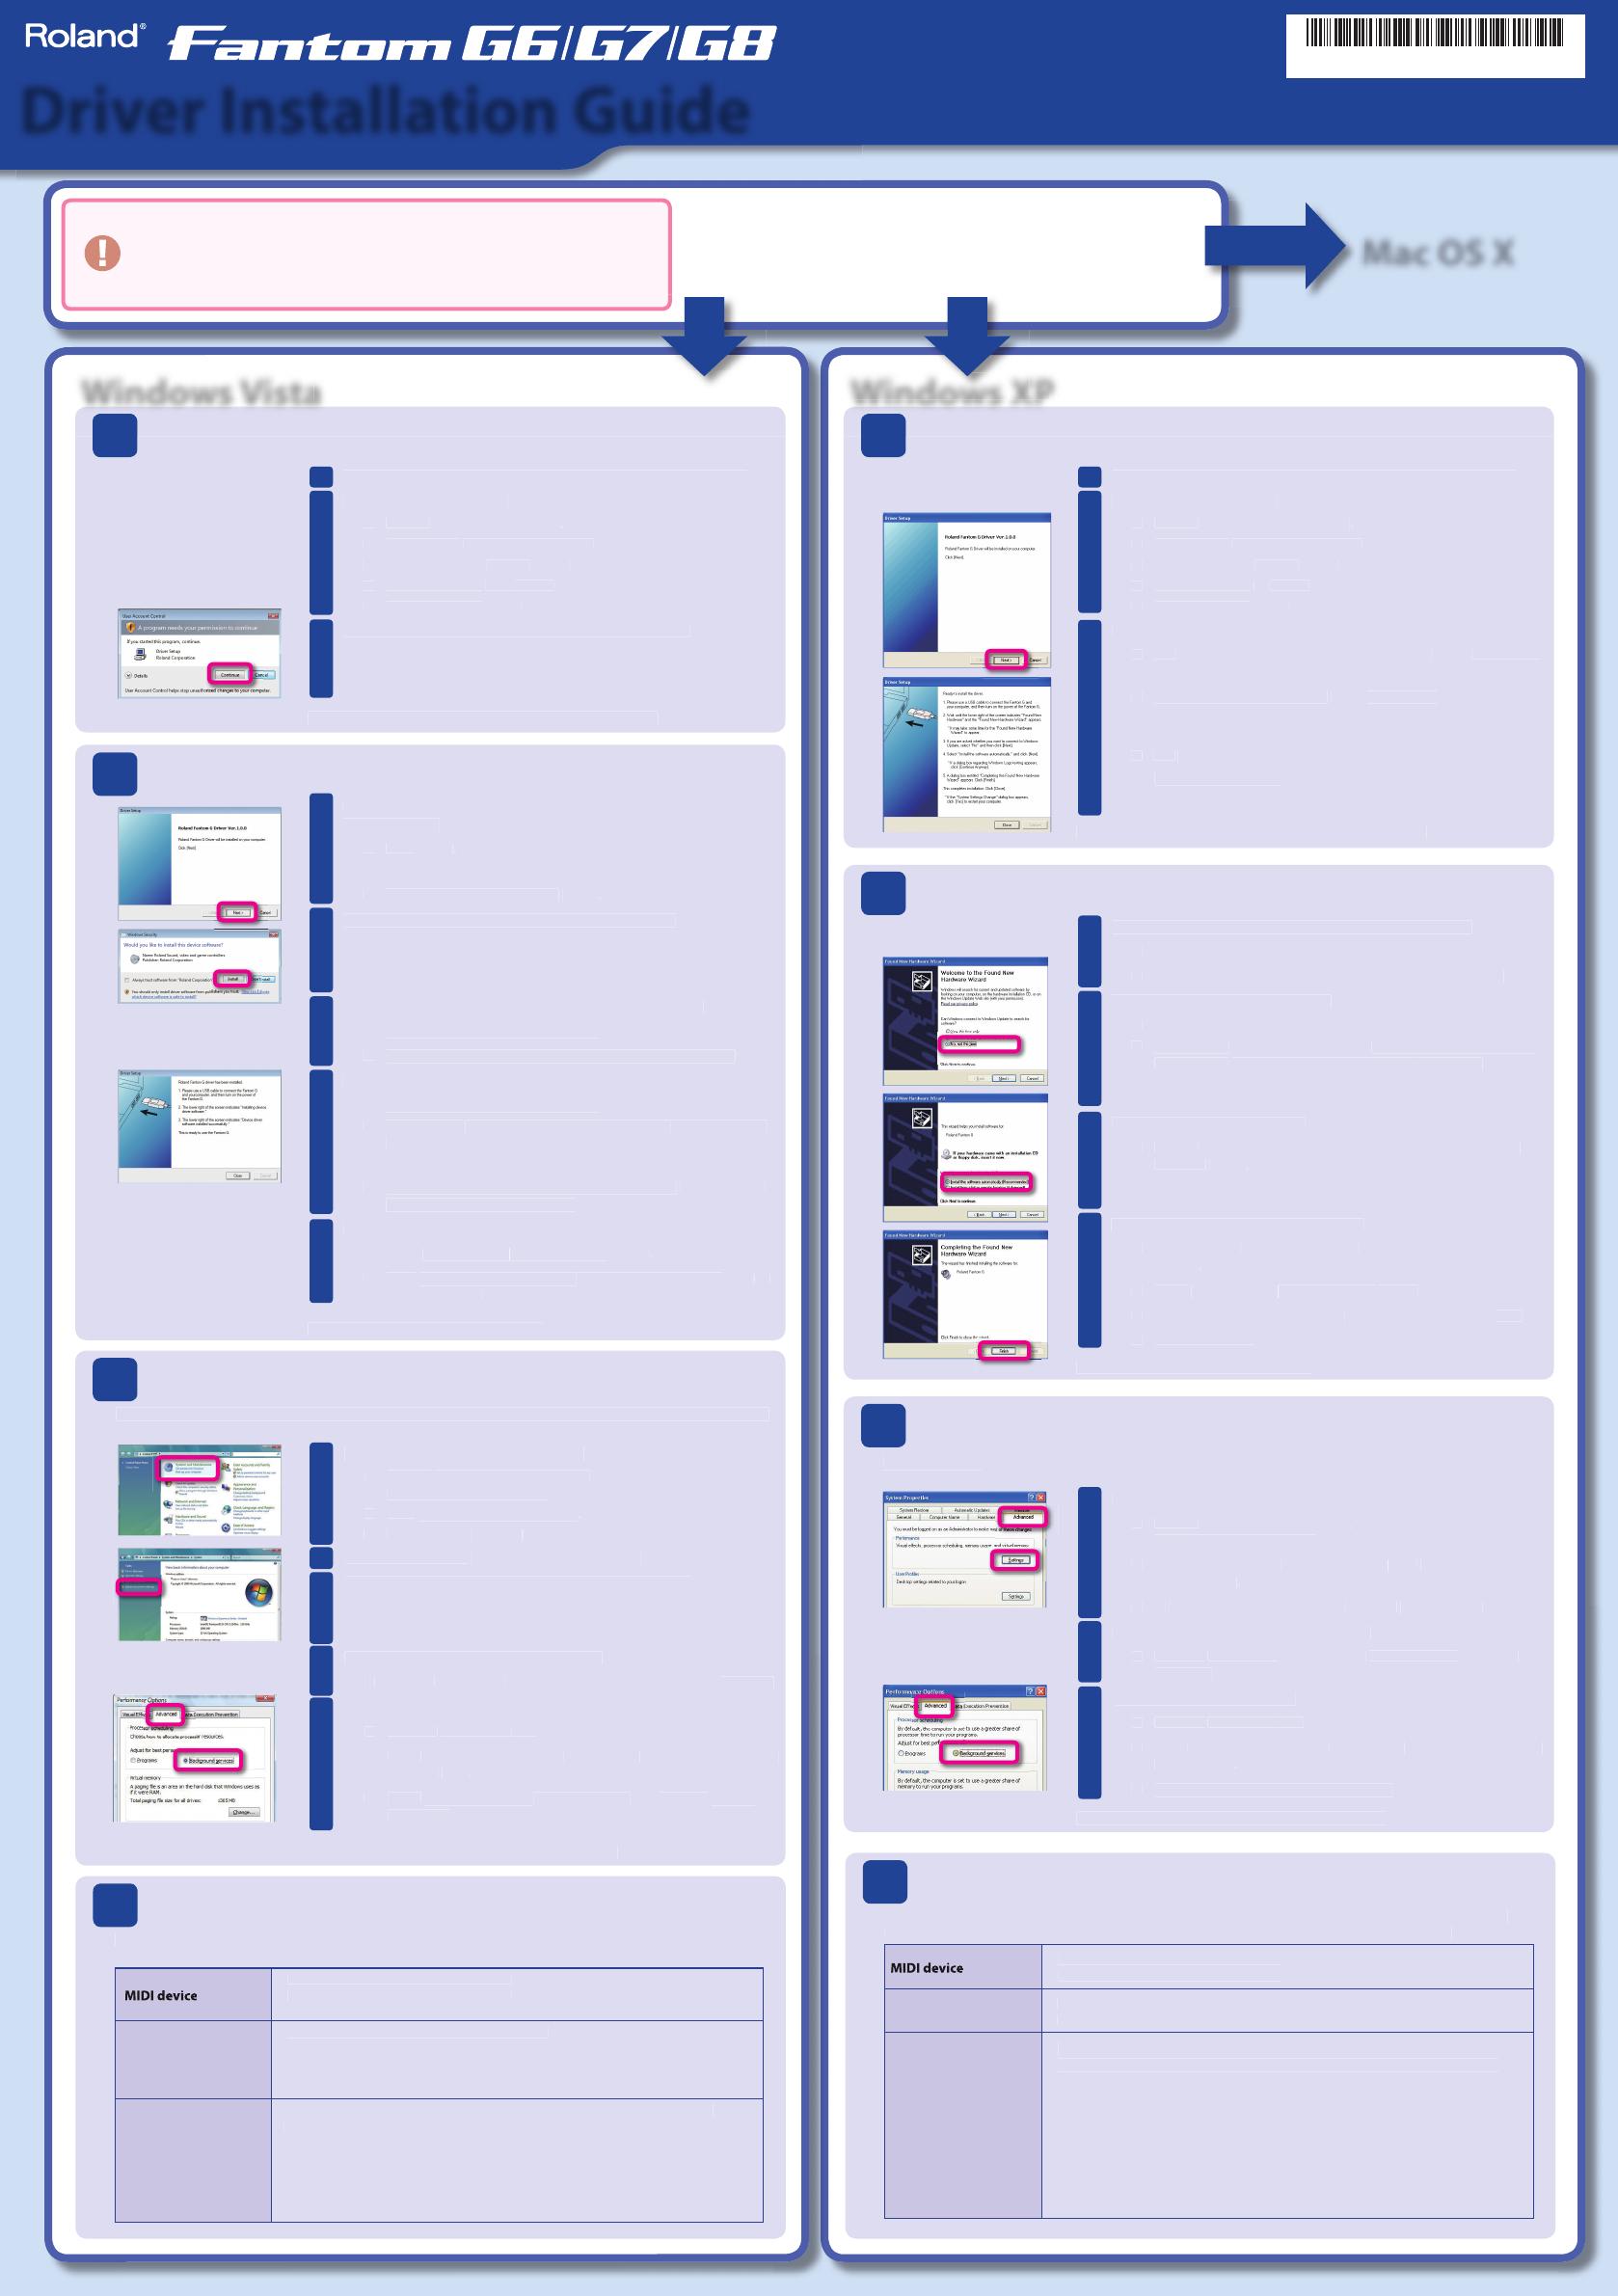
Preparations for installation
Insert the included “Fantom-G Editor CD-ROM” into your computer.
1
Start up the driver installer.
2
3
Click [Next] as instructed by the “Driver Setup” dialog box.
dialog box will appear. Click
To begin the installation, click
If a dialog box regarding Windows logo testing appears, click [Continue
Anyway].
“Roland Fantom G Driver will be installed on your computer”
This completes the preparations for installing the driver.
Driver installation and connections
Use a USB cable to connect the Fantom-G to your computer.
1
Turn o the power on the Fantom-G.
Use a USB cable to connect the Fantom-G to your computer.
Turn on the power on the Fantom-G.
2
Turn on the power on the Fantom-G.
will appear near the taskbar,
“Found New Hardware Wizard”
If the Found New Hardware Wizard asks whether you want to connect to
Windows Update, choose “No, ...” and click [Next].
Choose the installation method.
3
“Install the software automatically (Recommended),”
If a dialog box regarding Windows logo testing appears, click [Continue
Anyway].
Click [Finish] to complete the installation.
4
dialog box appears, click
This completes the driver installation.
Performance Options settings
By making these settings you may be able to prevent clicks or pops in the sound. Be sure to make the settings as
1
Open the System Properties dialog box.
[Start] — [Control Panel]
The control panel will open.
“or pick a Control Panel icon,”
Open the Performance Options dialog box.
2
3
Enable “Background services.”
In the System Properties dialog box, click
This completes the performance options settings.
Preparations for installation
Insert the included “Fantom-G Editor CD-ROM” into your computer.
1
Start up the installer driver.
2
3
If a User Account Control screen appears, click [Continue].
If the screen indicates “Driver installation must be performed by an ad-
ministrator,” you must log on to Windows as a user whose account type is
Administrator, and perform the installation again.
This completes the preparations for installing the driver.
Driver installation and connections
1
The screen will indicate “Roland Fantom G Driver will be installed on
If a di erent message appears, proceed as directed by that message.
To begin the installation, click
2
If a Windows Security dialog box appears, click [Install].
The screen will indicate “The Fantom G driver has been installed.”
If a di erent message appears, proceed as directed by that message.
Use a USB cable to connect the Fantom-G to your computer.
3
Turn o the power on the Fantom-G.
Use a USB cable to connect the Fantom-G to your computer.
4
Turn on the power on the Fantom-G.
Turn on the power on the Fantom-G.
“Installing device driver software”
the taskbar, and the driver will be installed automatically.
If a di erent message appears, proceed as directed by that message.
Installation is complete when the screen indicates
software installed successfully.”
Click [Close] to complete the installation.
5
dialog box appears, click
This completes the driver installation.
Performance Options settings
Disconnect your USB devices
Disconnect all USB cables from your computer, except for a USB keyboard and/or USB
mouse (if used). Do not connect the Fantom-G to your computer yet.
Close all software
Close all software and utility programs including anti-virus software.
In order to connect the Fantom-G to your computer and use it,
you must install the driver and make settings.
Proceed to the next step as appropriate
for your operating system.
See other side
By making these settings you may be able to prevent clicks or pops in the sound. Be sure to make the settings as
1
Open the System Properties dialog box.
[Start] — [Control Panel].
The control panel will open.
2
In the area at left, click
“Advanced system settings.”
If a User Account Control screen appears, click [Continue].
3
If you are asked to enter the password of an Administrator account, log on
to Windows as a user whose account type is Administrator, and then make
the settings again.
Open the performance options dialog box.
4
tab, and in the Performance area click
Enable “Background services.”
5
This completes the performance options settings.
Input/output device settings
In order to take full advantage of your software, make input/output device settings for your software as de-
scribed below. For details on the procedure, refer to the user’s guide for the software you’re using.
MIDI OUT device Roland Fantom G
MIDI IN device Roland Fantom G
WAVE OUT device Roland Fantom G
WAVE IN device Roland Fantom G
If you’re using the Fantom-G with an ASIO-compatible application such as
Cubase, choose “Roland Fantom G” for the ASIO settings of your application.
To prevent audio feedback loops or double monitoring, turn o monitoring in your application, *
or set things so ASIO Direct Monitoring is used.
The Fantom-G does not support ASIO Direct Monitoring. Support is emulated for your convenience.*
If you’re using the Fantom-G with ASIO, we recommend that you make settings in your applica-*
tion so that the Microsoft GS Wavetable SW Synth is not used. (This is in order to decrease the
processor load, and for convenience in changing the bu er size of the driver.)
In Cubase SX, if the Fantom-G’s sampling frequency is di erent than Cubase SX’s project setting, *
a message such as “Sample could not be set” may appear, and you will be unable to record or
play back correctly. If this occurs, you can ensure correct operation by opening “Project Setup,”
making sure that the sampling frequency matches, and clicking [OK].
Input/output device settings
In order to take full advantage of your software, make input/output device settings for your software as de-
scribed below. For details on the procedure, refer to the user’s guide for the software you’re using.
MIDI OUT device: Roland Fantom G
MIDI IN device: Roland Fantom G
In the Windows Media Player, the MIDI input/output device of Fantom-G cannot be used. *
WAVE OUT device: OUT (Roland Fantom G)
WAVE IN device: IN (Roland Fantom G)
If you’ve renamed this in the control panel “Sound” settings, the name you speci ed will ap-*
pear. In WDM/KS compatible applications such as Cakewalk SONAR, this will appear as “Roland
Fantom G.”
If you’re using the Fantom-G with an ASIO-compatible application such as
Cubase, choose “Roland Fantom G” for the ASIO settings of your application.
To prevent audio feedback loops or double monitoring, turn o monitoring in your application, *
or set things so ASIO Direct Monitoring is used.
The Fantom-G does not support ASIO Direct Monitoring. Support is emulated for your convenience.*
If you’re using the Fantom-G with ASIO, we recommend that you make settings in your applica-*
tion so that the Microsoft GS Wavetable SW Synth is not used. (This is in order to decrease the
processor load, and for convenience in changing the bu er size of the driver.)


