Page is loading ...

PARTS LIST:
Qt
y Description Qty Description
1 Headache Rack
4 12mm x 50m
m Hex Bolts
1 Drive
r/Left Mounting Bracket 8 12mm Lock Washers
1 Passenger/Right Mounting Bracket 16 12mm Flat Washers
4 12mm x 40m
m Hex Bolts 8 12mm Hex Nuts
INSTALLATION INSTRUCTIONS
1999-2012 FORD F250, SUPER DUTY
(LARGER MULTI FIT BLACK) PART # 111001
Pa
ssenger/right side
Mounting Bracket
Dri
v
e
r
/left side
Mount
ing Bracket
Head
ache Rack

PROCEDURE:
1. REMOVE CONTENTS FROM BOX. VERIFY ALL PARTS ARE PRESENT. READ
INSTRUCTIONS CAREFULLY BEFORE STARTING INSTALLATION.
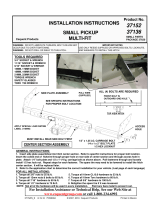
2. From the list above select the Driver/Left side mounting bracket and secure to the bottom of
the outside mount of the Headache rack with (2) 12mm x 40mm Hex Bolts, (4) 12mm Flat
Washer, (2) 12mm Lock Washers and (2) 12mm nuts, repeat this process for Passenger/right
side mounting bracket, (Fig 1) shows Driver/left side bracket attached to Headache rack, Snug
but do not tighten hardware at this time.
3. Next, with help place the Headache rack up on the upper rails of the trucks box and begin to
align the rack to the edge of the truck box (were the box ends not to where it meets the cab)
(Fig 2) shows brackets lined up on the truck rails, ounce you have it aligned and are satisfied
with the look and fit mark your mounting holes, and begin to drill the 12mm holes on the upper
rails ounce done fasten the Headache rack to the truck rails with (2) 12mm x 50mm Hex Bolts,
(4) 12mm Flat Washer, (2) 12mm Lock Washers and (2) 12mm nuts per side (Fig 2A & 2B)
shows bracket attached to Truck rails, Snug but do not tighten hardware at this time.
4. Level and align Headache Rack properly; then tighten all hardware at this time.
5. Do periodic inspections to the installation to make sure all hardware is secure and tight.
DRIVER SIDE SHOWN
Fig 1
Install mounting bracket
with
(2)12mm x 40mm Hex bolt
(4)12mm Flat washer
(2)12mm lock washer
(2)12mm Nuts
Fig 2
Mark front & back
holes then drill with
1/2" bit for mounting
bracket
Driver front side
shown repeat for rear
& passenger side
Fig 2A Fig 2B
Secure brackets to rail with
(2)12mm x 50mm Hex bolt
(4)12mm Flat washer
(2)12mm lock washer
(2)12mm Nuts
Driver side shown repeat for
passenger side
/


