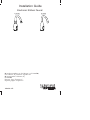
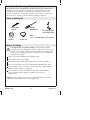
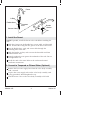
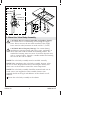
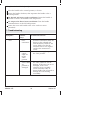
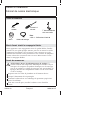
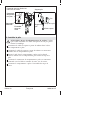
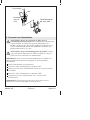
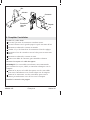
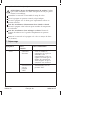
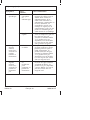
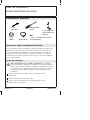
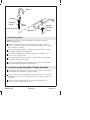
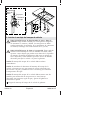
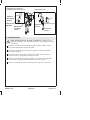
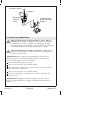
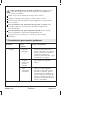
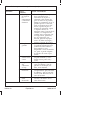
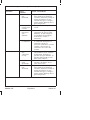
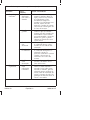
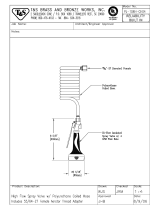
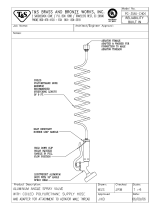
Kohler K-10103 is an electronic kitchen faucet operated by a 2CR5 6 V lithium battery. It is equipped with a sensor that allows for touchless activation and deactivation of water flow. The faucet is designed for use with a main kitchen faucet and can be converted to tempered or filtered water. It features a flexible hose, threaded stud, and bracket for easy installation and a valve body assembly with a gasket and screws for secure mounting. The faucet also includes a battery holder, solenoid connector, and sensor cable for electrical connections.
Kohler K-10103 is an electronic kitchen faucet operated by a 2CR5 6 V lithium battery. It is equipped with a sensor that allows for touchless activation and deactivation of water flow. The faucet is designed for use with a main kitchen faucet and can be converted to tempered or filtered water. It features a flexible hose, threaded stud, and bracket for easy installation and a valve body assembly with a gasket and screws for secure mounting. The faucet also includes a battery holder, solenoid connector, and sensor cable for electrical connections.


-
 1
1
-
 2
2
-
 3
3
-
 4
4
-
 5
5
-
 6
6
-
 7
7
-
 8
8
-
 9
9
-
 10
10
-
 11
11
-
 12
12
-
 13
13
-
 14
14
-
 15
15
-
 16
16
-
 17
17
-
 18
18
-
 19
19
-
 20
20
-
 21
21
-
 22
22
-
 23
23
-
 24
24
-
 25
25
-
 26
26
-
 27
27
-
 28
28
-
 29
29
-
 30
30
-
 31
31
-
 32
32
-
 33
33
-
 34
34
-
 35
35
-
 36
36
-
 37
37
-
 38
38
-
 39
39
-
 40
40
-
 41
41
-
 42
42
-
 43
43
-
 44
44


Kohler K-10103 is an electronic kitchen faucet operated by a 2CR5 6 V lithium battery. It is equipped with a sensor that allows for touchless activation and deactivation of water flow. The faucet is designed for use with a main kitchen faucet and can be converted to tempered or filtered water. It features a flexible hose, threaded stud, and bracket for easy installation and a valve body assembly with a gasket and screws for secure mounting. The faucet also includes a battery holder, solenoid connector, and sensor cable for electrical connections.
Ask a question and I''ll find the answer in the document
Finding information in a document is now easier with AI
in other languages
- français: Kohler K-10103 Manuel utilisateur
- español: Kohler K-10103 Manual de usuario
Related papers
-
Kohler K-13466-VS Installation guide
-
Kohler 13469-CP Installation guide
-
-
-
-
-
-
Kohler 103K37-SANA-CP Installation guide
-
-
Other documents
-
 T & S Brass & Bronze Works PJ-108H-CH04 Datasheet
-
Philips 2CR5 User manual
-
 T & S Brass & Bronze Works PG-35AV-CH04 Datasheet
-
Moen CA8302 Installation guide
-
Wacker Neuson CRT60-74L User manual
-
-
-
-
American Standard 4931380.002 Installation guide
-

