Installation Instructions
825 Series Shower Module Drain
Sioux Chief Manufacturing Company | P: 1.800.821.3944 | F: 1.800.758.5950 | www.siouxchief.com 04-20
Be sure to check all local plumbing codes before beginning any plumbing installation.
Remove the strainer from the drain and set aside for later installation. Disassemble the drain and separate the top portion (male
threaded) and the bottom portion (female threaded body and two washers).
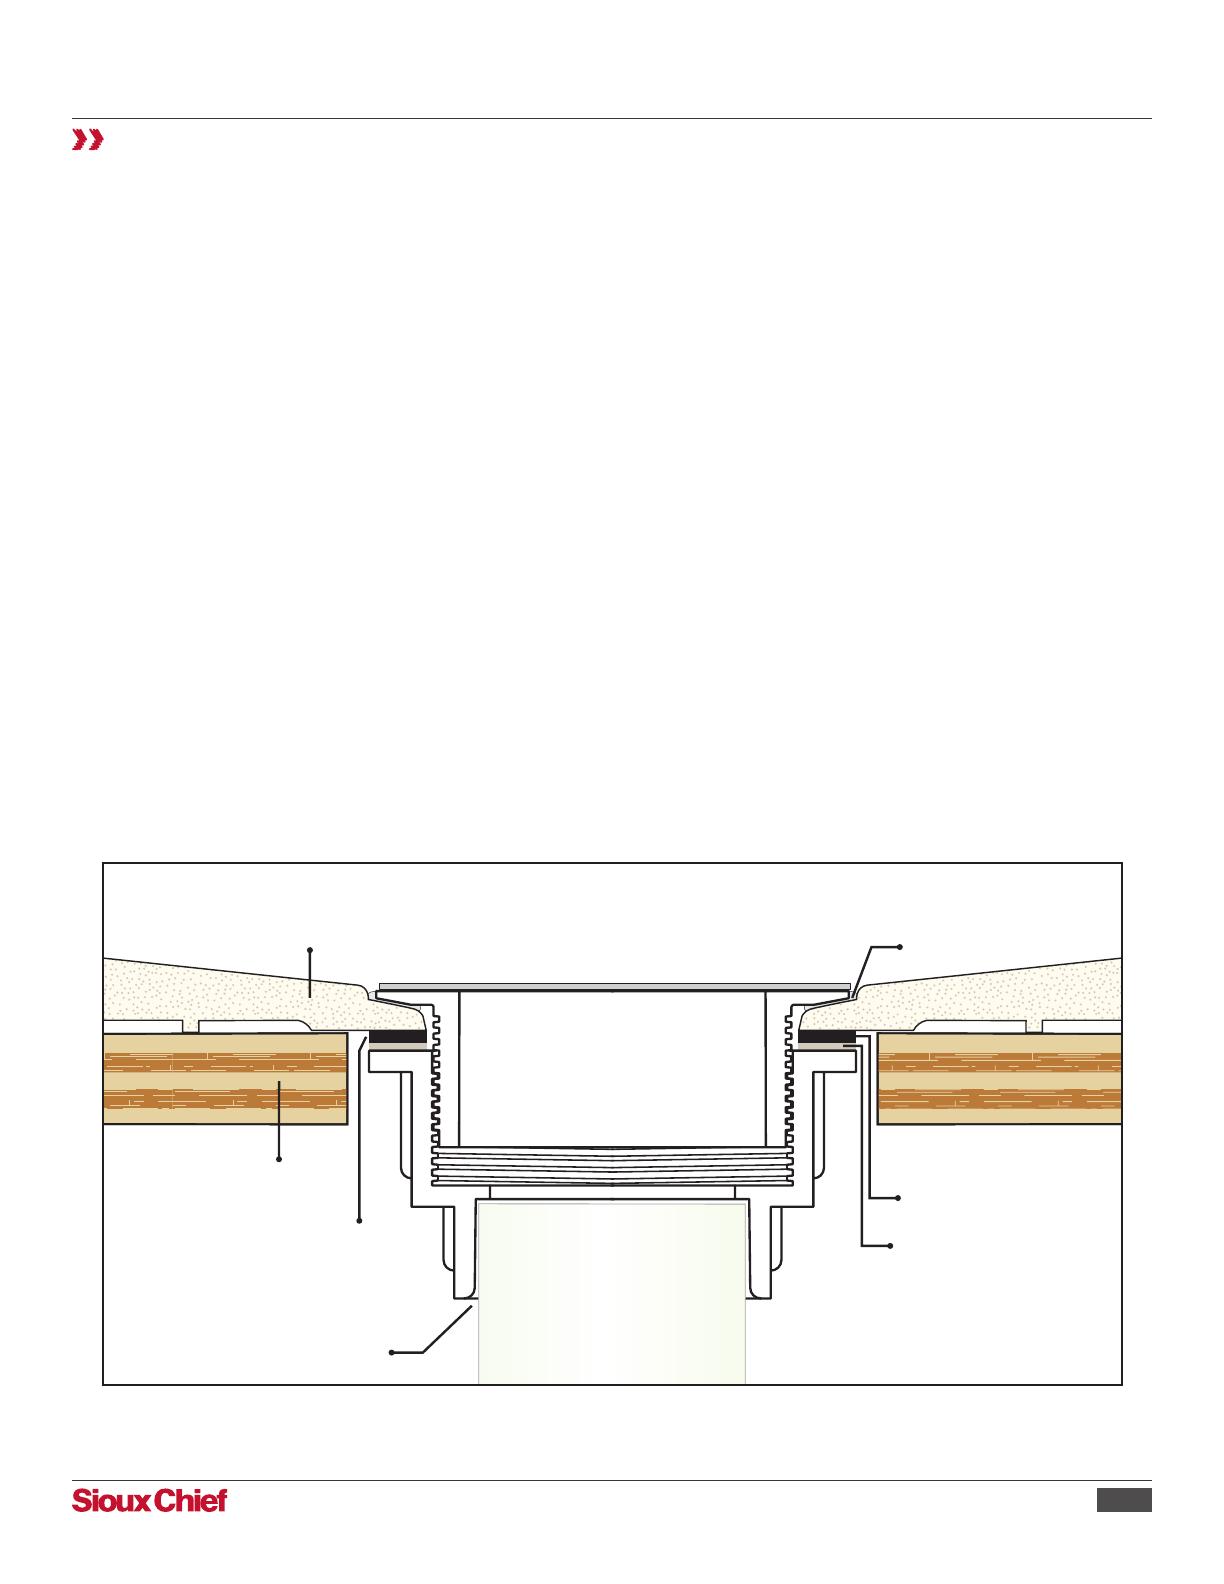
Before the shower base is set in the oor, attach the drain to the shower base. Apply a thick bead of 100% silicone sealant to
the underside of the ange on top portion of the drain and place it through the hole in the top side of the shower base.
From the bottom side of the shower base, place the black rubber sealing washer, then the poly friction washer over the male
threads against the bottom side of the shower base. Be sure there are no obstructions, and that the sealing washer makes
clean, even contact with the bottom of the shower base. Holding the top portion in place, engage the bottom portion of the drain
over the male threads and tighten. [Note: The poly friction washer is intended to protect the rubber washer from damage while
the bottom portion is threaded on and tightened up.]
From the top side of the shower base, wipe away excess silicone that has squeezed out from under the top portion.
The shower base is “sandwiched” between the top portion and the bottom portion. The rubber sealing washer along with the
silicone sealant (applied between the shower base and the top portion), keeps the drain watertight.
Set the base-and-drain assembly in place according to the base manufacturer’s instructions. After setting the assembly in place,
solvent weld the drain pipe into the hub of the drain according to the glue manufacturer’s instructions. Allow 24 hours for the
silicone to cure. Stand in the shower area to simulate normal use, then check for leaks. Turn water on in shower, and from below
shower oor, check the drain area for leaks concentrating on [1] the area between pipe and drain hub; and [2] between shower
base and sealing washer.
When the installation is complete, remove the adhesive cover from the strainer and install in to drain.
Suboor
Sealing Washer
Friction Washer
Sealant
Base
2" Sch. 40
Pipe
[2]
[1]