G
8PCS
FLAT WASHER
M6 x 19MM
D4PCS
SPRING WASHER
M6 x 12MM
4PCS
L - KEY
M5 x 65MM
M4 x 65MM
8PCS
M4 x 32MM
L - KEY
SCREW
M6 x 50MM
JCBC SCREW
M8 x 20MM
1PC
JCBB SCREW
1PC
E
4PCS
F
C
B
A
LEG
QTY
HARDWARE
ITEM
74PCS
FRONT RAIL
6
5
4
3
2
2SETS
1PC
SIDE PANEL
(L)
SLAT
SIDE PANEL
(R)
1PC
1PC
BACK RAIL
1PC
BACK PANEL 1PC
STEP 2
1
QTY
PARTLISTNO
STEP 1
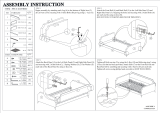
Begin assembly by attaching each Leg (7) to the bottom of Left Side Panel (2) &
Right Side Panel (3). Tighten the Legs (7) clockwise until secure.
Attach the Front Rail (4) and Back Rail (5) to the Left Side Panel (2) and Right Side Panel (3).
Aligning the holes and securing with 2 Allen Bolts (A) per each end by using L-key (G).
(DO NOT FULLY TIGHTEN BOLTS FOR THIS STEP)
ITEM : CORA TWIN DAYBED
7
23
2
3
5
4
A
G
ASSEMBLY INSTRUCTION

STEP 3
STEP 4
Tighten all Bolts on step 2 by using the L-Key (G) and following step 3 using L-Key (F) that has been provided.
Attach Slats (6) to the Front Rail (4) and Back Rail (5) by unrolling and securing with 2 Screws (E ) per each side.
Tighten all screws using philips head screwdriver (NOT INCLUDED)
ASSEMBLY
COMPLETED
2
4
6
1
3
6
E
1
3
2
DCBF
Attach the Back Panel (1) to the Left Side Panel (2) and Right Side Panel (3), and securing with 2
Allen Bolts (B), 2 Spring Washer (C ), 2 Flat Washer (D) each side of the Back Panel by using L-Key (F).
ASSEMBLY INSTRUCTION
-
 1
1
-
 2
2
ROOMS TO GO 39012543 Assembly Instructions
- Type
- Assembly Instructions
- This manual is also suitable for
Ask a question and I''ll find the answer in the document
Finding information in a document is now easier with AI
Related papers
Other documents
-
 Baxton Studio Pita-Black Velvet-Daybed-Twin Assembly Instructions
-
Qualler BLE000215P User guide
-
Qualler BLE000213E User guide
-
 X Rocker Convertible Battle Chair User manual
-
Qualler WM000513KB User guide
-
Orbit Power Stride 23 Elliptical OBE655T Owner's manual
-
Southern Enterprises MS872600TX Assembly Instruction Manual
-
Qualler BWM000304E User guide
-
 Furniture of America IDF-7529EX-T Installation guide
-
 Signature Home 4411K Installation guide


