Page is loading ...

1
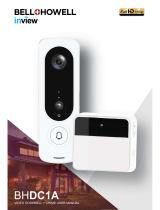
VDB 824YA Video Doorbell
The operating manual is a component part of the device.
It contains important information regarding safety, use and
disposal. Familiarize yourself with all the information con-
cerning operation and safety of the product before starting
to use it. Only use the product in the way described and
within the area of application specied. If you pass the
product on to third parties, be sure to hand over all the
documents with it.
Safety Instructions
Information on safety, intended use and disposal is
available in the separate supplementary sheet titled
"Safety Information".
Package Contents
Check the package contents of the doorbell carefully before putting
the doorbell into operation. If anything is missing or damaged,
please contact our Service Department.
■1 × video doorbell, VDB 824YA
■1 × operating manual
■1 × USB cable
■1 × assembly material
■3 × name labels made of paper
■1 × mounting plate
■6 × connection cables
■6 × clamping devices
■1 × Function board, CA 824
Separate Accessories Available
■Angle adapter, AM 824
■Digital gong, DC 433
System Requirements
You need a web-capable smartphone which has the Android (from
4.1) or iOS (from 8) operating system and the latest version of the
Tuya Smart app.
To put the doorbell into operation for the rst time, it must be con-
nected to the Tuya Smart app and the wi of your router.
The doorbell and smartphone/tablet PC must be registered on the
same wi system.
Observe the following points when selecting the assembly location:
■The doorbell must be within the range of the wireless home
network (wi).
■It is essential to observe local laws and regulations!
Features
The functions provided to compile pictures and sound means the
doorbell has many areas of application in the elds of surveillance
and communication.
All the functions can also be controlled via remote access using the
Tuya Smart app on your smartphone/tablet PC.
■Remote access
You can enjoy remote access to the doorbell via the Tuya Smart
app. You can then watch live pictures or a video recording and con-
trol other functions.
■Intercom function
You can use the Tuya Smart app to listen or speak directly into the
room being monitored.
■Shared access
You can use the Tuya Smart app to share access to your doorbell
and allow trusted persons to watch the live images from the doorbell
and control functions.
Inserting a MicroSD Memory Card (Option)
If you want to save photos or videos locally on the doorbell
14
you
can insert a microSD memory card (not contained in the package
supplied) with up to 64 GB memory space in the doorbell
14
.
1. Open the cover of the microSD card slot
11
on the rear side of
the device.
2. Insert the microSD memory card in the microSD card slot
11
.
Pay attention that the microSD memory card is aligned correctly.
The design of the microSD card slot
11
ensures correct
alignment.
►The microSD memory card latches audibly in place.
Switching the Doorbell On
1. Switch the doorbell
14
on using the On/O button
10
.
Resetting the Doorbell
Before installation, you must charge the battery of the
doorbell
14
fully by connecting the USB cable (contained in
the package supplied) to the USB charging port
12
.
Before assembly, you must connect the doorbell
14
to the
Tuya Smart app.
Before connecting the doorbell
14
to the Tuya Smart app, you must
reset the doorbell
14
.
1. Press and hold the Reset button
9
for about 5 seconds.
►The doorbell 14 conrms the reset function via the loud-
speaker 7.
After the reset process, the doorbell
14
is switched on
automatically and ready for connection.
As a result of the reset, the connection to the home net-
work and Tuya Smart app is disconnected.
Installing the Tuya Smart App
To dene further settings on the doorbell
14
and establish a
connection to your home network (wi), follow the instructions
provided by the Tuya Smart app.
1. Download the Tuya Smart app from the App Store or Google
Play Store or scan this QR code.
Pay attention that the doorbell
14
and your smartphone/
tablet PC are within range of the same home network
(wi).
2. Open the Tuya Smart app on your smartphone/tablet PC and
tap on Add Device.
3. Access the Camera & Lock screen option and select the Smart
Doorbell device type.
4. Conrm in the Tuya Smart app that the indicator is ashing fast
and tap on Next.
5. Select your home network and enter the corresponding WiFi
password.
1
2
5
6
7
7
8
91
3
4
8
2
9
10
11
12
G
General View
The gures illustrate the device in detail.
1
Wi LED
Blue, ashing: Not connected
Blue, on: Connected to WiFi
7
Loudspeaker
2
Battery charge indicator LED
Red: Charge; Green: Ready
8
Camera
3
Motion detector
9
Reset button
4
Name label slot
10
On/O button
5Microphone 11 MicroSD card slot
6Doorbell button 12 USB charging port

2
6. Scan the QR code displayed in the Tuya Smart app from a
distance of 15 to 20 cm using the camera 8 in the doorbell 14 .
7. Use the Tuya Smart app to conrm that you heard an acoustic
signal from the doorbell
14
after the scanning process.
►A counter runs backwards until the connection has been
established.
►When a connection has been established, you hear an
audible conrmation from the loudspeaker
7
in the
doorbell
14
.
Assembling the Doorbell
Before beginning assembly, check that camera surveil-
lance is permitted in the area concerned. Also check
whether the area being monitored must be identied.
When using the wireless option, pay attention that the
installation location of the camera
8
is within the operat-
ing range of the home network (wi system).
Insert the microSD memory card before completing the
wall installation.
Selecting an Installation Location
The doorbell
14
is splashproof at the installation location in accord-
ance with the criteria dened for Protection Class IP44. When
assembling the doorbell
14
, pay attention that it is installed in a dry
location and the electrical equipment will not get wet. Ideally, the
doorbell
14
should be installed at a height of approx.1.5 metres.
Install the doorbell
14
directly beside the entrance door and use the
bell wire (AC 8 – 24 V) provided for the power supply.
Alternatively, you can recharge the battery in the doorbell
14 at regular intervals by connecting the USB cable
supplied or a powerbank (not contained in the package
supplied) to the USB charging port 12 .
Warning! Risk of fatal injury from electric shock or
gas explosion! During installation, pay attention to the
possibility of electrical cables and gas pipes running
in the walls. Pay attention that you do not damage
electric cables or gas pipes. In case of doubt, contact
a specialist!
Attention! Before starting any assembly work,
unscrew any relevant fuses.
Call in a trained electrician to complete the connection.
1. Ensure that the power supply to the bell wire has been discon-
nected.
2. Ensure that there are no electric cables, gas or water pipes near
the installation location.
The mounting plate must be assembled on the wall rst. Pay
attention that the mounting plate is correctly aligned. The
opening for the feed-through of the bell wire must point down-
wards.
3. Mark the drill holes at the distance measured on the wall at the
installation location.
4. Drill the holes.
5. Insert the appropriate dowels contained in the assembly material
supplied.
We recommend the use of special dowels according to the
properties of the mounting surface.
6. Fix the mounting plate on the wall using the screws supplied.
7. Two bell wires come out of the wall. Connect each bell wire with
a bell wire in the doorbell. Use the clamping devices
16
for this
(contained in the package supplied). You need not pay attention
to the polarity of the bell wires.
8. Tighten the clamping devices 16 by turning them clockwise.
9. Ensure that the doorbell
14
is switched on via the
On/O switch
10
.
10. Fix the doorbell
14
to the mounting plate using the screws
supplied.
11. Switch on the power supply to the bell wire.
► The light ring around the bell button ashes red.
Circuit Diagram 1: Connecting to the building wiring
AC
8 V - 24 V
13 14 15
13
Current source
(AC: 8 V - 24 V)
15
House doorbell
14
Doorbell
Circuit Diagram 2: Extension with door opener
Lock
2
AC
8 V -
24 V
Lock
1
AC
8 V -
24 V
20
17
16 1918
AC 8 V - 24 V
The doorbell
14
has 2 connections for the door lock
20
. In the circuit
diagram, Connection 2 is indicated. The designation also applies for
Connection 1.
16
Terminal
19
Current source
(AC: 8 V - 24 V)
17
Bell wire socket
20
Door lock
18
Door lock 2 socket
Installing the CA 824 Function Board
If hissing or humming noises can be heard after the doorbell
14
has
been properly installed, you can install a CA 824 function board in
the bell to clear the noises.
More information is available in the Installing the CA 824 Function
Board information sheet enclosed.
Operating the Doorbell
The following illustrations do not reect the quality of the images
provided by the Tuya Smart app. They are made unrecognisable
due to reasons of personal rights.
1. Press the Bell button
6
.
►A video call is started in the Tuya Smart app.
2. Press the Call button in the Tuya Smart app.
►The call begins.
You can control two door locks (Door Lock 1 / Door Lock 2)
20
via
the Tuya Smart app. Actuation of a door lock
20
is described below.
The door lock
20
must be connected to the doorbell
14
in
order to use the Tuya Smart app to operate the door
lock
20
.
3. Use your nger to draw the button upwards.
4. Press on the lock icon.
►You have unlocked the door.
5. End the call by pressing on the On-hook button.
►The call is ended.

3
Alternative Method of Unlocking
You can also control the door lock
20
by using the applicable menu.
1. If you want to access the door lock
20
, press on the area
indicated in the Tuya Smart app.
2. Press on the lock icon.
3. Press Conrm.
►You have unlocked the door.
Warranty
Dear customer,
We are delighted that you have chosen this equipment.
In the case of a defect, please return the device together with the
receipt and original packing material to the point of sale.
Simplied EU Declaration of Conformity
We, GO Europe GmbH, Zum Kraftwerk 1,
45527 Hattingen, DEUTSCHLAND, declare
in sole responsibility, that the product com-
plies with the EU Directives: 2014/53/EU
and 2011/65/EU. The full EU Declaration of
Conformity is available online at the follow-
ing website or by scanning the QR code:
http://productip.com/?f=1d4073
Technical Data
VDB 824YA Video Doorbell
Operating frequency 433.92 MHz
Free eective range 120 m (min.)
Transmission frequency 2.4 GHz (wi)
Transmission power 14.98 dBm
Permissible ambient tempera-
tures
-10 °C to +50 °C at 10% to
80% rel. humidity
Storage temperature +20 °C to +60 °C at 10% -
80% rel. humidity
Humidity in operation ≤ 85% rel. humidity
Image sensor type CMOS
Angle of vision Plane: Ca. 100°
Vertical: Ca.70°
Permissible supply voltage AC: 8 V to 24 V
Power consumption 500 ± 100 mA
Motion detector, range 1 m
Motion detector, angle of
detection
Ca. 100°
Type of protection IP 44
Cloud technology P2P
Video encoding H.264
Video resolution 1080P
Video frame rate Max. 30 frames/s
Wi IEEE 802.11/b/g/n
Software Tuya app, with Alexa/Google
Current source AC/DC 24 V input
Battery Permanently installed 5200
mAh
3.7 V lithium-ion battery
Infrared sensor Yes
Weight Approx. 161 g
Dimensions (L × W × H) 58 × 60 × 105 mm
Encryption WEP, WPA, WPA2
Memory card MicroSD up to 64 GB
Ports MicroUSB port
Microphone Yes
Loudspeaker Yes
Audio and video Intercom function
You can switch the motion detector (PIR)
3
on and o
using the Settings menu. You can set the sensitivity of the
motion detector
3
to one of 3 levels.
Operation Using Alexa Show and Google Nest
The doorbell 14 can also be activated/connected via Alexa Show
and Google Nest using voice commands after the doorbell 14 has
been pressed and a corresponding push notication has been
received by the mobile phone.
To do this, you must pair Alexa Show or Google Nest with the
doorbell
14
.
Information on pairing devices is available in the documents provi-
ded by the Alexa Show and Google Nest manufacturers.
Cleaning and Maintenance
1. Clean the housing surfaces of the device with a soft, dry, lint-free
cloth. Do not use any solvents or cleaning agents.
The device does not require any special maintenance. Repairs to
the device may only be completed by technical specialists.
Frequently Asked Questions (FAQ)
What should I do if my house doorbell hums?
You could install a CA 824 function board (contained in the package
supplied) in the house doorbell
15
if hissing or humming sounds can
be heard following proper installation.
Can I use an additional gong?
You can also connect the doorbell 14 to a mobile, digital gong. The
DC 433 digital gong is available as a separate accessory.
What should I do if persons stand in a camera "blind spot"
when ringing the doorbell?
You can improve the angle of detection of the doorbell
14
. In this
case, use the angle adapter to adjust the assembly angle of the
doorbell
14
. The AM 824 angle adapter is available as a separate
accessory.
23 2414 22
14
Doorbell
23
Normal angle of detection
22
Door
24
Angle of detection with
angle adapter
Manufacturer
GO Europe GmbH
Zum Kraftwerk 1
D-45527 Hattingen
Germany
www.go-europe.com
V 1.15.1
03/2023
ID: 6024
/