Whirlpool TD2500XF0 User manual
- Category
- Dehumidifiers
- Type
- User manual
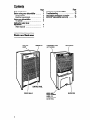
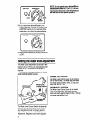
Whirlpool TD2500XF0 is a portable countertop dishwasher that can handle up to 6 place settings in a single cycle, which makes it suitable for mid-size households. This Energy Star certified dishwasher offers 4 wash cycles to choose from: Normal, Heavy, Pots & Pans, and Rinse Only and can be operated with a delay start of up to 24 hours. Additionally, a child lock option is available to prevent unintended operation.
Whirlpool TD2500XF0 is a portable countertop dishwasher that can handle up to 6 place settings in a single cycle, which makes it suitable for mid-size households. This Energy Star certified dishwasher offers 4 wash cycles to choose from: Normal, Heavy, Pots & Pans, and Rinse Only and can be operated with a delay start of up to 24 hours. Additionally, a child lock option is available to prevent unintended operation.


-
 1
1
-
 2
2
-
 3
3
-
 4
4
-
 5
5
-
 6
6
-
 7
7
-
 8
8
-
 9
9
-
 10
10
-
 11
11
-
 12
12


Whirlpool TD2500XF0 User manual
- Category
- Dehumidifiers
- Type
- User manual
Whirlpool TD2500XF0 is a portable countertop dishwasher that can handle up to 6 place settings in a single cycle, which makes it suitable for mid-size households. This Energy Star certified dishwasher offers 4 wash cycles to choose from: Normal, Heavy, Pots & Pans, and Rinse Only and can be operated with a delay start of up to 24 hours. Additionally, a child lock option is available to prevent unintended operation.
Ask a question and I''ll find the answer in the document
Finding information in a document is now easier with AI
Related papers
-
COMFORT-AIRE BFD300 User manual
-
Whirlpool AD0402XM1 User manual
-
-
Whirlpool Dehumidifier ADO25 User manual
-
-
-
-
-
-
Other documents
-
Friedrich D30 User manual
-
Roper RD50CBM2 Owner's manual
-
Amana DK40 User manual
-
 Hampton Bay HB40-S Owner's manual
-
Kenmore Dehumidifier C675-25010 User manual
-
Trion ComfortDry CD55 & CD90 Dehumidifiers User manual
-
GE AHG50 User manual
-
LG DH4010A Owner's manual
-
 Air Temp A3DH30B2A User manual
-
AlorAir Storm Elite Commercial Dehumidifier, 270 PPD High Performance, cETL Listed, LCD Display, 5 Years Warranty, Industrial Dehumidifier User manual

