IP-LUX60-ENW

Instant Pot IP-LUX60-ENW, 112-0170-01, IP-DUO60, IP-LUX50, IP-LUX50-ENW, IP-LUX60 User manual

  • Hello! I am an AI chatbot trained to assist you with the Instant Pot IP-LUX60-ENW User manual. I’ve already reviewed the document and can help you find the information you need or explain it in simple terms. Just ask your questions, and providing more details will help me assist you more effectively!
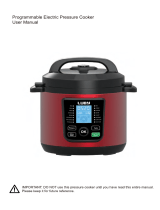
Programmable Electric Pressure Cooker
User Manual
Model: IP-LUX50 and IP-LUX60
Revision 2, Oct. 2013
(Pictures in the text are for reference only. Please refer to the actual product.)
Thank you for purchasing the mul-funconal Instant Pot. Please read the User Manual
carefully before use and keep it in a convenient place for future reference.
2

IMPORTANT SAFEGUARDS ........................................................................................ 3
Precauons .......................................................................................................... 4
Special Cord Set Instrucons ................................................................................ 4
Product Introducon................................................................................................. 5
Features ............................................................................................................... 5
Specicaons ....................................................................................................... 5
Product Structure ................................................................................................. 6
Before the First Use .................................................................................................. 7
Remove and Install the An-Block Shield ............................................................. 7
Remove and Install the Sealing Ring .................................................................... 7
Safe Lid Opening................................................................................................... 7
Cooking Preparaon ............................................................................................. 8
Controls and States of the Cooker .......................................................................... 10
Control Panel ...................................................................................................... 10
States of the Cooker ........................................................................................... 11
Operaon Keys ................................................................................................... 11
Funcon Keys ..................................................................................................... 11
Cooking with Your Instant Pot ................................................................................. 13
Pressure Cooking ................................................................................................ 13
Slow Cooking ...................................................................................................... 14
Delayed Cooking with Timer .............................................................................. 14
Sautéing ............................................................................................................. 15
Warming ............................................................................................................. 15
Inial Test Run .................................................................................................... 16
Care and Maintenance ............................................................................................ 16
Cleaning ............................................................................................................. 16
Troubleshoong ...................................................................................................... 17
Limited Warranty .................................................................................................... 19
3

Your Instant Pot cooks with pressure. When using pressure cookers, basic safety precauons
should always be followed.
PLEASE READ ALL INSTRUCTIONS.
1. Do not touch hot surfaces. Use handles or knobs.
2. Close supervision is necessary when the pressure cooker is used near children.
3. Do not place the pressure cooker in a heated oven.
4. Extreme cauon must be used when moving a pressure cooker containing hot liquids.
5. Do not use pressure cooker for other than intended use.
6. This appliance cooks under pressure. Improper use may result in scalding injury. Make
certain unit is properly closed before operang. Please see “Cooking Preparaon”.
7. Do not ll the unit over 2/3 full. When cooking foods that expand during cooking such as
rice or dried vegetables, do not ll the unit over 1/2 full. Over lling may cause a risk of
clogging the vent pipe and developing excess pressure. Please see “Food Preparaon
Instrucons”.
8. Be aware that certain foods, such as applesauce, cranberries, pearl barley, oatmeal or
other cereals, split peas, noodles, macaroni, rhubarb, or spaghe can foam, froth, and
spuer, and clog the pressure release device (the steam release handle). These foods should
not be cooked in a pressure cooker.
9. Always check the pressure release devices (the steam release handle) for clogging before
use.
10. Do not open the pressure cooker unl the unit has cooled and all internal pressure has
been released. If the handles are dicult to push apart, this indicates that the cooker is sll
pressurized – do not force it open. Any pressure in the cooker can be hazardous. Please see
“Cooking Preparaon”.
11. Never deep fry or pressure fry in the unit with oil. It is dangerous and may cause a re or
serious damage.
12. To protect against electrical shock, do not immerse cord, plugs, or appliance in water or
other liquid.
13. Unplug from outlet when not in use and before cleaning. Allow to cool before pung on
or taking o parts, and before cleaning.
14. Do not operate any appliance with a damaged cord or plug or aer the appliance
malfuncons or has been damaged in any manner. Return appliance to the service center for
examinaon repair or adjustment. See Warranty secon.
15. The use of accessory aachments not recommended by the appliance manufacturer may
cause injuries.
16. This product is for household use only. Do not use outdoors.
17. Do not let cord hang over edge of table or counter, or touch hot surfaces.
18. Do not place the unit on or near a hot gas or electric burner, or in a heated oven.
19. Extreme cauon must be used when moving the unit containing hot oil or other hot
liquids.
4
20. Cauon: to reduce the risk of electric shock, cook only in the provided removable
container (cooking pot).
21. Do not use incompable removable container (cooking pot) or sealing ring (gasket) to
avoid pressure leakage.
22. To disconnect, turn any control to "o", then remove plug from wall outlet.
23. Do not place the unit on an unstable locaon it is strictly prohibited to use it on a
newspaper, foam or other object that may easily block the vent holes at the boom.
24. Do not use it in a place which is near splash water or re. Do not use it in a place exposed
to directly to sunshine or oil splash. Put it in a place out of the reach of children.
25. Before use each me, be sure to check the an-block shield, oat valve and exhaust valve
(steam release handle) for obstrucon, wipe the surface of the inner pot and the heang
plate to conrm they are free of any foreign object; make sure the steam release handle is in
sealing posion.
26. Do not move this product or force to remove the lid when the unit is in operaon.
27. Do not place your hands or face over the exhaust valve (steam release handle) or oat
valve to avoid scald when the unit is in operaon.
28. To reduce the risk of re or electric shock, only authorized personnel should do repairs.
29. Do not cover the pressure valves.
30. This appliance is not intended for use by persons (including children) with reduced
physical, sensory or mental capabilies, or lack of experience and knowledge, unless they are
accompanied by a person responsible for their safety.
31. Do not use this product on any electrical system other than voltage: 110-120V~/60Hz.
PLEASE SAVE THESE INSTRUCTIONS.
And keep the user manual in a convenient place for future reference.

Before each use, please make sure to inspect the following:
1. The an-block shield, oat valve and exhaust valve are not blocked by food debris.
2. The boom surface of the inner pot and the heang plate are free of any foreign objects.
3. The steam release handle is in the "Sealing" posion for all pressure cooking.
Aer cooking, wait unl the cooker cools down for a while and release the pressure using the
steam release handle. Use extreme cauon when opening the lid. Scald and serious burns can be
caused by the steam inside the unit.
If all LED lights are ashing on the control panel, unplug the power cord immediately and consult
the “Troubleshoong” secon.
Care must be taken with the sealing ring to avoid deformaon. Failure to do so may prevent the
product from working properly.

A short power supply cord is provided to reduce the hazards resulng from entanglement and
5
tripping. An extension cord may be used if care is exercised in its use. If an extension cord is used,
the electrical rang of the cord must be at least 12 amps and 120 volts. The extended cord must
be arranged so that it will not drape over edge of table or counter where it can be pulled by
children or tripped over accidentally.
This appliance has a polarized plug (one blade is wider than the other). To reduce the risk of
electric shock, this plug is intended to t into a polarized outlet in only one way. If the plug does
not t fully into the outlet, ip the plug. If it sll does not t, contact a qualied electrician. Do not
aempt to modify the plug in any way.

Instant Pot® programmable pressure cooker is the new generaon of smart kitchen appliances. It
is a 6-in-1 mul-funcon cooker combining the benets of a Pressure Cooker, Sauté, Slow Cooker,
Rice Cooker, Steamer, and Food Warmer. Instant Pot® is a convenient and kitchen-friendly me
saver. Its 10 micro-processor controlled intelligent programs make your everyday cooking as easy
as pressing a buon.
It brings your green thinking right into the kitchen by saving up to 70% of energy comparing with
convenonal cooking. In most cases, your Instant Pot reduces the cooking me by 70%, and
preserves more vitamins and minerals in the natural ingredients.
Instant Pot has been design to avoid the common errors and safety hazards of old stove-top
pressure cookers using 10 proven safety mechanisms and patented technologies. They include lid
posion monitoring, locking the lid under pressure, electronic pressure and temperature control,
dry burn detecon with automac shuto, over-pressure protecon, and temperature and
electrical current liming fuse. Instant Pot® has earned the entrusted UL cercaon by going
through the rigorous UL lab tesng.

High safety standard: 10 safety mechanisms and UL safety cercaon. Please visit
www.InstantPot.com for detailed informaon.
Mul-funcon: Braising, pressure cooking, stewing, steaming, simmering, slow cooking,
sauté/browning, and keeping warm.
10 convenient cooking programs controlled by a microprocessor: Simply press one of
the funcon keys to start cooking. The microprocessor controls the me, cooking
pressure and temperature eliminang the need to watch over the cooker in the kitchen.
Clean and pleasant: Instant Pot produces very lile noise and leaks almost no steam.
This keeps the aromas and avor of ingredients in the food and avoids messy spills,
splashes or spaers to clean up.
Up to 24-hour delayed cooking: Long 24 hour mer. Perfect for meal planning.
Up to 120 minutes of manual cooking me selecon.
Auto keep warm: Aer cooking, the keep-warm funcon starts automacally for 10 hours.
Dishwasher safe stainless steel inner pot and steam rack.

Working pressure: High 10.2 ~ 11.6psi (70 ~ 80kPa)
Steam release pressure limit: 15.22psi (105kPa)
Working temperature: 115°C ~ 118°C (239°F ~ 244°F)
“Keep warm” funcon: up to 10 hours, 63 ~ 78°C (145 ~ 172°F);
6
“Slow Cook” funcon: 0.5 ~ 20 hours, at 88 ~ 99°C (190 ~ 210°F)
“Sauté” funcon: “Normal” mode: 160 ~ 176°C (320 ~ 349°F); “More” mode: 175 ~ 210°C
(347 ~ 410°F); “Less” mode: 135 ~ 150°C (275 ~ 302°F).

Model Power
Supply
Rated
Power
Volume Caliber of inner
pot
Weight Dimension
IP-LUX50 120V~
60Hz
900W 5 quart 14x22x24 cm
5.5x8.66x9.45
inch
(H x Inner rim
diameter x outer
rim diameter)
5.3kg
(11.68lb)
33x31x30 cm
13x12.2x11.8
inch
(LxWxH)
IP-LUX60 120V~
60Hz
1000
W
6 quart 16x22x24 cm
6.3x8.66x9.45
inch
6.61kg
(14.57lb)
33x31x32 cm
13x12.2x12.6
inch
Accesso-
ries
Rice paddle, Soup spoon, Measuring cup, Steam rack, User manual and Recipe
booklet.
7

Before the rst use, please take out all accessories from the package and read this manual
carefully. Please pay parcular aenon to operaonal instrucons and cauons to avoid any
injury or property damage. Please wash the inside of the lid and the inner pot with warm soapy
water, rinse and dry thoroughly. Wipe the outer housing with a clean damp cloth. Never immerse
the cooker housing in water or any other liquid. The inner pot, sealing ring and steam release
handle and all accessories are dishwasher safe. But never clean the lid and housing in a
dishwasher.
Remove and Install the An-Block Shield
The an-block shield can be
removed by pushing it on the
side to li it up. To install the
an-block shield, posion it
in place and press it down.
Remove and Install the Sealing Ring
The sealing ring can be removed by
pulling upwards from the sealing ring
rack in secons. To reinstall the sealing
ring, pressing it down into the rack
secon by secon. The sealing ring can
be installed on either side facing up.
Please note the following:
Prior to each use, inspect to make sure the sealing ring is well seated in the sealing ring
rack and the an-block shield is mounted properly on the steam release pipe. A properly
seated sealing ring can be shied, with a bit of eort, clockwise or an-clockwise inside
the sealing ring rack.
Aer use, remove any foreign objects from the sealing ring and an-block shield.
Keep the sealing ring clean to avoid odor. Washing the sealing ring in warm soapy water or
dishwasher can remove odor. However, it is normal for the sealing ring to absorb the smell
of certain acidic foods. That's why it is always a good idea to have more than one sealing
ring on hand. You can purchase addional sealing rings from www.InstantPot.com.
Never pull the sealing ring by force, as the pulling may cause deformaon and aect its
funcon in sealing the pressure.
A sealing ring with cracks, cuts or other damages should not be used. A new sealing ring
replacement should be used.

1. Make sure the pressure cooking program has completed or press “Keep-Warm/Cancel” to
terminate the program.
2. Releasing pressure in one of the following approaches.
8
Quick Release:
Slide the steam release handle to the "Venng" posion to let out steam unl the oat
valve drops down.
Cauon:
Please keep hands and face away from the hole on the top of the steam release handle
when using Quick Release. The escaping steam is very hot and can cause scalding.
Never pull out the steam release handle when it is leng out steam.
Please be aware that Quick Release is not suitable for food in large liquid volume or with
high starch content (e.g. porridge, congee, scky liquids, soup, etc.). Food content may
splaer out with steam. Use Natural Release instead.
Natural Release:
Allow the cooker to cool down naturally unl the oat valve drops down. This may take 10
to 15 minutes aer cooking is nished and the cooker is in Keep-Warm mode.
Pung a wet towel on the lid can speed up cooling.
3. Open the lid: Hold the lid handle, turn the lid counterclockwise to the open posion, and li
the lid up to open. To avoid vacuum sucon on the lid, turn the steam release to “Venng”
posion to let in air when liing the lid.
Cauon: Do not open the lid unl pressure inside the pot is completely released. As a
safety feature, unl the oat valve drops down, the lid is locked and cannot be opened.
If the oat valve is stuck due to food debris or sckiness, you can push it down with a pen
or chopscks when you are certain the pressure has been released by moving the steam
release handle in the venng posion.

1. Open the lid
Holding the lid handle with your hand, rotate approximately 30 degrees counterclockwise
unl the “ “mark on the lid is aligned with the “ Open” mark on the cooker housing
rim.
2. Check whether all parts on the lid are assembled properly
Check the oat valve and exhaust valve for obstrucons. Make sure that the sealing ring is
well seated inside its holding rack, the an-block shield is installed properly and the oat
valve can move up and down easily.
9
3. Take out the inner pot, and put in food and liquid
The total amount of food and water should NEVER exceed the
maximum level marking of the inner pot. It is recommended that
you do not ll the unit over 2/3 full. When cooking foods that
expand during cooking such as rice, beans or dried vegetables, do
not ll the unit over 1/2 full. Over lling may risk clogging the
vent pipes and developing excess pressure. This could also cause
spillage and may damage to the unit.
4. Place the inner pot inside the cooker housing
Before that, be sure to remove foreign objects and wipe dry the outside of the inner pot and
the heang element inside of the cooker.
Aer pung the inner pot inside the housing, rotate the inner pot slightly to ensure good
contact between the inner pot and the heang element.
5. Close the lid completely
Hold the lid handle and put the lid on the cooker, with the mark on the lid and the
“Open” marks on the housing rim are aligned. Rotate the lid clockwise approximately 30
degrees unl the mark on the lid is aligned with the “Close” mark on the housing
rim.
Instant Pot has a safety feature to disable the cooker and the display ashes "Lid" if the lid is
not posioned correctly. When using "Soup", "Poultry", "Meat/Stew", "Bean/Chili",
"Mulgrain", "Rice", "Steam", and "Porridge", the lid should be fully closed. When using
"Sauté", the lid should be open. "Keep Warm" and “Slow Cook” works with the lid either
opened or closed.
6. Posion the steam release handle properly
Please note that it is perfectly normal and necessary for the steam release handle to be
loose. It works by weight and simply rests on top of the exhaust pipe. It can also be removed
for washing if necessary by pulling it straight out.
10
In operaon of the cooker for any
funcons except "Keep-Warm",
"Sauté" or "Slow Cook", align the
pointed end of the steam release
handle poinng to "Sealing",
indicang that the pressure cooker
is in the sealed posion.
The "Sauté" funcon must be used
without the lid. The "Slow Cook"
and “Keep-Warm” can operate with
or without the lid, or using an oponal glass lid available at www.InstantPot.com.


The control panel of your Instant Pot consists of an LED display, 3 mode indicators, 3 operaon
keys and 13 funcon keys. Each funcon key has a funcon indicator light. Operaon keys do not
have indicator lights.
11

Your Instant Pot has 3 states which are
shown on the LED display and funcon
indicators.
Standby state: the LED display
shows “OFF”.
Pre-heang state: the LED
display shows “On” and the
acvated funcon indicator
lights up.
Program operang state: the acvated funcon indicator lights up and the LED display
shows me. For pressure cooking, slow cooking and mer funcons, the me counts down.
For “Keep Warm, the me counts up.

The 3 operaons keys include “+”, “-, and “Adjust” keys. The “+” and - are used to change the
me value.
The "Adjust" key can make 3 types of adjustments:
1. Changing the pressure keeping me for pressure cooking funcons, except "Manual"
and "Rice" funcons. "Rice" is fully automac.
2. Switching the temperature of "Slow Cook" and "Sauté".

The most important key is “Keep Warm/Cancel”. When Instant
Pot is being programmed or any program is in eect, press this
key will cancel the program and take the cooker to standby state.
When the cooker is in standby state, pressing this key acvates
the keep-warm program.
The “Soup” key is for making various soups and broth. You can
use the “Adjust” key to select a shorter or longer cooking
duraon, depending on the intended cooking result. Instant
Pot controls the pressure and temperature to a level that the
liquid never goes into the heavy boiling state. For example,
making chicken broth with the "Soup" funcon, the broth is
clear and the chicken remains intact aer cooking. If you need
the food content to be fully broken down, please sr and mix
the soup before serving.
The “Porridge” key is to make porridge of various grains. You can use the “Adjust” key to select a
cooking duraon. The “Normal” duraon is for rice porridge. For a mixture various grains and
beans, please choose the "More" duraon. Sr the Porridge before serving. Please note, aer
the “Porridge” program is nished, do NOT put steam release handle in venng posion;
otherwise the porridge will splaer through the steam release. Please use Natural Release.
The “Poultry” key is programmed to make poultry dishes. You may use the "Adjust" key to change
the poultry cooking me from "Normal" to "More" or "Less" depending on your preference of
the texture and the amount of poultry you put into the pot. Poultry meat is generally easier to
cook than pork, lamb and beef. Hence the poultry cooking me is adjusted within a shorter
me range when using the "Poultry" funcon key.
The “Meat/Stew key is for cooking meat and stew. The “Adjust” key can be used to change the
cooking me to achieve the desired texture of the meat. In general, "More" duraon is for
12
bone-stripping eect on meat.
The “Bean/Chili” key is specically for cooking beans and making Chili. If you want the beans well
cooked, please use the “Adjust” key to select "More" duraon.
The “Rice” key is a fully automated smart program for cooking regular rice or parboiled rice. The
cooking duraon is adjusted automacally depending on the amount of food content. To cook
2 cups of rice, it takes about 10 minute pressure keeping me; for 3~5 cups of rice, it takes
about 12 minute pressure keeping me; more cups will take longer me accordingly. Total
cooking me is not displayed, whereas the pressure keeping me will be shown when working
pressure is reached. The “Adjust” key has no eect on this program. Please note: You can cook
as lile as one cup of rice with the correct rao of water.
The "Mulgrain" key is a program to cook mixed grains of wild rice, hard brown rice, mung beans,
etc. There are three “Adjust” opons for mulgrain rice cooking. The "Normal" seng has 40
minutes of pressure cooking me. The "Less" seng has 20 minutes of pressure cooking me.
The "More" seng has 45 minutes of warm water soaking me and 60 minutes of pressure
cooking me. The "More" seng is suitable for harder grains such as dry split corn.
The “Steam” key is designed for steaming purposes. You can steam vegetables, seafood or
reheang with the enclosed steam rack. When steaming vegetables and seafood, please note
that using the “Natural Release” method for releasing the steam will likely overcook the food.
You will need to release the steam as soon as the cooking me has expired using the “Quick
Release” method.
Using 1~2 cups (160ml) of water is sucient for steaming fresh or frozen vegetables, with 1~2
minute pressure keeping me. Please use “+” or “-“ keys to change the steaming me. Please
note that unlike other pressure cooking funcons, the “Steam” funcon heats at full power
connuously. This may burn food in direct contact with the boom of the inner pot. Please
use the trivet provided to elevate the food above the water. Use a metal basket or (oven safe)
glass/ceramic container that ts into the inner pot to contain the food.
The “Manual” key allows manual seng of cooking me. The me set in this mode is pressure
cooking me which will begin to count down when working pressure is reached. The
maximum pressure cooking me is 120 minutes.
The "Sauté" key is used for open lid sautéing, browning or simmering inside the inner pot.
"Adjust" can be used to change the operang temperature in 3 modes. Please see the
“Sautéing” secon for details.
The “Slow Cook" key allows you to use your Instant Pot as a common slow cooker. The user can
change the cooking duraon by pressing the "+" or "-" key between 0.5 and 20 hours. The
"Adjust" key allows you to adjust the level of heang as in tradional slow cookers. Please see
the “Slow Cooking” secon for its usage.
The Timer key is for delayed cooking. To start delayed cooking, rst select the desired cooking
funcon (all program funcons except “Sauté”), and then press the “Timer” key. Use “+” and
-“ to set the delayed hours. Press "Timer" key again to change the minutes. The me you are
seng is the delayed me before the program starts. Please allow sucient cooking me
and cooling down me before serving. The me delay can be adjusted with “+” or “-“ keys for
up to 24 hours. Please see the “Delayed Cooking with Timer” secon for details.
13


The following procedure is for “Rice”, "Soup", "Poultry", "Meat/
Stew", "Bean/Chili", "Mulgrain", "Porridge", "Steam" and
“Manual” funcons.
1. Follow steps in the "Cooking Preparaon" secon of this
manual.
2. Connect power cord. The LED display shows “OFF”
indicang that its in standby state.
3. Select a cooking funcon, e.g. “Soup”. Once a funcon
key is pressed, its indicator lights up.
Within 10 seconds aer pressing a funcon key, you can
sll select any other funcon keys and adjust cooking
duraon.
4. Select cooking me.
You may use the "Adjust" key (except
the “Manual” and “Rice” funcons) to
adjust cooking duraon. Press the
"Adjust" key repeatedly to change
between “Normal”, “Less" and “More"
modes which will light up on the display.
If necessary, change the cooking me with “+” and “-. Press and
hold the “+” or “-“ key for faster changes.
The built-in cooking me is suitable for general purpose food.
Please use the cooking me table in the recipe book to determine the
appropriate cooking me based on the specic food, the quanty of food and your
texture preference.
5. Cooking starts automacally in 10 seconds aer the last key press.
Three audible beeps will sound to indicate the cooking process has begun. The LED
display shows "On" indicang that the pre-heang state is in progress. Please note:
Depending on the food content, the quanty and its temperature (frozen or not), the
preheat cycle can range between 10 to 40 minutes.
As the pressure increases inside the cooker, it is perfectly normal for traces of steam to
escape from the oat valve unl the oat valve pops up.
Once the cooker reaches working pressure, the LED display changes from “On" to the
programmed cooking me. The cooking me counts down to indicate the remaining
me in minutes. During this pressurized state you should not see any steam gushing out
anywhere from the lid. However, from me to me you may see a small smoke eect
coming from the steam release handle and occasionally a lile spuering. This is
perfectly normal.
During the cooking operaon, the cooker makes low clicking sounds. This comes from
normal operaon in switching the heang element on and o.
At any me, you can cancel the cooking program in progress and return to standby
mode by pressing the “Keep-Warm/Cancel” key.
14
6. When the pressure cooking cycle nishes, the cooker beeps
and automacally goes into the "Keep Warm" cycle, called Auto
“Keep Warm” Cycle. The LED display shows an “L” on the rst
digit, such as "L0:02", to indicate the “Keep Warm” cycle and me
duraon. The clock counts up for 10 hours. If the 10 hour Auto
“Keep Warm” cycle nishes, the cooker goes into standby state.
It is not recommended to leave cooked rice in “Keep-
Warm” state for too long as it may aect the texture or
the taste of the food.
7. To serve the food, press “Keep-Warm/Cancel” to stop the keep
-warm cycle and open the lid according to the “Safe Lid Opening” secon of this manual.
When opening the lid, the inner pot may appear to be stuck on the lid by vacuum. This
is caused by contracon of air due to cooling. Please turn the steam release handle to
Venng” to let in air to release the vacuum.

1. Follow steps in the "Cooking Preparaon" secon of this manual. The steam release handle
should be at the "Venng" posions. An oponal glass lid can also be used.
2. Connect power cord. The LED display shows “OFF” indicang
that it’s in standby state.
3. Press “Slow Cook” key.
4. Change cooking duraon between 0.5 and 20 hours by
pressing the "+" or "-" key.
5. Select the desired cooking mode with the “Adjust” key. By
pushing the "Adjust" key repeatedly, you can adjust the
cooking mode to “Normal”, “More” and “Less” modes, which
correspond to medium, high and low in a common slow
cooker.
6. Cooking starts automacally in 10 seconds aer the last key is pressed.
7. When the cooking nishes, the cooker beeps and goes into the Auto "Keep Warm" cycle for
10 hours.

Your Instant Pot has a mer funcon to delay the start of cooking
for up to 24 hours. Timer funcon does not apply to the “Keep
Warm”, and "Sauté" funcons. The following shows how to
program for delayed cooking.
1. Follow steps in the previous “Pressure Cooking” and “Slow
Cooking” secons to set a cooking program.
2. Within 10 seconds aer program selecon, press the “Timer
key to set the hours and minutes to be delayed. Use “+” and “-
“ to set the delayed hours. Press "Timer" key again to change
the minutes. The me is the delayed me before the program
starts. Please allow sucient cooking me and cooling down
me before serving.
3. 10 seconds aer last key press, the “Timer” funcon starts, the me on LED display counts
down, and the ashing green indicator on the “Timer” key changes to solid green.
15
4. To cancel the Timer operaon, press the “Keep-Warm/Cancel” key at any me.
5. Your Instant Pot starts cooking when the delay mer counts down to 0. Aer cooking, the
cooker will then enter the Auto “Keep Warm” cycle for 10 hours. Please Note:
We highly discourage using the Timer funcon for perishable foods, such as meat and sh,
which may go bad when le at room temperature for hours. Cooked rice may yield overly
so texture due to long soaking me. It may also cause a layer of burned rice at the
boom of the pot if it is le in Keep-Warm mode for too long.
The Timer funcon is not recommended for porridge, oatmeal or other foamy and scky
foods. Because of the possibility of these foods gumming up the oat valve causing it to
never seal and leading to overowing food content, it is highly recommended that your
Instant Pot not be le unaended during the preheat cycle. Since the delay funcon
implies leaving the unit unaended, we strongly recommend not using the mer funcon
for these types of food.

1. Follow steps in the "Cooking Preparaon" secon of this
manual. Keep the lid open to avoid pressure from building up
inside the cooker. An oponal glass lid can also be used.
2. Connect power cord. The LED display shows “OFF” indicang
that it’s in standby state.
3. Press “Sauté” key. For safety reasons, the maximum operaon
me of one “Sauté” cycle is 30 minutes.
4. Change the cooking temperature among “Normal”, “More”
and “Less” modes with the “Adjust” key. The "Normal" mode is
suited for regular sauté or browning. The "More" mode is for
sr-frying or blackening meat at higher temperature. The
"Less" mode is suitable for simmering, reducing juices or thickening sauce. To avoid pressure
building up, the lid cannot be closed. If you accidentally close
the lid, ashing "Lid" is displayed to warn about wrong lid
posion.
Cauon: parally closing the lid during sautéing could
cause the pressure to build up in the cooker. This can be
hazardous.
5. Heang starts automacally in 10 seconds aer the last key is
pressed. The “Sauté” program can be cancelled at any me by
pressing “Keep Warm/Cancel” key.
6. When the designated temperature is reached, the LED display
shows “Hot”.
7. When cooking nishes, the cooker beeps and goes to standby state. If you need more me,
simply press the “Sauté” key again.

Pressing the “Keep-Warm/Cancel” key in the standby state acvates the “Keep Warm” funcon.
When “Keep Warm” funcon starts, the me counts up by minutes for up to 10 hours. The "Keep
Warm" funcon can be used with or without the lid closed. You can also use an oponal glass lid
for this funcon. When it nishes, the cooker beeps and goes to standby state.
16

In order to get a feel for your Instant Pot before jumping in with your favorite recipe, its a great
idea to take it for a test run. This will help you to become familiar with your Instant Pot, make sure
that your unit is working perfectly and also clean the unit of possible residues in the process. This
test run can be accomplished in about 15 minutes. It’s oponal but recommended.
1. Make sure the steam release handle and oat valve are unobstructed and clean and that the
sealing ring is properly seated.
2. Insert the inner pot in the cooker base and add water to the
“3” mark on the inner pot.
3. Close the lid. Make sure that the steam release handle is
poinng to "Sealing" mark on the lid.
4. Press the "Steam" buon, and press the “-“ buon to change
the me to 2 minutes.
5. In 10 seconds, your Instant Pot will go into the preheang cycle
(display showing “On”). Within a few minutes steam will start
coming out for a minute or two unl the Float Valve pops up
and seals the cooker. Within another minute or two the
working pressure will be reached and the countdown mer will begin. Once the countdown
is nished, your Instant Pot will beep and automacally go into the “Keep Warm” mode.
That’s it. The test is complete. Press the “Keep-Warm/Cancel” buon and/or unplug the unit.
Once the pot cools down, you can open it and are ready to try your favorite recipe.

Regular care or maintenance is essenal in ensuring that this product is safe for use. If any of
the following circumstances take place, please stop using the appliance immediately and contact
Instant Pot support team.
Power cord and plug suer from expansion, deformaon, discoloraon, damages, etc.
A poron of power cord or the plug gets hoer than usual.
Electric pressure cooker heats abnormally, eming a burnt smell.
When powered on, there are unusual sounds or vibraons.
If there is dust or dirt on the plug or socket, please remove dust or dirt with a dry brush.

Cauon: please make sure the appliance has cooled down and is unplugged before cleaning.
1. Clean the product aer each use. Wipe the black inner housing rim and slot dry with cloth to
prevent rusng on the exterior pot rim.
2. Remove the lid and take out the inner pot, wash them with detergent, rinse with clear water
and then wipe dry with a so cloth. The stainless steel inner pot is also dishwasher safe.
3. Use water to clean the lid, including the sealing ring (which can be removed), exhaust valve,
an-block shield, and wipe them clean with dry so cloth. Do not take apart the steam
17
release pipe assembly.
4. Clean the cooker body with clean damp cloth. Do not immerse the cooker into water. Do not
use a wet cloth to clean the pot while the power cord is plugged into the power outlet.

If you experience any problem with the appliance, please DO NOT return the product to the
retail store or online merchant. For technical assistance and product return informaon, please:
Create a support cket at www.InstantPot.com/support/
Email to support@instantpot.com
Or call 1800 828-7280 for Instant Pot customer care team
The cases in the following tables do not always indicate a faulty cooker. Please examine the cooker
carefully before contacng the support for repair. You can also nd help videos and FAQ on
www.InstantPot.com/faq/
Problem Possible Reason Soluon
1
Dicult to close the lid
Sealing ring not installed
properly
Posion the sealing ring well
Float valve in the popped-up
posion
Press the oat valve lightly
downwards
2
Dicult to open the lid
Pressure exists inside the
cooker
Use the steam release handle
to reduce the internal pressure.
Open the lid aer the pressure
is completely released.
Float valve stuck at the
popped-up posion
Press the oat valve lightly with
a pen or chopsck.
3
Steam leaks from the
side of the lid
No sealing ring Install the sealing ring
Sealing ring damaged Replace the sealing ring
Food debris aached to the
sealing ring
Clean the sealing ring
Lid not closed properly Open then Close the lid again
4
Steam leaks from oat
valve for over 2
minutes
Food debris on the oat valve
silicone seal
Clean the oat valve silicone
seal
Float valve silicone ring worn-
out
Replace the oat valve silicone
ring
5
Float valve unable to
rise
Too lile food or water in
inner pot
Add water according to the
recipe
Float valve obstructed by the
lid locking pin
Close the lid completely, see
“Cooking Preparaon” secon
Troubleshoong Table
18
8
Display remains blank
aer connecng the
power cord
Bad power connecon or no
power.
Inspect the power cord to
ensure a good connecon,
check the power outlet is
acve.
Cookers electrical fuse was
blown
Contact support online
9
All LEDs
ash with
a code
appearing
on screen
C1 code Faulty temperature sensor
(cannot be detected)
Contact support online
C2 code Faulty temperature sensor
(short circuited)
Contact support online
C5 code Temperature is too high be-
cause inner pot is not placed
Put in the inner pot properly
Temperature is too high be-
cause there is no water in
inner pot
Put food and water in the
inner pot
C6 code Faulty pressure sensor Contact support online
10
Rice half cooked or too
hard
Too lile water Adjust dry-rice and water
rao according to recipe
Cover opened prematurely Aer cooking cycle com-
pletes, leave the cover on for
5 more minutes
11 Rice too so Too much water Adjust dry-rice and water
rao according to recipe
12
Intermient beeping
aer the cooker starts
for a while
Indicaon of overheang.
The cooker has reduced the
heang temperature, and
may not reach cooking pres-
sure
Possibly starch deposits at
the boom of the inner pot,
which have clogged heat
dissipaon. Stop the cooker
and inspect the boom of
the inner pot
Occasional cking or
light cracking sound
The normal sound of power
switching and expanding
pressure board in changing
temperature
Nothing to be worried about
13
Wet inner pot boom. Wipe inner pot boom dry
before cooking
Troubleshoong Table (Cont… )
Problem Possible Reason Soluon
Steam comes out from
exhaust valve non-stop
Steam release handle not in
sealing posion
Turn the release handle to the
sealing posion
6
Pressure control fails Contact support online
7
Display ashes “Lid” Lid is not at the correct posi-
on for the selected program
Close lid for pressure cooking
or open the lid for sautéing
19

Instant Pot Company (the “IPC”) warrants this appliance to be free from defects in workmanship
and material, under normal residenal use, for a period of one (1) year from the date of purchase.
This warranty extends only to the original purchaser and use in USA and Canada. A purchase
receipt, purchase order number or other proof of date of original purchase is required before
warranty service is performed. IPC’s obligaon under this warranty is limited to replacing or
repairing, or assisng in the repair at IPCs opon. All repairs for which warranty claims are made
must be pre-authorized by IPC.
This appliance comes equipped with many safety features. Any aempt to interfere with their
operaon may result in serious injury/damages and void this warranty. No warranty service will be
provided to any appliance that has been tampered with, unless directed by an IPC representave.
This warranty does not cover normal wear of parts or damage resulng from negligent use or
misuse of the appliance, use contrary to the operang instrucons, failure to provide reasonable
and necessary maintenance, or disassembly, repair or alteraon by anyone unless directed by an
Instant Pot Representave. This warranty does not cover units that are used outside of US and
Canada. Further, the warranty does not cover damage resulng from Acts of God, such as re,
ood, hurricanes and tornadoes. IPC is not responsible for shipping cost for warranty service.
Limitaon and Exclusions
To the extent permied by applicable law, the liability of IPC, if any, for any allegedly defecve
appliance or part shall be limited to repair or replacement of the appliance or part and shall not
exceed the purchase price of a comparable replacement appliance or part. THE PROVISIONS OF
THIS WARRANTY ARE YOUR SOLE AND EXCLUSIVE REMEDY WITH RESPECT TO THE PRODUCT(S)
COVERED BY THIS WARRANTY. ALL IMPLIED WARRANTIES WITH RESPECT TO THE APPLIANCES(S)
INCLUDING, BUT NOT LIMITED TO, IMPLIED WARRANTIES OF MERCHANTABILITY AND FITNESS FOR
A PARTICULAR PURPOSE, ARE HEREBY EXPRESSLY EXCLUDED.
IPC is not responsible or liable for indirect, special or consequenal damages arising out of or in
connecon with the use or performance of the appliance or damages with respect to any
economic loss, loss of property, loss of revenues or prots, loss of enjoyment or use, costs of
removal, installaon or other consequenal damages of whatsoever nature. Some provinces/
states do not allow the exclusion or limitaon of incidental or consequenal damages.
Accordingly, the above limitaon may not apply to you.
You the buyer may have other rights and remedies under your state's or province’s applicable
laws, which are in addion to any right or remedy which may be available under this limited
warranty.
Warranty Service
If the appliance should become defecve within the warranty period, please contact Instant Pot
Customer Service team by
Create a support cket at www.InstantPot.com/support/
Email to support@instantpot.com
Or call 1800 828-7280 for Instant Pot customer service representave
To facilitate speedy service, please provide:
Your name, email address or phone number
A copy of the original purchase receipt with order number, the model and serial number
Descripon of the product defect, pictures or video if possible
Standards: UL 1026, Fih Edion
CAN/CSA-C22.2 No. 1335.1-93
CAN/CSA-C22.2 No.1335.2.15-93
Instant Pot Company
11 – 300 Earl Grey Dr., Suite 383
Oawa, Ontario
Canada K2T 1C1
Telephone: +1 800 828-7280
Fax: +1 (613) 800-0726
Web: hp://www.InstantPot.com
E-mail: support@instantpot.com
© 2011, 2012, 2013, 2014 Instant Pot Company, All Rights Reserved.
All contents in this document have been checked carefully. Instant Pot
Company reserves the right to interpret any prinng mistake or misunder-
standing of content.
For any technical improvement or change in appearance or name plate,
changes shall be placed in the revised manual without further noce. In case
of changes in appearance and color, please refer to the actual product for
detailed informaon.
/