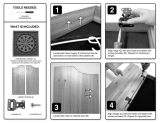
E|ectro|ux iNSTRUCTION SHEET
=
a. Position Right Hand Side Trim on cabinet trim
with bottom resting on the floor.
b. Drill the 1/8" (3mm) pilot hole.
c. Run screw in all the way and then back out.
Remove side trim for later install,
(See Figure 10).
Left Side Right Side
Figure 10.
Top Trim install
(Single and Dual Installations)
NOTE: Step ladder required for installing top trim
components.
9. a. Remove outer hinge screw common on both
sides for a dual installation, (for a single
installation this screw is removed in Step 6.
Align the top trim and attach with a 3/8" socket.
Repeat for opposite side. (See Figure 11).
b. (Dual installation only) Install outer screws on
common mounting bracket, align top trim and
attach with 3/8" socket. (See Figure 12).
H
Figure 11.
Figure 12.
10. 75" (1905mm) High Opening With Top Trim
(Single and Dual Installations)
a. Slide units into place. Adjust height so top trim
height reaches 75.09" (1907mm). Center units
in opening and level. (See Step 12 for leveling
instructions)(See Figures 13 and 14)
b. Drill 1/8" (3mm) pilot holes and fasten screws
with a Phillips driver to kitchen cabinets,
Cabinet
Figure 13.
Figure 14.
11. 79" (2006mm) High Opening With Louvered Top
Trim (Single and Dual Installations)
a. Slide units into place. Adjust height so top trim
height reaches 79.09" (2009ram). Center units
in opening and level. (See Figure 15)
b. Drill 1/8" pilot holes and fasten two (2) screws
per side with a Phillips driver to kitchen cabinets,
' L
5H
J
Item 4 Single Kit
or
Item 5 Dual Kit
Figure 15.
@2011 Etectrolux Home Products, Inc. Instruction Sheet 297299700 Rev. B 02.09.11