Page is loading ...

_AR8
CRRFTSHRNo
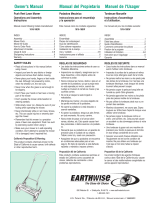
owners manual
MODEL NO.
35900
SEARS CRAFTSMAN
18" HAND LAWN MOWER
assembly
operating
repair parts
CAUTION:
Read RULES for Safe
OPERATION and
INSTRUCTIONS Carefully
manual del propietario
MODELO NO.
35900
SEARS CRAFTSMAN
PODADORA MANUAL
DE 18" (pulgadas)
ensamblaje
operaci6n
repuestos
PRECAUCION:
Lea cuidadosamente las
REGLAS de OPERACI(_N
segura y las instrucciones
owner manuel
MODELE NO.
35900
SEARS CRAFTSMAN
18"TONDEUSE
MANUELLE
assemblee
operation
pieces pour reparation
ATTENTION:
Lisez attentivement toutes
les Instructions dans ce
manuel concernant rem-
ploi roperation et I'utilisa-
tion de votre tondeuse.
SEARS, CANADA INC, TORONTO ONTARIO M5B 2B8
i
Part No. 31186

RULES" FOR SAFE OPERATION
1. Read and familiarize yoLIrselfwith the methodsofuse.
2. Inspectyour lawn amd remove foreignobjects, etc.
3. Don't operate mower when barefoot or weadng sandals.
4. Use caution - A mower isa precisionpiece oflawn care equip-
ment and should be treated as such.
5. Don't operate a damaged mower.Have repairs made before
returningto work.
6. Never place your hands or feet near a movingpart.
7. Do not mow the tawnwhen it iswet enoughto be slippery.
8. Always be sure of yourfooting. Walk, don'trun.
9. Keep all screws and nuts tight. Be sure equipmentis in a safe
operating condition.Keep mower clean of dry grassand dirt.
ITEMS IN CARTON
One complete Hand Mower Chassis.
Two lower handle sections.
Two upper handle sections.
One handle grip section.
One plasticbag includinghardware for assembly of
handle.
Six ¼" x 1 ¼" handle bolts-
Eight ¼-20 handle nuts-keps.
Two ¼" x 1" handle bolts.
One foam grip.
Two retaining rings.
Do not use Key Numbers when ordering Repair
Parts, always use Part Numbers.
Your mower is right hand (R.H.) or left hand (LH.)
as you push.
REGLAS DE OPERACI6N SEGURA
1. Lea y familiarfcese con lasformas de uso.
2. Inspeccione su c6sped y retirecualquierobjeto extrai'lo,etc.
3. No opera la podadoradescalzo o usando sandalias.
4. Tenga cuidado. Una podadora es un aparatode precisi6npare el
cuidado del c_sped y deber sertratada comotal.
5. No opere la podadorase estd dai_ada.Rep_rela o mdndela a
reparar antes de voIvera usada,
6. Mantsnga las manos y los pies alejados de las partes m6viles.
7. No corte el cdsped si estd mojado o resbaladizo.
8. Tenga los pies firmes en todo momento,iNo core,camine[
9. Mantenga apretados todos lostornillosy tuercas.Aseg0rese de
que su podadora est6 en condicionesadecuadas para un uso
seguro. Mant_ngala limpia de hierba seca y suciedad.
CONTENIDO DE LA CAJA
El chasis completo de la podadora manual.
Dos secciones de manija infedores.
Dos secciones de manija superiores.
Una secci6n de mango de ta manija.
Una bolsa de pldsticocon las plazas pare el
ensamblaja de la manija.
Seis pernos de 1/4" x 1 1/4".
Ocho tuercas de 1/4-20.
Dos pernos de 1/4"x 1".
Un mango de espuma.
Dos ares de retsnci6n.
No utilicelos n0meros de clave para ordenar los
repuestos, utilice siempre los n_msros de repuesto.
El lado derecho e izquierdo de la podadore son
desde la perspectiva de qulen la est_ empujando.
RI=GLES POUR L'UTILISATION DE LATONDEUSE
1. Lisez attantivament et familiarisez vousavec Is mode d'entretien.
2. tnspectezta surface de la petouset_tondre et en retirer tous las
corps dtrangsrs (outils,jouets, d6bris, etc.)
3. Ne pas uUliserla tondeuse Iomquevous _tes piednus ou
Iorsquevous portez des sandales.
4. Soyez prudent. Une tondeusa & gazon est une piece
d'equipement spdcifiquepour rentretien de la pelousset dolt an
tout temps _.tre considdr_e de la sorts.
5. N'utifisez pas une tondeuse endommag6e. Assurezvous que les
rdparetionsndcessaires ont dt6 effectuedsavant de reprendre
son utilisation.
6. Ne jamais approcher les mains ou les piedsprosdes pi_ces
mobiles de la tondeuse.
7. Ne pas tondra la pelouss Iorsqu'elleest mouill6eau point d'6tre
gflssanta.
8. Poussez toujoure& la mi_me cadence, marchez NE COURREZ
PAS.
9. Guardez tousles vis et _crous biens6rrds.Assurez vous bvant
chaque amplol qua rdqulpement est en boons conditionde
marche. Guardaz votre tondeuse proprs. Ddbarrasez la du gason
sac et de la saletd.
CONTENU DU CARTON
Le chassis complet d'une tondeuse.
Deux sections superieuras de la poignea.
Deux sections interieure de la poignee.
Un section de poignee centrals
Un sac en plastique contenant le necessaire
pour assembler la poignae
Six boulons 1/4" x 1 1/4" pour la poignee
Huit ecrous 1/4" - 20" pour la poignee
Deux boulons 114"x 1"pour la poignee
Un manchon en caoutchouc
Deux anneaux de retenue
Lorsque vous faites une commands indiquez le
numero de la piece.
Votre tondeuse est main droite ou main gauche
suivant comme vous la poussez.

MOWER BLADE ADJUSTMENT
• The blades have been preadjusted before leaving the factory.
• Misalignment can occur resulting in blades that are too loose or too tight. If this happens, you will notice a rough,
uneven cut or a hard pushing mower.
• All adjustments are made from the rear of the mower (opposite from the bar with the logo decal.) Each end of the cut-
ting bar can be adjusted separately.
• As you follow the instructions below, refer to Figure 1 for more information.
• The cutting bar blade (located under the reel) pivots. The front screws move the cutter bar away from the blades, while
the rear screws move the cutting bar toward the blades.
• Adjusting the screws is a very sensitive procedure. 1/16th of a turn is considered a major adjustment.
• Before tightening one adjusting screw, be sure to loosen the opposing screw an equal amount.
LOOSENING THE BLADES
• The cutter bar blade must be moved further from the cutting reel.
• Loosen both back screws equally by turning them counter-clockwise.
• Tighten both front screws equally by turning them clockwise.
TIGHTENING THE BLADES
• The cutter bar must be moved closer to the cutting reel.
• Loosen both front screws equally by turning them counter-clockwise.
• Tighten both back screws equally by turning them clockwise.
CHECKING ADJUSTMENTS
• Turn mower upside down.
• Insert a piece of paper (i.e., writing or newspaper) between the cutter bar and the reel blades, and carefully turn the reel
blades by hand.
* All blades should slice the paper evenly the entire length of the cutter bar while the reel turns smoothly.
• if the mower has an uneven cut, an adjustment should be made to the appropriate side of the blades to attain an even
cutting action.
FIGURE 1
ILLUSTRACI6N 1
DESSIN 1
Adjusting Screws
Tornillos de ajuste
Vis d'ajustement

18" HAND-LAWNIVIOWERS
MODELNUMBER35900
PODADORASMANUAL DE 18"
MODELONO.35900
18" TONDEUSEMANUELLE
MODELENUMERO35900
KeyNO. F'll Be. Pal Nanll Rap.
CIM De Rep. NombmDUlRapuesto Req.
Dumem NumeroDes Pieces Desc_on DUSPieces Nece_im
1, 30122 BallCup 2
Recept_o del copnste
Rouge
2, 30137 8nil B_aringA_sembly 2
Momajedel€_"matede bolas
Assemblagebilnisde i_u_emant
L 3Q004 BeatingCo_e 2
Cormdel co,linste
ConedlJ¢ou,_inst
4. 303_ Spring, ReelAdj. 1
ResorsideaJuste_d dlindro
Ressortd'ahJstementfmo_eu)
5. 303_20 DustCap 1
Co_ena _ po_
Prot_e onusslere(mo_eu)
6. _ _ Spacw I
Es_ader ddl€_Indm
F_lle
7. 30_16 RachutPard 2
Tdnquete
Encllouetaoe_ rochst
8. 10122-3-20 ReelAssembly(Incl. KeyNOS.2 t_ 6) 1
Montajedel ctlindm(Incl.IQsnos. dla_ de2 a 6)
Assemblagedu moyon(co_dantnis piecesnumero_
30137.30004-30309-30308-0-20-30307)
9. 30317-1 Axle SnaplOng 2
Aro an "E" dnieje
Anneaua pression(essieu)
10, 30926-I Hub Cap 2
Tapacubo
Couve_e du mo_eu
I1. 30337 Axle 2
Eje
Es._eu
11. B 30733 Axle Nut 2
Tuercadnieje
EcrouHexagonalgoutI'esnieu
12. 10446 Wheel & Tire 2
Reude- Llauta
Roueet Pneu
13. 30660 He_HeadBoit 2
Pemodecapezade_ni
Boniona t6te _nale
14. 3Q_2G Co_r Plate 2
Plata de ni cubierta
Plaquedeco_rmrture
15. 10326-17-20 LeftSide Plate 1
Plocaniteral izqulerde
Fix_on Isteraleeau_ll#
15, A 10326-18-20 RightSide Piate I
Placalateralderecha
Flxat]_ 1_6_e drolte
16. 30990 HandleRetaininglong 2
Aro demonni6nde la manija
Anrmaude Rsten_
17, 10491-1-20 ShrubBarASS'/. 1
Ensamnia# deni barrade pintecckin
8arre de torsion
18. 30737-3 Left PinionGear 1
Pi_ Iz_rdo
Engronaged p_onongauche
19, 210300 Adjus_g Screw5/16 X 1 (Incl. in KeyNOeL15 & 15A) 4
Tornillodll ajuatede5/16 x 1
(se indwe enlos no_.dims t5 & 15A)
VIs d'aJustemest(conBerdles piecesnumem
10326-13-20st 103_6-17.30)
Bey NO. PartNo. Pal Nwe
Claw DeRap. Nenl_e DillRapasto
NunlerO NumemDesPieces Be_riptni_ DesPiec_
20. 30737-2 lOghtPinionGear
21. 310¢39
22. 31003
Z'J. 31U/'_
24. 30119-2
25. 103_5.3-20
25. A _19
26. 30320
27_ 30_/1
28. 30319-3
10016"11
29. 10473-1
30. 31107-14
30. A 31107-15
31. 31100
31. A 31100-2
32. 30992
33. 31098"3
34, 310_.3
35. 30948
36. 10474
Re_.
Ne_m_tre
1
derecho
Engreongea pignondroit
CutterBerBert3/8 X 11/8 2
Tornilnide )abarTadecorte,3/8 x 1 1/8 pulgades
Boaton-Banedes lames3/8 x 1 I/8
WingNUt 2
TuercaHexzgona_
EcmuHe_a_pnni
HOllerBr'ac_ 2
Soportedel rodllni
Lequst
CarriapeBolt_d16X 11/4 2
Pernode carruajede 5/18 x I 1/4
goaton5/16 x 1 1/4
CutterBet_,_ 1
B_rz de corte
Banedes lames
CutstrBe_Stud(incl. m KeyN_. 15 & 15A) Z
Eap4_ de_ barradecorte(se Indl.en10sn_ 15y 15_Q
RMt - Barredes _nes fco_eut lesnumero_1Q_I 15/q
RogerSec_n 7
Seccni_d¢ mdHIo
Sec_onduRouleau
RollerSpacer 2
Espaniaderdel r_uni
Ron_lle deRouleau
RolerTape 1
Tubodel r_li!lo
Tubedurooleau
ComplesiRnilerkssembly 1
Mofltajecompletodel roniEo
A_s_mniaoeoourle mufeau
ComplsteHandle/_nl. I
Montajecompk_tode nimanila
Assemblagepour_apnignee
i_ HandleBect_on_H 1
Secnion_fedor de la manijareded derecha
SectionDnioneedrniteinfedeupe
HandleSectionLH 1
Seo_oninferiordela man_am_ad b_uletda
Sectionon,nee oaucheinf_euze
HandleB_t 1/4-20-1" 2
Pemodela ma_a 1/4-20-1"
Bo_lonpour_,pdlgnee1/4 x 2
HandleBdt 114x 1 114 6
Pemode lamanija1/4 x 1 1/4
BO_ pourla pnig_le 1/4x 114
He<Nut 114Nyk_ Insert 8
Tuercahexagonal,Insertodeni_n
EcrouHe_anonal
CenterHandleSection 2
Secc_ superiordelama_ja
Sec_ de oonineesuoedeum
HandleGdpSecden I
Secniondel manoodela rna_ja
Sectiondeonianeece_rale
FoamGrip I
Mangodeeapuna
Ma_ depnigneeen caoutchouc
_em. Hazdwam 1
Paqustedenirreteda
Assemblagede _incnilterle

CUSTOMER RESPONSIBILITIES
Alwaysusecare when operatingyourlawnmowerand keepclearof movingparts.Avoidstrikingor runningintosolidobjectsor debdsin
thearea tobe mowed.Be surethe mowerisclean and followa regularmaintenanceschedulein ordertoprovideefficientand safe opera-
tion.A well-carad-forlawn mowerwill lastlongand operatemoreefficiently.
TWO YEAR LIMITED WARRANTY ON CRAFTSMAN
MODEL 35900 LAWN MOWER
For two years from the date of purchase, when this Craftsman Lawn Mower is maintained and lubricated according to the instructions in the
owner's manual, Sears will repair, free of charge, any defect in material and workmanship.
If this Craftsman Lawn Mower is used for commercial or rental purposes, this warranty applies for only 90 days from the date of pur-
chase.
This warranty does not cover:
Expendable items which become worn during normal use.
Repairs necessary because of operator abuse or negligence, and the failure to maintain the equipment according to the instructions con-
tained in the owner's manual.
WARRANTY SERVICE IS AVAILABLE BY RETURNING THE CRAFTSMAN LAWN MOWER TO THE NEAREST SERVICE
CENTER/DEPARTM ENT.
This warranty gives you specific legal rights, and you may also have other rights which vary from state to state.
SEARS.
RESPONSABILIDADES DEL CLIENTE
Siempreoperasu podadoracon cuidadoy mant_ngasealejad_ de las plazasmbviles.Eviteloschoques o cualquierotrocontactocon
objetassblidoso con desechosen el Area que ss corta.Aseg0resede qua la podadorase mantengalimpiay observeun programade
mantenimentoregular,a fin de asegurarelusoeficientey segurodel ap_ato. Una podadorabiencuidadadurar_ per muchos a_osy fun-
cionar_de una manera eficiente.
GARANTiA LIMITADA DE DOS AI_IOS PARA LA PODADORA CRAFTSMAN MODELO 35900
Durante dos ar3os a partir de su fecha de compra, siesta podadora Craftsman recible mantenimiento y lubricacibn de acuerdo con las
instrucciones del manual del propieCario,Sears rsparar8 gratuitamente cualquier defecto en materiales y mano de obra.
Siesta podadora Craftsman se utiliza para usos comerciales o renta, esta garantTasolamenta se aplica durante 90 dias a partir de la fecha
de compra.
ESTA GARANTJA NO CUBRE:
Partes desechables que se desgastan durante el uso normal.
Reparaciones necesadas debido al abuso o negligencia del operador, o per falta de mantenimiento del equipo seg0n las intrucciones del
manual del propietario.
EL SERVICIO DE GARANTJA SE OBTIENE HACIENDO LLEGAR LA PODADORA CRAFTSMAN AL CENTRO O DEPARTAMENTO DE
SERVICIO MAS CERCANO.
Estagarantlaleotorgaderechoslegalesespecificos.Esposiblequa ustedtengactros derachosadicionalesseqOnsu lugarde residencia.
SEARS.
RESPONSABILITES DU CONSOMMATEUR
Fairs toujours attention Iorsque vous utilisez votrs tondeuse. Enlever tousles debris avant de commencer. Ne la cogner pas contre des
objets durs ou des debris. Conservez votre tandeuse en bon etat, et toujours propra. Familiarisez vous avec le mode d'entretien et suivoz
les instructions sugg6r6es pour garder votrs tondeuse en bon etat. Une tondeuse bien entrstenue durera plus Iongtamps et marchera en
bonne condition.
DEUX ANS DE GUARANTIE LIMITEE POUR LE MODELE 35900 SEARS TONDEUSE
POUR DEAU ANS COMMENCANT A LA DATEDE UACHAT,LORSQUE LATONDEUSE SEARS EST MAINTENUE ET LUBRIFII_EEN
SUIVANTLESINSTRUCTIONS DONNEES DANSCE MANUEL,SEARS I-ERALESREPARATIONSGRATIS,EN CAS DEDEFAULTDANS
LE MATERIELOU UOUVRAGE.
CETTE GUARANTIE NE COUVRE PAS:
- LESARTICLES US¢:SPENDANT UN EMPLOI NORMAL.
- Ri._PAPATIONSNC'CESSAIRES CAUSf_ESPAR UABUSE OU LA NC:GLIGENCEDU CONSOMMATEUR QUI N'A PAS SUIVI LES
INSTRUCTIONS DANS CE MANUEL POUR MAINTENIRCE'rTE TONDEUSE EN BON L_"rATDE MARCHE.
LE SERVICEDE CETTE GUARANTIE PEUT b'TREOBTENU EN RETOURNANTLATONDEUSE AU CENTRE DE RC:PARATIONSEARS
LE PLUS PROCHE
CETTE GUARANTIE VOUS DONNE DES DROITS TRI_SSP_:CIFIQUES,ET VOUS POUVEZ AVOIR€:GALEMENTD'AUTRESDROITS,
QUI CHANGENT D'UN L_'TATA UN AUTRE.
SEARS

Dear Customer,
In manufacturing this product, many steps have been taken to provide you with the highest quality. Unfortunately, errors
or omissions occasionally occur. In the event that you find a missing or defective part, please contact your nearest Sears
store.
SERVICE AND REPAIR PARTS
CALL 1-800-665-4455 *
Keep this number handy should you require a
service call or need to order repair parts.
If ordering parts make sure you have the name, make and
model no. of the merchandise and the name and number
of the part you wish to order.
* If calling locally, please use one of the following numbers:
Regina - 566-5124 Montreal - 333-5740
Toronto - 744-4900 Halifax - 454-2444
Kitchener - 894-7590 Ottawa - 738-4440
Vancouver - 420-8211
If you have any suggestions that would help us to improve our assembly/operation instructions, or this product, please
write them down and mail it to:
Sears Canada Inc.
222 Jarvis Street
Toronto, Ontario
M5B 2B8
Attention: Buyer Dept. 671
Model No.
NAME:
ADDRESS:
POSTALCODE: PHONE #:
COMMENTS:
/