Instruction Manual
DE: Bedienungsanleitung - de.startech.com
FR: Guide de l'utilisateur - fr.startech.com
ES: Guía del usuario - es.startech.com
IT: Guida per l'uso - it.startech.com
NL: Gebruiksaanwijzing - nl.startech.com
PT: Guia do usuário - pt.startech.com
Manual Revision: 07/05/2013
For the most up-to-date information, please visit: www.startech.com
Packaging Contents
• 1x400WATXPowerSupply
• 1xPowerCord(NA)
• 1xInstructionManual
Installation
NOTE: Computerscontainsensitiveelectroniccomponentsthat
areeasilydamagedbystaticelectricityandexcessiveshock.When
handlingthepowersupplyandothercomponents,ensureyouare
properlygroundedusingananti-staticmatorsimilardevice.Ifanti-
staticequipmentisnotavailable,groundyourselfbytouchingthe
exteriorofthecomputercaseoranotherlargemetalsurfacebefore
handlinganyperipherals.
1. Installationofapowersupplyrequiressomemechanicalskill
andrequiresthatyouopenyourcomputercasetodisconnect
andreconnectwires.Ifyouareunfamiliarwiththiskindofwork,
considerbringingyourcomputerandnewStarTech.compower
supplytoyourlocalcomputerstoreforhelp.
2. Checktheredswitchontherearofthepowersupply,nextto
thepowercordplug.Besureitissettothecorrectvoltagefor
yourcountry.InNorthAmerica,itshouldread“115”.InEurope
andAustraliaitshouldread“230”.Tochangetheswitch,use
ascrewdriverinthenotchoftheswitchandslideittothe
oppositeside.Ifyouareunsureofthevoltageusedinyour
country,contactyourelectricityproviderbeforeproceeding.
3. Ifyouarereplacinganoldpowersupplyinyourcomputer,
ensurethecomputerisshutdownanddisconnectthepower
cordfromthebackoftheoldsupply.
4. Openyourcomputercase.Inmostdesigns,thecaseisopened
byremovingtwoorthreescrewsattherearofthecaseandthen
slidingthecoveringpanelbackwarduntilitcomesfree.Ifyour
caseisatowerstyle,ensurethatyouremovethepanelthatwill
exposethetopofthecomputer’smotherboard.Thisisgenerally
theleft-sidepanel.Therearemanydierentcasedesigns,
however,soifyouareunsureofhowtoopenyourparticular
case,consulttheusermanualforyourcaseorcontactyourlocal
computerstoreforhelp.
5. Withthecomputercaseopen,reviewtheconnectorsbeingused
fromyouroldpowersupply.Ifyouarebuildinganewcomputer,
reviewtheconnectorsthatyouwillneedtouse.Checkthetype
ofconnectoronyourmotherboardanduseeitherthe24or20
pinATXpowerconnectoronthepowersupplyasappropriate.
6. Disconnecttheoldpowersupplyconnectionsfrominside
yourcomputer.Harddiskdrive,CDdriveandoppydisk
driveconnectorsdisconnectbypullingontheconnector.The
motherboardconnector(s)haveaclipthatmustbepressed
whilepullingontheconnectortoreleasethem.Arocking
motionwhilepullingwillaidingettingtheconnectorsloose.
Neverpullonthewiresofaconnectortounplugit.
7. Checkthatallthewiresfromyouroldpowersupplyarefree.
Removethefourscrewsontherearofyouroldpowersupplyto
freeitfromthecomputercase.Supportthepowersupplywith
onehandifitcouldfallwhileremovingthelastscrew.(Suchasin
atowerstylecase.)Removethepowersupplybyslidingitback
andthenoutthroughthesideofyourcase.
8. Installyournewpowersupplybypositioningitthroughthe
sideortopofyourcase(dependingonyourcasestyle)andthen
backontothepowersupplymounts.Checkthattheorientation
withthescrewholesinyourcaseiscorrect;allfourholesmust
bealigned.Supportthepowersupplywithonehandwhile
threadingamountingscrewthroughthebackofthecaseand
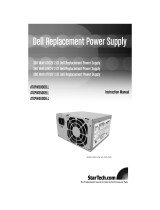
ATX2POW400HS
400 Watt 20/24-pin Silent ATX 2.01 Computer Power Supply
*actual product may vary from photos

FCC Compliance Statement
ThisequipmenthasbeentestedandfoundtocomplywiththelimitsforaClassBdigitaldevice,pursuanttopart15oftheFCCRules.Theselimitsaredesignedtoprovidereasonableprotectionagainst
harmfulinterferenceinaresidentialinstallation.Thisequipmentgenerates,usesandcanradiateradiofrequencyenergyand,ifnotinstalledandusedinaccordancewiththeinstructions,maycause
harmfulinterferencetoradiocommunications.However,thereisnoguaranteethatinterferencewillnotoccurinaparticularinstallation.Ifthisequipmentdoescauseharmfulinterferencetoradioor
televisionreception,whichcanbedeterminedbyturningtheequipmentoandon,theuserisencouragedtotrytocorrecttheinterferencebyoneormoreofthefollowingmeasures:
• Reorientorrelocatethereceivingantenna.
• Increasetheseparationbetweentheequipmentandreceiver.
• Connecttheequipmentintoanoutletonacircuitdierentfromthattowhichthereceiverisconnected.
• Consultthedealeroranexperiencedradio/TVtechnicianforhelp.
Use of Trademarks, Registered Trademarks, and other Protected Names and Symbols
This manual may make reference to trademarks, registered trademarks, and other protected names and/or symbols of third-party companies not related in any way to
StarTech.com.WheretheyoccurthesereferencesareforillustrativepurposesonlyanddonotrepresentanendorsementofaproductorservicebyStarTech.com,oranendorsementoftheproduct(s)
towhichthismanualappliesbythethird-partycompanyinquestion.Regardlessofanydirectacknowledgementelsewhereinthebodyofthisdocument,StarTech.comherebyacknowledgesthatall
trademarks,registeredtrademarks,servicemarks,andotherprotectednamesand/orsymbolscontainedinthismanualandrelateddocumentsarethepropertyoftheirrespectiveholders.
Technical Support
StarTech.com’slifetimetechnicalsupportisanintegralpartofourcommitmenttoprovideindustry-leadingsolutions.Ifyoueverneedhelpwithyourproduct,visitwww.startech.com/supportandaccess
ourcomprehensiveselectionofonlinetools,documentation,anddownloads.
Forthelatestdrivers/software,pleasevisitwww.startech.com/downloads
Warranty Information
Thisproductisbackedbyatwoyearwarranty.
Inaddition,StarTech.comwarrantsitsproductsagainstdefectsinmaterialsandworkmanshipfortheperiodsnoted,followingtheinitialdateofpurchase.Duringthisperiod,theproductsmaybereturned
forrepair,orreplacementwithequivalentproductsatourdiscretion.Thewarrantycoverspartsandlaborcostsonly.StarTech.comdoesnotwarrantitsproductsfromdefectsordamagesarisingfrom
misuse,abuse,alteration,ornormalwearandtear.
Limitation of Liability
InnoeventshalltheliabilityofStarTech.comLtd.andStarTech.comUSALLP(ortheirocers,directors,employeesoragents)foranydamages(whetherdirectorindirect,special,punitive,incidental,
consequential,orotherwise),lossofprots,lossofbusiness,oranypecuniaryloss,arisingoutoforrelatedtotheuseoftheproductexceedtheactualpricepaidfortheproduct.Somestatesdonotallow
theexclusionorlimitationofincidentalorconsequentialdamages.Ifsuchlawsapply,thelimitationsorexclusionscontainedinthisstatementmaynotapplytoyou.
intothepowersupply.Thescrewshouldthreadsmoothlyand
shouldnotrequireeort.Donotforceitoryoucoulddamage
themountingholes.Ifthescrewwon’tthreadsmoothly,remove
itandchecktoensurethemountingholesarecorrectlylined
up.Repeatfortheremainingthreescrews.Donotfullytighten
anyofthescrewsuntiltheyallhavebeenthreadedintotheir
mountingholes.(Note:ConsiderStartechpartSCREWTHUMB
screwsforeasierinstallation.)
9. Tieunusedwiresawayfromfansandothermovingparts.
10. Replacethecasecoverandsecureit.Youmaywishtonot
replacethescrewsuntilafteryouhavecheckedthatall
connectionsareworking.
11. Toggletherearpowerswitchonpowersupplytoo.(The“0”
symbolontheswitch.)Connectthepowercordtothepower
supplyandplugitintoagroundedpoweroutlet.(Thepower
supplyMUSTbeconnectedtoagroundedoutlet.)Togglethe
rearpowerswitchtoon.
12. Startyourcomputer.Youshouldhearitsfansanddevices
immediatelybegintorun.Ifyoudonot,toggletherearswitch
onthepowersupplytoo,disconnectthepowercord,openthe
caseandcheckthatallconnectorsarewellseatedandsecure.
13. Whenyouhaveconrmedallconnectionsareworking,replace
thescrewsinyourcase.
14. Powersuppliescontainelectricalandelectroniccomponents
andshouldbedisposedofproperly.Ifyouarereplacingapower
supply,pleasefollowyourcity’srulesforproperdisposalof
electricalequipment.
Specications
Dimensions 5.51x5.91x3.35in.(140x150x86mm)
Weight 4.2lb(1.9kg)
AC Input Voltage
115V(10A)or230V(5.5A),50/60Hz
(ManualSwitching)
DC Output
+3.3V +5V +12V1 +12V2 -12V +5Vsb
30A 28A 14A 15A 1A 2.5A
Output Power
(max.)
400W
Fan 12cm,dualballbearing
Certications FCC,TUV,UL,CUL
Output
Connectors
1xATX12VP4Power(4pin;v2.x)Male
1xATXSplitPower(20+4pin;v2.x)Male
1xMolexFan(3pin;TX3)Female
1xPCIExpressPower(6pin;v1.x)Female
2xSP4(4pin;SmallDrivePower)Female
4xLP4(4pin;MolexLargeDrivePower)Female
4xSATAPower(15pin)Plug
/