Page is loading ...

Version 1.1
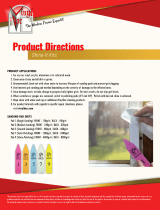
UV Nail Extensions
A Range Overview
UVLP5
UVLP4
UVLB
UVLF

Rio UV Nail Extension Range
The Rio UV Nails Extension Range includes
everything you need for fantastic natural
looking, long lasting and strong nail extensions.
The high gloss finish also prolongs the life of nail
polish and reduces the likelihood of chipping.
With the correct maintenance and aftercare
procedures, UV Nails can last up to 3 months.
A step-by-step DVD shows all the techniques to
get salon quality results every time.
Each product has different features.

UV Nails Professional – UVLP4
Product Overview
•36 W (4x 9w bulbs)
•Mains operated
•Comes with Pink and Clear UV gel for French
manicure
•Mirrored surfaces allowing the optimum amount of
UV light is delivered evenly to the nail for rapid curing
and super strong results
•Contents: 36W (4 bulb) UV Hand & Foot Lamp, 3
stage buffers, extension cutters, finishing wipe,
acetone solution, grit file, nail primer, sanding block,
cuticle oil, nail glue, hoof stick, Pink UV gel, Clear UV
gel, 100 natural tips, 100 white tips, brush, instruction
book and step-by-step DVD.

UV Nails Extensions – UVLP5
•15 W Bulb
•Contents: UV lamp, UV Gel, 100 Extension Tips,
Acetone Solution, Finishing Wipe, Grit File, 3
Graded Buffers, Sanding Block, Nail Clippers,
Hoof Stick, Primer, Cuticle Oil, Glue,
Application Brush, Instruction Book and Step-
by-Step Instruction DVD.
Product Overview

UV Nails Extensions – UVLB
•4 w bulb
•Battery operated (adaptor can be
purchased separately)
•Contents: Step-by-step DVD, UV Lamp,
Batteries (x4 AA), 100 Extension Tips, 3
Graded Buffers, Grit File , Finishing Wipe,
Acetone Solution, Hoof Stick, Application
Brush, Nail Primer, Sanding Block, UV Gel,
Nail Clippers, Nail Glue x1.
Product Overview

UV Line Extension
• UV curing enables the protection of the natural nail or
dramatically extending the life of your favourite nail polish

UV 14 Day Nails – UVLF
Rio 14 Day UV Gel Clear Polish, uses a specially
formulated clear gel which reacts with UV light to
create a very strong, high gloss layer protecting
your favourite nail polish from chips, dents and wear
for up to 14 days.
• Suitable for use with all brands of polish.
• Ideal for application on both hands and feet.
• Promotes longer, stronger nails which don’t split or
peel.
Contents: UV Lamp, Mains Adapter, 14 Day UV Gel
Clear Polish, Base Coat, 3 Step Buffers, Sanding
Block, Large File, Hoof Stick, Finishing Wipe, Acetone
Solution, Lint Free Wipes and Step-by-Step
Instructions.
Product Overview

How to Use Rio UV Nail Extensions

UV Nail Extensions Treatment
Before you start
Your treatment area should be a flat surface covered with a towel or
disposable covering. Any spilled gel or glue will be difficult to remove from
clothes, furniture and carpets. Do NOT operate the UV lamp over a surface
that is not protected by a towel or similar covering.
•Keep gel away from the UV lamp, and out of sunshine, at all times.
Before You Start
Natural Nail Nail Extension ‘C’ Curve
Choose a tip with the best fit to the
natural nail shape. Note, the
‘C’ curve of the tip must be as near a
perfect fit as possible to your
Natural ‘C’ Curve.
The same principles and instructions
apply to the preparation and
treatment of your toenails.

UV Nail Extensions Treatment
Cut and file the free edge of the natural nail to a fairly
uniform length and shape with a grit file. We recommend
approximately 3mm. Always file in one direction from
outside to centre of nail.
Select a tip for each nail that fits neatly against the free
edge of your existing natural nail tip end. If necessary,
choose a larger tip rather than a smaller one and file down
the sides to fit. Clip the base of each tip using the clippers
so the stop point covers a maximum of one third of your
natural nail.
Pre blend the edge with a grit file, so that the well area is
thin and tapers to the end. File horizontal to the nail
extension. Repeat procedure for all nails.
Before You Start

This is the most important part of applying nail extensions, if the nails are not
correctly prepared the nail extensions will start to lift. Follow each of these steps
carefully and thoroughly. You may find it easier to have a friend help you the first
time and we suggest you work on one hand at a time.
STEP 1 Remove jewellery. Wash hands with a mild soap and dry thoroughly.
Gently push back the cuticles with the hoof stick and remove ALL residual skin
cells from the nail plate surface. Skin cells contain oils and moisture which will
prevent proper adhesion, this is the most common cause of gel nails lifting.
STEP 2 Lightly buff over the nail surface with the white sanding block to remove
surface shine. Pay particular attention to the cuticle and sides of the nail to
remove any residual skin cells.
STEP 3 Brush away dust using a tissue or small brush, take care to remove all dust
particles.
STEP 4 Now wipe over surface using finishing wipe to remove all oils and
dehydrate the nail plate. Do NOT touch the nail surface after this stage as your
fingers will transfer natural oils from the skin onto the nail.
Preparation
UV Nail Extensions - Preparing Your Nails

STEP 1 Apply a thin line of nail glue onto the well of the tip. Tap the tip
sharply on a tissue to remove any excess glue.
STEP 2 Hold the tip at an angle to the nail plate, then bring the tip up
to the free edge. Tilt and slide the nail tip onto the nail plate so that
the natural free edge sits snugly against the stop point of the tip.
STEP 3 Press and hold the tip in position for about 5 seconds or until
an airtight bond occurs. Ensure the bonded area beneath the nail
extension is sealed and contains no gaps. This will prevent the
trapping of water and dirt.
STEP 4 Apply all five tips in this manner then cut and file to the
required length. The nails are only attached by glue at this point, so
file carefully. If you are not used to having long nails, cut the tips to a
sensible length, as knocking and banging the nails will weaken them.
Applying Extension Tips
UV Nail Extensions - Applying Extension Tips

The seams only need to be blended when natural/clear tips are used. Do not
blend if you are using white tips.
STEP 1
If your tips have been pre-blended correctly you can conceal the seam by
buffing over lightly with the white sanding block until the seam is barely visible.
OR
STEP 1 Dip a cotton bud into the acetone solution and using several fast
sweeping strokes, rub vigorously until the seam begins to blend. Try to avoid
rubbing on the natural nail plate. Do NOT use too much acetone or the nail
tip bond will be weakened.
STEP 2 Neaten the sides of the nail extension using the buffing files, so they are
straight and remove any ‘wings’ but do not over file. Repeat for each nail.
Blending in the Seam
UV Nail Extensions - Blending in the Seam

STEP 1 Brush one very THIN coat of primer LIGHTLY over each nail, wait
for primer to dry (approx 3 mins). Too much primer can cause a burning
sensation. Should this occur, tap your finger/toe against a hard surface
until the burning sensation passes, this usually takes between 15–20
seconds.
Using gel brush, scoop a small amount of gel from tub, keeping one
side of the brush clean by wiping it on the edge of the tub. Apply a
thin coat of the gel in the same manner as you would nail polish. Start
1mm from the cuticle and work towards the free edge. Avoid
getting gel on skin or cuticles. If this happens, remove immediately
using a cotton bud dipped in finishing wipe.
Finish off by brushing across the free edge of the extension tip. Do NOT
apply too much pressure, as the brush will fan, leaving brush marks.
Repeat this process for all the nails. You are now ready for UV curing.
Note: We recommend applying gel and curing the thumbnails
separately.
Applying UV Gel
UV Nail Extensions - Applying UV Gel

It is a good idea to familiarise yourself with the position of the UV bulb so you
can place your nails directly under the bulb. ALWAYS keep your UV gel pot
away from the UV light. Note: You will need to cure the thumbnails separately.
STEP 1 Turn on your UV lamp - wait for 1 minute to allow the UV to reach
maximum strength. Place your nails under the UV bulb to cure the gel for 3
minutes.
STEP 2 Repeat the application of UV gel and curing two more times.
The top layer of gel ALWAYS appears tacky after curing, this is completely
normal and should NOT be removed between layers.
STEP 3 Once you have applied and cured 3 layers of UV gel check each nail
for ‘craters’ (small indentations or ridges in the UV gel). If ‘craters’ appear,
apply another thin layer of UV gel and cure the nails again.
STEP 4 Use the finishing wipe on a tissue to gently remove the tacky top layer
revealing the hardened gel underneath. Always wipe away from cuticle and
use a fresh wipe for each nail to avoid getting the tacky gel onto the skin of the
next nail.
UV Nail Extensions - UV Nail Curing
UV Nail Curing
Important: Exposure to UV light should be limited to a maximum of 6 treatments to each hand in any one
day (Each treatment lasting 3 minutes).

UV Nail Extensions - Finishing
STEP 1 Once the nails are cured, file the seams of the
applied UV gel using the grit file. This helps avoid the
hardened UV gel lifting at the back of the nail. File
around the sides of the nails.
STEP 2 If you wish to achieve a more natural look without
the high gloss finish buff over each nail with the white
sanding block. Then buff with the 3 stage buffing files,
progressing from file 1 to file 3, until each nail has a
natural shine.
Finishing
Don’t forget to clean your brush and replace the lids on the bottles &
pots. To clean your gel brush, dip into some finishing wipe and wipe on
some tissue. Then dip into a cuticle oil to preserve the bristles. Before
using the brush you must remove the oil by again dipping into some
finishing wipe and wiping on a clean tissue.

UV Nail Extensions - Infilling
• As the natural nail grows it is necessary for you to in-fill
as a gap will appear between the cuticle and the
seam. The gel may also begin to lift. This is usually
required about two weeks after your first application
and every 2-3 weeks thereafter
• File around the seams of UV gel using the grit file,
paying attention to remove all loose or lifted areas of
gel
• Buff over the whole area using the white sanding
block
• Apply a THIN coat of primer to each nail, allow to dry
• Follow the section APPLYING UV GEL, only using two
layers, and then the sections for UV NAIL CURING and
FINISHING
Infilling

UV Nail Extensions - Removal
UV nails are very strong and are designed to remain on the nail
for up to three months as the natural nail grows underneath. If a
proper routine of filing and infilling is maintained there is no
reason to remove the nails as they will simply grow out with the
nail, ultimately being trimmed off as you shape the nail tip. If
however you need to remove or replace the nail tips there are
two approved methods:
REMOVAL BY FILING
This is the preferred method for professional removal. You simply
file the cured gel away until only a very thin layer is left on the
nail, this is allowed to grow out naturally. Start by shortening the
nails to the desired length.
Slowly and carefully file the gel layer with a medium-grit file,
leaving a very thin layer of product. Take great care NOT to file
into the natural nail plate.
Shape with the file and wash hands and nails thoroughly to
remove all traces of gel dust which can irritate the skin.
Removal - Filing

UV Nail Extensions – Removal with acetone
The cured gel polymer is highly cross-linked which makes it very
strong. It is exactly this cross-linking which makes the gel resistant to
most solvents. However, acetone can be used to soften the gel
allowing it to be scrapped off in layers. This involves submerging the
fingertips in acetone for some time. We do not recommend doing this
regularly. Cut all the extension tips down as far as possible and
remove any nail polish.
Slowly and carefully file the gel layer with a medium-grit file, leaving a
very thin layer of product. Take great care NOT to file all the way
to the natural nail plate.
Fill a medium bowl half way with hot water. Place a smaller NON-
plastic dish into the hot water filled dish. Pour extension tip remover of
nail varnish remover (containing at least 90% acetone)
into the inner bowl.
Soak the nails for at least 15 minutes before checking whether the gel
is softening. Make sure the nails are fully submerged in the solution.
You can cover your hand with a towel to help maintain the heat and
reduce the vapours.
Removal - Acetone
/