Page is loading ...

172
AND
SKYHAWK
SERIES
1969
THRU
1976
SERVICE
MANUAL
LATEST CHANGED PAGES SUPERSEDE
THE SAME PAGES
OF
PREVIOUS DATE
Insert changed pages into basic
publication De5troy superseded pages
D972C3-I 3-RAND-1 750-7175
1
JULY
1972
CHANGE
3
15
JUNE
1975

INSERT LATEST CHANGED PAGES
.
DESTROY SUPERSEDED PAGES
.
NOTE:
The portion of the text affected by the changes
is
indicated by
a
vertical
line in the outer margins
of
the page
.
Changes to illustrations
are
indicated by
i
miniature pointing hands
.
LIST
OF
EFFECTIVE
PAGES
Dates
of
issue
for
original and changed pages
are:
Original
....
0
....
1
July 1972
Change
....
1
....
1
July 1973
Change
Change
....
3
....
15 June 1975
....
2
....
1
July 1974
TOTAL NUMBER
OF
PAGES IN THIS PUBLICATION IS 408. CONSISTING OF THE FOLLOWING:
Page Change
No
.
No
.
*Title
.......
3
*A
.........
3
*ithruii
......
3
iii
........
0
iv Blank
......
0
1.1
........
0
1-2
........
2
1-3
........
1
1-4
........
0
1-5
........
2
1-6 Blank
.....
2
*2-1
........
3
2-2
........
2
2-U
.......
2
2-2B Blank
....
2
2-3
........
1
*2-4
........
3
2.5
.......
IO
*2-7
thru 2-8
....
3
2-9
........
0
*2-10thru 2-14
.
*
.
3
*2-14A
.......
3
*2-14B Blank
....
3
2-6
........
2
*2-15
.......
3
2-16
.......
2
*2-17 thru 2-18
...
3
2-19thru
2-20
...
1
2-21
.......
2
*2-22
.......
3
2-23 thn2-24
...
1
*2-25thm
2-26
...
3
3-1
........
2
3-2
........ 0
*3.3
........
3
3-4
........
0
*3-5 thm 3-6
....
3
*3-6A thru 3-6B
...
3
*3-7
........
3
3-9
........
1
*3-10
........
3
3-11 thru 3-12
...
1
*3-13
.......
3
3-14A thru 3.14B
. .
1
3-15
.......
o
3-17 thn 3-18
...
0
*3-19 thru 3-20
...
3
*4-1
........
3
4-2 thru 4-3
....
2
*4.4
........
3
4-5
........
0
*4-6 thru 4-7
....
3
3-8
........
0
3-14
.......
1
3-16
.......
2
Page Change
No
.
No
.
*4-8 Blank
.....
3
*5-1 thru 5-3
....
3
5-4
........
0
*5-5
........
3
5-6
thru 5-8
....
1
*5-8A
thm 5.8B
...
3
*5-9 thru 5-15
...
3
5-16
.......
1
*5-17 thn 5-18
...
3
*5.18A
.......
3
*5-18BBlank
....
3
*5-19
.......
3
5-20
.......
0
5-21
.......
1
5-22
thru 5-23
...
0
*5-24
.......
3
5-25 thru
5-26
...
0
5-27
.......
1
5-28
Blank
.....
1
6-1 thn
6-2
....
0
*6.3
........
3
6.4
........
0
*6.5
........
3
6-6
thru
6-7
....
0
6-8
Blank
.....
0
7-1 thru7-9
....
1
7-10thru7-11
...
2
*8.1
........
3
8.2
........
0
*8-3thm 8-6
....
3
7-12 Blank
....
2
19-1 thru 9-7
....
3
*9-8 Blank
.....
3
10-1 thru 10-2
...
2
*10-3thm 10-6
...
3
10-7 thm 10-8
...
2
*11-1
.......
3
11-2
.......
0
11-3
.......
2
*11-4 thru 11-7
...
3
11-8
.......
0
*11-9 thru
11-11
.
.
3
11-12 thm 11-13
. .
0
11-14 thn 11-15
.
.
2
11-16
.......
1
11-17 thru 11-20
. .
0
11-21 thru 11-22
. .
1
*11-23 thru 11-24
.
.
3
11-25
.......
2
11-26 thru 11-27
. .
0
11-28 Blank
....
0
*11A.l
.......
3
llA.2
.......
0
*llA.3
.......
3
llA.4
.......
1
Page Change
No .
No
.
11A-5thm llA.9
.
.
0
llA-10
......
1
*llA-ll thm llA.12
.
3
llA-13 thru llA.16
.
0
*12-1
.......
3
12-2 thru 12-5
...
0
12-6 thru 12-7
...
2
12-8 thru 12-10
. .
1
12-11
.......
0
12-12 Blank
....
0
*13-1 thru 13-2
...
3
13-3
.......
0
13-4 Blank
....
0
14-1 thru 14-2
...
0
14-3
.......
2
14-4
.......
0
15-1
.......
1
*15-2
.......
3
*15.2A
......
3
*15-2B Blank
....
3
*15-3thru 15-4
...
3
*15.4A
......
3
*15-4B Blank
....
3
*15-5thn 15-6
...
3
15-7 thw 15-8
...
0
*15-9
.
.
..
3
15-10 thru i5112
.
.
0
15-13
.......
2
*15-14
.......
3
15-15
.......
2
15-16 thru 15-17
.
.
0
15-18
.......
1
15-19 thru 15-22
.
.
0
15-23
.......
2
*15-24 thru 15-25
.
.
3
*15-26
Blank
....
3
*16-1
.......
3
16-2
thm 16-4
...
0
16-5 thn 16-6
...
1
16-7
.......
0
*16-8
.......
3
16-9 thru 16-12
.
.
0
16-13
.......
1
*16-14
.......
3
16-15 thru 16-16
. .
1
16-17 thn 16-18
.
.
2
16-19 thru 16-21
.
.
1
*16-22
.......
3
16-2%
......
2
*16-22B
......
3
16-23 thru 16-24
.
.
1
*16-24A
......
3
16-24B
.....
2
16-25 thru
i6-26
. .
2
*16-27
.......
3
16-28
.......
2
Page Change
No
. No .
16-29
.......
0
*16-30
.......
3
16-31
.......
1
116-32 thm 16-38
.
.
3
18-3 thm 18-4
...
0
18-5 thn 18-6
...
2
*18-7
.......
3
18-8 thru 18-33
. .
0
18-34 Blank
....
0
*19-1 thm 19-2
...
3
*20-1 thru20-3
...
3
20-4
.......
0
*20-5
.......
3
20-6
.......
0
*20-7
.......
3
20-8
.......
0
*20-9 thru 20-10
. .
3
20-11
.......
0
*20-12 thru 20-17
.
.
3
20-18
.......
0
*20-19 thm
20-22
. .
3
*20-22A thru 20.22B
.
3
*20-23
.......
3
20-24
.......
2
*18-1 thru 18-2
...
3
*20-24A
......
3
*20-24B Blank
...
3
20-25
.......
2
*20-26
.......
3
20-27
.......
0
*20-28
thm 20-29
.
.
3
*20-31
.......
3
20-32
.......
0
20-33
.......
3
20-34
.......
0
20-35
.......
2
20-36
.......
1
*20-36A
......
3
*20-36B Blank
...
3
20-37
.......
0
*20-38
.......
3
20-39 thm 20-40
. .
1
*20-41
.......
3
20-42
.......
0
*20-43
.......
3
*20-46
.......
3
20-47
.......
0
*20-48
.......
3
20-49
.......
0
*20-50 thru 20-53
.
.
3
*20-55 thru 20-85
.
.
3
*20-30 Blank
....
3
20-44 thru 20-45
. .
1
*20-54 Blank
....
3
$20-86
Blank
....
3
Upon receipt
of
the second and subsequent changes to this book. personnel
responsible
for
maintaining this publication in current status should ascertain
that all previous changes have been received and incorporated
.
The
asterisk
indicates
pager
changed. added
.
or
deleted
by
the current change
.

TABLE
OF
C
SECTION
Page
1
GENERAL DESCRIPTION
.......................
1-1
2 GROUND HANDLING. SERVICING. CLEANING. LUBRICATION AND
INSPECTION
............................
2-1
3 FUSELAGE
.............................
3-1
4 WINGSANDEMPENNAGE
.......................
4-1
5 LANDING GEAR AND BRAKES
.....................
5-1
6 AILERON CONTROL SYSTEM
.....................
6-1
7 WING FLAP CONTROL SYSTEM
....................
7-1
8
ELEVATOR CONTROL SYSTEM
....................
8-1
9 ELEVATOR TRIM TAB CONTROL SYSTEM
...............
9-1
10
RUDDER CONTROL SYSTEM
.....................
10-1
11
ENGINE (LYCOMING "BLUE-STREAK")
................
11-1
11A ENGINE (CONTINENTAL)
.......................
11A-1
12 FUELSYSTEM
............................
12-1
13
PROPELLER
............................
13-1
14 UTILITY SYSTEMS
..........................
14-1
15 INSTRUMENTS AND INSTRUMENT SYSTEMS
..............
15-1
16 ELECTRICAL SYSTEMS
........................
16-1
17 ELECTRONIC SYSTEMS (DELETED) (See
Page
iii)
...........
18
STRUCTURAL REPAIR
........................
18-1
19 PAINTING
..............................
19-1
20 WIRING DIAGRAMS
..........................
20-1
I
Change
3
i

CROSS REFERENCE LISTING OF POPULAR
NAME
VS.
MODEL NUMBER AND SERIALS
All aircraft, regardless of manufacturer,
are
certificated under model number designations. However,
popular names
are
often used for marketing purposes.
To
provide
a
consistent method of referring to the
various aircraft, model numbers will be used in this publication unless names
are
required to differentiate
between versions of the same basic model. The following table provides
a
cross reference listing of popular
name
vs.
model numbers.
POPULAR NAME
172
or
SKYHAWK
172, SKYHAWK
or
SKYHAWK
I1
SKYHAWK
or
SKYHAWK
II
REIMS 172
REIMS/C
ESSNA
~172
RE
IMS
IC
E
SSNA
F
1
7
2
SKYHAWK, SKYHAWK
I1
MODEL
YEAR
~~~ ~
1969
1970
1971
1972
1973
1974
1975
1976
1969
1970
1971
1972
1973
1974
1975
1976
MODEL
172K
172K
172L
172L
172M
172M
172M
172M
F172H
F172H
F172K
F172L
F172M
F172M
F172M
F
172M
SERIALS
BEGINNING ENDING
17257162
17258487
17259224
17259904
172 60759
17261899
17263459
17265685
17258486
17259223
17259903
17260758
17261898
17263458
17265 684
F17200560
F17200655
F17200755
F17200805
F
172 00905
F1720103
5
F17201235
F
1720 1385
F17200654
F17200754
F17200804
F
172 00904
F17201034
F17201234
F
1720 1384
ii
Change 3

FOREWORD
This manual contains factory recommended procedures and
instructions for ground handling, servicing and maintaining
Cessna Model 172-Series aircraft. This includes the Models
172, Skyhawk, Reims 172 and Reims/Cessna F172. The Reims
versions
of
the Model 172 and Skyhawk
are
identical to the Model
172 and Skyhawk, through Model year 1971, except that they
are
powered
by
0-300-D
Rolls Royce engines. Beginning with the
1972 Models, both 172 and F172-Series aircraft
are
powered by
"Blue- Streak" (Lycoming) engines. Besides serving
as
a
refer-
ence for the experienced mechanic, this manual also covers
step-by-step procedures for the
less
experienced man. This
manual should
be
kept in
a
handy place for ready reference. If
properly used,
it
will
better
enable the mechanic to maintain
Cessna 172-
Series
aircraft and thereby establish
a
reputation
for
reliable
service.
The information in this manual
is
based on
data
available at
the time of publication, and
is
supplemented and kept current
by service letters and service news letters published by Cessna
Aircraft Company. These
are
sent to
all
Cessna Dealers
so
that
they have the latest authoritative recommendations for servicing
Cessna aircraft. Therefore, it
is
recommended that Cessna owners
utilize the knowledge and experience
of
the factory-trained Dealer
Service Organization.
In addition to the information in this Service Manual,
a
group
of Vendor publications
is
available from the Cessna Service Parts
Center which describe complete disassembly, overhaul, and parts
breakdown
of
some of the various vendor equipment items. A listing
of the available publications
is
issued periodically in service letters.
Information for Nav-0-Matic Autopilots, Electronic Communi-
cations, and Navigation Equipment
are
not included in this manual.
These manuals
are
available from the Cessna Service Parts Center.
iii/(iv blank)

This page intentionally
left
blank.

SECTION
1
GENERAL DESCRTPTION
TABLE OF CONTENTS Page
GENERAL DESCRIPTION
..........
1-1
Model 172-Series.
...........
1-1
Description
.............
1-1
1-1.
GENERAL DESCRIPTION.
1-2. MODEL 172-SERIES.
1-
13. DESCRIPTION. Cessna Model 172 Series
aircraft, described in
this
manual, are high-wing
monoplanes of all-metal, semimonocoque construct-
ion. These aircraft are equipped with
a
fixed
tri-
cycle landing gear.
Thru 1970 Models, they are
equipped with
flat
spring- steel main landing gear
struts.
Eeginning with 1971 Models, these aircraft
are equipped with tubular spring- steel main gear
struts. The steerable nose gear
is
equipped with an
air/hydraulic fluid shock strut. Four-place seating
is
standard, and
a
double-width, fold-up auxiliary
rear seat may be installed
as
optional equipment.
Thru 1971 Models, F172-Series aircraft are equip-
ped with six-cylinder air-cooled 0-300-Series, Con-
tinental engines, manufactured under license by
Rolls Royce. Model 172-Series aircraft, and F172-
Series aircraft, beginning with 1972 Models, are
powered by four-cylinder, horizontally opposed,
air-
cooled "Blue Streak" (Lycoming) engines.
the engines drives are all-metal, fixed-pitch pro-
Each of
Aircraft Specifications
.........
1-1
Stations
................
1
-
1
Torque Values
.............
1-1
peller.
Model 172-Series aircraft feature rear side
windows,
a
"wrap-around" rear window and
a
swept-
back fin and rudder.
1-4. AIRCRAFT SPECIFICATIONS. Leading parti-
culars of these aircraft, with dimensions based on
gross weight, are given in figure
1-1.
If
these di-
mensions are used for constructing
a
hangar
or
com-
puting clearances,
remember that such factors
as
nose gear strut inflation, tire pressures, tire sizes
and load distribution may result in some dimensions
that are considerably different from those listed.
1-5. STATIONS, Station diagrams are shown in fig-
ures
1-2
and 1-3 to
assist
in locating equipment when
a
written description
is
inadequate
or
impractical.
1-6. TORQUE VALUES. A chart of recommended
nut torque values
is
shown in figure 1-4. These tor-
que values are recommended for
all
installation pro-
cedures contained in this manual, except where other
values are stipulated. They are not to be used for
checking tightness of installed parts during service.
1-1

........................
GROSSWEIGHT 23001b NOTE
FUEL CAPACITY
Standard Wing (Total)
....................
42 gal. These specifications
are
LOng-mnge Wing (Total)
..................
52 gal. and F172-Series aircraft,
Long-Range Wing (Usable).
.................
48 gal. except
as
indicated.
(Without External
Filter)
..................
8
qt
(With External Filter).
...................
9 qt
Standard Wing (Usable)
...................
38 gal.
applicable to both Model 172
OIL CAPACITY
ENGINE MODEL
172-Series(Refer to Section
11
for Engine Data)
........
LYCOMING 0-320 Series
F172-Series (Refer to Section 11A thru 1971 Models).
.....
CONTINENTAL 0-300 Series
F17P-Series (Refer to Section
11
Beginning with 1972 Models).
.
LYCOMING-0-320 Series
PROPELLER (Fixed Pitch)
...................
76" MCCAULEY
MAIN WHEEL TIRES
......................
6.00
x
6, 4-Ply Rating
Pressure (Thru 1970 Models)
................
24 psi
Pressure (Beginning with 1971 Models)
............
29 psi
NOSE WHEEL TIRE (Standard)
.................
5.00 x
5,
4-Ply Rating
Pressure (Thru 1970 Models)
................
26 psi
Pressure (Beginning with 1971 Models)
............
31 psi
NOSE WHEEL TIRE (172-Series Only, Optional)
..........
6.00
x
6, 4-Ply Rating
Pressure
.........................
26 psi
Camber.
.........................
3"
to
5"
Toe-In
.......................... 0"
to .06"
Camber
..........................
2" to 4"
Toe-In
.........................
0"
to
.18"
up..
..........................
20"*1"
Down..
.........................
15"*l0
(Thru 1972 Models).
....................
0"
to 40"
*
2"
(Beginning with 1973 Modelsb
................
0"
to
40°,
+Oo
-2O
Right
...........................
16' 10'*1"
Left
...........................
16' 10'
*lo
Right
...........................
17' 44'*1"
Left
...........................
17' 44'51'
Up..
..........................
28",
+1"-0"
Down
...........................
23", +I"
-
0"
Up..
..........................
?Bo,
+1"-0"
Down
...........................
13",
+lo
-
0"
Wing Span (Conventional Wing Tip)
..............
Wing Span (Conical-Camber Wing Tip)
............
35' 10"
Wing Span (Conical-Camber With Strobe Lights)
........
Tail Span
.........................
11'
Length
..........................
26'
11"
Flashing Beacon Installed on Fin
.............
8'
-
9 1/2"
Track Width (Thru 1970 Models)
...............
7'
2"
Track Width (Beginning with 1971 Models).
8'
-
3 1/2"
BATTERY LOCATION.
.....................
Firewall
NOSE GEAR STRUT PRESSURE (Strut Extended).
.........
45 psi
WHEEL ALIGNMENT (Flat Spring Struts)
WHEEL ALIGNMENT (Tublar Spring Struts
*
(Tubular Gear
is
non-adjustable)
AILERON TRAVEL
WING FLAP TRAVEL
RUDDER TRAVEL (Measured parallel to water line)
RUDDER TRAVEL (Measured perpendicular to hinge line)
E LEVATOR TRAVEL
E LE VATOR TRIM TAB TRAVEL
PRINCIPAL DIMENSIONS
36'
2"
36'
Fin Height (Maximum with Nose Gear Depressed and
..........
*
No provisions
are
made for aligning wheels on tubular gear aircraft.
The tolerances provided
are
to be used only for checking existing
wheel alignment.
Figure
1-1.
Aircraft Specifications
1-2 Change
2

O.
0°1
BEGINNING WITH 1972
r
8:12
56.70
3.375
-
\
m
16.66 65.33 205.81
/
/
/
BEGINNING WITH 1971
WHEEL FAIRINGS THRU 1973 MODELS
8.12
44.00
I
80.00
56.70
4
STATIO
F172 SERIES
THRU 1971
I\
6,
WHEEL FAIRINGS BEGINNING WITH 1974 MODELS
NS
REMAIN THE SAME
172-SERIES AND F172-SERIEI
BEGINNING WITH 1972
Figure 1-2. Reference Stations
Change
1
1-3

23.62
I
39.00
Figure
1-3. Wing Stations
SHOP
NOTES:
1-4

RECOMMENDED NUT TORQUES
THE TORQUE VALUES STATED ARE POUND-INCHES, RELATED
ONLY TO STEEL NUTS ON OIL-FREE CADMIUM PLATED THREADS.
FINE THREAD SERIES
I
L
8-36
10-32
5/16-24
7/16 -20
9/16
-
18
5/8-18
7/8-14
1-14
1-1/8-
12
1-1/4-12
1/4-28
3/8-24
1/2-20
3/4-16
8-32
10-24
1/4-20
5/16
-
18
3/8- 16
7/ 16
-
14
1/2-13
9/16-12
5/8-11
3/4
-
10
7/8-9
1-8
1-1/8-8
1-
1/4
-8
TENSION
TORQUE
STD
(NOTE
1)
12-15
20
-
25
50-70
100- 140
160-190
450-500
480-690
800
-
1000
1100- 1300
2300-2500
2500-3000
3700-5500
5000-7000
9000-11000
(NOTE 4)
12- 15
20-25
40-50
80-90
160
-
185
235-255
400-480
500-700
700-900
1150- 1600
2200-3000
3700-5000
5500-6500
6500-8000
A LT
(NOTE 2)
20-28
50-75
100-150
160-260
450-560
480 -730
800
-
1070
1100-1600
2300-3350
2500-4660
3700-6650
5000-10000
9000-16700
SHEAR
TORQUE
ST D
(NOTE 3)
7-9
12-15
30-40
60-85
95-110
270
-
300
290-410
480-600
660-780
1300-1500
1500
-
1800
2200 -3300
3000 -4200
5400-6600
COARSE THREAD SERIES
(NOTE 5)
7 -9
12-15
25-30
48-55
95-100
140-155
240-290
300-420
4
20
-
540
700-950
1300-1800
2200-3000
3300 -4000
4000-5000
A LT
(NOTE
2)
12-19
30-48
60-106
95-170
270-390
290-500
480-750
660- 1060
1300 -2200
1500-2900
2200-4400
3000 -6 300
5400-10000
NOTES
1.
Covers AN310, AN315, AN345, AN363, MS20365, MS21042, MS21044, MS21045 and MS21046.
2. When using AN310
or
AN320 castellated nuts where alignment between the bolt and cotter pin slots
is
not
reached using normal torque values, use alternate torque values
or
replace the nut.
3. Covers AN316, AN320, MS20364 and MS21245.
4.
Covers AN363, MS20365, MS21042, MS21043, MS21044, MS21045 and MS21046.
5. Covers AN340.
DO NOT REUSE SELF-LOCKING NUTS.
The above values
are
recommended
for
all
installation procedures contained in this manual, except where
other values
are
stipulated. They
are
not to be used
for
checking tightness
of
installed parts during service.
~~~~ ~
Figure 1-4. Torque Values
Change
2
1-5/(1-6 blank)

This page intentionally
left
blank.

SECTION 2
GROUND HANDLING. SERVICING. CLEANING. LUBRICATION AND INSPECTION
TABLE OF CONTENTS Page
GROUND HANDLING
............
2-1
Towing
.................
2
.
1
Hoisting
................
2-3
Jacking
................
2-3
Leveling
................
2-3
Parking
................
2
.
3
Tie-Down
...............
2-3
Flyable Storage
.............
2-3
Returning Aircraft To Service
......
2-3
Inspection During Storage
........
2-4
Returning Aircraft To Service
......
2-4
Indefinite Storage
............
2-4
Temporary Storage
...........
2-3
Inspection During Storage
........
2-6
Returning Aircraft To Service
......
2-6
Fuel
..................
2-6
Fuel Drains
..............
2-6
2-6
Engine Oil
...............
2-7
Engine Induction Air Filter
........
2-8
SERVICING
................
2 -6
Carburetor Drain Plug Inspection
....
2.1
.
GROUND HANDLING
.
2.2
.
TOWING
.
Moving the aircraft by hand
is
ac-
complished by using the wing struts and landing gear
struts
as
push points
.
A
tow bar attached to the nose
gear should be used for steering and maneuvering the
aircraft on the ground
.
When no tow bar
is
available.
press down at the horizontal stabilizer front spar ad-
jacent to the fuselage to
raise
the nose wheel off the
ground
.
With the nose wheel
clear
of the ground. the
aircraft can be turned by pivoting it about the main
wheels
.
Vacuum System Filter
..........
2-9
Battery
.................
2-9
Tires
.................
2-9
Nose Gear Shock Strut
..........
2-9
Nose Gear Shimmy Dampener
.......
2-10
Hydraulic Brake System
.........
2-10
C LEANING
................
2
.
10
Windshield and Windows
.........
2-10
Plastic Trim
..............
2-10
Painted Surfaces
............
2-10
Aluminum Surfaces
...........
2-10
Engine Compartment
..........
2
.
11
Upholstery and Interior
.........
2-11
Propeller
................
2
.
11
Wheels
.................
2
.
11
LUBRICATION
..............
2
.
11
Wheel Bearings
.............
2-11
Nose Gear Torque Links
.........
2-11
Wing Flap Actuator
...........
2-11
Fuel Selector Valve
...........
2-12
INSPECTION
...............
2-19
When towing the
aircraft.
never turn the nose
wheel more than 30 degrees either side of
center
or
the nose gear
will
be damaged
.
Do
not push on control surfaces
or
outboard em-
pennage surfaces
.
When pushing on the tail-
cone. always apply pressure
at
a
bulkhead to
avoid buckling the skin
.
Figure 2.1
.
Tow Bar
Change 3 2-1

___------
___-.----
A
..
~
_____-
REFER TO SHEET 2
FOR JACKING
JNFOR MATION
Built-in jack pad
*
THRU 17259223
AND
F17200754
#
17259224 THRU 17260554 AND F17200755 THRU F17200879
t
BEGINNING WITH 17260555 AND F17200880
Corresponding points on both upper door
sills
may
be
used to level the aircraft laterally.
Prior to 1972 Models, reference points for leveling the aircraft longitudiiially
are
the top
of the tailcone between rear window and vertical fin.
Beginning with 1972 Models, reference points for longitudinal leveling of aircraft
are
two
screws on left side of tailcone at zero waterline. These
are
indicated in illustration byA
(Also refer to paragraph
2
-5)
Figure 2-2.
Jacking and Leveling (Sheet
1
of 2)
2-2 Change 2

JACKING INFORMATION
1.
2.
3.
4.
5.
Wing jacks
are
placed under front spar of wing just outboard of wing strut, and must
extend
far
enough to
raise
wheels off ground, and must be of adequate strength.
Attach
a
suitable stand to the tie-down ring. Be sure tail stand weighs enough to
keep tail down and under
all
conditions that it
is
strong enough to support any
weight that might be placed on it (place shot bags
or
sand bags on tail stand. In
addition, the
base
of adjustable tail stand
is
to be filled with concrete for additional
weight
as
a
safety factor.
Operate jacks evenly until desired height
is
reached.
When using universal jack point
(10004-98),
flexibility of the gear strut will cause the
main wheel to slide inboard
as
the wheel
is
raised, tilting the jack. The jack must be
lowered for
a
second operation. Jacking both wheels simultaneously with universal
jack points
is
not recommended. Universal jack point may be used to
raise
only one
main wheel.
DO
NOT USE brake casting
as
a
jack point.
Items
(4),
(5)
and
(6)
are
available from the Cessna Service
Parts
Center.
On tubular gear aircraft, the only fairing requiring removal
is
the fuselage-to-tube gear fairing.
Jack pad
is
inserted
on
tube in area between fuselage and upper end of tube fairing, then
jack aircraft
as
required.
SHOP
NOTES:
Figure 2-2. Jacking and Leveling (Sheet
2
of
2)
Change 2 2-2A/(2-2B blank)

This page intentionally
left
blank.

2-3. HOISTING. The
aircraft
may be lifted with
a
hoist of two-ton capacity by using hoisting rings,
which
are
optional equipment,
or
by means of suit-
able slings.
The front sling should be hooked to
each upper engine mount at the firewall, and the aft
sling should be positioned around the fuselage
at
the
first bulkhead forward of the leading edge of the
stabilizer.
If
the optional hoisting rings
are
used,
a
minimum cable length of 60 inches for each cable
is
required to prevent bending of the eyebolt-type
hoisting rings.
If
desired,
a
spreader jig may be
fabricated to apply vertical force to the eyebolts.
2-4. JACKING. Refer to figure 2-2 for jacking
procedures.
2-5. LEVELING. Corresponding points on both upper
door
sills
may
be
used to level the aircraft laterally.
Prior to 1972 models, the reference point for leveling
the aircraft longitudinally
is
the top of the tailcone, be-
tween the
rear
window and vertical fin.
Beginning
with 1972 models, the reference points for longitud-
inally leveling the aircraft,
are
the two screws located
on the left side of the tailcone. Refer to figure 2-2
for screw locations.
2-6. PARKING. Parking precautions depend prin-
cipally on local conditions.
As
a
general precaution,
set parking brake
or
chock the wheels and install the
controls lock. In severe weather and high wind con-
ditions, tie down the aircraft
as
outlined in paragraph
2-7
if
a
hangar
is
not available.
2-7. TIE-DOWN. When mooring the
aircraft
in the
open, head into the wind
if
possible. Secure control
surfaces with the internal control lock and set brakes.
Do
not
set
parking brakes during cold weather
when accumulated moisture may freeze the
brakes
or
when the brakes
are
overheated.
After completing the preceding, proceed to moor the
aircraft
as
follows:
a.
Tie ropes, cables,
or
chains to the wing tie-
down fittings located
at
the upper end of each wing
strut. Secure the opposite ends of ropes, cables,
or
chains to ground anchors.
b. Secure rope (no chains
or
cables) to forward moo-
ring ring and secure opposite end to ground anchor,
c.
Secure the middle of
a
rope to the tail tie-down
ring. Pull each end of rope away at
a
45 degree angle
and secure to ground anchors at each side of tail.
d. Secure control lock on pilot control column. If
control lock
is
not available, tie pilot control wheel
back with front seat belt.
e.
These aircraft
are
equipped with
a
spring-loaded
steering system which affords protection against nor
-
mal wind gusts. However,
if
extremely high wind
gusts
are
anticipated, additional external locks may
be installed.
2-8. FLYABLE STORAGE. Flyable storage
is
de-
fined
as
a
maximum of
30
days non-operational stor-
age and/or the
first
25 hours of intermittent engine
operation.
NOTE
The aircraft
is
delivered from Cessna with
a
Corrosion Preventive Aircraft Engine Oil
This engine oil
is
a
blend of aviation grade
straight mineral oil and
a
corrosion preven-
tive compound. This engine oil should be
used for the
first
50
hours of engine opera-
tion.
Refer to paragraph 2-21 for oil changes
during the
first
50 hours of operation.
(MIL-C-6529, Type
11,
RUST BAN),
I
During the 30 day non-operational storage
or
the
first
25 hours of intermittent engine operation, every sev-
enth day the propeller shall
be
rotated through five
revolutions, without running the engine.
If
the
air-
craft
is
stored outside, tie-down in accordance with
paragraph 2-7. In addition, the pitot tube, static
air
vents,
air
vents, openings in the engine cowling,
and other similar openings shall have protective
covers installed to prevent entry of foreign material.
After
30 days, aircraft should be flown
for
30 minutes
or
ground run-up until oil has reached operating tem-
perature.
2-9. RETURNING AIRCRAFT TO SERVICE. After
flyable storage, returning the aircraft to service
is
accomplished
by
performing
a
thorough pre-flight in-
spection.
At the end of the
first
25 hours of engine
operation, drain engine oil, clean oil screens and
change external oil
filter
element.
Service engine
with correct grade and quantity of engine oil. Refer
to figure 2-4 and paragraph 2-21 for correct grade of
engine oil,
2-
10.
TEMPORARY STORAGE. Temporary storage
is
defined
as
aircraft in
a
non-operational status for
a
maximum of 90 days. The aircraft
is
constructed
of corrosion resistant alclad aluminum, which will
last
indefinitely under normal conditions
if
kept clean,
however, these alloys
are
subject to oxidation.
The
first
indication of corrosion on unpainted surfaces
is
in the form of white deposits
or
spots.
On painted
surfaces, the paint
is
discolored
or
blistered.
Stor-
age in
a
dry hangar
is
essential to good preservation
and should
be
procured
if
possible.
Varying condi-
tions will
alter
the measures of preservation, but
under normal conditions in
a
dry hangar, and for
storage periods not to exceed 90 days, the following
methods of treatment are suggested:
a.
Fill
fuel
tanks
with correct grade
of
gasoline.
b. Clean and wax aircraft thoroughly.
c. Clean any oil
or
grease from
tires
and coat
tires
with
a
tire
preservative.
Cover
tires
to pro-
tect against grease and oil.
do Either block up fuselage to relieve pressure on
tires
or
rotate wheels every 30 days to change sup-
porting points and prevent
flat
spotting the
tires.
e.
Lubricate
all
airframe items and
seal
or
cover
all
openings which could allow moisture and/or dust
to enter.
Change
1
2-3

NOTE
The aircraft battery serial number
is
recorded
in the aircraft equipment list. To assure ac-
curate warranty records, the battery should be
re-installed in the same aircraft from which
it
was
removed.
If
the battery
is
returned to
service in
a
different aircraft, appropriate
record changes must be made and notification
sent to the Cessna Claims Department.
f.
Remove battery and store in
a
cool dry place;
service the battery periodically and charge
as
re-
quired.
NOTE
An
engine treated in accordance with the fol-
lowing may be considered protected against
normal atmospheric corrosion for
a
period
not to exceed 90 days.
g. Disconnect spark plug leads and remove upper
and lower spark plugs from each cylinder.
NOTE
The preservative oil must be Lubricating
Oil-Contact and Volatile, Corrosion In-
hibited,
MIL-L-46002,
Grade
1
or
equiva-
lent. The following oils
are
approved for
spraying operations by Teledyne Continental
Motors, Nucle Oil
105
-
Daubert Chemical
Co.,
4700
So.
Central Ave., Chicago, Illinois,
Petratect VA- Pennsylvania Refining Coo,
Butler, Pennsylvania, Ferro-Gard 1009G
-
Ranco Laboratories, Inc.,
3617
Brownsville
Rd., Pittsburg, Pennsylvania. The following
oils are approved for spraying operation by
Lycoming, Socony Averex
901,
or
Esso Rust-
Ban
626,
or
equivalent.
h. Using
a
portable pressure sprayer, atomize
spray preservative oil through the upper spark plug
hole of each cylinder with the piston in
a
down posi-
tion. Rotate crankshaft
as
each pair of cylinders
is
sprayed.
i.
After completing step "h,
"
rotate crankshaft
so
that no piston
is
at
a
top position.
If
the aircraft
is
to be stored outside, stop two-bladed propeller
so
that blades are
as
near horizontal
as
possible to pro-
vide maximum clearance with passing aircraft.
crankshaft to thoroughly cover
all
interior surfaces
of the cylinder above the piston.
j.
Again spray each cylinder without moving the
k, Install spark plugs and connect spark plug leads.
1.
Apply preservative oil to the engine interior by
spraying approximately
two
ounces of the preserva-
tive oil through the oil filler tube.
m.
Seal
all
engine openings exposed to the atmos-
phere using suitable plugs
or
non- hygroscopic tape.
Attach
a
red streamer
at
each point that
a
plug
or
tape
is
installed.
n.
If
the aircraft
is
to be stored outside, perform
the procedures outlined in paragraph
2-7.
In addi-
tion, the pitot tube, static source vents,
air
vents,
opepings in the engine cowling and other similar
2-4
Change
3
openings should have protective covers installed to
prevent entry of foreign material.
0.
Attach
a
warning placard to the propeller to the
effect that the propeller shall not be moved while the
engine
is
in storage.
2-
11.
INSPECTION DURING STORAGE.
a.
Inspect airframe for corrosion
at
least once
a
month and remove dust collections
as
frequently
as
possible. Clean and wax
as
required.
b. Inspect the interior of
at
least one cylinder
through the spark plug hole for corrosion
at
least
once
a
month.
NOTE
Do not move crankshaft when inspecting
interior of cylinder for corrosion.
c.
If
at
the end of the
90
day period, the aircraft
is
to be continued in non-operational storage, again per-
form the procedural steps "g thru
0"
of paragraph
2-
10.
2- 12.
RETURNING AIRCRAFT TO SERVICE. After
temporary storage, use the following procedures to
return the aircraft to service.
proper inflation. Check for proper nose gear strut
inflation.
a.
Remove aircraft from blocks and check tires
for
b. Check battery and install.
c. Check that oil sump has proper grade and quan-
d. Service induction
air
filter and remove w?rning
e.
Remove materials used to cover openings.
f.
Remove spark plugs from engine.
g. While spark plugs are removed, rotate propel-
ler several revolutions to clear excess rust preven-
tive oil from cylinders.
h. Clean, gap and install spark plugs. Torque
plugs to the value specified in Section
11
or
11A;
connect spark plug leads.
screen
if
necessary.
for moisture and sediment, drain enough fuel to elimi-
nate moisture and sediment.
start and warm-up engine.
2- 13.
INDEFINITE STORAGE. Indefinite storage
is
defined
as
aircraft in
a
non-operational status
for
an
indefinite period of time.
Engines treated in accor-
dance with the following may be considered protected
against normal atmosphere corrosion, provided the
procedure outlined in paragraph
2- 14
are performed
at
the intervals specified.
a.
Operate engine until oil temperature reaches
normal operating range. Drain engine oil sump and
reinstall drain plug.
b.
Fill
oil sump to normal operating capacity with
corrosion preventive mixture which
has
been thor-
oughly mixed and pre-heated to
a
minimum of
221°F
at
the time
it
is
added to the engine.
tity of engine oil.
,*
placard from propeller.
I
I
i.
Check fuel strainer. Remove and clean filter
Check fuel tanks and fuel lines
j.
Perform
a
thorough pre-flight inspection, then

NOTE
r-q
Injecting corrosion-preventive mixture too
fast can cause
a
hydrostatic lock.
e.
Do not rotate propeller after completing step
"d.
f.
Remove
all
spark plugs and spray corrosion-
preventive mixture, which has been pre-heated to
221" to 250"F, into
all
spark plug holes to thorough-
ly cover interior surfaces of cylinders.
g.
Install
lower spark plugs
or
install solid plugs,
and install dehydrator plugs in upper spark plug
holes. Be
sure
that dehydrator plugs
are
blue in
color when installed.
h. Cover spark plug lead terminals with shipping
plugs (AN4060-1)
or
other suitable covers.
i.
With throttle in
full
open position, place
a
bag
of desiccant in the carburetor intake and
seal
open-
ing with moisture resistant paper and tape.
j
.
Place
a
bag of desiccant in the exhaust
tail-
pipe(s) and
seal
openings with moisture resistant
tape.
k. Seal cold
air
inlet
to the heater muff with mois-
ture
resistant
tape.
Corrosion preventive mixture consists of
one part compound MIL-C-6529, type
I,
mixed with three parts new lubricating oil
of
the grade recommended for service,
Lycoming recommends Esso Rust-Ban 628
or
equivalent. Continental Motors Corpor
-
ation recommends Cosmoline No. 1223, sup-
plied
by
E.
F.
Houghton
&
Co., 305 W. Le-
High Avenue, Philadelphia,
Pa.
During
all
spraying operations corrosion mixture
is
pre-heated to 221" to 250°F.
c. Immediately after filling the oil sump with
cor-
rosion preventative mixture, fly the
aircraft
for
a
period of time not to exceed
a
maximum of 30 min-
utes.
d. With engine operating
at
1200 to 1500 rpm and
induction
air
filter
removed, spray corrosion pre-
ventive mixture into induction airbox,
at
the
rate
of
one-half gallon per minute, until heavy smoke
comes from exhaust stack, then increase the spray
until the engine
is
stopped.
IF IT BECOMES NECESSARY TO
INSTALL SURFACE CONTROL
LOCKS
ON WINGS EQUIPPED
WITH CONICAL -CAMBER WING
LSURFACE CONTROL
ONTROL LOCK IS NOT
WHEEL BACK WITH THE
PILOT SEAT BELT
Figure 2-3. Tie-Down Details
2
-5

1.
m. Seal
all
other engine openings exposed to atmos-
Seal engine breather by inserting
a
protex plug
in the breather hose and clamping in place.
phere using suitable plugs
or
non- hygroscopic tape.
NOTE
Attach
a
red streamer to each place plugs
or
tape
is
installed. Either attach red streamers
outside of the sealed
area
with tape
or
to the
inside of the sealed
area
with safety wire to
prevent wicking of moisture into the sealed area.
n. Drain corrosion-preventive mixture from engine
sump and reinstall drain plug.
NOTE
The corrosion-preventive mixture
is
harmful
to paint and should be wiped from painted
sur-
faces immediately.
0.
Attach
a
warning placard on the throttle control
knob, to the effect that the engine contains no lubri-
cating oil.
Placard the propeller to the effect that
it
should not be moved while the engine
is
in storage.
paragraph 2-10 thru step
"f."
p.
Prepare airframe for storage
as
outlined in
NOTE
As an
alternate
method of indefinite storage,
the aircraft may be serviced in accordance
with paragraph 2-10 providing the aircraft
is
run-up
at
maximum intervals of 60 days and
then reserviced per paragraph 2-10.
2-14. INSPECTION DURING STORAGE. Aircraft in
indefinite storage shall be inspected
as
follows:
a.
Inspect cylinder protex plugs each
7
days.
b. Change protex plugs
if
their color inqcates an
c.
If
the dehydrator plugs have changed color in one
unsafe condition.
half of the cylinders,
all desiccant material in the
engine shall be replaced with new material.
with corrosion-preventive mixture.
d. Every
6
months respray the cylinder interiors
NOTE
Before spraying, inspect the interior of one
cylinder for corrosion through the spark
plug hole and remove at
least
one rocker box
cover and inspect the valve mechanism.
2-15. RETURNING AIRCRAFT TO SERVICE.
After indefinite storage, use the following Procedure
to return the aircraft to service.
a.
Remove aircraft from blocks and check
tires
for
correct inflation. Check for correct nose gear strut
inflation.
b. Check battery and install.
c. Remove
all
materials used to
seal
and cover
d. Remove warning placards posted
at
throttle and
e.
Remove and clean engine oil screen, then
re-
openings.
propeller.
2-6 Change
2
install and safety. On aircraft that are equipped
with an external oil filter, install new filter element.
Remove oil sump drain plug and drain sump.
Install and safety drain plug.
f.
NOTE
The corrosion-preventive mixture will mix
with the engine lubricating oil,
so
flushing
the oil system
is
not necessary. Draining
the oil sump will remove enough of the cor-
r
osion-pr eventive mixture.
g. Service and install the induction
air
filter.
h. Remove dehydrator plugs and spark plugs
or
plugs installed in spark plug holes and rotate pro-
peller by hand several revolutions to clear corrosion-
preventive mixture from cylinders.
plugs to the value listed in Section
11
or
11A.
screen.
Check fuel
tanks
and fuel lines for moisture
and sediment, and drain enough fuel to eliminate.
start
and warm-up engine.
craft.
i.
Clean, gap, and install spark plugs. Torque
j.
Check fuel strainer, Remove and clean
filter
k. Perform
a
thorough pre-flight inspection, then
1.
Thoroughly clean aircraft and flight test
air-
2-16. SERVICING.
2-17.
Servicing requirements
are
shown in figure
2-4. The following paragraphs supplement this
figure by adding details not included in the figure.
2-18. FUEL. Fuel
tanks
should be filled immedi-
ately
after
flight to reduce condensation. Tank capa-
cities
are
listed in figure
1-1.
The recommended
fuel grade to be used
is
given in figure 2-4.
2-19.
FUEL DRAINS.
are
located
at
various places
throughout the fuel system. Refer
to
Section 12 for
location of the various drains in the system. The
strainer drain valve
is
an integral part of the fuel
strainer assembly. The strainer drain
is
equipped
with
a
control which
is
located adjacent to the oil
dipstick. Access to the control
is
through the oil
dipstick
access
door. Remove drain plugs and open
strainer drain
at
the intervals specified in figure
2-4. Also, during daily inspection of the fuel
strainer,
if
water
is
found in the fuel strainer, there
is
a
possibility that the wing tank sumps
or
fuel line
contain water. Therefore,
all
fuel drain plugs should
be removed and
all
water drained from the system.
To activate drain valve for fuel sampling, place cup
up to valve and depress valve with rod protruding
from cup. (Refer to figure 12-3.)
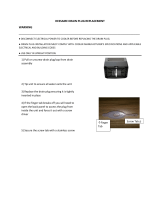
2-20. CARBURETOR DRAIN PLUG INSPECTION.,
In order to prevent the possibility of thread sealent
contamination in the carburetor float chamber,
cleaning and inspection of the carburetor should
be
accomplished
at
each 100-hour inspection and any-
time water in the fuel
is
suspected.
a.
With the fuel valve OFF, remove carburetor
drain plug and clean off any sealant present on the
end of the plug
or
in the threads on the plug.
I
.
b.
Inspect drain plug hole in the carburetor and
re-
/