Page is loading ...

Model CS1203:
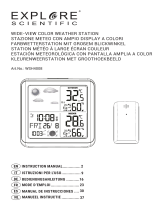
WIRELESS WEATHER STATION
WIRELESS WEATHER STATION

FCC INFORMATION:
USER INFORMATION:
This device complies with Part 15 of the FCC Rules. Operation is subject to the following two conditions:
(1)This device may not cause harmful interference, and (2)This device must accept any interference received,
including interference that may cause undesired operation.
CAUTION: changes or modifications not expressly approved by the party responsible for compliance could void
the user’s authority to operate the equipment.
NOTE: This equipment has been tested and found to comply with the limits for a class B digital device, pursuant to
Part 15 of the FCC Rules. These limits are designed to provide reasonable protection against harmful
interference in a residential installation.This equipment generates, uses and can radiate radio frequency energy
and, if not installed and used in accordance with the instructions, may cause harmful interference to radio
communications. However, there is no guarantee that interference will not occur in a particular installation.
If this equipment does cause harmful interference to radio or television reception, which can be determined by
turning the equipment off and on, the user is encouraged to try to correct the interference by one or more of the
following measures:
--Reorient or relocate the receiving antenna.
--Increase the distance between the equipment and receiver.
--Connect the equipment into an outlet on a circuit different from that to which the receiver is connected.
--Consult the dealer or an experienced radio/TV technician for help
1

Main unit:
LOCATION OF CONTROLS
1.LCD Display
2.TIME (Set) button
3.ALARM (Set/Off) button
4.UP button
5.Down button
6.CHANNEL (Selection) button
7.SNZ (Snooze) button
8.Battery Compartment
1
TIME ALARM
UP
DOWN
CHANNEL
SNZ
2
3
4
5
67 8
2

Portable Sensor:
1.Bell Clip
2.Battery Compartment
3. C/ºF (Celsius/Fahrenheit) selection button
4.TX (Transmit) button
5.Channel selection button
o
BATTERY INSTALLATION AND CHANNEL SET UP
Main unit:
1.Press the tabs on the battery door and lift it off.
2.Install two (2) x AAA size batteries (NOT included) into the battery compartment as shown on the figure below
and the polarity markings inside battery compartment.
3.Replace the battery door.
4.Press the CHANNEL button repeatedly on the rear of cabinet to 1; 2 or 3 as desired. The selected channel
number will appear on the display Left-Bottom corner.
TIME ALARM
UP
DOWN
CHANNEL
SNZ
1
2
3
4
5
C/ F TX
AAA 1.5V
AAA 1.5V
AAA 1.5VAAA
1.5V
AAA 1.5VAAA
1.5V
TIME ALARM
UP
DOWN
CHANNEL
SNZ
TIME ALARM
UP
DOWN
CHANNEL
SNZ
3

Portable Sensor:
NOTES:
1.Slide the Bell Clip to either Left or Right and lift it off as shown on Fig. 1 below.
2.Remove the screws on the battery door.
3.Remove the battery door.
4.Install two (2) x AAA size batteries (NOT included) into the battery compartment as the Fig. 2 below and the
polarity markings inside battery compartment.
5.Slide the channel selection switch to 1; 2 or 3 (Channel) as the Main Unit settings.
6.Press the ºC/ºF selection button repeatedly to select the unit of temperature.
7.Press the TX button, an icon will appear on the Main Unit Left-Bottom corner. Wait a few seconds, same
Temperature and Humidity will show on both Main Unit and Portable Sensor.
8.Replace the battery door; screws and Bell Clip.
9.Place the Portable Sensor to anywhere you want it to detect the Temperature and Humidity.
1.The signal transmittance is in Radio Frequency. If any interference occurring in current channel. Set both units in
others channels.
2.The maximum effective range between Main Unit and Portable Sensor is approximately 80 feet in distance in an open
area. If the Main Unit cannot receive the signal from the Portable Sensor, put them closely.
Pull up to replace batteries
C/ F TX
AAA 1.5V
AAA 1.5V
C/ F TX
Fig.1 Fig.2
4

BATTERY PRECAUTIONS
Follow these precautions when using a battery in this device:
1.Use only the size and type of battery specified.
2.Be sure to follow the correct polarity when installing the battery as indicated in the battery compartment. A
reversed battery may cause damage to the device.
3.Do not mix different types of batteries together (e.g. Alkaline and Carbon-zinc) or old batteries with fresh ones.
4.If the device is not to be used for a long period of time, remove the battery to prevent damage or injury from
possible battery leakage.
5.Do not try to recharge the battery not intended to be recharged; it can overheat and rupture. (Follow battery
manufacturer's directions.)
6.Do not dispose of batteries in fire. Battery may explodes or leak.
7.Clean the battery contacts and also those of the device prior to battery installation.
LOCATION OF INDICATORS ON SCREEN
1.Weather Forecast
2.Temperature & Humidity
3.Comfort Index
4.Receiving Channel
5.Temperature trend indication
6.Hour and Minute
7.Second
8.PM Indicator
9.Alarm
10.Moon Phase
11.Day-Month and Day of Week
1
2
3
4
5
6789
PM
10
11
Sunny Light Cloud
Cloud
Rainy
Comfortable Normal Uncomfortable
MAIN UNIT
PORTABLE SENSOR
5

Portable Sensor:
1.Temperature
2.Humidity
3.Transmittance Channel
4.Transmitting
OPERATION AND SETTINGS
MAIN UNIT
Unit of temperature:
Display format of hour:
Time set:
NOTE: In 12 hour display format, make sure the PM indicator is appearing on the display if the time is PM and disappear if
thetimeisAM.
Alarm Set:
NOTE: In 12 hour display format, make sure the PM indicator is appearing on the screen if the alarm time is PM and
disappear if the alarm time is AM.
Press the DOWN button repeatedly to set the unit of temperature to Celsius (ºC) or Fahrenheit (ºF) as desire.
Press the UP button repeatedly to set the display format to 12 or 24 hour as desire.
1.Press and hold the TIME (set) button until the current year appears blinking on the screen.
2.Press the UP or DOWN button to set the year. When finished, press the TIME button.
3.The digits of Month will blink. Press the UP or DOWN button to set the month. When finished, press the TIME button.
4.The digits of Day will blink. Press the UP or DOWN button to set the month. When finished, press the TIME button.
5.The digits day of week will blink. Press the UP or DOWN button to select and set the language as desired of it.
(EN=English,IT=ITALIAN,
FR=FRENCH, DR=DANISH, ES=SPANISH, NE=DUTCH, GE=GERMAN). When finished, press the TIME button.
6.The digits of Hour will blink. Press the UP or DOWN button to set the Hour. When finished, press the TIME button.
7.The digits of Minute will blink. Press the UP or DOWN button to set the Minute. When finished, press the TIME button.
8.The digits of Second will blink. Press the UP or DOWN button to set the second. When finished, press the TIME button to resume
normal display.
1.Press and hold ALARM button until alarm time appear on the screen and the digits of hour and blinking.
2.Press the UP or DOWN button to set the hour of alarm. When finished, press the ALARM button.
CH1
1
2
3
4
6

3.The digits of Minute will blink. Press the UP or DOWN button to set the Minute. When finished, press the Alarm
button to resume normal display.
4.Press the ALARM button to activate alarm, the alarm on icon will appear on the screen. To cancel, press
the ALARM button again, the alarm on icon will disappear.
Press ALARM button to shut off, alarm will automatically reset for the following day.
To deactivate alarm time setting (Alarm will not goes off at next day), press the ALARM button twice. The
alarm on icon will disappear.
When alarm goes off, press the SNZ (snooze) button to turn it off temporarily. The alarm will turn back on
automatically five (5) minutes later. This feature can be repeated until ALARM button is pressed.
5.When alarm goes off:
TROUBLE SHOOTING GUIDE
Check the following before requesting service:
Symptom
Not workable; Dim segments
The Temperature and Humidity
from Portable Sensor can't show
on the Main Unit
The unit of Temperature incorrect
The Hour format incorrect
Press the DOWN button repeatedly to
set the unit of temperature to Celsius
(ºC) or Fahrenheit (ºF) as desire
Possible Cause Solution
Batteries consumed
Replace by new batteries
The location of Portable Sensor too far
Put the Main Unit and Portable
Sensor closely
Set them in same channel
The Transmit and Receive channels
between Main Unit and Portable
Sensor are difference
Wrong settings
Wrong settings
Press the UP button repeatedly
to set the display format to 12 or
24 hour as desire
7
.
.
.

GENERNAL SPECIFICATION
Thermometer:
Hygroscope:
Accessory:
LIMITED WARRANTY
Power Source:
Main unit: DC 3V; 2 x “AAA” size batteries (not included)
Portable sensor: DC 3V; 2 x “AAA” size batteries (not included)
Rang:-20ºC-60 ºC (+/-1 ºC); -4 ºF – 140ºF (+/-1.8 ºF)
Rang: 20% - 95% (+/-5%)
1 x User's Manual
Craig warrants this product to be free from manufacturing defects in material and workmanship under normal use
for a period of 90 days from date of purchase. lf service is required, please return the product to the store where it
was purchased for exchange; or, pack the unit in the original packing material with all accessories if applicable, a
copy of your sales receipt and a Cashier’s check or Money Order for $7.00(to cover shipping and handling costs)
payable to Craig Electronics lnc. For consumers in Canada, please make sure that the cashier check or money
order is redeemable through a U.S. bank. Ship your product freight pre-paid. Your unit will be repaired, replaced
or if the unit can not be repaired or replaced, a refund will be forwarded to you within four weeks of reeks of receipt
of your unit. Please ship your unit to:
Craig Electronics lnc.
1160 NW 163 Drive
Miami, FI33169
This warranty is void if the product has been: a)Used in a commercial application or rental. b) Damaged through
misuse, negligence, or abuse. c) Modified or repaired by anyone other than an authorized Craig service center. d)
Damaged because it is improperly connected to any other equipment
Note: This warranty does not cover: a) Ordinary adjustments as
8

LIMITED WARRANTY(CONTINUED)
outlined in the Owner’s Manual which can be performed by the customer. b) Damage to equipment not properly
connected to the product. c) Any cost incurred in shipping the product for repair. d) Damage to the product not
used in the USA.
This warranty is not transferable and only applies to the original purchase. Any implied warranties, including the warranty of
merchanbtability, are limited in duration to the period of this expressed warranty and no warranty whether expressed or implied shall
apply to the product therafter.
Under no circumstance shall Craig be liable for any loss or consequential damage arising out of the use of this product. This warranty
gives specific legal rights. However, you may have other rights which may vary from state to state. Some states do not allow
limitations on implied warranties or exclusion of consequential damage. Therefore, these restrictions may not apply to you.
To Obtain Service on your Product
email: [email protected]
Printed in China CS1203-IB-EOEV1-BOCV
9
/