Page is loading ...

⬏⬎⫰⫰
sv
tq
sq
Error Condition Corrective Action
q
v
uv
q vr
q
v
uv
q
v
uv
q vr
q
v
uv
q vr
q
v
uv
q v r
q
v
uv
q v r
sv
tq
sq
Battery Cover
Open
REFERENCE POINT SETTING PRESET FUNCTION
TROUBLESHOOTING
OPERATION
POWER
INSERTING THE BATTERY
CAUTION
Thimble
Clamp
ON/OFF SET Button
Long Press
Flashing
Measured value is wrong Clean measuring surfaces with cloth.
Make sure Reference Point is correct.
LCD does not display
Displayed value is unstable
Display is not clear
Cycle power by removing and replacing
battery.
Replace battery with new one.
Value displayed is not
correct
Cycle power by removing and replacing battery.
Replace battery with new one.
Make sure Reference Point is correct.
Tight
Loosen
Before use, use a lens cloth or similar to wipe off any
grime or dust from tip of Spindle and the contact
surface of the part being measured.
Loosen the Clamp and turn the Thimble until the
Spindle is at the desired reference point, then tighten
the Clamp again. (Fig.1)
Press and hold the [ON/OFF SET] Button as shown in
Fig.2 until Set flashes on the Display. (Fig. 3)
Instrument is now in the mode for setting the
Reference Point (or Zero Point).
To set the Reference Point to the value displayed.
A short press of the [ON/OFF SET] Button will set the current position to the value displayed.
To change the value of the Reference Point. (Preset Function)
1. Press and hold the [ON/OFF SET] Button to enter Preset Mode.
2. Press the button to change the flashing digit, each press will cycle through the numbers (1 2
3...9 0 1). When the desired number is displayed, a long press on the button will confirm and
move to the next digit.
3. In the same way as above, set each digit in turn to enter the desired value.
4. When the right most digit is completed, Set will blink on the Display. A short press of the button
sets the position to the value entered and the Reference Point setting procedure is complete.
Preset Value is initialized to 0.000 at the factory.
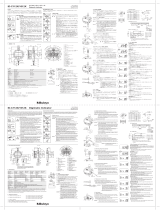
DIGITAL
MICROMETER
HEAD
Thank you for purchasing the Digital Micrometer Head.
Please read this manual thoroughly before use for proper operation.
Digital display for high accuracy of measurements.
0-25mm measurement range for general purpose use.
Carbide measuring surfaces.
Constant pressure ratchet mechanism.
Auto-display-off function (approx. 6 minutes)
SR44 (silver oxide battery) included for testing.
INSTRUCTION MANUAL
Flat
Ball SR5
Straight
Stem 6.5 28.5 12 17.5 0.001 3 162
EMH
-
25F
EMH
-
25S
Tip ShapeModel No. Stem Shape Spindle
mm
Stem
mm
Resolution
mm
Thimble Diameter
mm
18
Maximum
Instrument Error m
Total Length
mm
Use for precise measurement of position and feed on equipment and machinery.
Use as indicator for X-Y Stage on precision equipment.
Model No. :
EMH-25F/EMH-25S
<combined>
SPECIFICATIONS
FEATURES
APPLICATIONS
If problem persists, or if you have any questions, please contact distributor or
place of purchase.
Please note, manufacturer is unable to respond to inquires or provide service directly.
Please contact distributor or place of purchase. Only use SR44 type Battery.
Rotate the battery cover on
rear using coin or similar tool.
Insert battery with + side up.
Replace battery cover.
CAUTION
Spindle
Stem Sleeve
Clamp
Battery Cover
0-Point
Adjustment Hole
Ratchet Stop
LCD Display
ON/OFF SET Button
FRONT Thimble
REAR
Measuring Surfaces
(Carbide)
Model EMH-25F shown
PART IDENTIFICATION
ACCESSORIES
Spanner
SR44
(Silver Oxide Battery)
for test
Always remove dirt from measuring surfaces with lens cloth before use.
Do not turn spindle more than 3mm above upper measurement range.
This is a precision instrument, handle with care. Do not drop or subject to excessive forces.
Keep away form high voltage and strong magnetic fields; instrument damage may result.
Do not use or store in direct sunlight or locations with high temperatures such as in a car, or near a stove
or heat source.
Not for use in exposure to water or oil.
Please do not disassemble or modify.
After use, wipe off any cutting chips or dust using a soft cloth, and protect using a rust preventive oil.
Keep out of reach of children.
Do not use organic solvents to clean the body of the instrument.
When not being used for long period of time, please remove
battery.
Only use as directed. Improper use may cause accident or
injury.
When [ON/OFF SET] Button is pressed, power is turned
ON, and measurement is displayed on the LCD.
Press Button a second time to turn power OFF.
Before use, use a lens cloth or similar to wipe off any
grime or dust from tip of Spindle and the contact
surface of the part being measured.
Loosen the Clamp
(Fig.1) and turn the Thimble to move
the Spindle into contact with the surface.
Use the Ratchet Stop to control the contact force; The
Sleeve scale also will also show the Spindle position.
To set the display to read a relative position, refer to
section below on
Reference Point Setting Preset Function.
Figure 2
Figure 3
Figure 1

⬏⬎⫰⫰
sv
tq
sq
sv
tq
sq
q
v
uv
q v r
q
v
uv
q v r
q
v
uv
q vr
q
v
uv
q
v
uv
q vr
q
v
uv
q
v
uv
q vr
q
v
uv
ȭ ȭ
URL http://www.niigataseiki.co.jp
/


