Page is loading ...

CAR DVR
Overview.................................................................................................................................................. 1
Quick Installation and Startup Guide .................................................................................................. 2
Features ................................................................................................................................................... 4
Structure .................................................................................................................................................. 5
Key Functions ......................................................................................................................................... 5
Operation ................................................................................................................................................ 6
Specifications .......................................................................................................................................... 9

1
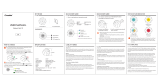
Overview
The Wicked HD G1W dashboard camera features stunning 1080p HD video and audio recording, night vision
capability, and unmatched reliability. The 2.7’’ high resolution LCD screen is easy to navigate and lets you
playback recordings directly on the camera anywhere. The dash cam is a breeze to setup; the included suction
mount allows you to attach it to any flat surface in seconds. Just insert a formatted Micro SD card, plug the camera
into your dashboard and start driving. The device will automatically start whenever your car does. To ensure that
you are always protected your camera will record indefinitely via loop recording, overwriting the oldest footage
recorded with the newest. Your video recordings are available for easy viewing on any HD TV using the included
HDMI cable or on the device itself.
Enjoy true high-definition with this product.

2
Quick Installation and Startup Guide
Step 1: Insert a micro SD card into the memory card slot and press until you hear a clicking sound.
*Important: SD card must be formatted to FAT32. (MAX size 32 GB)
If the SD card you have inserted is brand new you may proceed to step 2. Otherwise, please format your card to
FAT32.
Please Note: A micro SD card is not included with the camera. Your new G1W camera requires a micro SD card
for storing recordings and images.
Step 2: Provide power to your device using option A or B.
A. Plug the provided USB car adapter into your car and the other end into your G1W dashboard camera.
B. Plug the provided USB to mini USB cable into your G1W dashboard camera (via mini USB) and the other end
into any powered USB device.
Note: A blue LED will indicate the device is powered and working correctly.
Step 3: Recording: The G1W camera automatically turns on and begins recording when plugged in to an external
power source.
Buttons & Functions
1. Power ( ): Turns the camera on and off
2. MODE: Cycle through modes (Video Recording, Photo, Playback)
3. REC: Stops and starts recording or playback during playback mode
Important! REC button functions as Enter/Select for menu operations.
4. Menu (M): While NOT recording. One press brings up respective video or photo options menu for current the
MODE. Two consecutive presses bring up the settings option menu. While in a menu, another press of (M) closes
the menu options.
5. UP/DOWN: The left face buttons are correspondingly used to scroll through menu selections and zoom in and
out during recording.
Recommended Settings Changes
Language Selection: Press (M) two times to enter the settings represented by screw driver and wrench icon.
Scroll down to “Language” represented by the “A” icon and press REC to enter.
Scroll to desired language and press REC to select and confirm.
LCD Recording Preview Sleep Setting: Press (M) two times to enter the settings. Scroll to “Screen Protection”
and press REC to enter. Choose desired option, ie “3M” and press REC to select.

3
Set Date/time. Press (M) two times to enter the settings. Scroll to “Date/Time” and press REC to enter. Use
UP/DOWN to set the desired date/time and press REC to set and move on to next setting. Repeat until all
Date/Time options are accurate and Press (M) to exit the menu.
Problem Troubleshoot Guide
“File error” in playback mode: Ensure the micro SD card is brand new and/or is formatted.
Camera will not record: Ensure the micro SD card is fully inserted and locked in to place.
Camera will not turn on: Ensure application of external power. Check external power is both plugged in, and is
connected to the camera’s mini USB port.

4
Features
Product features:
◎ 120 degree ultra wide angle lens.
◎ Advanced Wide Dynamic technology
◎ 1920x1080P FULL HD high quality resolution.
◎ Advanced H.264 video compression technology.
◎ 3 megapixels
◎ 4X digital zoom ranges from 12cm to infinity.
◎ 2.7 inch high resolution LCD which can be watched while recording.
◎ Supports HDMI video output.
◎ 3 choices in resolution for video recording.
◎ 30/60 frames per second for smooth video flow.
◎ Equipped with special auto suction cup holder. Convenient installation and use.
◎ Built-in GPS, record traffic speed, track driving. (Optional)
◎ G-sensor to keep records of sensor data and real-time display on the player.
◎ Powerful storage protection. Even during the recording process, the occurrence of sudden power outages,
machine damage, etc., video files will remain intact.
◎ Seamless continuous recording. It will not miss any data.
◎ Auto cigarette lighter power supply to make the video recording possible while driving.
◎ Automatic circulating of video recording and the ability to set the record time for each file.
◎ Live view of video recording while driving. Supports local play back.
◎ Improved time & date display, no need to reset after restart.
◎ Set the video recording time and it stops recording when the time is up.
◎ Charges through USB.
◎ Maximum 32GB supported storage

5
Structure
1) USB port
2) AV port
3) GPS port (optional)
4) Power button
5) Menu button
6) Lens
7) Speaker
8) Micro SD slot
9) UP key
10) Down key
11) REC/OK button
12) MODE button
13) HDMI port
14) Reset button
Key Functions
Power button
ON/OFF
MENU button
Options menu
MODE button
Switch operation mode and corresponding menu
REC Button
Start/Stop
UP key
UP/Zoom in
DOWN key
DOWN/Zoom out

6
Operation
Starting the car camcorder
Turning ON/OFF
Press power button once to power on. The light indicator will turn on.
Press again to power off. The light indicator will turn off.
Attention: Low battery is displayed before shutting down.
Charging Batteries
There 3 ways of charging the battery:
1. Using an AC adaptor to charge battery
2. Using USB to charge battery
3. In-car battery charging
LED Indicators
Red LED: Power
On: Camera is powered on
Off: Camera is powered off
Blue LED: Charge
On: Camera is charging
Off: Camera has finished charging
Note: If the camera is charging and powered on, both lights will be lit.
Installing the Micro SD card
Insert the micro SD card into the memory card slot according to the image below; press it until you hear a click.
Removing micro SD card: Press it once and remove it after it pops up
Basic operation
With the micro SD card installed and the camera connected to the in-car charger, simply turn on the car and the
camera should turn on and start recording. A magenta light will signify the camera is on and plugged in. The screen
should turn on as well, show the current scene, and a blinking red dot to signify it is recording. When the car is
turned off, the camera will stop recording and shut down.
Note: If your car’s charging port remains powered after the car has been turned off, the camera will have to be
turned on and off by manually by pressing the power button. The recording can be started and stopped by pressing
the REC button.
How to switch between video, photos, playback modes
Press MODE to cycle between modes
How to enter the system Setup menu
Press MENU once then press MENU key again in any mode to enter the Setup menu.
Date setup: Sets the Date & Time
Auto Power Off: If no action is taken and the camera is not recording for the selected amount of time, the

7
camera will turn off. The OFF option means the screen will always remain on. [OFF, 3mins, 5mins, 10mins]
Beep Sound: Controls the sounds when buttons on the camera are pressed. [OFF/ON]
Language setting: Changes the language on the camera. [English, Traditional Chinese, Simplified Chinese,
Japanese, Russian, German, French, Spanish, Italian, Portuguese]
TV Mode: When outputting to a TV, please select the appropriate setting for your country. [NTSC/PAL]
Frequency: Depending the lighting, flickering may occur. Change this setting to compensate. [50Hz/60Hz]
Screen Protection: Automatically turns off the screen after the selected amount of time. [Off, 3mins, 5mins,
10mins]
IR LED: Controls the light to assist in dark environments. [OFF/ON]
Format: Formats Micro SD card (this action will delete not locked data stored on the Micro SD card)
Default Settings: Reset the camera to default settings [Cancel/Proceed]
Version: Displays the version number of the camera.
How to record video and enter setup
◣Shooting video
Press REC to start recording. Press it again to stop.
In recording mode, press MODE key to activate Day/Night mode
◣Video option settings:
Press MENU key while in video mode and enter the video option setting
Note: The video settings menu is not accessible while the camera is recording.
Resolution: Change the resolution of the video being recorded. [1080HFD 1920x1080, 720P
1280x720@60FPS, 720P 1280x720@30FPS, WVGA 800x480, VGA 640x480]
Loop Recording: Determines the length video recordings should be divided into. If it is set to off, the camera
will stop recording once the Micro SD card is full. Otherwise, once the card is full, the oldest recordings are
overwritten. [Off/3min/5min/10min]
WDR: Wide Dynamic Range enables both light and dark parts of a scene to visible simultaneously. [OFF/ON]
Exposure: Changes the exposure of the recording [+2.0, +5/3, +4/3, +1.0, +2/3, +1/3, 0.0, -1/3, -2/3, -1.0, -4/3,
-5/3, -2.0]
Motion detect: Once motion is detected, the camera will automatically start recording. After 10 seconds of no
movement, the camera will automatically stop recording. [OFF/ON]
Record Audio: Controls if audio is recorded. [OFF/ON]
G-sensor: When the impact dynamics reach the value you setup, the video will be locked. [OFF/ON]
Date Stamp: Determines if the date is recorded directly onto the video. [OFF/ON]
How to enter photo setting options
◣Taking photo
Press REC key to take a photo
◣Photo shooting setup options:
Press MENU key while in photo mode and enter the photo shooting setup option
Capture Mode: Determines whether to take a regular photo or to have it on a timer. [Single, 2sec timer, 5sec
timer, 10sec timer]
Image resolution: Change the resolution of the photo. [VGA 640x480, 1.3M 1280x960, 12M 4032x3024, 10M
3648x2736, 8M 3264x2448, 5M 2592x1944, 3M 2048x1536, 2MHD 1920x1080]
Sequence: Takes 3 pictures one right after the other. [OFF/ON]

8
Quality: Changes the quality of the photo. [Fine, Normal, Economy]
Sharpness: Changes the sharpness of the photo. [Strong, Normal, Soft]
White Balance: Adjusts the white balance for different light settings. [Auto, Daylight, Cloudy, Tungsten,
Fluorescent]
Color: Determines what color filter is used. [Normal, Black & White, Sepia]
ISO: Changes the ISO level. The higher the ISO level, the less light is needed. [Auto, 100, 200, 300, 400]
Exposure: Adjusts the exposure level [+2.0, +5/3, +4/3, +1.0, +2/3, +1/3, 0.0, -1/3, -2/3, -1.0, -4/3, -5/3, -2.0]
Anti-Shaking: Prevents photos from blurring due to shaking. [OFF/ON]
HDR: High Dynamic Range prevents loss of detail when there is a large range from dark to light. [ON]
Date Stamp: Include the date and/or time on the photo. [Off, Date, Date/Time]
Manage Files
Press the MODE key to enter the File Management mode
There are 2 types of files: Video playback and Image playback
Most recent file will be displayed on LCD.
For example: If your last action was photo shooting, the photo will be displayed on LCD.
Video and Photo playback
◣Video Playback
Press UP/DOWN keys to select the desired file for playback
Press REC key to play/pause the video playback. While paused, adjust the volume using the UP or DOWN
buttons.
Press DOWN key while playing back to rewind. Additional presses will increase the rewind speed up to x8 (shown
as –x8)
Press UP key while playing back to fast forward. Additional presses will increase the fast forward speed up to x8
Press MODE to stop video playback.
◣Image Playback
Press UP/DOWN key to select desired file for playback.
◣Playback option settings
While in playback, press MENU key to access Playback option setting:
Delete: Press REC key to select Single/All/Select and delete the file(s).
Protect file: Select to lock or unlock the file.
Slide play: Select 2sec/5sec/8sec to play the slide show spending the selected amount of time on each photo.
HDMI Output
The camera comes with a HDMI cable to connect to an external monitor or HDTV. Once the cable is connected
from the camera to the TV the output will automatically switch to the TV.
Connecting to PC
Downloading Videos and Images
After the USB cable is connected to computer, the LCD displays the start picture, the blue indicator will turn on, a
menu will pop up, press REC/OK to enter the mass storage function, and then the display screen will be blue.

9
The computer will automatically detect the Micro SD card as a removable drive.
Browse or manage files through the computer.
Unplug the USB cable to turn the device off.
Remarks: If device crashes during usage, press the RESET button and restart.
Attention: System requirements: Windows 2000/XP/Vista/Windows 7, MAC OS *10.3.6 or above
Specifications
LCD Display
2.7LTPS(16:9)
Lens
120°A+High Resolution Wde Angle Lens
Language selection
English, Traditional Chinese, Japanese, Russian, German, French, Spanish,
Italian
Video resolution
1080HFD 1920x1080, 720P 1280x720@60FPS, 720P 1280x720@30FPS,
WVGA 800x480, VGA 640x480
Video format
MOV H.264 compression formats
Image resolution
VGA 640x480, 1.3M 1280x960, 12M 4032x3024, 10M 3648x2736, 8M
3264x2448, 5M 2592x1944, 3M 2048x1536, 2MHD 1920*1080
Image format
JPG
Memory card
Micro SD
Microphone/Speaker
Yes
Capture mode
Single/2sec timer/5sec timer/10sec timer
TV mode
PAL/NTSC
Frequency
50HZ/60HZ
USB Port
USB2.0
Power input
5V 500MA
Motion
Detection
Supported
Color
Effect
Standard / M
onochrome
/
Sepia
HDMI
Supported
AV-Out (Mini
USB)
Supported
Digital
Magnification
Supported : 4x Digital
Zoom
Image
Stabilization
Supported
Battery
Rechargeable Li-ion
◣Accessories:
1) In-car charger
2) In-car holder
3) USB cable
4) User Manual
5) HDMI cable
/