Page is loading ...

©2008 Delta Children’s Products, Inc. 35301-XXX_Bassinet_Instruction_V1
Made in China
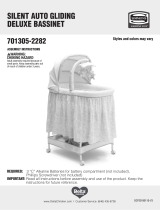
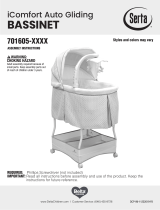
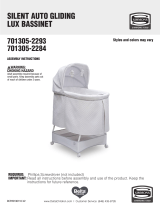
Bassinet
Assembly Instructions
Model Number
Manufacturer’s Code
If you have missing parts or questions...
If a part is missing or you have questions, call us. DO NOT return
product parts to store from where it was purchased before calling us at:
(212) 645-9033
Our service is fast, free and easier than returning the product.
Important: So we can better assist you, have the model number and
manufacturer’s code available. It is located at bottom right-hand corner of this page.
Before assembly, read these instructions. Make sure all pre-assembled parts are tight.
Store this instruction manual for future reference.
Adult assembly required.
Delta Children’s Products, Inc.
114 West 26th Street
New York, NY 10001 (USA)
Web site: www.DeltaChildrensProducts.com
E-mail: [email protected]
Customer Service Toll-Free: (212) 645-9033
DeltaTM
Childrens’s Products
DeltaTM
Childrens’s Products
Your Delta Baby Gear is warranted to be free from defects for a
period of 30 days from the date of purchase under normal use.
This warranty extends only to the original retail purchaser and is
only valid when supplied with proof of purchase, or if received
as a gift, when the registration is on file with Delta.
Warranty
35301-310
04 / 2011

Disassembling Bassinet for Storage
To disassemble Bassinet for storage, follow assembly steps in reverse.
Store all parts and hardware together in a safe place. Store the instruction manual for future
reference.
Fabric:
DO NOT USE THIS PRODUCT WITHOUT FABRIC ASSEMBLY IN PLACE. Fabric Assembly may be
removed for washing. Always follow instructions for disassembly and reassembly. Fabric assembly
may be hand-washed in mild detergent. Never use bleach. Air dry or use dryer on the lowest
setting. Use iron for touch up on fabric for best results. Please note that the Canopy fabric cannot be
removed from Canopy frame, and may be hand-washed.
Frame:
Frame paint may be touched up as needed. Use only non-toxic paints approved for children’s
products. Check all frame fasteners occasionally. Tighten all screws and bolts as necessary.
Cleaning and Maintenance
To install batteries: First unscrew the battery cover and install 3 C batteries as shown in the
battery compartment.
To install batteries: First unscrew the battery cover and install 3 AAA batteries for Remote
Controller.
SAFE BATTERY USE
• Keep batteries out of the reach of children.
• Do not mix old and new batteries.
• Do not mix alkaline, standard (carbon-zinc), or rechargeable (nickel-cadmium) batteries.
• Do not mix different battery types.
• Make sure batteries are inserted correctly.
• Discard leaky batteries immediately. When discarding batteries, be sure to dispose of them in
the proper manner, according to your state and local regulations.
Battery Power Pack and Remote Controller
27
2
WARNING -
BASSINET WARNINGS
Read all instructions BEFORE assembly and USE of product. KEEP INSTRUCTIONS FOR
FUTURE USE.
• Before each usage or assembly, inspect unit for damaged hardware, loose joints, missing parts or
sharp edges. NEVER use this product if there are any loose or missing fasteners, loose joints,
broken parts, or torn mesh/fabric. Check before assembly and periodically during use. Contact
Delta Children’s Product Customer Service Department at 212-645-9033 (8:00am ~ 4:30pm
EST) for replacement parts, repair or instructions. DO NOT substitute parts.
• FALL HAZARD – To help prevent falls, DO NOT use this product when the infant begins to push
up on hands and knees or has reached manufacturer’s recommended maximum weight of 15 lbs.
• Use bassinet with only one child at a time.
• Strings can cause strangulation! DO NOT place items with a string around a child’s neck, such as
hood strings or pacifier cords. DO NOT suspend strings over a crib or attach strings to toys.
SUFFOCATION HAZARD:
Infants can suffocate:
• In gaps between an extra pad and side of the bassinet/cradle.
• On soft bedding.
NEVER add a mattress, pillow, comforter or padding. Use ONLY the pad provided by the
manufacturer.
intended for that purpose. They can cause suffocation.
• To reduce the risk of SIDS, pediatricians recommend healthy infants be placed on their
backs to sleep, unless otherwise advised by your physician.
• If a sheet is used with the pad, use only the one provided by the manufacturer or one
specifically designed to fit the dimensions of the bassinet/cradle.
• The total thickness of the mattress should not exceed 1 1/2 in. and the length and width
should not allow a gap greater then 1 in. between the mattress and the side of the
bassinet when the mattress is pushed up against the sides and into one corner of the unit.
• DO NOT leave child unattended in the bassinet with the wheels on the bassinet frame in
the “up” position.
• DO NOT place bassinet near a window where cords from blinds or drapes may strangle a
child. Child may fall out of window. DO NOT place cords, straps or similar items that could
become wound around a child’s neck in or near the bassinet.
• CAUTION: Check proper fit of mattress. Mattress should not be more than 1 1/2 in. thick.
The maximum gap between mattress and inside of the bassinet border (or edge) should
be no more than 1 in.
Failure to follow these warnings and assembly instructions
could result in serious injury or death.
!
WARNINGS

3
26
NOTES
WARNINGS
MOBILE WARNINGS
Read all Instructions BEFORE assembly and USE of product. KEEP INSTRUCTIONS FOR
FUTURE USE.
• A mobile is intended for visual stimulation and is not intended to be grasped by the child.
• From birth to 5 months.
• Possible entanglement injury.
• Keep out of baby’s reach.
• Remove mobile from bassinet or cradle when baby begins to push up on hands and knees. Toys
are not meant to be “mouthed” by the baby and should be positioned clearly out of reach of the
baby’s face and mouth.
• Adult assembly required.
• Always attach all provided fasteners (strings, straps, clamps, etc.) tightly to the bassinet according
to the instructions. Check frequently. Do not add additional strings or straps to attach to the
bassinet.
• The mobile is not intended for use in playpens or portable cribs.
WARNING
!
Read all instructions BEFORE assembly and USE of product. KEEP INSTRUCTIONS FOR
FUTURE USE.
• Do not use changing table if it is damaged or broken.
• Maximum weight of child: 25 lbs. (11.34 kg).
• Never leave child unattended.
CHANGING TABLE WARNINGS
WARNING -
Failure to follow these warnings and assembly instructions
could result in serious injury or death.
!
WARNING -
!
FALL HAZARD – To prevent death or serious injury, always keep
child within arm’s reach.
Notes

25
FREQUENTLY ASKED QUESTIONS
4
00095 - Mattress
Pad
(x1)
Q
Parts and Part Numbers
00084 - Accessory
Basket
(x1)
A
00066 - Accessory
Basket Tubes
(x2)
B
00065 - Non-Locking
Rocker Base
(x1)
C
00068 - Rocker
Legs
(x4)
D
02503 - Support
Tube
(x2)
E
00135 - Bassinet
Frame
(x1)
H
00131 - Mattress
Support
(x1)
I
01630 - Mobile
Arm
(x1) *Screws included
K
00083 - Bassinet
Fabric Skirt
(x1)
L
DO NOT REMOVE FOAM FROM BASSINET PARTS
00064 - Locking
Rocker Base
(x1)
cc
PARTS AND PART NUMBERS
00560 - Sheet (x1)
R
00073 - Canopy (x1)
S
Frequently Asked Questions - continued
7) Batteries
- Bassinets require 3 “C” batteries.
- If your bassinet includes a remote control, the remote control requires 3 “AAA” batteries.
8) Electronics Trouble-Shooting
Double-check that all batteries are installed correctly in the battery box. Also check that the wire is
properly attached to the battery box and to the mobile base.
9) Cleaning your bassinet
To clean bassinet use a damp cloth or sponge with household soap or detergent and wipe clean the vinyl,
plastic, and metal parts. The sheet is machine washable and recommended to drip dry. Do not use bleach.
Battery Box
Underside of the
wooden mattress support
Battery
Box
Wire

5
Parts & Hardware/Part & Hardware Numbers
HARDWARE SHOWN AT ACTUAL SIZE
00079 - Wrench
00078 - Screwdriver
00077 - Rocker Leg Screw (x8)
M
00139 - Mattress Support
Screw
(x2)
U
00130 - Lock Nuts
(x4)
Z
00142 - Mobile
Remote Control
(x1)
*On certain models
X
01629 - Mobile
Propeller with Toys
(x1)
*Toys may vary
*Mobile cover on certain models
T
PARTS & HARDWARE/PART & HARDWARE NUMBERS
24
FREQUENTLY ASKED QUESTIONS
Frequently Asked Questions
1) Warranty Information
All Delta bassinets include a 30-day limited warranty. Please fill out the product registration card that
accompanied your bassinet, and mail it back to us so we can have your information on file.
2) Model Number and Manufacturer’s Code
It is important to have the model number and manufacturer’s code available when calling our Customer
of base assembly.
3) Height Adjustment
The 5 positions for the height-adjustable legs are: 30.25” (lowest), 32.25” , 34.00” , 35.75” , and 37.50”
(highest).
4) Weight Limits
- Bassinet weight limit: 15lbs
- Changing table weight limit: 25lbs
5) Mattress Pad Dimensions
are 32” x 15.75”.
6) Mattress Pad Thickness
It is important to use only the mattress pad provided by the manufacturer. According to ASTM (American
Society For Testing and Materials) standards, the total thickness of the mattress should not exceed 1.5”. The
length and width should not allow a gap greater than 1” between the mattress and the side of the bassinet
when the mattress is pushed up against the sides and into one corner of the unit. Replacement mattresses
are available through Customer Service.
37.5 inches (highest position)
30.25 inches (lowest position)
00080 - Lock Nuts
(x2)
Y
The mattress pad dimensions
DELTA CHILDREN’S PRODUCTS
114 WEST 26TH STREET. NEW YORK, NY 10001 USA
TEL.: 212-645-9033 STYLE NO.:
MADE IN CHINA ORDER NO.:
FABRIQUÉ EN CHINE
DATE OF MFG.:
35301- 310
250063
04/ 2011
LOT NO.: WF08006
Service department. This information can be found on a white sticker on the underside of support tube

6
Bassinet Base Assembly
1
Continue to Step 2...
Insert two (2) Accessory Basket Tubes (B)
into the Non-Locking Rocker Base (cc).
00066 - Accessory
Basket Tubes
(x2)
B
00065 - Non-Locking
Rocker Base
(x1)
cc
cc
B
Parts Needed:
BASSINET BASE ASSEMBLY
23
MOBILE OPERATION
Mobile Operation
19
Night Light - activates the mobile light. Press to turn on mobile light for 5-minutes. To turn off sooner
than 5-minutes, press again. Press the button again to start another 5 minute cycle. This operating cycle is
the same for all functions except music.
Vibration - Press to start 5-minute cycle, press again to stop. The strength of vibration is adjusted with
the round knob on the side of the mobile arm. This adjustment knob is also marked with waves. Turning
towards the + sign increases vibration, towards the - sign reduces vibration.
Music - operates the music function . Press the button successive times to cycle the music through two
modes of music, one of musical chimes, and back to off. Music volume is adjusted with the “Music Volume
Adjustment” button on the other side of the mobile arm. Turning towards the + sign increases volume,
towards the - sign reduces volume.
Small Lights - operates the light show. Press to start the 5-minute show. Press again to stop the music. If
the music button is pressed during a light show, the show will restart, synchronized with the music.
Rotate Mobile Toys - controls the mobile. Press to begin a 5-minute cycle. Press again to stop the mobil
e.
Press again to start a new 5-minute cycle. If the mobile button is pressed while the mobile is operating, the
mobile cycle will restart, synchronized with the music.
After batteries are in place, turn on “Mobile Function” switch at base of mobile arm. This is the main power
switch to the arm and also turns on the power LED on the “Night Light” button. This LED will stay lit to help
you find the “Night Light” button in the dark.
Rotate Mobile Toys
Small Lights
Music
Vibration
Night Light
Music Volume
Adjustment
Vibration
Adjustment
Mobile Functions
On/Off
Mobile Remote
requires
3 AAA batteries.
*on certain models

7
Bassinet Base Assembly - continued
2
Continue to Step 3...
00068 - Rocker
Legs
(x2)
D
HARDWARE SHOWN
AT ACTUAL SIZE
00077 - Rocker Leg
Screw
(x2)
M
00078 - Screwdriver
00084 - Accessory
Basket
(x1)
A
A
D
M
Figure 1
Parts Needed:
Insert two (2) Rocker Legs (D) into Non-
Locking Rocker Base. Secure using two
(2) Rocker Leg Screws (M) (see Figure
1). The screws will go through the Non-
Locking Rocker Base, Rocker Legs, and
into the Accessory Basket Tubes. Then
slide on the Accessory Basket (A) onto
the Accessory Basket Tubes.
Note: Snap button holes on Rocker Legs
must face towards the inside.
BASSINET BASE ASSEMBLY
22
CASTER ASSEMBLY
18
Continue to Step 19...
Caster Assembly
Parts Needed:
To Lower Casters:
1
2
3
To Raise Casters:
1
2
3
Rotate In
Pull Down

8
Bassinet Base Assembly - continued
3
Continue to Step 4...
On other side of assembly, attach Rocker
Legs (D) into Locking Rocker Base (C).
Then attach Locking Rocker Base to
Accessory Basket Tubes. Secure using
two (2) Rocker Leg Screws (M). The
screws will go through the Locking
Rocker Base, Rocker Legs and into the
Accessory Basket Tubes (see Figure 1).
Note: Snap button holes on Rocker Legs
must face towards the inside.
00078 - Screwdriver
HARDWARE SHOWN
AT ACTUAL SIZE
D
M
00068 - Rocker
Legs
(x2)
D
00077 - Rocker Leg
Screw
(x2)
M
Figure 1
00064 - Locking
Rocker Base
(x1)
C
C
Parts Needed:
BASSINET BASE ASSEMBLY
21
CHANGER ASSEMBLY
17
Continue to Step 18...
Changer Assembly
Parts Needed:
Place the Bassinet against a wall and lock
the two (2) Locking Rocker Base caster
wheels (see Figure 1). This will keep the
Bassinet in a stationary position.
Figure 1

9
Bassinet Base Assembly - continued
4
Continue to Step 5...
Tie Fabric Accessory Basket (A) to the
four (4) Rocker Legs (D).
A
D
Parts Needed:
BASSINET BASE ASSEMBLY
20
BASSINET BASKET ASSEMBLY
Bassinet Basket Assembly - continued
16
Continue to Step 17...
Parts Needed:
01629 - Mobile Assembly (x1)
T
Figure 1
T
K
Attach Mobile Assembly (T) to the
Mobile Arm (K) by lining up the top of
the Mobile Assembly to the connector
located on the Mobile Arm and push
firmly up until it snaps into place
(see Figure 1).
Connector

10
Bassinet Base Assembly - continued
5
Continue to Step 6...
Insert Support Tube (E) into Rocker Legs
(D). Push in on the snap button. Then
slide the Support Tube down until the
snap button locks into place.
Note: Make sure holes on Support Tubes
face in.
E
02503 - Support
Tube
(x1)
E
D
Parts Needed:
BASSINET BASE ASSEMBLY
19
BASSINET BASKET ASSEMBLY
15
Continue to Step 16...
Parts Needed:
Bassinet Basket Assembly - continued
Insert the two ends of the Canopy (S)
through the openings in the Bassinet
Fabric and into the connectors on the
Bassinet Basket Frame. Push down until
both sides snap into place (see Figure 1).
Then locate the two snaps on the Canopy
(near the connectors ). Snap into place (see
Figure 1). Attach the velcro or snap at the
back of the Canopy to the bassinet skirt
(see Figure 2 & 2a).
Figure 2
Figure 1
00073 - Canopy (x1)
S
Snap
Button
Figure 2a

11
Bassinet Base Assembly - continued
6
Continue to Step 7...
IMPORTANT: Height of Support
Tubes must be adjusted evenly. Do
Not elevate one side higher than
the other.
02503 - Support
Tube
(x1)
E
Note: When both Support Tubes (E)
are in place, you may adjust the height
by pushing in on the snap buttons and
lifting up or down.
D
E
Parts Needed:
Insert Support Tube (E) into Rocker Legs
(D). Push in on the snap button. Then
slide the Support Tube down until the
snap button locks into place.
BASSINET BASE ASSEMBLY
18
BASSINET BASKET ASSEMBLY
Bassinet Basket Assembly - continued
14
Continue to Step 15...
Parts Needed:
Slip the Sheet (R) over the Mattress Pad (Q).
Then Assemble it into the bottom of the
Bassinet Assembly (see Figure 1).
Note: On some models sheet will already
be attached to mattress pad.
00095 - Mattress
Pad
(x1)
Q
00560 - Sheet (x1)
R
Figure 1
R
Q

12
Bassinet Basket Frame Assembly
7
Continue to Step 8...
Parts Needed:
BASSINET BASKET FRAME ASSEMBLY
17
BASSINET BASKET ASSEMBLY
Attach the Bassinet Frame (H) to the
Bassinet Base Assembly with four (4)
Rocker Leg/Basket Frame Screws (M)
and four (4) Lock Nuts (Z).
00077 - Rocker Leg Screw
(x4)
M
00130 - Lock Nuts
(x4)
Z
HARDWARE SHOWN
AT ACTUAL SIZE
00079 - Wrench
00078 - Screwdriver
00135 - Bassinet
Frame
(x1)
H
H
Z
M
Bassinet Basket Assembly - continued
13
Continue to Step 14...
Parts Needed:
Find the elastic red pockets on the
bottom of both ends of Bassinet Fabric
Skirt (L). Pull them underneath the
wooden Mattress Support. Refasten all 10
(see Figure 1). Also you will need to fasten
4 snaps that attach skirt to Mattress
Support (see Figure 2). Then loop the
Mobile Arm wire and battery wire through
side tabs and connect both ends together
(see Figure 3).
Figure 1
Figure 2
Figure 3
Snap
Red Pocket
Mattress
Support
snaps that go around the skirt

13
Bassinet Basket Frame Assembly - continued
8
Continue to Step 9...
Parts Needed:
BASSINET BASKET FRAME ASSEMBLY
16
BASSINET BASKET ASSEMBLY
Locate the battery compartment. With the
Screwdriver, remove battery cover plate
and install three (3) “C” alkaline batteries
(see Figure 1). Replace the cover plate and
tighten the screws.
Note: We recommend using alkaline
batteries for longer battery life. Make sure
batteries are correctly installed.
I
Battery
Compartment
Figure 1
00131 - Mattress
Support
(x1)
I
Bassinet Basket Assembly - continued
12
Continue to Step 13...
Parts Needed:
Note: Unfasten 10 snaps around
the Bassinet Fabric Skirt (L)
(see Figure 1).
Find the opening for the Mobile Arm,
and two openings for the Canopy. Make
sure that they will line up. Then Slide
the Bassinet Fabric Skirt (L) over the
Mobile Arm and shape it around the
Bassinet Basket Frame. Make sure fabric
fits snugly around the top bar of the
Bassinet Basket Frame.
00083 - Bassinet
Fabric Skirt
(x1)
L
L
Figure 1
Snap

14
Bassinet Basket Frame Assembly - continued
9
Continue to Step 10...
H
I
Attach Mattress Support (I) to Bassinet
Frame (H) using four (2) Mattress Support
see
Figure 1). Tighten the screws and nuts by
using the Screwdriver and the Wrench.
Make sure vibration battery unit is on the
bottom.
Note: DO NOT remove foam from
around Bassinet Frame.
00079 - Wrench
00078 - Screwdriver00131 - Mattress
Support
(x1)
I
00139 - Mattress
Support Screw
(x2)
U
00080 - Lock Nuts
(x2)
Y
HARDWARE SHOWN
AT ACTUAL SIZE
Figure 1
Parts Needed:
U
Y
BASSINET BASKET FRAME ASSEMBLY
15
BASSINET BASKET ASSEMBLY
Bassinet Basket Assembly - continued
10
Continue to Step 11...
Parts Needed:
01630 - Mobile
Arm
(x1) *screws included
K
K
00078 - Screwdriver
Remove two (2) pre-installed screws from
Mobile Arm (K) (see Figure 1). Locate the
pre-drilled holes on the Bassinet Frame
and snap on Mobile Arm (K) (see Figure 2).
Re-insert the screws into the Mobile Arm.
Tighten with Screwdriver.
Figure 2
Figure 1
Screw
Screws (U) and four (2) Lock Nuts (
Y)
/