8
Adjustment of the needle thread tension
Theneedlethreadtensioncanbeadjustedby
changingpressureofthetensiondisk,andforce
andstrokeofthethreadtake-upspring.
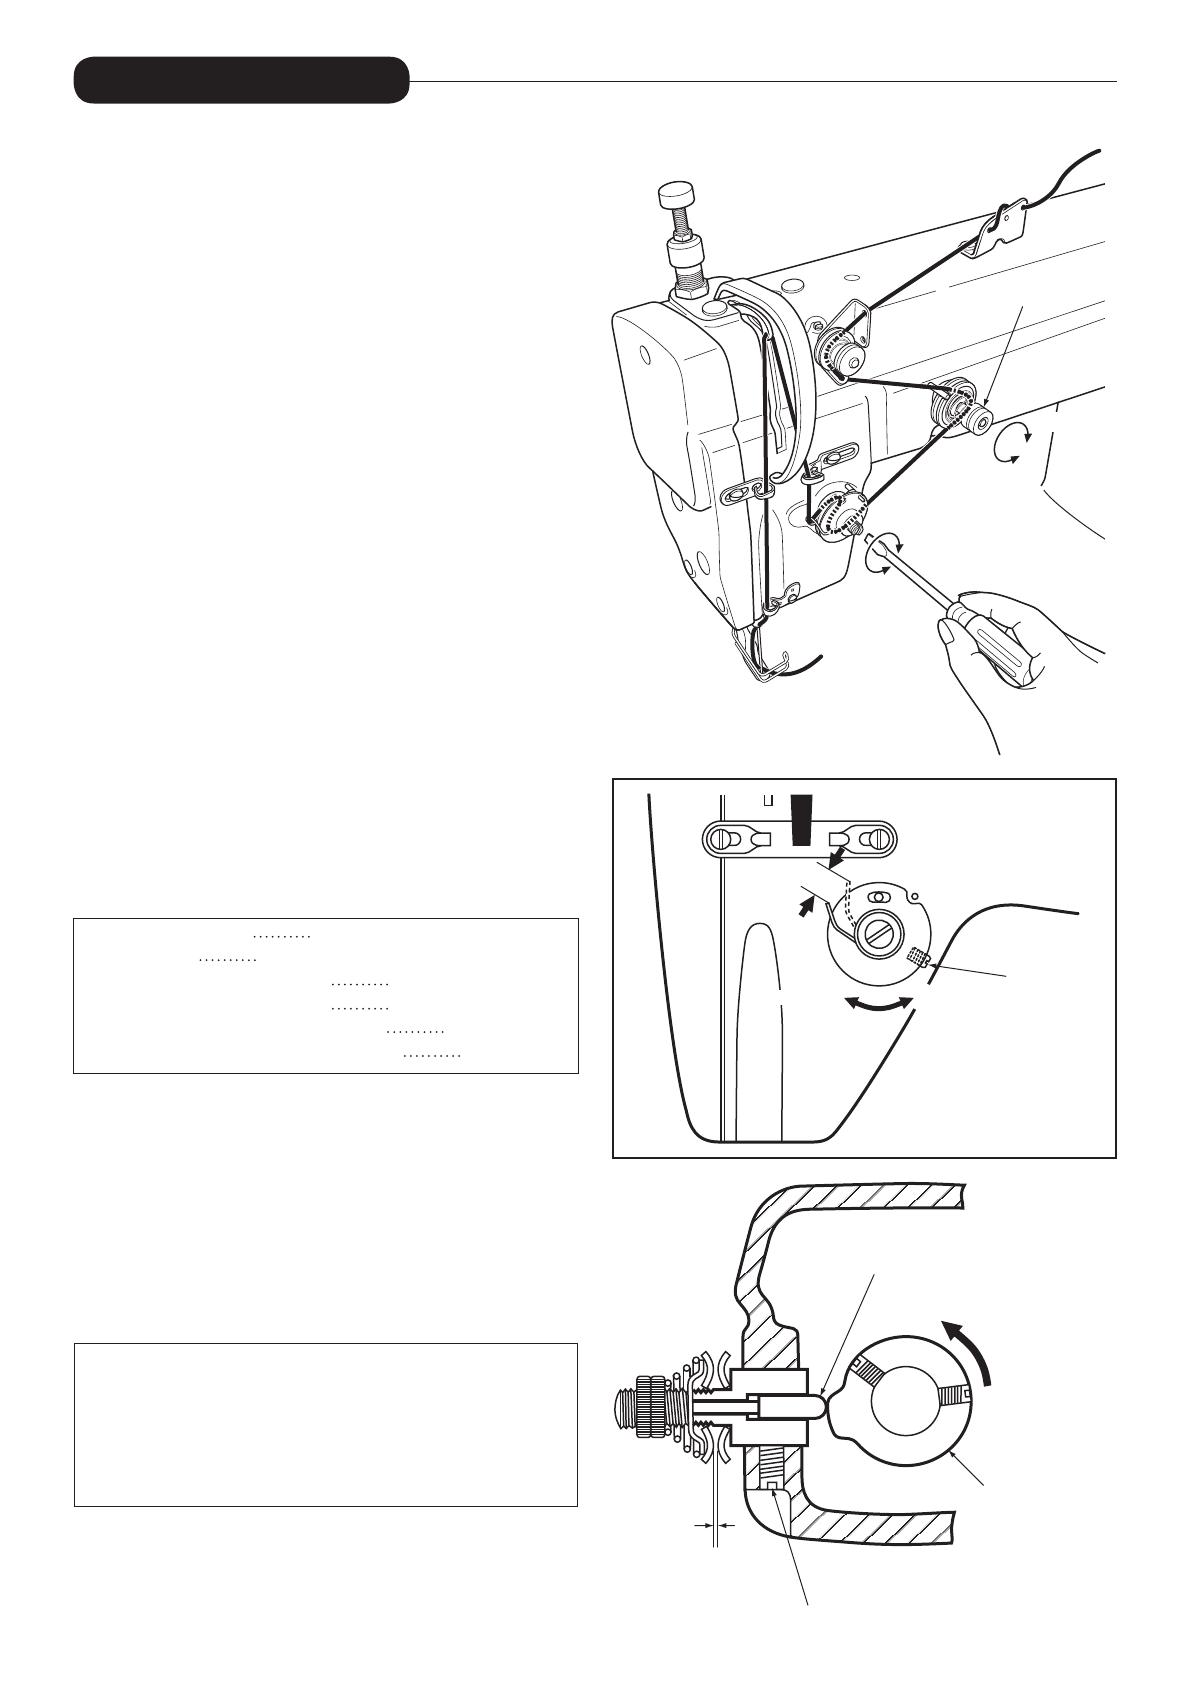
●Adjustment of the tension disk pressure
1 . Inmostcases,threadtensioncanbeproperly
adjustedonlybychangingtightnessofthe
threadtensionnutⒶ.
2 . Toincreasepressure,turnthenutclockwise.
3 . Todecreasepressure,turnthenut
counterclockwise.
●Adjustment of the thread take-up spring force
Applyascrewdrivertothethreadtake-upspring
studandturnthestud.
Thespringforceincreaseswhenthescrewdriver
isturnedcounterclockwise,anddecreaseswhen
turnedclockwise.
Ifthestudistight,removethefaceplateand
loosenthescrewoftensionregulatorslightly.
●Adjustment of the thread take-up spring stroke
1 . Loosenthesetscrewusedtosecurethe
threadtensionregulatorslightly.
2 . Applyascrewdrivertothethreadtake-
upspringstudandturnthescrewdriver
counterclockwisetoincreasethestroke.
3 .
Turnthescrewdriverclockwisetodecreasethestroke.
4 .
Afteradjusting,besuretotightenthesetscrew.
Thestandardstrokeofthreadtake-upspring
isfrom6to8mm.
9
Adjustment of the thread tension releasing
1 .
Adjustment of the thread tension regulator setting position.
Thestandardgapisabout0.5mmwhenthe
tensionreleasecamsalienceisincontactwith
thetensionreleasepin.
Toadjust,loosenscrewⒶandchangeposition
ofthethreadtensionregulatorproperly.
2 . Adjustment of the tension release timing
Note: Thetensionreleasetiminglargelyaects
stitchingoperation.Ifthegap betweenthe
tensiondisksis toosmall, theneedlethreadis
notdrawnproperly.Onthe contraryifthegap
istoolarge,the needlethreadmaybereleased
earlierandbecomeloose.
Thetensionreleasecamshouldbesetsothatthe
tensionreleasediskscometoopenatthetime
whentheredmarkpointonthepulleycomesin
linewiththeblackmarkpointonthearm.
Ex.:
ThreadusedCotton#40(doubletwist)
FabricGeneralapparelandpad
Needlethreadtension40-60g
Bobbinthreadtension5-10g
Threadtake-upspringforce15-20g
Threadtake-upspringstroke6-8mm
HOW TO USE
— 6 —
From the library of Superior Sewing Machine & Supply LLC - www.supsew.com


