2
MAN 246E-822
WilliamsAV.com
U.S. | 800.843.3544 info@williamsav.com INTL | +1.952.943.2252 info-intl@williamsav.com
© 2022, Williams AV, LLC
9. (FM + D only) Connect an Ethernet cable from the
Dante network to the connector labelled Dante on the
transmitter. (Note: Dante IP Address and other settings
are configured externally through Dante Controller;
there are no settings in the transmitter for Dante, other
than choosing Dante as the input source).
10. If Dante audio is being used, the Dante source must
be connected, must be playing audio, and the Dante
Controller must be used to route audio from the Dante
source to the FM +.
11. Install an appropriate antenna for your system
configuration. For a full list of antenna options, please
go to our website www.williamsav.com. NOTE: The FCC
requires this device to be used with approved, FCC 15.203
compliant antennas and be professionally installed. Refer
to Williams AV’s 72 MHz Antenna Selection Install Guide
for compliant antennas for this product.
12. Set the Transmitter Channel. The FM + is shipped from
the factory with the channel/frequency set to Ch.1 (72.1
MHz). To change the channel/frequency, while on the
main info screen, use the right and left arrow buttons
to change channels.
13. To test Wi-Fi Audio, use a personal device with the
WaveCAST App installed to listen to the audio and test
that device is working and sounds correct over Wi-Fi.
14. To test FM Audio, listen with an FM receiver. Walk
around the listening area. The signal should be clear
and quite loud when the volume is turned up.
To adjust any settings via a web browser:
1. Connect an Ethernet cable from your local area
network, or Wi-Fi router to the connector on the
transmitter labelled Ethernet. This network will be
used to broadcast the audio.
2. Open a web browser on a computer or mobile device
that is also connected to the same local network as the
FM +.
3. In the address bar of the browser, type in the IP
address that is shown on the front of the transmitter's
main info screen, and push the enter key on the
keyboard. (Note: it is not necessary to type “http://”
or “www.” preceding the IP address. For example:
192.168.1.123)
4. The browser will open the transmitter's web page,
displaying a Login button. Click the log-in button and
enter the user name “admin” and the default password
“admin”.
5. The web browser will now show the transmitter's
Home Page, which shows the current FM + status info.
The tabs at the top navigate to different pages that
allow adjustment of the transmitter's settings.
WaveCAST Receiver App
The WaveCAST Receiver app allows listeners to hear the audio
on their personal, Wi-Fi connected devices, such as a mobile
phone. The WaveCAST App can be downloaded from the
Google Play Store for Android devices or the Apple App Store
for iOS devices.
Download the WaveCAST App
Download the WaveCAST app from the Apple App Store for
iOS devices or Google Play Store for Android devices.
It is recommended that the app is downloaded in advance
over an internet-connected wi-fi network or cellular network.
Join the WaveCAST Wi-Fi Network
Once the WaveCAST App is downloaded, join the same Wi-Fi
network that the audio is being broadcast over. If no channels
are listed when selecitng an audio channel, there is no audio
being streamed on this Wi-Fi network. Ensure you are on the
correct Wi-Fi network.
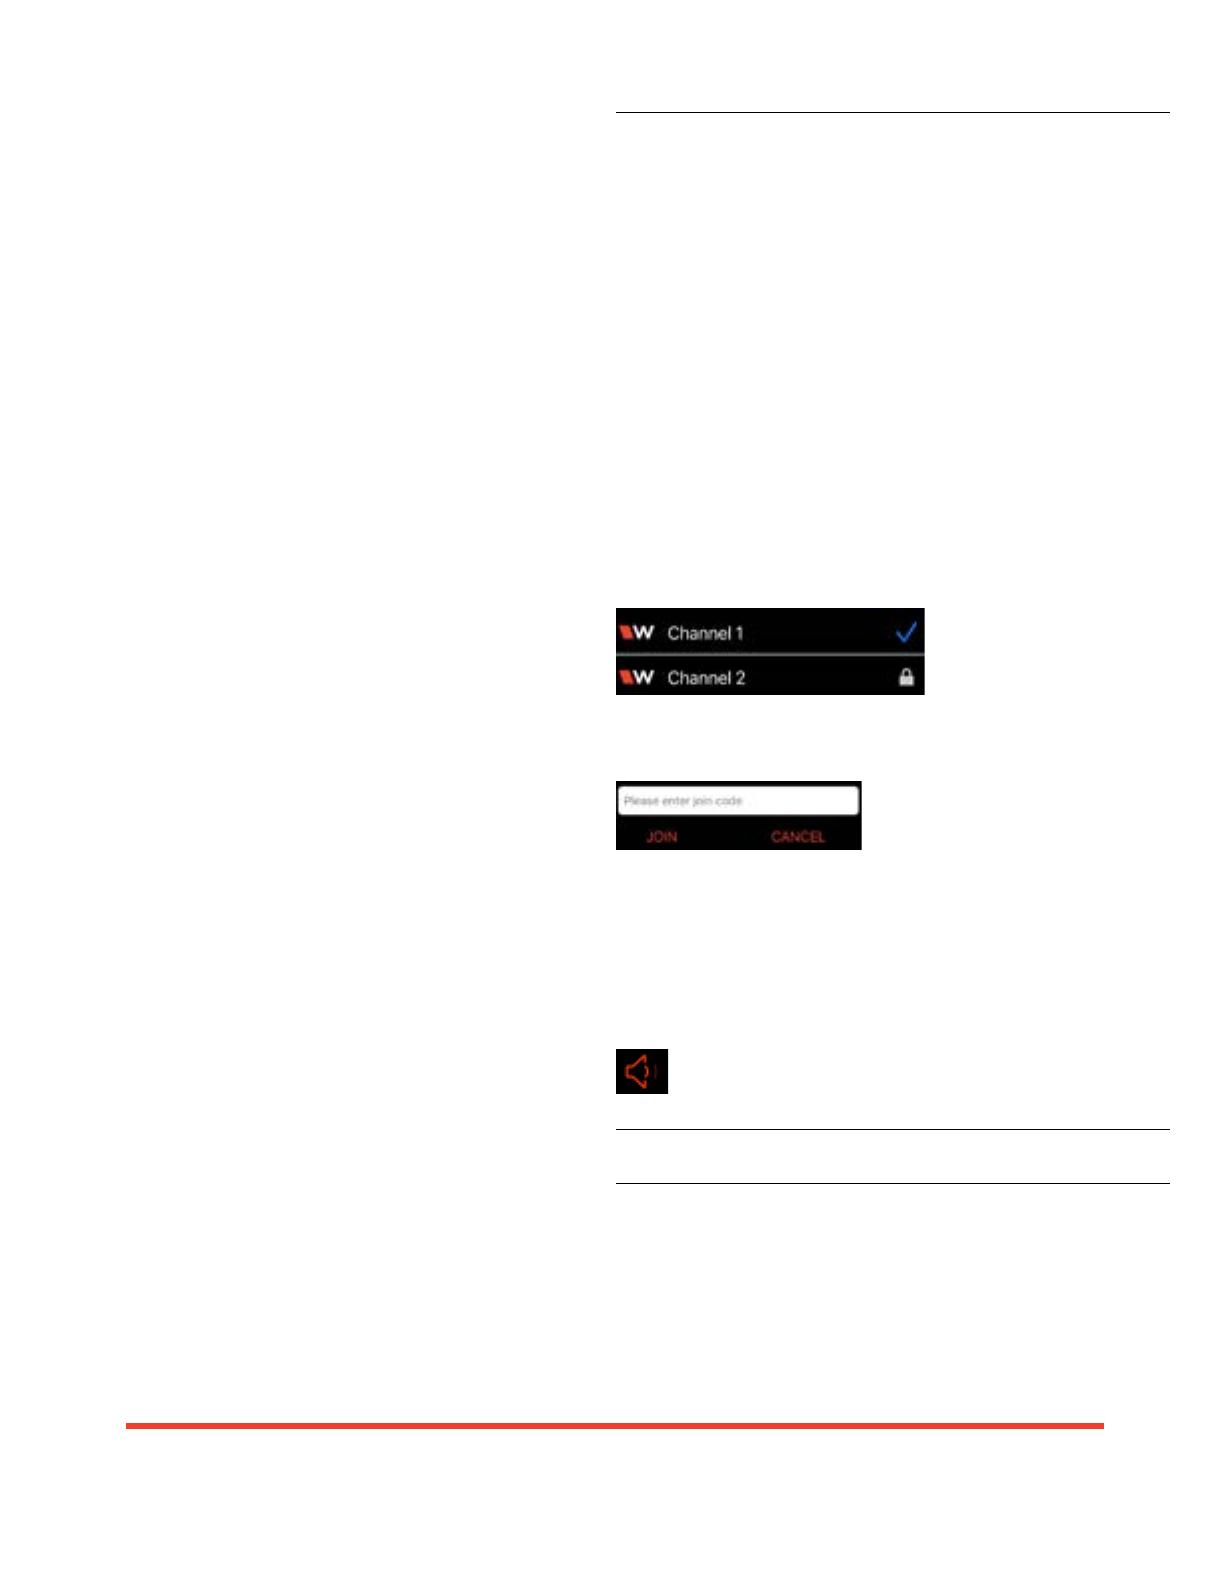
Select an Audio Channel
When the App is opened
for the first time, a list of
available channels will
appear. Tap on the
channel to listen to the audio. The venue should provide the
name of the channel to listen to for your event if more than
one is available.
Channels marked with a lock
icon require a code to join. Enter
the join code assigned to the
channel when prompted. If a channel is currently streaming, it
will have a blue checkmark next to its channel name.
Listen to the Audio
Once an audio channel has been selected, the audio should
start playing automatically. The volume of the audio can be
adjusted using the slider in the middle of the screen, or with
the physical volume controls on the personal device.
To mute the audio, tap the speaker icon. Tap it again to
unmute the audio.
To switch channels, hit the back arrow at the top of the screen.
For Additional Information
This manual is a quick start guide for getting your FM +
system up-and-running. Most features and customization
options are not documented in this manual.
For additional information, feature instructions, commands,
warranty information and more, please download the full user
manual from the FM + system's product page on Williams
AV’s website.


